- Compatibility first: Validate RAM type, motherboard and CPU limits, and use symmetrical kits.
- Secure installation: respect the notch, know your anchors and press perpendicularly.
- Cleaning and diagnostics: compressed air, slot/module testing and updating BIOS.
- Real-life performance: Activate XMP/EXPO profiles and keep drivers and SO a day.

If your PC has started acting strangely, freezing, or you simply want to upgrade your RAM, knowing how to properly clean and reinstall RAM modules will save you headaches and money. Here's a comprehensive guide that covers compatibility, installation, cleaning, and troubleshooting, with clear explanations to make it easy for you.
Before doing anything, it's crucial to confirm that the memory type is compatible with your system and that you'll install it correctly. We'll also cover how to free up system-level RAM in Windows and macOS, and which BIOS/UEFI settings to enable to ensure the memory performs as advertised, including tips for preventing damage to the sockets and the modules themselves.
Check your equipment's compatibility and limits
The first thing to do is verify that the module you're going to install matches the standard supported by your motherboard and processor: DDR, DDR2, DDR3, DDR4, or DDR5 . Although they all store data in DRAM cells, what changes between generations is the interface, timings, and the signals that the CPU's memory controller understands, so there is no such thing as "universal" RAM.
To identify what memory your PC uses, you can check the label on the installed module if it's still visible, or run utilities like CPU-Z or AIDA64 that detail the type, speed, and timings. Additionally, consult your CPU model on the official Intel or AMD websites and your motherboard manual to confirm what it supports without overclocking, as installing out-of-specification memory is not recommended.
If you have a laptop with LPDDR memory (very common in ultra-thin laptops), forget about upgrading: LPDDR is usually soldered to the motherboard and there are no expansion slots. Desktops and laptops with SO-DIMMs will be able to upgrade, but check how many slots you have available and whether they are configured for dual or quad channel.
For optimal performance, it's best to install modules in symmetrical pairs from the same kit to take advantage of dual-channel capability. Buying two identical individual modules might work, but the kits are validated to work together , so it's better to use two in pairs or four in pairs if your motherboard has many slots and you need more capacity.
Physical differences between generations: the notch and other details
Desktop (DIMM) and laptop (SO-DIMM) memory modules share a consistent length within their form factor, but the position of the notch changes between DDR, DDR2, DDR3, DDR4, and DDR5, preventing you from inserting the wrong type into an incompatible socket . That small notch is your guide: if it doesn't align, don't force it.
One interesting detail you'll notice in DDR4 is that the contact area is slightly curved , which helps with anchoring and even pressure during insertion. DDR5 looks very similar to previous generations, and it's easy to be misled by appearance alone, but in addition to the notch, there are internal improvements and power management enhancements; don't be fooled by "it looks the same," the specifications speak for themselves.
In older generations, upgrading from DDR2 to DDR3 or from DDR3 to DDR4 involved changes in the number and density of contacts; with DDR5, the shape can be even more deceiving. In short: to get it right the first time, verify the motherboard, CPU, and memory specifications in their datasheets, and avoid any improvisation.
Types of baseboard anchors and how they affect the installation
Motherboards use slots with two retention philosophies: active latches (with a movable tab) and passive latches (without a moving part). You'll see models with both sides active, others with one side active and the opposite side passive; what you won't see are two passive latches at the same time, since the module must be securely held in place.
If your slot has both an active and a passive side, it's best to position the module passively first. Once it's in place and aligned, press down so the active tab clicks into place automatically . For slots with two active locking points, press perpendicularly from both ends until you hear a click on both sides.
Very important: the module must be inserted smoothly. If you notice that you have to force it or that it only goes in "tip to tip," stop. Inserting it diagonally can damage the socket or the module's PCB . The notch must align, and the pressure must be even and perpendicular.
Preparation and safe handling
Before opening the computer, turn it off and unplug it. Discharge any static electricity by touching a metal surface on the chassis. Work in good lighting and avoid touching the gold contacts of the RAM; the PCB is delicate and a wrong move can break traces or contaminate the pads.
To properly install a new module in desktop computers, experience indicates that you'll need to apply around 13 kg of evenly distributed pressure for it to "lower" and the tabs to click into place. In laptops and NUC -type barebones systems , the figure is similar, but the action is more controlled: you press the module down until it's flat and locked into position.
A useful, though not foolproof, visual trick: on many kits, the manufacturer's logo faces the ATX power connector , while the labeled side usually faces the processor socket. If your motherboard has the sockets near the ATX connector, this helps avoid confusion at first.
Step-by-step installation of the modules
With the active locking mechanisms open, align the module on the base, respecting the notch's position. Place one side down first, then the other, without twisting. Press firmly and perpendicularly until you hear the "click" when it locks. If the tabs don't close automatically , it's most likely not properly positioned.
Avoid overtightening: if you notice it's not going down, remove it, check the orientation, and try again. Never force it with tools or try to "make room" with a screwdriver; the connectors and guides are calibrated to fit without any tricks.
If you have four slots and are installing two modules, consult your motherboard manual to determine which slots to use first. They are usually populated alternately (for example, A2 and B2) to enable dual channel, but each manufacturer defines its own order , and it's best to follow it.
How to remove RAM modules without damaging them
To uninstall, push the active tab(s) straight out. Sometimes, when releasing the retention mechanism, the module pops up slightly due to the tension . Hold it with your other hand to prevent it from hitting anything. If there are anchors on both sides, repeat the process on each end.
Once the tabs are free, pull the module straight out vertically, without bending it. Avoid touching the contact area and store the module in its anti-static sleeve. This process is very similar for any modern motherboard, and you shouldn't feel excessive resistance if the clips have been released properly.
Cleaning modules and baseboards
If you suspect dust or dirt in the slot, use compressed air in short bursts to clean the receptacle. You can also gently blow on the module, being careful not to rub the contacts. Ideally, apply air from a distance to avoid condensation on the circuit board.
After cleaning, reinsert the module and make sure it's fully seated. If you notice it loosens slightly when you insert it, hold the module down at the end of its travel so the tabs can close properly. This is especially important for laptops.
Troubleshooting common problems after installing RAM
If the system won't boot, there are BIOS beeps, or the screen is displaying incorrectly, start with the basics: reseat the memory and test each module and slot by slot to isolate whether the problem is with the stick or the socket. Sometimes a module isn't making good contact, and a simple reinstall resolves the issue.
Incompatibility can arise from issues with density, speed, or internal architecture that your motherboard doesn't support. Major brands offer compatibility scanners and configuration advisors to help you choose guaranteed modules for your specific model; if you're unsure, this is the safest approach.
A less obvious option: update your BIOS/UEFI to the latest stable version. Many motherboards add support for new memory or memory capacities via firmware. Check your motherboard manufacturer's website and follow their instructions for a safe flash.
If you experience unusual hardware issues after changing your memory (strange lines on the screen, distorted colors, network drops, or unresponsive USB devices ), a driver may not be reconfiguring correctly . Update or reinstall the drivers for the affected devices; doing so in Safe Mode may help.
There are also cases where certain applications get confused with the new memory. Run their setup wizard if they include one, or reinstall them (after backing up your data). If you don't know the cause of the problem, a software memory test can rule out faulty modules and help you pinpoint the issue.
Reset CMOS/BIOS when your computer won't boot
If your PC refuses to boot after the upgrade, you can try clearing the firmware settings. Some BIOSes have a soft reset option or a jumper; if not, try the battery method. Power off, unplug, and open the case. Touch a metal surface to discharge static electricity and locate the coin cell battery on the motherboard.
Press the metal tab on the battery tray and remove the battery. Leave the device without the battery for about 15 minutes . Then, replace the battery, close the device, connect the cables, and turn it on. This process clears any settings that might prevent the device from booting with the new memory.
Performance Settings: XMP/EXPO and Frequencies
Many memory modules, especially DDR5, advertise speeds higher than the JEDEC standard. By default, they may boot at 4800 MT/s (or similar) even if the kit is rated at 6000 MT/s. To reach the manufacturer's advertised speed, enter the BIOS/UEFI and enable the module's profile : XMP for Intel or EXPO for AMD.
These profiles automatically apply voltages and timings validated by the kit vendor. Remember that the effective speed is limited by what your CPU/controller and motherboard support. The best balance comes from using the fastest speed your platform supports without resorting to manual overclocking if you're not comfortable with it.
How to free up RAM in the operating system (without opening the PC)
Sometimes the problem isn't hardware-related but workload-related. A restart clears everything in memory and helps start fresh. Keep your browser updated, as browsers are among the biggest resource hogs , and close unnecessary tabs and extensions to reduce RAM usage. If you use Edge, see how to reduce RAM consumption in Edge.
In Windows, open Task Manager with Ctrl+Shift+Esc and check the Memory column to see which programs are using the most resources. From the Startup tab, disable anything you don't need at startup, and in Settings > Privacy, you can disable background apps that don't contribute anything. For a more in-depth analysis, you can use RAMMap to understand and free up memory in Windows.
Run an anti-malware scan: malicious software can increase memory usage and cause slowdowns. Keeping your system updated prevents performance issues, as recent versions optimize processes and patch memory leaks.
On macOS, if you have the developer tools installed, you can use the 'sudo purge' command in Terminal to force the release of caches; for more details, see how to clear the cache and temporary files in macOS . As always, restarting helps clear RAM and restore a clean state without affecting the hardware.
Purchasing tips and best practices
If you're upgrading, prioritize validated kits and, when possible, twin modules. Mixing different memory types sometimes works, but it's not ideal for stability or achieving maximum dual-channel performance.
Always check the QVL (Qualified Vendor List) for your motherboard and consult forums or manufacturer documentation to avoid surprises. If nothing works after all the tests, consider that the module may be defective; the seller's warranty covers these cases and they usually facilitate returns.
Finally, if a memory upgrade seems to trigger hardware or software errors that weren't there before, reinstall the original RAM to see if the problem stems from the new component. Also, make sure other cables and cards are securely fastened ; sometimes, during handling, something can come loose unintentionally.
As you can see, mastering RAM is a matter of method: clear compatibility, unhurried installation, air cleaning when necessary, and a bit of diagnostics if something goes wrong. By enabling XMP/EXPO when appropriate, keeping your BIOS and drivers up to date, and ensuring proper mounting, your PC will gain stability and performance without any major issues.
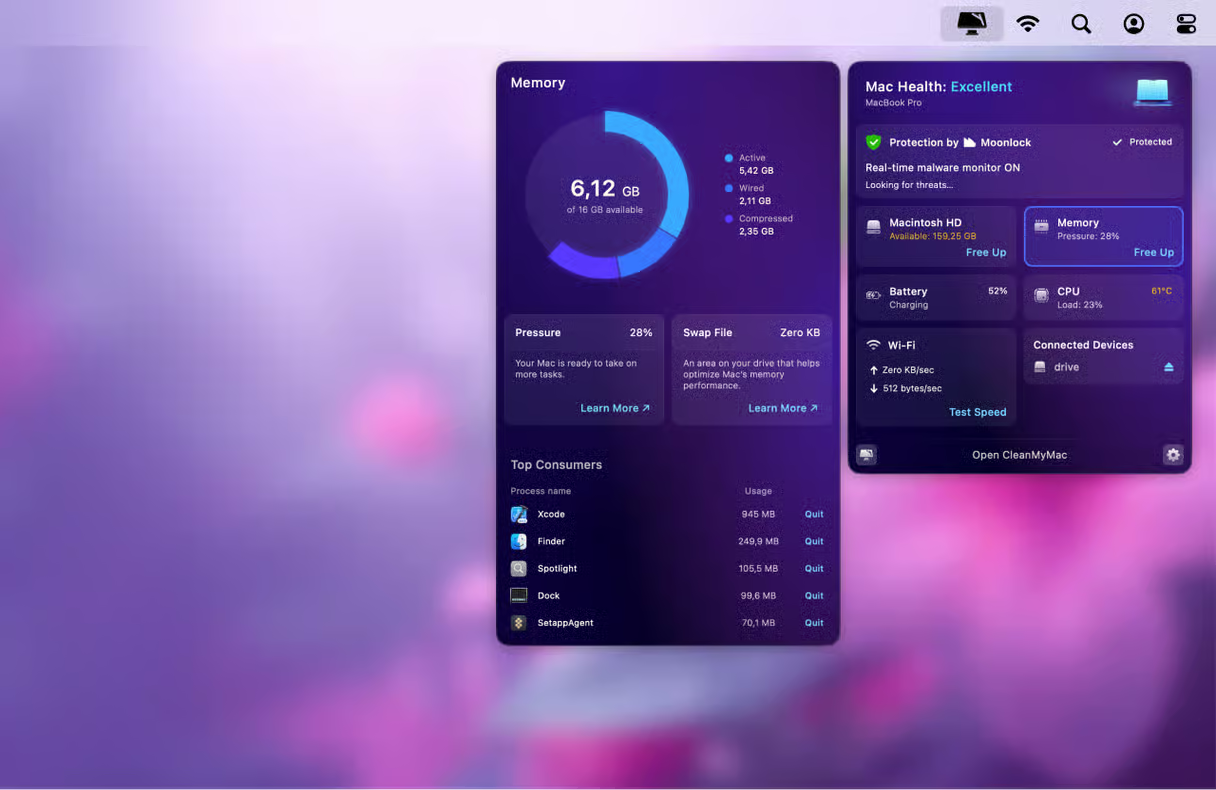
Table of Contents
- 1 Check your equipment's compatibility and limits
- 2 Physical differences between generations: the notch and other details
- 3 Types of baseboard anchors and how they affect the installation
- 4 Preparation and safe handling
- 5 Step-by-step installation of the modules
- 6 How to remove RAM modules without damaging them
- 7 Cleaning modules and baseboards
- 8 Troubleshooting common problems after installing RAM
- 9 Reset CMOS/BIOS when your computer won't boot
- 10 Performance Settings: XMP/EXPO and Frequencies
- 11 How to free up RAM in the operating system (without opening the PC)
- 12 Purchasing tips and best practices
