- OBS freezing is usually caused by outdated drivers, unstable network, and GPU/CPU overload.
- Adjust bitrate, resolution and FPS to your hardware is key; try x264 or NVENC/AMD depending on your rig.
- The OBS log analyzer guides you through quick fixes; use the automatic wizard.
- If the errors persist, consider lightweight alternatives such as EaseUS RecExperts or DemoCreator.
When OBS Studio starts connecting and suddenly the CPU usage spikes to 100%, causing the recording or live stream to crash, it's understandable to get frustrated. This behavior usually stems from a combination of demanding settings, outdated drivers, plugin conflicts, or GPU and network overload. The good news is that there are concrete solutions to get back to recording and streaming without stuttering or freezing.
In this guide, you'll find a comprehensive and practical compilation of all the causes, symptoms, and solutions we've found to work: from updating drivers and reducing GPU usage to fine-tuning the bitrate, FPS, and the correct encoder. You'll also learn how to use the OBS log analyzer, what to do if the app freezes when stopping recording, and several lightweight alternatives if your PC is running low on resources.
What causes OBS to freeze or crash on startup?
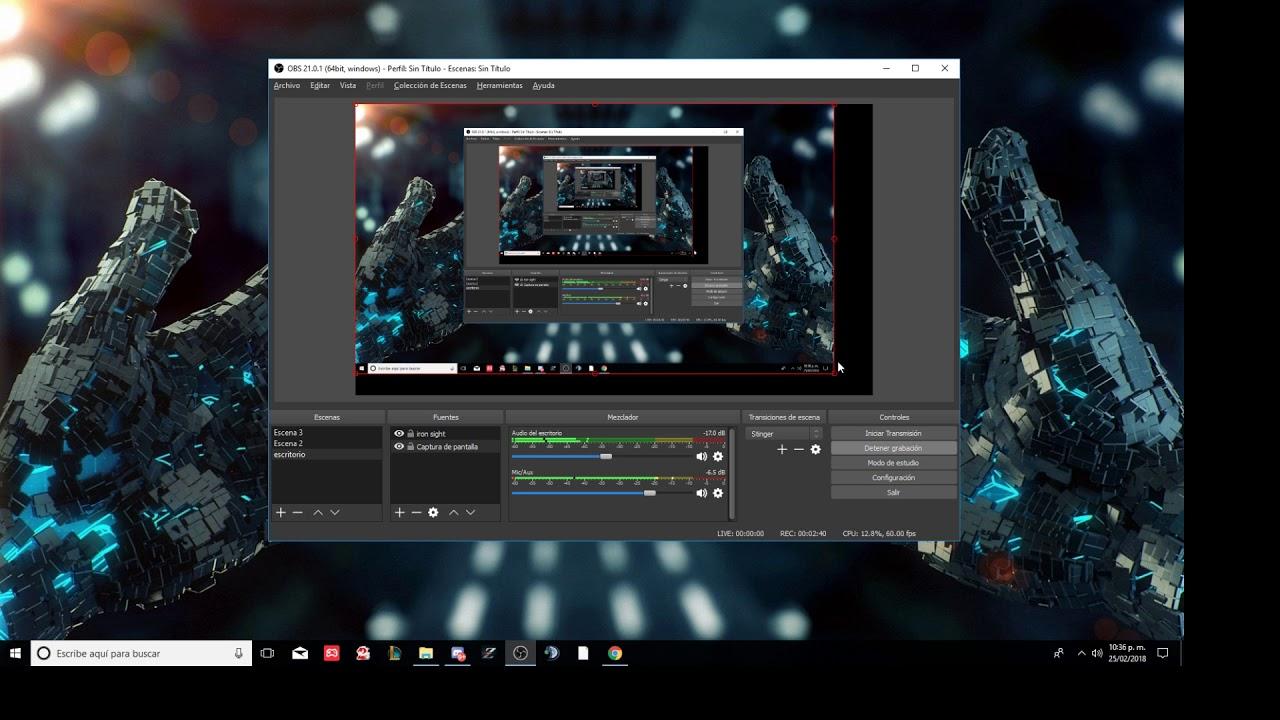
Before making any adjustments, it's important to understand the source of the problem. This way, each adjustment will make sense and you'll prevent OBS from crashing again in the future. These are the most common causes we've identified:
- Outdated or faulty graphics drivers- If the GPU is not up to date, capture will degrade and lag or freeze.
- Outdated network adapter drivers: generate network instability and affect transmission and recording.
- Unstable internet connection: To broadcast live without interruptions, you need a stable line; FPS drops usually give this away.
- GPU Overuse- If other programs saturate the graphics, OBS cannot render scenes or the game properly.
- Firewall interference: Windows Defender Firewall may block OBS functions if it treats them as suspicious.
- Bitrate too high: An aggressive bitrate is very resource intensive.
- High resolution: Capturing or streaming at high resolutions increases the load on the CPU and GPU.
- Incompatibilities with Windows: Certain versions of OBS do not play well with some versions of Windows 10/11.
Step-by-step solutions to fix blockages, freezes, and stuttering
Apply these fixes in order. Many resolve the OBS freeze right at the start of recording ; others improve overall stability in live streams and recordings.
1) Update your graphics card drivers
OBS requires a properly configured and up-to-date GPU; with outdated drivers, capture quality will suffer and the app may freeze or become unresponsive . To force an update from Windows:
- Step 1:: open the Device administrator from the search engine.
- Step 2:: Expand Display Adapters and locate your GPU.
- Step 3:: Right-click on the graphics card and select Update driver.
- Step 4:: Choose Search automatically for drivers and when it's finished, restart your PC to see if the problem has been resolved.
2) Update the network adapter drivers
If the freeze occurs when starting a live stream or during broadcasting, the problem might be your network card and its drivers . Update your drivers as follows:
- Step 1:: Opens Device Manager.
- Step 2:: Expand Network Adapters to see the list.
- Step 3:: Right click on your adapter and click Update Driver.
- Step 4:: Restart your computer after installation to apply the changes.
3) Check your internet connection
Constant stuttering and dropouts when starting a stream are usually due to an unstable connection. Before messing around with OBS, run a speed test and restart your router to rule out line problems.
Press and hold the router's power button, disconnect the network cable and power cord, wait 20–30 seconds, and then turn it back on. If the speed or stability remains poor, contact your internet service provider because OBS won't be able to maintain streaming if the network is unreliable.
4) Reduce GPU consumption in OBS
If you notice that the computer is struggling when rendering scenes, limit the game capture load so the GPU can breathe and OBS stops freezing on startup.
- Step 1:: Open OBS.
- Step 2:: In Sources, right click on Game Capture and go to Properties.
- Step 3:: Check the Limit capture speed option.
- Step 4:: Save changes and restart OBS to check the improvement.
5) Allow OBS in Windows Firewall
The firewall may be blocking OBS traffic or functions. Allow it to avoid interference that could interrupt streaming or recording.
- Step 1:: Press Windows + I and open Settings.
- Step 2:: Go to Privacy & security > Windows Security > Firewall & network protection.
- Step 3:: Choose Allow an app through the firewall.
- Step 4:: Tap Change settings > Allow another app and add OBS. Accept to save.
If you don't notice any changes, you can revert it to test, but usually enabling OBS prevents unexpected network crashes.
6) Adjust OBS to your PC's capabilities
Increasing the resolution, bitrate, and FPS without considering the hardware is a surefire way to cause the app to freeze on startup or during recording . Reduce the load like this:
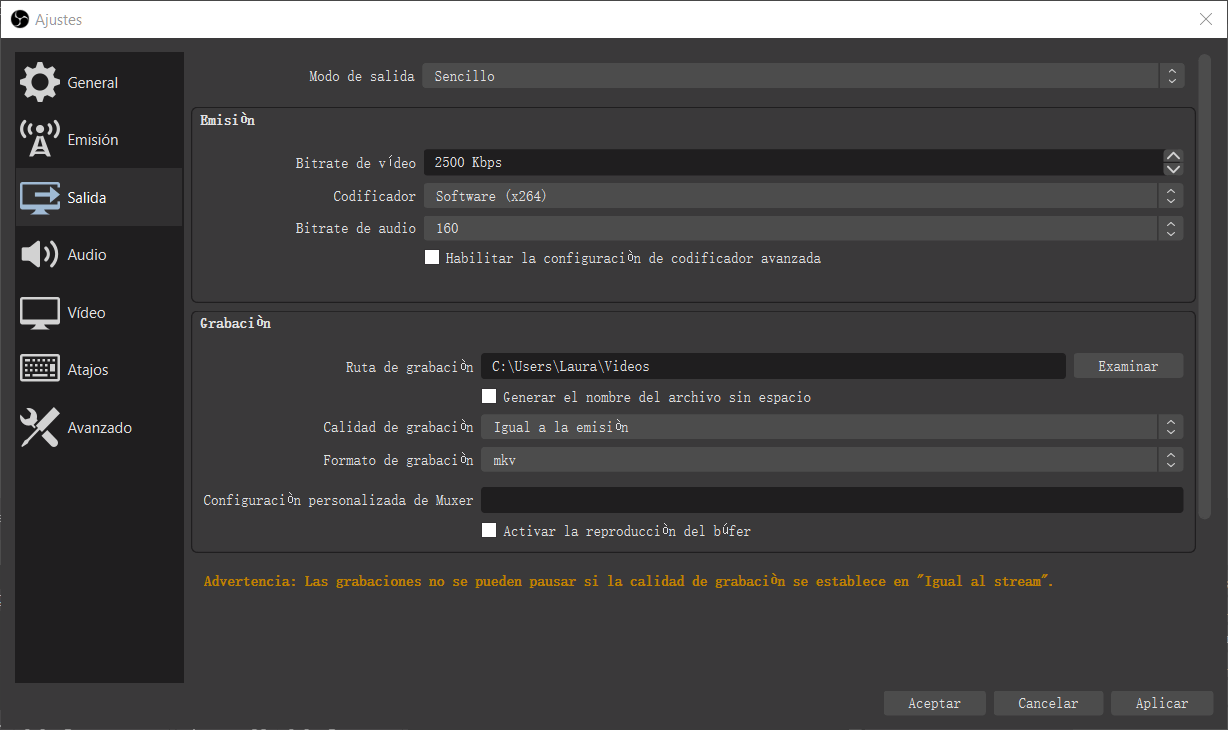
- Step 1:: Open Settings and go to Output.
- Step 2:: In Recording, lower the bit rate to a reasonable range for your computer. For modest PCs, around 4000 kbps for video and 320 kbps for audio is usually a good balance. quality and stability.
- Step 3:: Go to Video and adjust Base/Output Resolution (e.g. 1920x1080 or 1280x720) and Common FPS Values; if there is stuttering, change to 30 FPS for lighten up.
7) Run OBS in compatibility mode
Sometimes the Windows version and the OBS version don't work well together. Forcing compatibility can prevent crashes or freezes when starting recordings.
- Step 1:: Open the OBS Studio folder, right click on the executable and go to Properties.
- Step 2:: Go to the Compatibility tab.
- Step 3:: Check Run this program in compatibility mode for and choose your system.
- Step 4:: Use Run the compatibility troubleshooter, then Apply and OK to confirm.
8) Reinstall OBS from scratch
If all else fails, a clean reinstall eliminates residual conflicts and corrupted files that prevent OBS from functioning correctly:
- Step 1:: Press Windows + R to open Run.
- Step 2:: Type appwiz.cpl and press OK.
- Step 3:: Uninstall OBS Studio.
- Step 4:: Download the latest version from the official website and install it again to start with a .
9) Typical case: CPU at 100% when starting streaming
If your CPU maxes out and OBS crashes without an error message when you start streaming, it points to an encoding overload or a problem with a plugin/overlay. Try the following:
- Change the encoder. Under Output > Stream/Recording, toggle between Hardware (NVENC/AMD) and x264. Some users have found that recording has returned by switching from "use streaming encoder" to x264 for the Recording tab, and then applying the everything worked again.
- Lower the CPU preset. On x264, use Superfast or Ultrafast to reduce load (at the cost of some quality), and in Advanced Settings, set the process priority to High so that OBS has preferred resources.
- Temporarily disable the vertical streaming plugin and any overlays. If the crash stops, you've found the culprit and can check for an updated version or alternative.
10) Quick Alternative Settings Guide (1080p and 720p)
Some people prefer a quick fix by tweaking several parameters at once. If you want to try it, these steps focus on key changes to minimize delays and freezes :
- In Settings > Encoding, increase Maxbitrate to 500.000 for 1080p computers or 800.000 for slower 720p PCs. If you still notice lag, gradually increase the maximum bitrate to gain fluency.
- Under Video, select Custom and set it to 1920x1080 (1080p) or 1280x720 (720p) depending on your screen and performance. Then set it to 60 FPS and if there is still lag, lower it to 30 FPS. reduce load.
- Under Advanced, accept the prompt to change settings, set Process Priority Class to High, x264 CPU Preset to Ultra Fast, Profile to Main, and under Custom x264 Encoder Settings, add CRF=20 for control quality.
11) Format and FPS to avoid jams when stopping recording
If OBS keeps loading when you press "Stop Recording" (especially with MKV containers), change to FLV as the output format and adjust the FPS :
– In Output > Advanced Mode > Recording, set FLV and use a bitrate appropriate for your needs: for example, ~4000 kbps for 1080p or ~8000 kbps for 4K, prioritizing stability. In Video, you can select 59,94 FPS as a non-integer value if your stream requires finer synchronization.
12) Reduce system CPU usage
OBS competes for resources with the game, the browser, and any other open apps. It closes unnecessary processes to free up CPU and RAM.
- Step 1:: open the Task Manager (Ctrl + Shift + Esc).
- Step 2:: Checks active processes, including hidden ones.
- Step 3:: Right click on unnecessary tasks and End Task to give OBS access to the task. more margin.
13) Enable hardware encoder (NVENC/AMD)
Provided your GPU allows it, the hardware encoder offloads the CPU and usually improves stability in both recording and live performance, preventing processor usage spikes.
- Step 1:: Go to Settings > Output > Advanced Mode.
- Step 2:: Under Recording/Streaming, choose “Hardware (NVENC)” Encoder or your AMD’s.
- Step 3:: Apply changes and test for at least 30 seconds with your usual flow to validate.
14) Check disk space and recording path
If the disk is full or highly fragmented, recording often gets stuck when it stops, or the file remains incomplete.
- Step 1:: In Explorer, right-click on the drive and go to Properties.
- Step 2:: In General, use Disk Cleanup to clean up temporary and large files.
- Step 3:: In OBS > Output, check the Recording Path and, if possible, point to a SSD with plenty of room or check the USB ports if you use external drives for avoid bottlenecks.
15) Disable conflicting overlays and plugins
Third-party overlays, docks, and plugins may conflict with certain versions of OBS or your graphics driver. Disable them (e.g., the Discord overlay ) to isolate the source.
- Step 1:: In OBS, open the Docks menu.
- Step 2:: Uncheck non-essential overlays and add-ons, test and activate them one by one until you find which one causes the problem.
16) Check for conflicts with other applications
Video editors, RGB apps , or capture cards with their own software can sometimes interfere with OBS. Close anything you don't need to minimize interference . If you're using other capture tools, make sure they aren't capturing the same window/game simultaneously.
17) Update Windows, use the Setup Wizard, and analyze the registry
An outdated version of Windows can cause subtle glitches. Update your system and GPU first, then let OBS guide you with its wizard to adjust the optimal profile . You can also use WhoCrashed to detect Windows problems and analyze crashes.
- From the Tools menu, run the Automatic Configuration Wizard.
- Restart OBS and run a 30–60 second test by playing your actual stream (gameplay, scenes, full screen cameras). This is key to getting a representative register.
- In Help > Log > Load Current Log, copy the URL and click Parse to follow the parser's recommendations (fix common warnings and retest). If the log was broken, repeat the test to capture the entire session.
Lightweight alternatives when OBS keeps causing trouble
OBS is incredibly powerful, but also demanding and has a learning curve. If, after optimizing, you're still encountering crashes or your PC is low-end, you can opt for lighter tools that work without complications.
EaseUS Rec Experts
A cross-platform screen recorder (Windows and macOS) focused on simplicity and performance. It allows you to record the entire screen or a specific area, overlay webcam feeds, schedule recordings, and simultaneously capture system and microphone audio with a very clear interface.
- Approximate valuation: 4/5.
- Highlighted features: Capture up to 4K/8K and 144 fps, Multiple recording modes, Basic video and audio editing, Noise reduction, Export to multiple formats for share without hassle.
If you don't want to struggle with complex profiles, it's a solid alternative for gameplays, tutorials, or informational videos without sacrificing apparent quality.
Wondershare DemoCreator vs Filmora
DemoCreator simplifies capture: open the app, enter "Game Mode", define the area (full or partial screen), adjust the frame rate and system/microphone audio, choose the destination folder, enable GPU acceleration and press capture; to stop, press F10.
It's compatible with games like Minecraft , League of Legends, Overwatch, Dota, and CS:GO , with plans to add more. Filmora, meanwhile, stands out for its intuitive editor with customizable tools that deliver a professional finish without the hassle.


Passionate writer about the world of bytes and technology in general. I love sharing my knowledge through writing, and that's what I'll do on this blog, show you all the most interesting things about gadgets, software, hardware, tech trends, and more. My goal is to help you navigate the digital world in a simple and entertaining way.