- WBAdmin allows you to create, schedule, query, and restore system, volume, and file backups from the Windows command line.
- The correct use of parameters such as -backupTarget, -include, -allCritical, -systemState and VSS options determines the quality and scope of each backup.
- On Windows servers, WBAdmin integrates with Windows Server Backup and coexists with third-party solutions such as AOMEI Backupper or Vinchin Backup & Recovery.
- Combining system image copies with additional tools and cleanup policies ensures a robust backup strategy against failures and attacks.
If you manage Windows servers or desktop computers and are concerned about data loss, the WBAdmin command-line tool is a key component for creating and restoring backups powerfully and flexibly. Although many are intimidated by using the command line, once you understand the logic of its commands, it becomes an indispensable ally against hardware failures, malware attacks, or human error.
In this tutorial, you'll find a comprehensive guide, written in Spanish and with a friendly tone, on how WBAdmin works, what commands it offers, how to create and restore backups on Windows 7, 10, and Windows Server , and also what graphical alternatives exist when you don't feel like dealing with the command line. The goal is for you to finish this article with a clear and practical understanding of the entire backup ecosystem with WBAdmin.
What is WBAdmin and what is it really used for?
WBAdmin is the command-line backup utility built into Windows . It replaced the older NTBackup tool years ago and is available on multiple systems: Windows Vista, 7, 8, 10, 11, and Windows Server 2008/2008 R2/2012/2016/2019/2022. It's designed to allow you to back up and restore the operating system, entire volumes, files, folders, and specific applications from an elevated command prompt.
When you perform a backup using WBAdmin, the system generates virtual disk image files (.VHD or .VHDX) along with XML configuration files . These images can be mounted from Windows Disk Management, allowing you to explore their contents as if they were regular disks and recover files in a granular manner.
The tool not only creates backups, but is also able to activate and deactivate scheduled backups, list which backups exist, show what they contain, delete them, restore the backup catalog and launch full recoveries (including the classic "bare metal recovery", that is, returning the entire system to a previous state even on new hardware).
To use WBAdmin effectively, you must meet two requirements: first, you must belong to the appropriate groups (Administrators or Backup Operators, depending on the task), and second, you must always open the console as an administrator. This involves right-clicking on "Command Prompt" or PowerShell and selecting " Run as administrator ."
Required permits and high execution
Not all WBAdmin operations have the same security requirements; Windows is quite strict here because a botched restore or deletion of backups can render the system unusable . To configure a scheduled backup on a regular basis, you need to be a member of the Administrators group . For all other tasks (one-off backups, restores, queries, etc.), it is sufficient to belong to the Backup Operators or Administrators group, or to have equivalent delegated permissions through policies.
In all cases, there's one essential requirement: open WBAdmin from an elevated console . If you run the commands from a regular Command Prompt or PowerShell window, many will fail or result in an "Access Denied" error. The standard procedure is simple: search for "Command Prompt" in the Start menu, right-click, and select "Run as administrator." Once the elevated window is open, you can begin working with the backups.
Main WBAdmin commands and what each one does
WBAdmin groups its functions into a series of main commands, each geared towards a specific type of task. Understanding them allows you to set up a complete backup, restore, and cleanup strategy without ever touching the graphical interface.
Among the most important commands for daily administration are the following:
- wbadmin delete catalogThis deletes the backup catalog from the local computer when it is corrupted. You should only use this if you have no other option and you have backups in another location from which you can rebuild the catalog.
- wbadmin delete systemstatebackup: deletes one or more system state backups to free up space when you no longer need them.
- wbadmin disable backup: disables scheduled daily backups on the server or computer.
- wbadmin enable backup: Configure and enable a scheduled copy task, with the destination and the items you want to protect.
- wbadmin get disks: lists all disks that are currently online; it is very useful for checking drive letters and knowing where you can save copies.
- wbadmin get items: shows which specific elements are included in a backup (volumes, folders, etc.).
- wbadmin get status: displays the status of the copy or restore operation that is currently running.
- wbadmin get versions: details all available backups to recover, whether from the local computer or from an external or network destination.
- wbadmin restore catalog: retrieves a copy catalog from an alternate storage location when the local catalog is corrupt.
- wbadmin start backup: launches a one-time backup; if you call it without parameters, it reuses the settings for the daily scheduled backup.
- wbadmin start recovery: initiates a recovery of specific volumes, applications, files, or folders.
- wbadmin start sysrecovery: Performs a full system restore (all volumes containing the operating system and their state). It is only available from the Windows Recovery Environment (WinRE).
- wbadmin start systemstatebackup: creates a backup of the system state (registry, boot files, Active Directory, etc., depending on the server role).
- wbadmin start systemstaterecovery: launches system state recovery from a previous backup.
- wbadmin stop job: stops a copy or restore operation that is still in progress.
This range of tools covers the entire lifecycle of a backup: creating, viewing, retrieving, scheduling, and, when necessary, deleting it . The key is combining them with the correct syntax and keeping track of where you store the images.
Why you need system image backups with WBAdmin
Beyond the theory, it's worth remembering why all this is important. There are quite a few situations where having a recent system image makes the difference between a scare and a disaster : catastrophic operating system failures, disks that die without warning, problematic updates, hardware changes that prevent the system from booting, or malware and ransomware infections that encrypt or corrupt data.
In any of these scenarios, without a system image or a solid backup of your critical volumes, you face data loss, lengthy reinstalls, and downtime that can be disastrous in a production environment. With WBAdmin, you can create system images on Windows 10 or more modern servers directly from the command line, without relying solely on graphical wizards.
In older versions like Windows 7 and 8, many relied on File History or OneDrive for document backups, but those solutions fall short when you need to clone the entire system and be ready to restore it to another disk or even another machine . That's where the system image backup created with WBAdmin comes in.
In addition, WBAdmin can also be used to generate "bare metal" copies, designed to restore the operating system to different hardware while preserving the configuration and data of critical volumes (and capturing disk images when necessary).
Create a full backup with WBAdmin on Windows 10
In Windows 10, you can use WBAdmin from either PowerShell or the Command Prompt, always running as administrator. The process is more technical than with the graphical wizard, but it gives you a very high level of control over what is copied and where.
The general workflow for a full backup would be something like this: First, you decide which drive or drives you want to protect and what the destination will be (usually an external drive or a network share ). Then, you construct the WBAdmin command with the appropriate parameters and run it; the system will create the image with all critical volumes and operating system information.
The basic syntax for a full copy relies on the command:
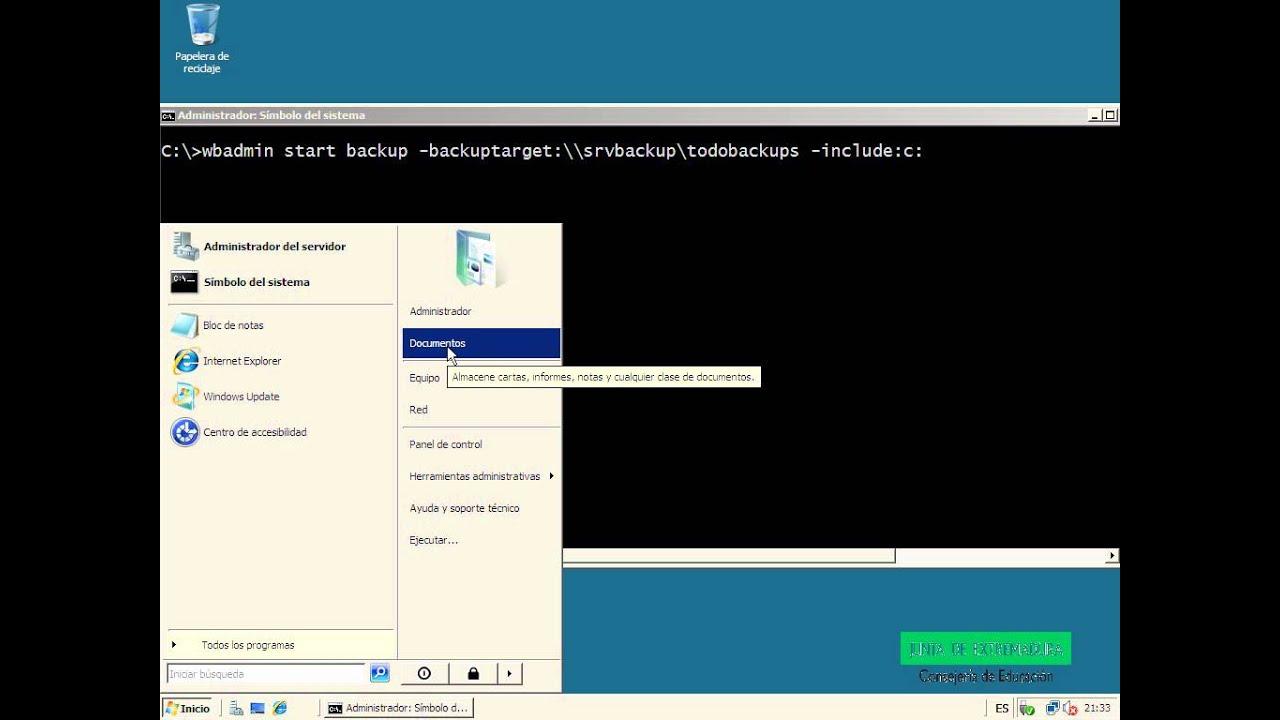
wbadmin start backup
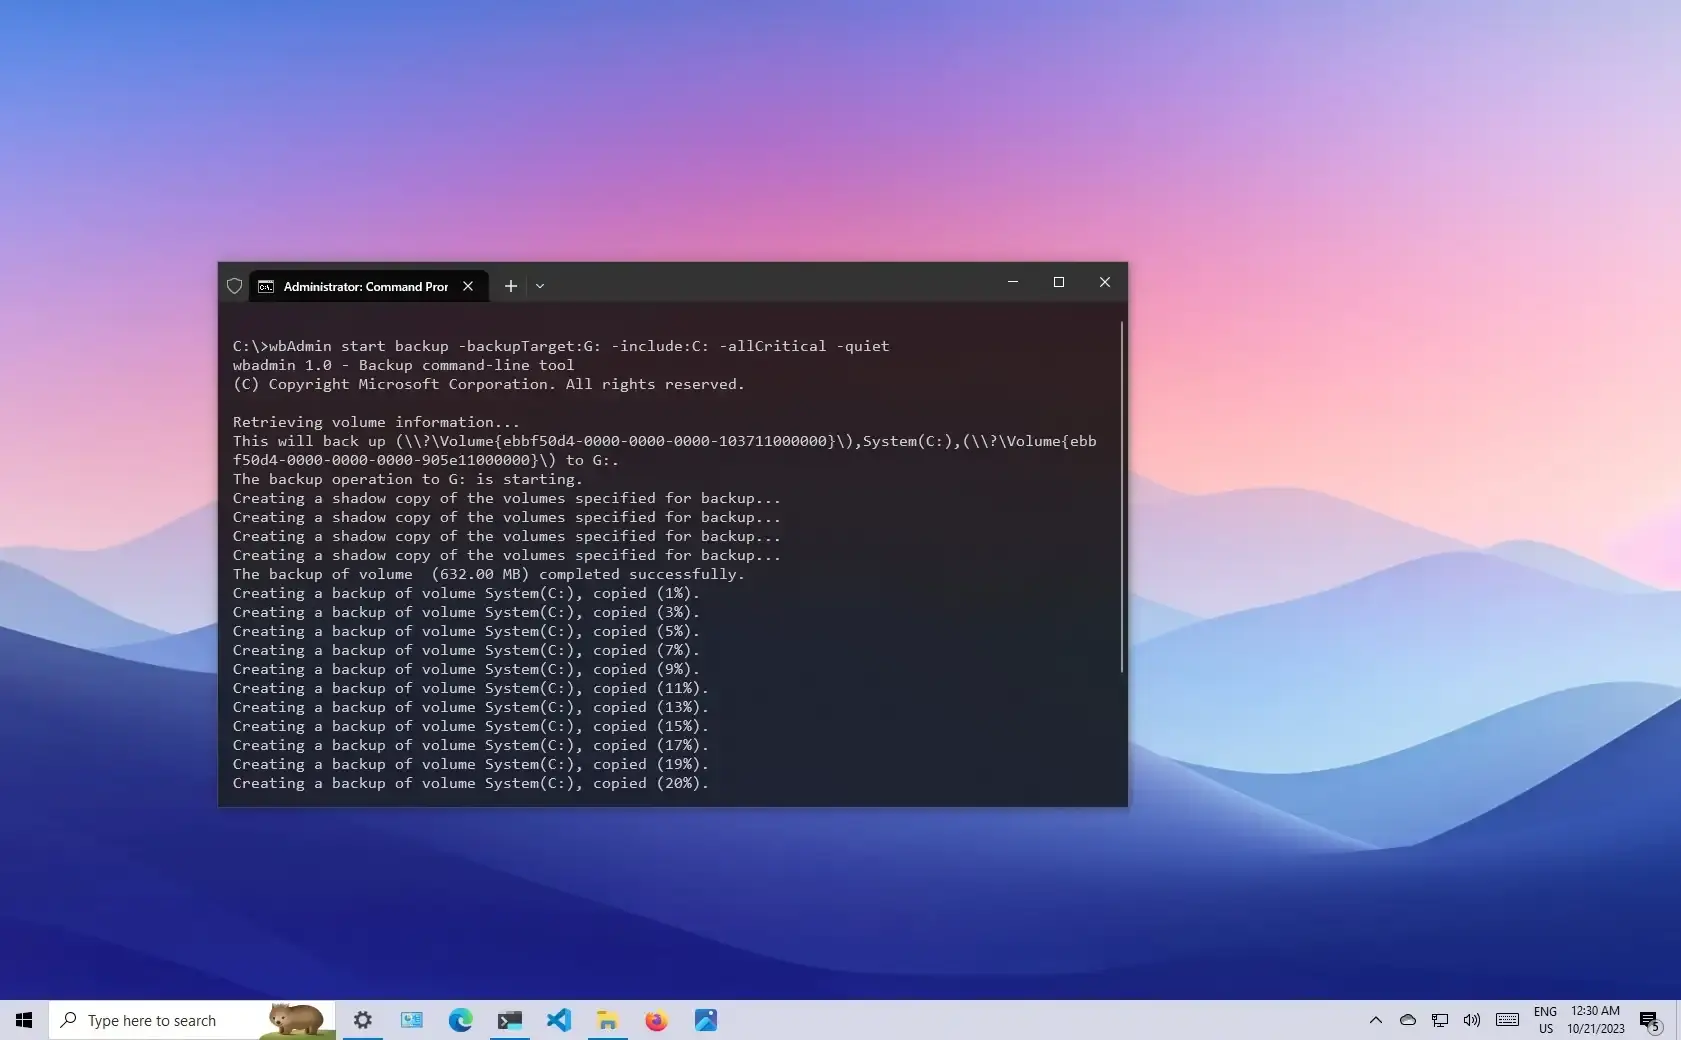
A typical example of making a copy of the C: drive (where the system resides) to an external E: drive, including all critical volumes, would be:
wbadmin start backup -backupTarget:E: -include:C: -allCritical -quiet
This command specifies that the destination is E:, the primary source is C:, all critical volumes are included, and the user will not be prompted (using the -quiet parameter). The result will be an image suitable for restoring the system in case of disaster.
Key parameters of wbadmin start backup
The `wbadmin start backup` command is the heart of the backup system , and its parameters allow you to fine-tune its behavior. It's helpful to know at least the most commonly used ones:
| Parameter | Description |
|---|---|
| -backupTarget | Define where the backup will be savedIt can be a drive letter (F:), a GUID-based volume path (of the type \\?\Volume{GUID}\) or a UNC path to a network share (\\servidor\recurso\By default, WBAdmin will create the folder within the destination. WindowsImageBackup\NombreEquipo\. |
| -include | Allows specify a comma-separated list of items you want to includeVolumes, folders, or files. Paths can be by drive letter, mount point, or GUID-based volume names (ending with a backslash). Wildcards (*) are supported. This parameter must always be used with -backupTarget. |
| -exclude | It serves for exclude specific paths from the copy (files, folders, or volumes). The syntax is similar to -include, also with wildcard support, and requires using it in conjunction with -backupTarget. |
| -nonRecurseInclude / -nonRecurseExclude | They work like include/exclude, but without browsing subfoldersThey only apply to the specified path, without going down a level in the directory tree. |
| -allCritical | WBAdmin Include all critical system volumes (those containing the operating system or components necessary to boot). It is mandatory to combine it with -backupTarget and it can be used at the same time as -include. |
| -systemState | Add to copy the entire state of the system (boot files, registry, sysvol, Active Directory, IIS metabase, certificate services, etc., depending on installed roles). Ideal for domain controllers and servers with critical roles. |
| -noVerify | In copies to removable media, skips error checking at the end of the copyIf you don't use it, copies on DVD or other removable media are checked automatically. |
| -user / -password | They are used when the destination is a shared network resource. They specify the credentials with write permission. about the remote folder where the copy will be stored. |
| -noInheritAcl | It makes the copy folder Do not inherit permissions from the shared resourceInstead, use the credentials specified with -user and -password. This way, only those users (or backup administrators/operators on the destination server) will be able to access the backup. |
| -vssFull | Instruct WBAdmin to perform a full copy using Volume Shadow Copy Service (VSS)This updates the file backup history and truncates application logs if necessary. It's not recommended if other backup software already handles incremental/differential backups of those same applications. |
| -vssCopy | It also makes a copy with VSS, but without modifying the copy history Nor truncate records. This way, the incremental/differential backup sequence of other tools working on the same volumes is not broken. This is the default behavior. |
| -quiet | It makes the command run without displaying questions or confirmationsIt is essential when programming automatic tasks. |
A couple of important points: if you save multiple copies in the same remote shared folder without organizing subfolders, the new copy can overwrite the previous one . Furthermore, if a copy fails mid-process, you could be left without a valid version. Therefore, it's recommended to create subfolders (by date, by server, etc.) and always ensure you have plenty of free space on the shared resource.
Practical examples of wbadmin start backup
To better understand how the parameters are combined, let's look at some real-world examples of using the copy command:
1) Make a copy of volumes E:, the D:\mountpoint folder , and a volume identified by GUID in F::
wbadmin start backup -backupTarget:F: -include:E:,D:\mountpoint,\\?\Volume{cc566d14-44a0-11d9-9d93-806e6f6e6963}\
2) Create a one-off copy of two folders (G:\folder1 and H:\folder2) on D:, including the system state and using a VSS copy type that does not affect scheduled differential backups:
wbadmin start backup -backupTarget:D: -include:G:\folder1,H:\folder2 -systemState -vssCopy
3) Perform a one-off, non-recursive copy of D:\folder1 to a network resource, restricting access to administrators and backup operators:
wbadmin start backup -backupTarget:\\backupshare\backup1 -noInheritAcl -nonRecurseInclude:D:\folder1
As you can see, by playing with destination, included elements, VSS options and permission control you can adapt the copy policy to almost any need: from protecting only specific directories to copying the entire system.
WBAdmin in Windows Server 2012 and later versions
In server environments, WBAdmin is even more relevant. In Windows Server 2012, 2012 R2, 2016, 2019, or 2022, the tool relies on the Windows Server Backup feature , which you must install beforehand from Server Manager (Manage > Add Roles and Features > Features > Windows Server Backup).
Once installed, you can use either the Windows Server Backup graphical interface or the WBAdmin console. The console opens the door to advanced scenarios such as bare metal backups , backups to network locations with credentials, Hyper-V virtual machine backups, and very specific hourly scheduling.
Some typical examples in Windows Server 2012 would be:
- Copy bare metal to drive E:
wbadmin start backup -backupTarget:E: -include:C: -allCritical -systemState -vssFull - Copy C: and the D:\Video folder to a network share:
wbadmin start backup -include:C:,D:\Video -backupTarget:\\192.168.1.222\backup -user:USUARIO -password:CONTRASEÑA -quiet - Copy of a Hyper-V virtual machine called «Server 1» in C:
wbadmin start backup -backupTarget:C: -hyperv:"Servidor 1" - Daily scheduled backup of system status in G: at a specific time:
wbadmin enable backup -addTarget:G: -systemState -schedule:06:44
Note that the `-schedule` parameter supports multiple comma-separated times, so you can define multiple runs per day if your backup policy requires it. However, some limitations remain: WBAdmin only works with NTFS volumes and, in older versions, only allows one backup schedule per machine.
Restoring backups with WBAdmin on Windows servers
System restoration is the other side of the coin. With WBAdmin, you can recover everything from individual files and folders to the entire system, including hypervisors, virtual machines, system state, or entire volumes . In some cases, such as bare-metal recovery, you'll need to boot into the Windows Recovery Environment and open a command prompt from there.
To locate which backup to restore, the usual approach is to start with:
wbadmin get versions -backupTarget:<Destino>to see the identifier of each copy version (mm/dd/yyyy-hh:mm format).mountvolto obtain GUID-based paths if the drive letters have changed in the recovery environment.wbadmin get items -version:<Versión> -backupTarget:<Destino>to list the contents of a specific copy.
With that information in hand, you can now construct the restore commands. For example:
- Bare metal recovery of a copy saved on E: on 06/17/2020 at 04:41:
wbadmin start sysrecovery -version:06/17/2020-04:41 -backupTarget:E: -machine:"Servidor 1" - Restoring a copy from a shared network folder:
wbadmin start recovery -version:06/17/2020-05:33 -backupTarget:\\192.168.1.222\backup -machine:"Servidor 1" - Recovering a Hyper-V virtual machine "Server 1" from E::
wbadmin start recovery -version:06/17/2020-06:28 -itemType:HyperV -items:"Servidor 1" -backupTarget:E: - Restore a system state created at 06:44 from E::
wbadmin start systemstateRecovery -version:06/17/2020-06:44 -backupTarget:E:
In all cases, you must run the console as an administrator and be a member of the Backup Operators or Administrators group . Additionally, some parameters, such as -machine, are only necessary if you are saving backups from multiple machines to the same destination.
Delete old copies with WBAdmin
As time passes, backup disks fill up. WBAdmin provides several options for cleaning up old backups without manually deleting folders or snapshots indiscriminately . The most important parameters in this regard are:
- -version: deletes a specific copy version identified by date and time.
- -keepVersions: deletes all copies except the last N versions you specify.
- -deleteOldest: deletes the oldest available copy, freeing up space quickly.
Two very common examples would be:
- Delete a stateless system backup taken on 06/17/2020 at 06:22 and saved in E::
wbadmin delete backup -version:06/17/2020-06:22 -backupTarget:E: - Delete all system state copies on E: except the three most recent ones:
wbadmin delete systemstateBackup -keepVersions:3 -backupTarget:E:
In Windows Server 2008 R2 and earlier versions, Windows Server Backup It does not allow directly deleting copies that are not of the system stateAn alternative solution is to delete the corresponding shadow copies at the destination using the command-line tool. diskshadowHowever, that's where you enter delicate territory, and it's important to know exactly what you're doing.
Using Windows Server Backup (GUI) as a complement to WBAdmin
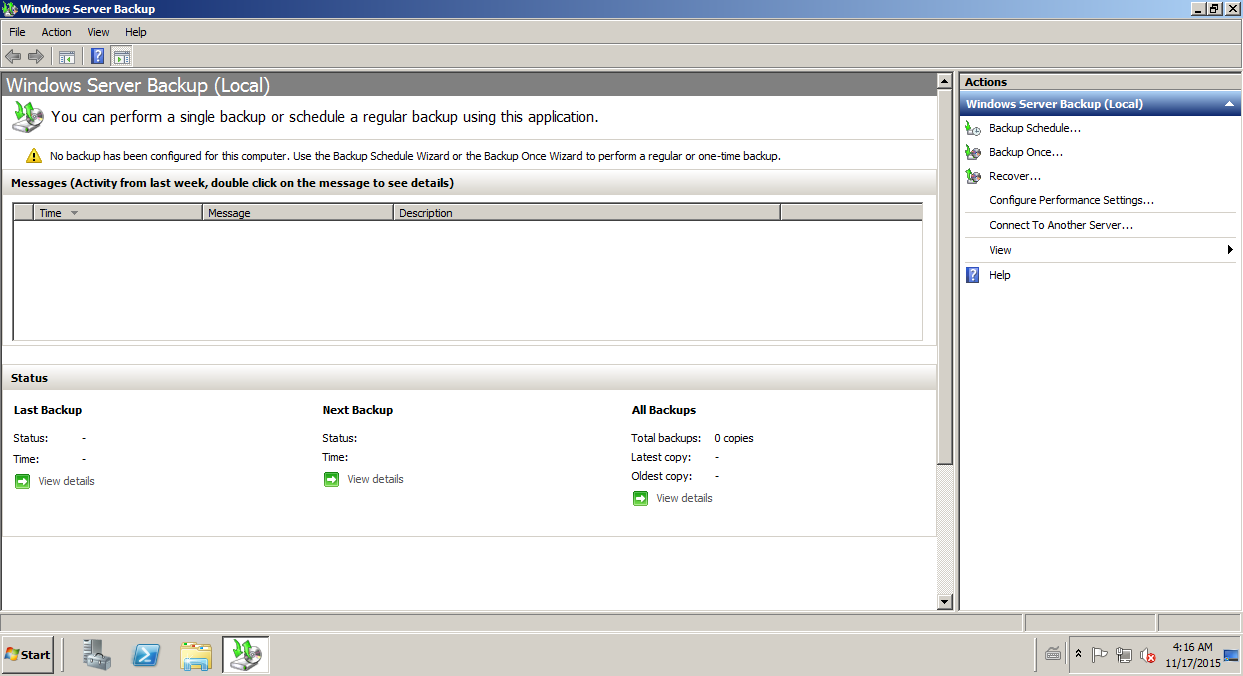
Although WBAdmin is very powerful, many people prefer to use the Windows Server Backup graphical interface for more routine tasks . This integrated tool allows you to back up the entire server, specific volumes, the system state, or individual files/folders, and then restore them from your local machine or a NAS.
The typical process for a one-off backup with Windows Server Backup would be:
- Open Server Manager, go to Tools and launch “Windows Server Backup”.
- Select “Local Backup” and in the actions panel click on “Backup Once…”.
- Select “Different options” and then “Full server (recommended)” to copy the entire server.
- Choose whether the destination will be a local disk or a remote shared folder.
- Specify the destination drive or UNC path, review the summary and click on “Backup”.
To restore from this same tool, the process is just as straightforward: select “Recover…”, define the location of the backups, choose the date, the type of recovery (application, volume, files, etc.), and the destination location . It's a good option for administrators who don't want to memorize complex syntax but still need a reliable backup system.
Third-party alternatives: AOMEI Backupper Server and Vinchin Backup & Recovery
WBAdmin and Windows Server Backup cover basic scenarios well, but they have clear limitations: they only support NTFS, offer simple scheduling, and have little advanced flexibility . Therefore, many professional environments opt for third-party backup software with a graphical interface and additional features.
A widely used example is AOMEI Backupper Server, which offers an intuitive interface for backing up systems, disks, partitions, and files on Windows Server 2003/2008/2012/2016/2019/2022 and also on Windows desktop . Its key features include:
- Flexible scheduling of daily, weekly or monthly backups, with the option to use event triggers or automatic backups when connecting a USB drive.
- Support for incremental and differential backups, which only save changes and save space and time.
- Automatic cleaning schemes for old copies based on quantity, age, or space occupied.
- Compatibility with multiple storage types (internal, external, USB, RAID, NAS, network) and with file systems beyond NTFS (FAT32, FAT16, EXT2, EXT3, etc.).
- Advanced features such as SSD alignment, partition editing when restoring to larger disks, universal restoration to different hardware, and even deployment of images to multiple computers via network.
Another frequently cited solution is Vinchin Backup & Recovery, which focuses on virtual machine backups, data replication, and high availability . It supports full, incremental, and snapshot-based backups, with data reduction technologies to save space and dedicated ransomware protection for backup repositories.
Vinchin is compatible with a wide range of Windows versions (7 through 11 and all editions of Windows Server from 2003 to 2022) and allows you to define automated tasks, select backup types, migrate VMs between hosts, and manage recovery strategies through a centralized console. It also typically offers extended trial periods so you can evaluate whether it fits your infrastructure.
In both cases, the idea is that you don't give up the power of WBAdmin and Windows Server Backup, but complement them with more convenient and feature-rich tools when the complexity of your environment justifies it.
Ultimately, mastering WBAdmin gives you a very solid foundation: you understand what gets backed up, where, when, and how to restore it in case of a crisis. From there, you can decide whether the command line and built-in wizard are sufficient, or if you prefer to delegate daily tasks to graphical interface solutions and reserve WBAdmin as a technical "plan B" for when things get tough and you need complete control from the console.


Table of Contents
- 1 What is WBAdmin and what is it really used for?
- 2 Required permits and high execution
- 3 Main WBAdmin commands and what each one does
- 4 Why you need system image backups with WBAdmin
- 5 Create a full backup with WBAdmin on Windows 10
- 6 Key parameters of wbadmin start backup
- 7 Practical examples of wbadmin start backup
- 8 WBAdmin in Windows Server 2012 and later versions
- 9 Restoring backups with WBAdmin on Windows servers
- 10 Delete old copies with WBAdmin
- 11 Using Windows Server Backup (GUI) as a complement to WBAdmin
- 12 Third-party alternatives: AOMEI Backupper Server and Vinchin Backup & Recovery