- FFmpeg is a line tool of commands cross-platform capable of recording, converting and processing audio and video with support for a large number of codecs and formats.
- It allows you to perform everything from simple format conversions to advanced tasks such as cropping, resizing, inserting logos, generating GIFs and creating videos from image sequences.
- Its true potential emerges when integrated into scripts and automated workflows, where it can concatenate clips, apply transitions, normalize audio, and standardize content production.
- With a few well-understood commands, it is possible to build an efficient workflow for video editing and compression without relying on cumbersome graphical interfaces.
If you work with video often, sooner or later you'll run into FFmpeg as a Swiss Army knife for converting, compressing, and automating tasksIt doesn't matter if you come from editors with a graphical interface, from platforms of streaming or simple online converters: when you need fine control, rare formats or massive automation, FFmpeg comes into play.
It's also true that the first time you see it, it's a little intimidating: tons of parameters, very long commands, and messages in the terminalBut once you understand its logic, it becomes an extremely convenient tool for repetitive tasks: changing formats, reducing file size, cropping, adding logos, generating GIFs, or creating time-lapse videos from photos, among many other things.
What is FFmpeg and why is it used so much in video?

FFmpeg is a set of free software tools and libraries Designed for recording, converting, processing, and streaming audio and video. It's not an application with pretty windows and buttons: it's controlled from the command line, which gives it incredible flexibility and makes it ideal for automation, servers, and scripting.
Its name refers to Fast Forward MPEG...referring to the group that defined the MPEG video standards. Since 2000, when Fabrice Bellard launched the project, the community has been expanding it into... the multimedia engine used by countless programs and services without you knowing (streaming platforms, editors, converters, etc.).
One of its greatest virtues is that It supports a huge number of codecs and containers (How to choose the best codecs for videos): MP4, MOV, MKV, AVI, WebM, FLV, Ogg, animated GIFs, image sequences, MP3AAC, OGG, WAV, WMA, and many more formats. If your favorite player plays something, FFmpeg can probably read or generate it.
Furthermore, FFmpeg is multi platformIt can be installed without any problems in Linux, WindowsmacOS and other similar systems UnixAnd although it's used from the console, there are several graphical interfaces that use it behind the scenes if you prefer to proceed gradually without seeing commands.
How to install FFmpeg on Windows, macOS, and Linux
Before we start issuing commands, we need to install the tool. The process varies depending on the operating system.But in all cases, it's done only once and then you forget about it.
Install FFmpeg on Windows
In Windows you have several options, but one of the most common is to download a static package already compiledThis saves you from compiling anything or dealing with dependencies.
A typical workflow would be like this: you go to the official FFmpeg website or a reliable builds page, downloads a "static" version in ZIP or 7z formatYou extract it to the folder you want (for example, on a secondary drive), and inside you'll see a directory with several subdirectories, including bin, where the executables ffmpeg.exe, ffplay.exe and ffprobe.exe are located.
To avoid having to always go to that folder, the ideal solution is add the path to the bin directory to the system environment variablesFrom Control Panel > System > Advanced system settings > Environment Variables, locate the Path variable, edit it, and add the full path to that bin folder. From there, you will be able to write ffmpeg on any console and it will run.
Another very convenient alternative is to use a package manager like Chocolatey and run it in an administrator console: choco install ffmpegThe manager himself handles the installation and the PATH.
Install FFmpeg on macOS
En MacThe most practical way is to pull HomebrewIf you don't have it, install it by pasting the script Installation officer at the Terminal. Once operational, simply:
brew install ffmpeg
and in a matter of minutes you'll have ffmpeg ready to use from any terminalHomebrew automatically handles dependencies, paths, and future updates.
If you prefer to go it alone, you can also download already compiled binaries for macOS, but in practice, with Homebrew you save yourself a lot of hassle and can keep FFmpeg updated with a simple brew upgrade ffmpeg.
Installing FFmpeg on Linux
In most modern distributions, FFmpeg is available in the official repositoriesIn Debian, Ubuntu and derivatives, for example, You can install it with:
sudo apt install ffmpeg
In other distributions the package manager will change, but the idea is the same: You install the ffmpeg package and its associated tools, like ffprobe. If you then run which ffmpeg and you get something like /usr/bin/ffmpegEverything is fine.
In more advanced scenarios (for example, servers that need specific support for certain codecs or librariesSome prefer to compile FFmpeg from source code and manually add modules such as LAME for MP3, libogg, libvorbis, or integrate it with mplayer. In these cases, these libraries are downloaded and compiled beforehand, and permissions and paths are adjusted (LD_LIBRARY_PATH) and symbolic links are created in /usr/lib towards the FFmpeg libraries in /usr/local/lib.
Understanding the basic syntax of FFmpeg
Once installed, the next step is to understand How to write a minimal FFmpeg commandThe general structure is usually:
ffmpeg -i entrada.ext salida.ext
The key parameter is -iThis indicates the input file or stream. Everything you add before and after that option are settings that affect how the output is processed and generated.
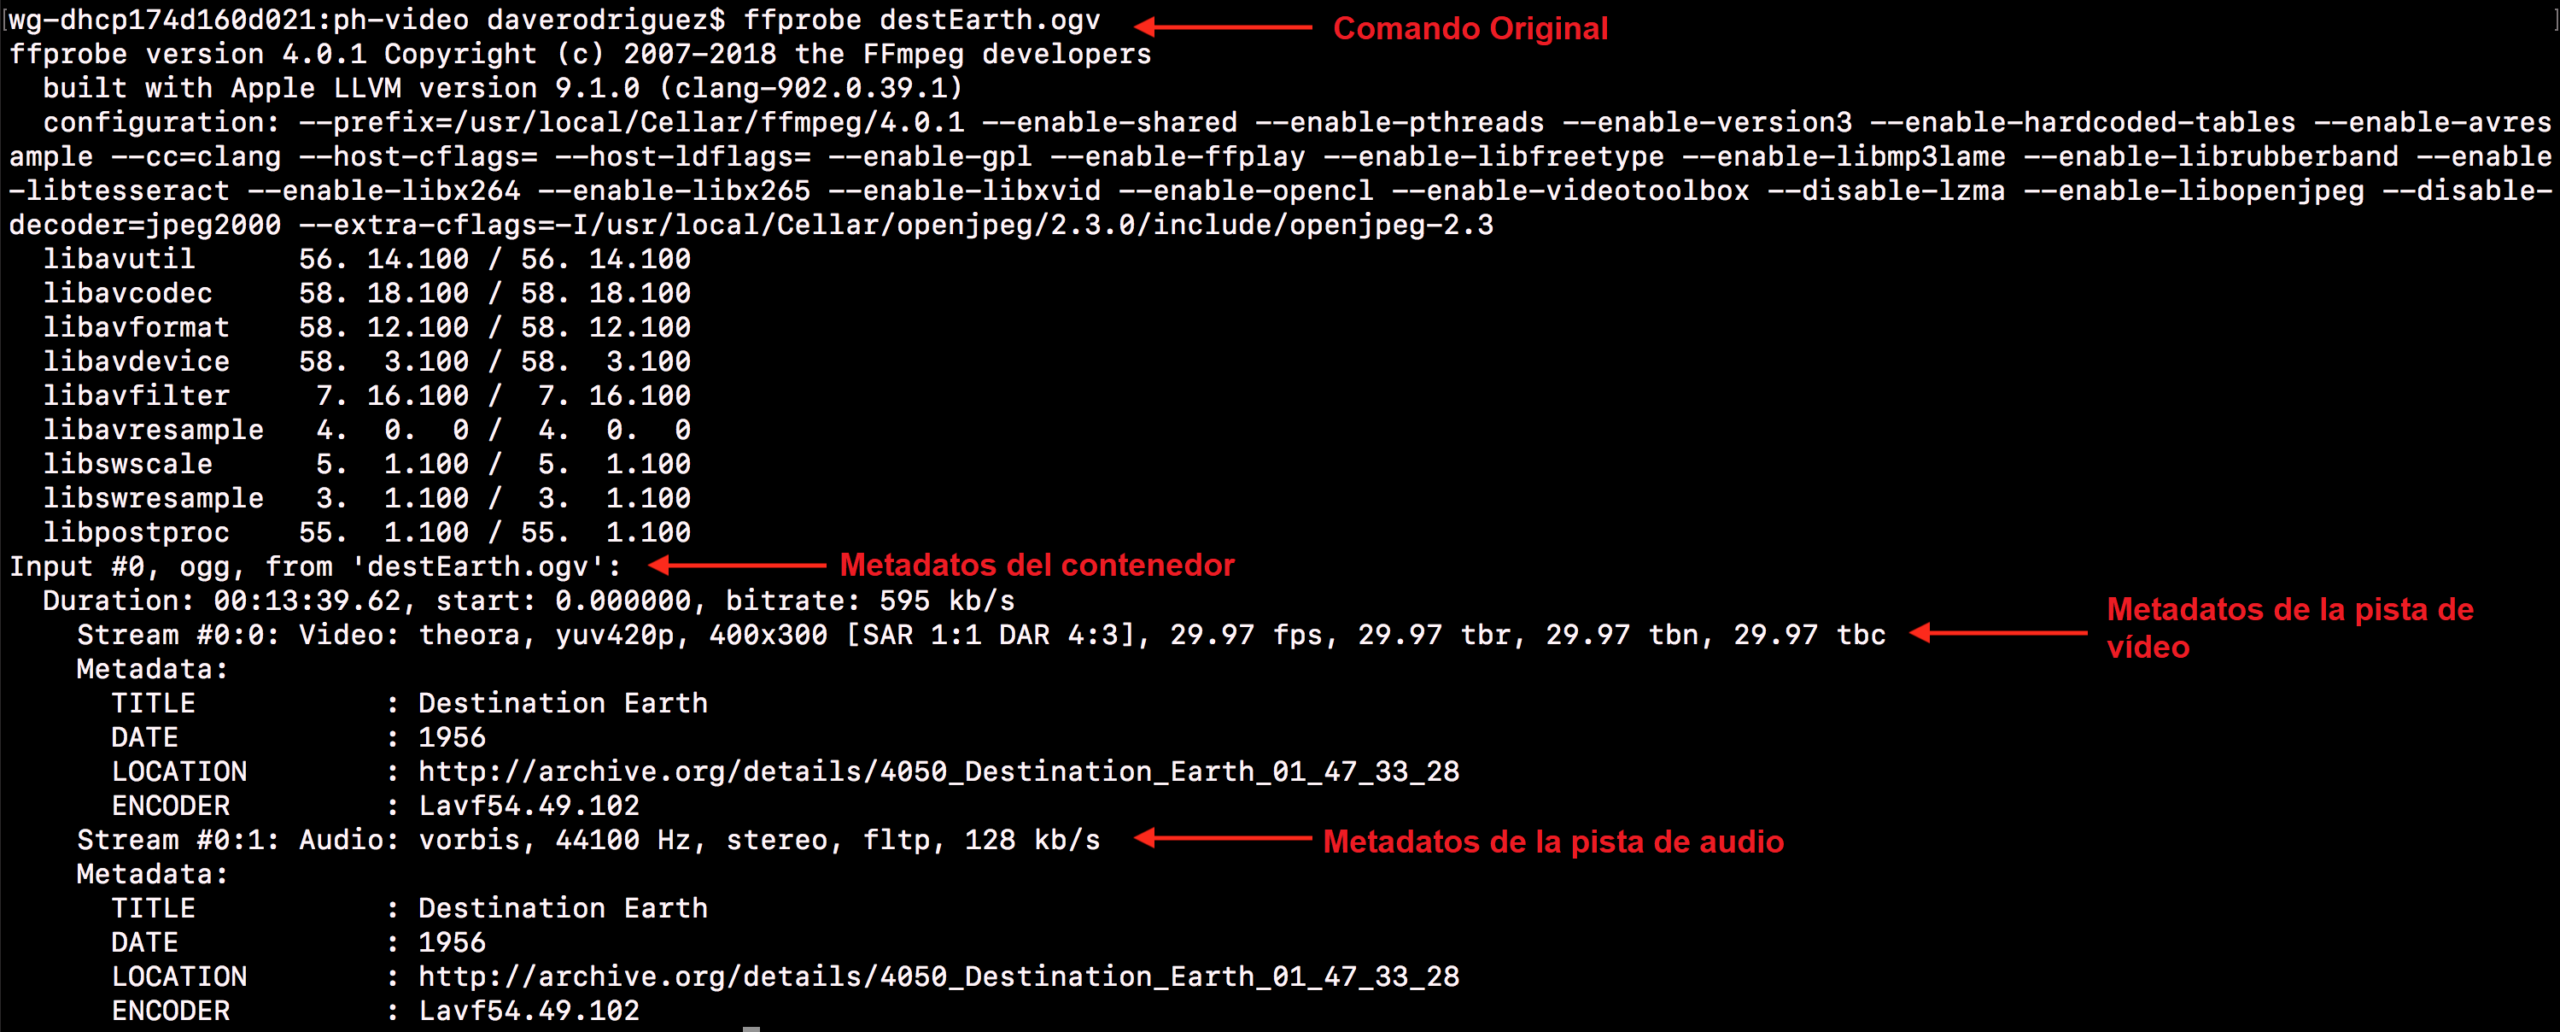
If you simply want obtain technical information from a video file, you can use:
ffmpeg -hide_banner -i video.mp4
With this, FFmpeg shows details such as duration, bitrate, video and audio codecs, resolution, framerate and other metadata. The parameter -hide_banner It prevents you from seeing the huge initial configuration and compilation block, and allows you to focus on the really useful information.
Some very useful global parameters to guide you are:
- -formats: lists the supported formats (containers).
- -codecs: displays all input and output codecs.
- -decoders: details the codecs accepted as input.
- -encoders: lists the codecs you can use when exporting.
With that minimum of information, you can begin to convert from one format to another simply by changing the output extension. For example: uterine
ffmpeg -i video_origen.mov video_destino.mp4
In this case, FFmpeg will choose reasonable codecs depending on the extensionFor example, H.264 for video and AAC for audio in MP4, unless you specify otherwise.
Codecs, containers, and key quality parameters
To get the most out of FFmpeg, it is important differentiate between codec and containerMP4 (container) is not the same as H.264 or H.265 (video codecs), although the terms are often mixed up in everyday language.
Un codec It is the algorithm that compresses and decompresses the audio or video data stream (H.264, H.265/HEVC, AV1, VP9, AAC, MP3, Ogg Vorbis, etc.). contenedor (MP4, MKV, AVI, MOV, WebM, Ogg, etc.) is the “wrapper” that can contain multiple video and audio tracks, subtitles and metadata.
Some common containers are:
- REVIEWS: a classic Windows program, widely used but with modern limitations.
- MOV: QuickTime standard format, widely used in Apple environments.
- MP4: standard container for MPEG-4, highly compatible across devices.
- Ogg- Open container for codecs like Vorbis or Theora.
- MKVMatroska format, very flexible and open, ideal for masters and archiving.
In FFmpeg you can control the quality primarily with parameters such as -b:v (video bitrate), -b:a (audio bitrate) or the popular FIU in codecs such as H.264 or H.265. For example:
ffmpeg -i video.avi -b:v 2500k -b:a 192k salida.mp4
In this case, you force a video bitrate of 2.500 kb / s and one audio recording of 192 kb / sHigher bitrate generally means higher quality but also larger file size, and vice versa. With CRF (Constant Rate Factor), the logic changes slightly, because A lower value means higher quality and a larger file size.In H.265, for example, a CRF around 18-22 is often almost indistinguishable from the original in many cases.
Video conversion, compression, and format change
One of the most common uses of FFmpeg is Convert and recompress videos to make them smaller or change their format.while maintaining reasonable quality. If you prefer an alternative with a graphical interface, you can see How to edit and convert videos using VLC.
In the basic conversionSimply indicate the entry and exit points:
ffmpeg -i origen.avi destino.mpg
If you want to fine-tune things, you can specify the video and audio codecs, the quality mode, and the container. For example, for Compress a video using H.265 (libx265) with very good quality and without touching the audio:
ffmpeg -i "input.mp4" -c:v libx265 -preset veryslow -crf 18 -c:a copy "salida_comprimida.mkv"
Here you are using:
- -c:v libx265: H.265 video codec (very efficient).
- -preset veryslow: slower encoding but with better compression.
- -crf 18: very high quality; you can go up to 20-22 if you want less weight.
- -c:a copy: copies the audio as is, without recompressing it.
If you prefer compress the audio as well For AAC at 128 kb/s, you could use:
ffmpeg -i input.mp4 -c:v libx265 -preset veryslow -crf 18 -c:a aac -b:a 128k output.mkv
The MKV container format is very stable and flexible for this type of work. If you absolutely need an MP4 later on, you can remultiplex (change container without recompressing) with:
ffmpeg -i salida.mkv -c copy salida_final.mp4
This last step is Speedbecause only the file's "wrapper" changes, without touching the video and audio content.
Basic editing operations with FFmpeg
FFmpeg also allows you to perform many classic editing tasks without opening a heavyweight video editorIt's not convenient for large-scale creative editing, but for specific tasks it's immediate.
Cut out a fragment of time
If you want to extract a specific segment from a video, you can use the options -H.H, -t y -to. For example: uterine
ffmpeg -i video.mp4 -ss 35 -t 30 fragmento.mp4
In this case, You start at second 35 and you extract 30 seconds. Another variation would be:
ffmpeg -i video.mp4 -ss 00:00:35 -to 00:01:05 fragmento.mp4
Here you define start time and end time in the format hours:minutes:seconds. Depending on the order in which you put them. -H.H with respect to -iThe cutting will be faster but less precise, or vice versa; for most practical uses you can leave it as in the examples.
Change video resolution
To adapt a video to another resolution, for example from 1920×1080 to 1280 × 720, you can use:
ffmpeg -i entrada.mov -s 1280x720 salida.mp4
Parameter -s define the output size. You can also use video filters (-vf scale=) to have more control over rescaling or to maintain specific proportions.
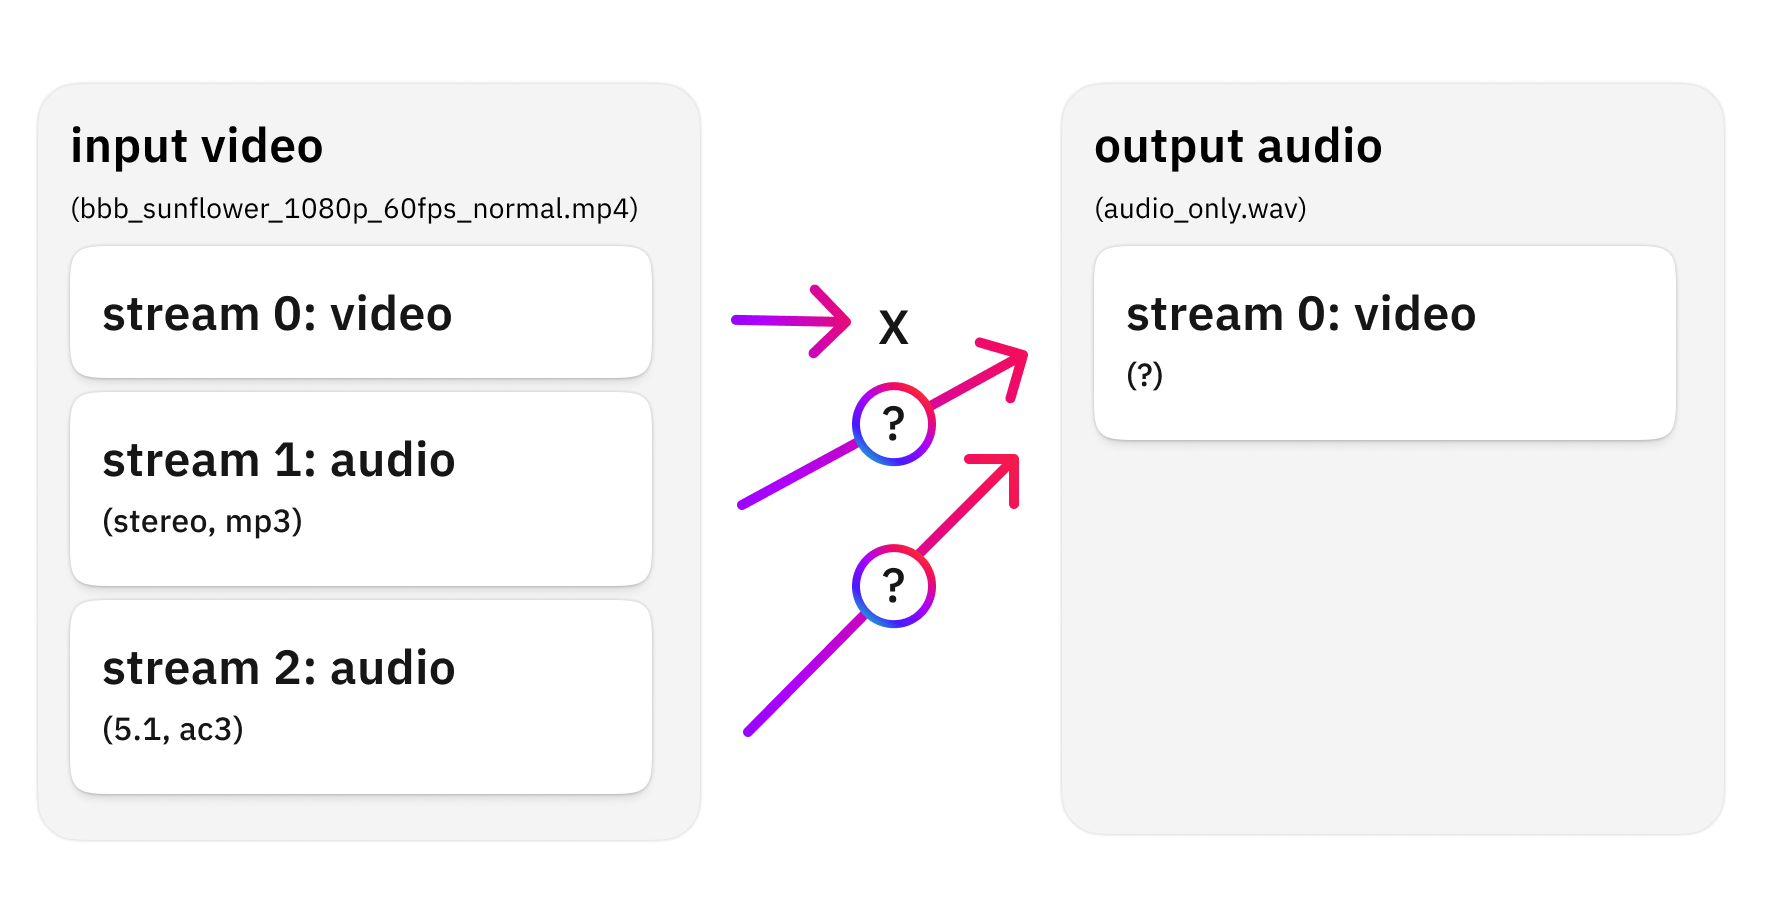
Delete or extract audio tracks
If you would like to keep only the audio For example, from an MP3 video, you can use:
ffmpeg -i video.avi -vn -ar 44100 -ac 2 -ab 192k -f mp3 audio.mp3
This indicates that you don't want video with -vnThe sampling frequency and channels are adjusted, and a reasonable audio bitrate for MP3 is defined.
If what you want is remove audio from video To leave only the image, you could use:
ffmpeg -i entrada.mp4 -an -c:v copy salida_sin_audio.mp4
The option -year It removes the audio, while -c:v copy Avoid recompressing the video, saving time and maintaining quality.
Insert logos or watermarks
To place a fixed logo in a corner of the video, you can use the filter. overlayA typical example:
ffmpeg -i video.mp4 -i logo.png -filter_complex "overlay=10:10" salida.mp4
In this command, overlay=10:10 This indicates that the logo is positioned 10 pixels from the left edge and 10 pixels from the top. If you want to move it to the bottom right corner, you can use expressions based on width and height:
overlay=x=(main_w-overlay_w):y=(main_h-overlay_h)
This way the logo adapts to any video resolution without having to calculate positions by hand.
Working with images: extracting frames and creating videos
FFmpeg isn't just for classic videos; it's also very powerful for convert between videos and imageswhich is ideal for time-lapse, stop-motion or for analyzing specific frames.
Extract images from a video
If you want to convert each frame In an image, something like (see more options in) is sufficient. How to extract frames from videos and GIFs):
ffmpeg -i video.mp4 image%d.jpg
This will generate one file per frame: image1.jpg, image2.jpg, image3.jpg…If the video is long, you'll end up with thousands of images, because most videos run at between 25 and 30 fps.
To avoid generating a huge number of files, you can limit the extraction with a filter. fpsFor example, one image per second:
ffmpeg -i video.mp4 -vf fps=1 image%d.png
This way, only one image is exported per second of the original video, perfect for creating visual summaries or automatic thumbnails.
Create a video from images (time-lapse and slideshows)
If you have a sequence of numbered photos (for example, img-01.png, img-02.png, img-03.png…You can easily create a video:
ffmpeg -framerate 5 -i img-%02d.png video.avi
In this case, -framerate 5 It specifies that 5 images per second will be used in the resulting video. If they are photos from a time-lapse, you might want to increase the speed for smoother movement, or decrease it for a more relaxed slideshow.
FFmpeg understands several naming patterns:
- filename-%03d.png- Matches filename-001.png through filename-999.png.
- filename-%d.png- Matches filename-1.png, filename-2.png, etc.
- filename-*.png: more generic pattern, for when you don't follow strict numbering (in this case you will need additional parameters to control the order).
If you also want to force the output video to be MP4 with a specific playback framerateYou can do something like this:
ffmpeg -framerate 1 -i img%03d.png -r 25 -pix_fmt yuv420p output.mp4
Here you define a capture of 1 image per second and a playback framerate of 25 fps, with a pixel format compatible with most players.
Generate animated GIFs and simple effects
Another classic in FFmpeg is converting small videos into Animated GIFs for websites or networksThe process can be simplified to a single line or done in several steps to improve quality.
For most direct case:
ffmpeg -i entrada.mp4 salida.gif
This will give you a working GIF, although perhaps not optimized. If you want better control over the size and quality, one option is rescale the video, generate PNG frames, and then create the GIF from them. For example: uterine
ffmpeg -i input.mp4 -vf scale=640x360 -c:v h264 -crf 18 -c:a aac salida_intermedia.mp4
ffmpeg -i salida_intermedia.mp4 frame%04d.png
ffmpeg -i salida_intermedia.mp4 salida.gif
Or use external GIF editing tools for an even finer finish. This type of workflow allows you to maintain a Full control over resolution, quality, and size of the final file.
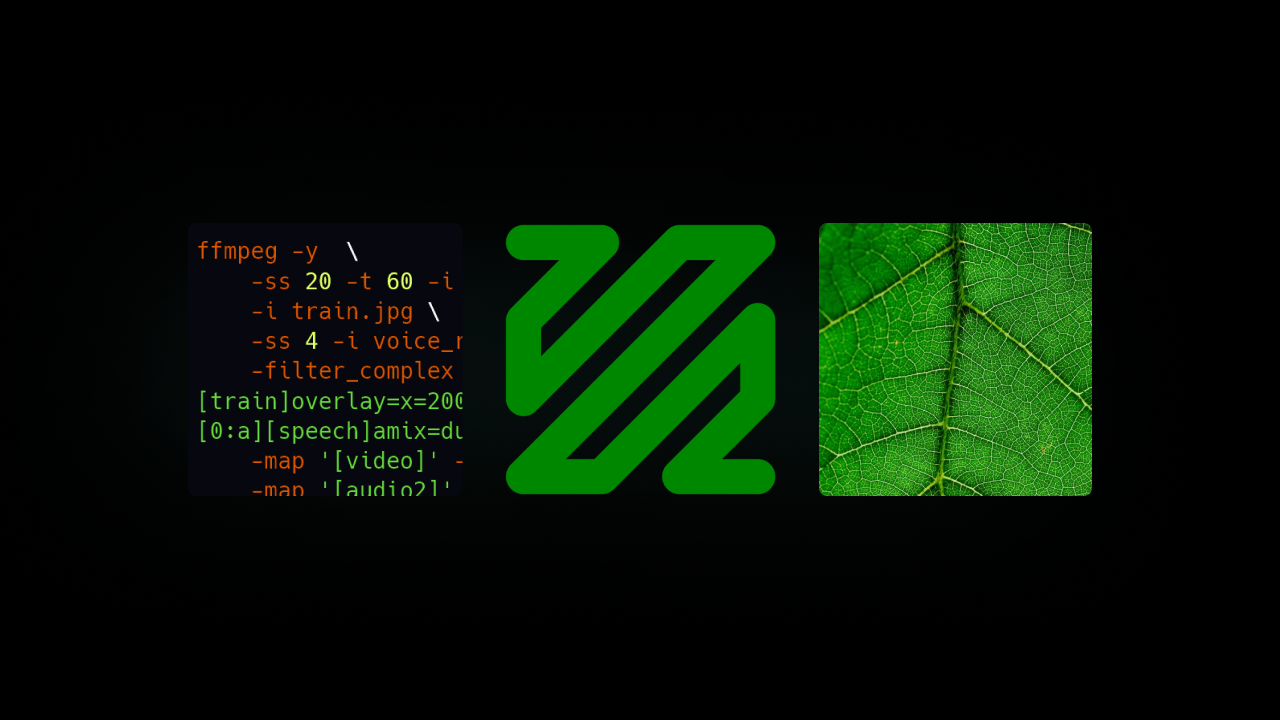
Automate video editing with scripts and YAML
Where FFmpeg really shines is when you integrate it into scripts that automate repetitive tasksIf you produce the same type of video every week (courses, interviews, institutional pieces…), you can define a standard workflow and let a script do practically everything.
A very powerful approach is to describe your project in a YAML file (config.yml)where you detail what clips, images, durations, cuts, volumes, and transitions you want, and then a script takes care of translating that into complex FFmpeg commands.
With this system you can, for example, define a list of elements (images, videos, audio tracks) which are processed individually (trimming, volume change, rescaling, normalization) in a temporary directory, and then concatenated with millimeter precision, keeping audio and video synchronized.
Typical use cases include:
- Create training videos from slides + short clips.
- Create informational capsules composed of several standard blocks.
- Generate institutional intros and outros for a whole series of videos.
Examples of practical scripts with FFmpeg
Based on this idea of automation, one can build various types of scripts, from the simplest to quite elaborate setups, always relying on FFmpeg as the engine.
General script for concatenating images and videos
A general-purpose script can work with a list of heterogeneous elements described in YAML (videos, images, audio clips), assigning each duration, start and end trims, relative volume, etc. The script generates pre-adjusted temporary versions and then builds a list file to concatenate everything using FFmpeg.
This gives you fine control over:
- Final resolution and FPS of the project.
- Volume of each segment separately.
- Start and end of each clip without opening a graphics editor.
Simple script: cover image + main video
An even more common scenario is wanting to display a static slide as a cover image (title, logo, event details) for a few seconds and then launch the main video.
The typical script It does something like this:
- Turn the cover image into a video clip of about 5 seconds.
- Encode both the cover and main clip in a format compatible for concatenation (e.g., using mpegts).
- It concatenates both segments without recompressing the content, which speeds up the process and avoids loss of quality.
This type of solution is usually stored in paths like /automation/videos-open-subjects/ and they integrate easily into recording workflows for classes, lectures, or recorded presentations.
Script developed for montages with transitions
At a higher level, you can build a script that assembles several blocks with smooth audio and video transitionsA typical example includes:
- Institutional intro with music and animation.
- Still image with the title and details of the meeting.
- Main video recorded in raw (trimmable at the beginning and end).
- Closing with animation and music.
With FFmpeg you can apply filters such as xfade (video transition) and acrossfade (audio transition) to make the changes between blocks smooth. Additionally, you can:
- Trim the main video on the fly according to the times indicated in YAML.
- Adjust the volume of each segment independently.
- Force standard parameters such as 720p resolution and 44.1 kHz audio.
The logic of the assembly is defined in a config.yml with the paths of each element, the duration of the transitions, the cut points, etc., and a script in a folder like /automation/café-edition/ Translate all of that into a chain of filters and maps in FFmpeg. The result is a final video that is visually and audibly consistent with minimal manual effort.
More useful commands and advanced tricks
In addition to all of the above, FFmpeg has infinite uses "Niche" products that, when you need them, save the day. Among others:
- List or extract metadata:
ffmpeg -i INPUT -f ffmetadata metadata.txt. - Replace the audio track of a video without touching the video:
ffmpeg -i video.mp4 -i nuevo_audio.mp3 -map 0:v -map 1:a -c copy salida.mp4. - Generate a visualization of audio waves in video with the filter
showwaves, useful for podcast type videos. - Change subtitle formatFor example, from VTT to ASS:
ffmpeg -i subtitulos.vtt salida.assTo easily edit subtitles, you can see Use Word as a subtitle editor. - adjust volume quickly with
-volor more advanced audio filters.
The complete list is almost impossible to manage, but with a combination of official documentation and practical examples you can start building. your own repertoire of frequently used commands so we don't have to reinvent the wheel every time.
FFmpeg goes from being that "weird console program" to becoming a central tool for converting, compressing, batch editing, and automating video creationWhether on your personal computer or within professional scripts and workflows, once you get used to writing a few basic commands, each new use case is simply a matter of adding small pieces to a foundation you already master.

Passionate writer about the world of bytes and technology in general. I love sharing my knowledge through writing, and that's what I'll do on this blog, show you all the most interesting things about gadgets, software, hardware, tech trends, and more. My goal is to help you navigate the digital world in a simple and entertaining way.