- Blackmagic Cam converts the iPhone 15 Pro in a cinema-style camera with full manual control of ISO, shutter, white balance and codec.
- Apple Log's 10-bit HEVC H.265 codec offers great dynamic range and near-ProRes quality with much smaller file sizes.
- For a cinematic look, it's advisable to lock the ISO around 1250, use a 1/48 shutter speed at 24 fps, and rely on ND filters in bright light.
- The SSD The Aiffro P10 and P10 Plus allow you to easily record and move large files from your Blackmagic Cam without overloading your iPhone's memory.

If you've upgraded to the iPhone 15 Pro hoping to get the most out of Apple Log mode with the Blackmagic Cam app , you've probably already realized it's not as simple as opening the camera and pressing the red button. You have to carefully adjust exposure, ISO, shutter speed, codec, and storage to avoid going crazy with overexposed footage and your phone about to burst with files.
In this guide, we'll take a step- by-step look at how to configure Blackmagic Cam to record cinematic-looking video, take advantage of the iPhone 15 Pro's dynamic range, and solve the problem of large file sizes using external SSDs like the Aiffro P10 and P10 Plus. Everything is explained in clear, accessible Spanish, making what often sounds like a technical manual much easier to understand.
Why the iPhone is a beast for professional video
Apple's current mobile phones have become a kind of "mini pocket-sized movie camera ." The iPhone 15 Pro, and recent models in general, record in 4K, offer various frame rates, and advanced modes such as slow-motion video or cinematic mode, which mimics the background blur typical of larger cameras.
In practice, this means you can leave home with just your phone and still get perfectly usable footage for YouTube, travel vlogs, or more serious projects without lugging around a bulky DSLR or film camera. For casual shoots, creators on the go, or anyone working solo, it's a lifesaver.
The trick is that, to get the most out of it, the iPhone's built-in camera app isn't enough. You need an app that gives you real manual control over the image : exposure, ISO, shutter speed, white balance, recording format… that's where Blackmagic Cam comes in.
However, when you start recording in 4K, Log, ProRes, or 10-bit HEVC, another enemy appears: internal storage fills up incredibly fast . Even a few minutes of high-quality video can easily consume several gigabytes.
Between apps , games, photos, social media, and videos, the iPhone's 256 GB or 512 GB of storage isn't enough if you're serious about recording. And you can't always download files to your laptop or the cloud, especially if you're traveling or recording away from home.
What does the Blackmagic Cam app actually offer?

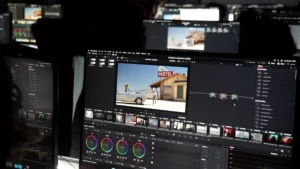
Blackmagic Cam is a free app from Blackmagic Design, the same company behind many professional cinema cameras and the DaVinci Resolve editing software . The app aims to bring a cinema camera-like experience with full manual controls to the iPhone.
In the app's settings tab, you'll find advanced options for video, audio, and monitoring . You can choose the recording resolution and format (H.264, H.265/HEVC, and even Apple ProRes on compatible devices), select audio codecs such as AAC, IEEE Float, or PCM, and view VU meters or peak meters to monitor sound levels.
It also allows for easy connection of external microphones , essential if you want your content to sound as good as it looks. As for image quality, you can apply lens corrections, use anamorphic decompression for specific lenses, and load 3D LUTs to preview cinematic color styles directly on screen.
In terms of monitoring, the app includes professional tools such as the "zebra" function for checking exposure , focus indicators, and framing guides. All of this is presented with an interface reminiscent of Blackmagic film cameras, featuring real-time histograms and audio levels, and a layout designed for easy access.
In addition to creative control, Blackmagic Cam integrates with the brand's ecosystem: it allows you to upload recordings directly to Blackmagic Cloud , ideal if you work with a team and will edit later in DaVinci Resolve without having to send discs back and forth.
Advantages of Blackmagic Cam over the iPhone's native camera
The main difference compared to the native iOS app is that this one focuses entirely on manual control. With Blackmagic Cam, you can adjust ISO, white balance, focus, shutter speed, and codec completely manually , without the phone making decisions for you mid-shot.
The app supports recording in 10-bit HEVC H.265 and even 10-bit Apple ProRes on compatible models. These formats capture significantly more color information and detail than standard video, resulting in greater flexibility for editing and color correction.
The interface displays a histogram and real-time audio levels , so you can instantly check if you're blowing out lights, if the scene is underexposed, or if the sound is distorted. For someone coming from the world of "real" cameras, it feels like stepping into familiar territory.
Another key feature is the support for uploading directly to Blackmagic Cloud , which is very useful if you work in collaborative workflows or want to have your footage ready for remote editing. This allows you to record with your iPhone on the street while someone else is editing the video in the studio almost simultaneously.
The big problem: the iPhone runs out of storage while flying.
Once you start recording in 4K, 10-bit HEVC, or ProRes with Blackmagic Cam, you discover the less glamorous side: the massive file sizes . Several minutes of ProRes footage can easily take up tens of gigabytes.
This means that if you frequently record videos, your iPhone will constantly be in a state of " almost full storage ." It's not just the videos themselves, but also the apps, games, photos, and everyday files that take up space. And when your phone runs out of space, everything slows down, recordings can stop, and you end up desperately deleting things.
The typical solution is to transfer the footage to a computer or upload it to the cloud, but in the middle of a trip, an outdoor shoot, or a getaway, you usually don't have your laptop or a good internet connection readily available. That's where having an external SSD designed for iPhone makes all the difference.
A fast portable SSD like the Aiffro P10 or P10 Plus lets you directly empty or burn your Blackmagic Cam clips and keep your iPhone's internal storage relatively clean , without constantly seeing the "memory full" message.
Aiffro P10 and P10 Plus SSDs: perfect allies for mobile creators
The Aiffro P10 and P10 Plus are ultra-fast, compact portable SSDs designed specifically for creators who record with iPhones and other mobile devices . They're designed for on-the-go use, with no complicated setup or additional applications required.
The Aiffro P10 offers up to 2TB of storage , with transfer speeds of up to 2000MB/s, more than enough to move huge files in seconds. It also features a magnetic back compatible with MagSafe, so it attaches to your iPhone like a case , staying securely in place while you record.
It connects via a USB-C to Lightning adapter (depending on your iPhone model) and is so small and light you can slip it into your pocket without even noticing it. Whether you're recording long interviews, travel B-roll, or entire content sessions, it gives you peace of mind knowing you won't run out of storage space in the middle of a crucial shot.
The Aiffro P10 Plus takes it a step further with a dual-port design: Lightning and USB-C . This allows you to use it with iPhones, iPads, Macs, PCs, and even some cameras, without needing adapters. It's plug-and-play, compatible with the iPhone's file system, and appears as a separate drive in the Files app.
Both models prioritize simplicity: they require no drivers , proprietary apps, or configuration . You plug them in, see them in your system, and start working. They're designed for creators who are constantly on the go and don't want to carry around a lot of equipment or waste time fiddling with menus.
How to configure Blackmagic Cam to record with an external SSD
Using a Blackmagic Cam with an Aiffro P10/P10 Plus SSD is quite simple, but it's best to follow a specific order to ensure everything works smoothly and you can take advantage of the external storage from the very beginning.
First, go to the App Store and search for “Blackmagic Camera.” Install the app, open it, and grant all the necessary permissions: camera, microphone, and file access . Without these, you won't be able to record or properly manage your footage.
Once inside the application, the next step is to adjust the basic video settings. Select the resolution you want to work with (1080p, 4K, or 4K DCI) and choose the frame rate: 24 fps for a classic cinematic look, 30 fps for something more standard, or 60 fps for very smooth motion or the possibility of slow motion in post-production.
In the codec section, decide whether you want to record in 10-bit HEVC H.265 or Apple ProRes . ProRes offers the highest quality and ease of editing, but it generates very large files. 10-bit HEVC, on the other hand, offers quality close to ProRes with a much smaller file size, ideal for those who don't want to fill up their storage.
Don't forget to manually set and lock the white balance . For daylight, a value around 5500K usually works well as a starting point. The idea is to prevent the automatic white balance from changing the image's tone mid-shot depending on what enters the scene.
Connect Aiffro P10/P10 Plus and manage storage
With the image setup complete, it's time to address the storage space. Connect the Aiffro P10 or P10 Plus to your iPhone using the appropriate USB-C or Lightning cable . If your iPhone has MagSafe, the SSD will magnetically attach to the back, making the setup easy to handle even without a tripod.
You should now see the SSD appear as a drive in the Files app on iOS. From there, you can create folders, move clips, and organize projects with ease. It's a very similar workflow to working with a USB drive or external hard drive on a computer.
You have two work options: record to the iPhone's internal storage and then transfer the files to the SSD , or directly select the Aiffro as the main recording destination from the Blackmagic Cam settings (on devices and versions that allow it).
The second option is especially practical if you record a lot during the day, as it saves you from constantly worrying about your phone filling up and keeps your internal memory clear . In both cases, the advantage is clear: you can record long sessions without worrying about your phone's storage limits.
A useful trick is to record several takes and, as soon as each block is finished, transfer the footage to the SSD . That way, if you need to check something on your phone or continue using other apps, you won't be left without any options because of the video.
Best Blackmagic Cam settings for iPhone 15 Pro with Apple Log
If your goal is to achieve the most cinematic look possible with your iPhone 15 Pro using Apple Log, there are a few specific settings you should follow. By adhering to these guidelines, you'll achieve greater dynamic range, manageable file sizes, and very precise exposure control.
In the app's settings menu, within the video section, select HEVC H.265 10-bit as the codec . This setting gives you image quality very close to ProRes, but with only a fraction of the file size—approximately 5% of what ProRes 422 would take up in many situations.
Reserve Apple ProRes 422 for very specific cases: for example, if you're working with a green screen (chroma key) or projects that require extreme color accuracy . For everyday use, 10-bit HEVC is a great balance between quality and file size.
In that same menu, adjust the resolution to 4K and select the Apple Log color space. Recording in Log reduces the artificially sharp appearance often associated with mobile devices and expands the dynamic range, allowing you to recover highlights and shadows much more easily during color grading.
Next, on the camera's main screen, tap the white balance icon and set a manual value that matches the scene's lighting (for example, 5500K for standard daylight). Locking the white balance prevents unusual color shifts while recording if something unexpected enters or leaves the frame.
Exposure control: zebras, ISO and shutter speed
Once you have the codec, resolution, color space, and white balance set, it's time to fine-tune the exposure. Start by activating the zebras from the framing icon (top right of the Blackmagic Cam interface) and adjust the threshold to approximately 95%.
The zebras draw lines over the overexposed areas, meaning the parts of the image that are blown out and where detail is lost. The idea is to reduce exposure (by adjusting ISO or using ND filters) until these zebra-like areas are controlled and only appear in very intense, localized highlights.
Regarding ISO, experience with the iPhone 15 Pro and Apple Log shows that the sweet spot is primarily between ISO 1100 and 1450 , with 1250 being a very good benchmark for maximizing dynamic range. Within this range, the iPhone can offer up to 14 stops of dynamic range, comparable to some professional cameras.
It's tempting to lower the ISO significantly to reduce noise, but in this case, that means losing some dynamic range , so it's not worth it if your priority is overall image quality. It's better to stay close to that optimal value and control the light using other methods.
The shutter speed, if you want cinematic-looking motion, should ideally be set to around 1/48 of a second when recording at 24 fps . If the app doesn't allow that exact value, 1/50 is a perfectly valid alternative. The important thing is to respect the famous "180° shutter rule," meaning that the shutter speed should be twice the frame rate.
Why your image looks too bright and how to fix it
Many people who set up Blackmagic Cam on the iPhone 15 Pro following these recommendations find that, when locking the shutter speed to 1/48 and setting the ISO to around 1250 , the image is still too bright, especially in bright daylight.
The main reason is that the iPhone's lens aperture is fixed (for example, f/1.8) and cannot be closed down like on a camera with interchangeable lenses. Therefore, the only real exposure controls you have left are ISO and shutter speed.
If you want to maintain 24 fps, respect the 180° shutter rule, and keep the ISO in the sweet spot for Apple Log, the only solution when there is too much light is to use neutral density (ND) filters , which literally work like sunglasses for the camera.
These filters reduce the amount of light entering the sensor without changing the color or sharpness of the image (provided the filter is of decent quality). Mobile solutions include clip-on adapters with interchangeable ND filters or cases with integrated filter mounts that attach to the iPhone's camera module.
With a good ND filter you can maintain ISO 1250, shutter speed around 1/48 and achieve a perfectly exposed image even in strong sunlight, without resorting to excessively high shutter speeds that generate unnatural and "shaky" movement.
Avoid automatic exposure changes and use focus correctly
When you lock the shutter speed and work with manual ISO, it is crucial not to randomly touch the screen while recording , because that often causes the system to try to adjust the exposure automatically as well.
On Blackmagic Cam, once the ISO and shutter speed are manually set, if everything is configured correctly, tapping the screen should only display AF (autofocus) and not AF/AE (focus and exposure) . This indicates that the exposure is locked and will not change even if you select a different focus point.
Regarding focus, you can choose to leave autofocus on, but for more detailed shots it's usually better to use manual focus whenever possible , especially if the subject isn't moving much. This prevents the typical focus "pumping" that occurs when the camera hesitates.
To further improve the stability of the shot, it's advisable to use a tripod or gimbal if possible . The iPhone's internal image stabilization helps, but if you want a more professional and smooth result, an external mount makes all the difference, especially when you also have an SSD attached to the phone.
If audio is important (interviews, videos of you speaking to the camera, etc.), consider using an external microphone connected to your iPhone . The Blackmagic Cam app shows you live levels so you can adjust the gain and avoid clipping. Combining good image and good sound makes a huge difference in quality.
Extra tips for better recording with iPhone + Blackmagic Cam
In addition to the technical setup, there are a number of practical guidelines that make a difference in the final result and that are often overlooked, especially when you come from casual use of the mobile phone camera and start taking video more seriously.
The first thing is to take advantage of the best possible light . If you're filming indoors, using a softbox, a soft continuous light, or simply getting close to a window with good natural light will help you avoid harsh shadows and excessive contrast, which are the enemy of dynamic range.
It's also important to plan the shots at least minimally : angles, movements, framing, where the subject will move... You don't need to make a film storyboard, but being clear about what you want to record and from where saves you useless footage and unnecessary repetitions.
Before starting an important recording, check the audio levels and do a couple of test takes of a few seconds each . Then play them back carefully: check for clipping, burn-in, and good focus. It's better to spend two minutes here than to discover a disaster when you get home.
Finally, if you're using Apple Log, keep in mind that the image on screen will appear flat and lacking in contrast . This is normal and intentional, allowing for more adjustments. Don't judge the final result based solely on the preview; you'll only see its true quality when you apply a LUT or perform color grading in your editing software.
In post-production, you can use DaVinci Resolve, Final Cut Pro, or Adobe Premiere Pro to apply Apple Log-specific LUTs or color presets . From there, you can give the footage the style you want: more natural, more contrasted, cool tones, warm tones, a cinematic look, etc.
By combining a good Blackmagic Cam setup, an external SSD like the Aiffro P10/P10 Plus to keep storage under control, and a few good shooting practices, your iPhone 15 Pro goes from being "a phone that records well" to becoming a perfectly valid recording tool for serious projects without you having to invest in a full film crew.

Passionate writer about the world of bytes and technology in general. I love sharing my knowledge through writing, and that's what I'll do on this blog, show you all the most interesting things about gadgets, software, hardware, tech trends, and more. My goal is to help you navigate the digital world in a simple and entertaining way.