- Using WASAPI or ASIO in exclusive mode bypasses the Windows mixer and allows sending bitperfect audio to the external DAC.
- The system's mixing layers and certain drivers can resample without your knowledge, so it's best to configure them or bypass them.
- Processing in the player (DSP, resampling, equalization) only makes sense when it responds to a specific need.
- The final quality depends largely on the internal design of the DAC (upsampling, filters) and on delivering a clean digital signal.

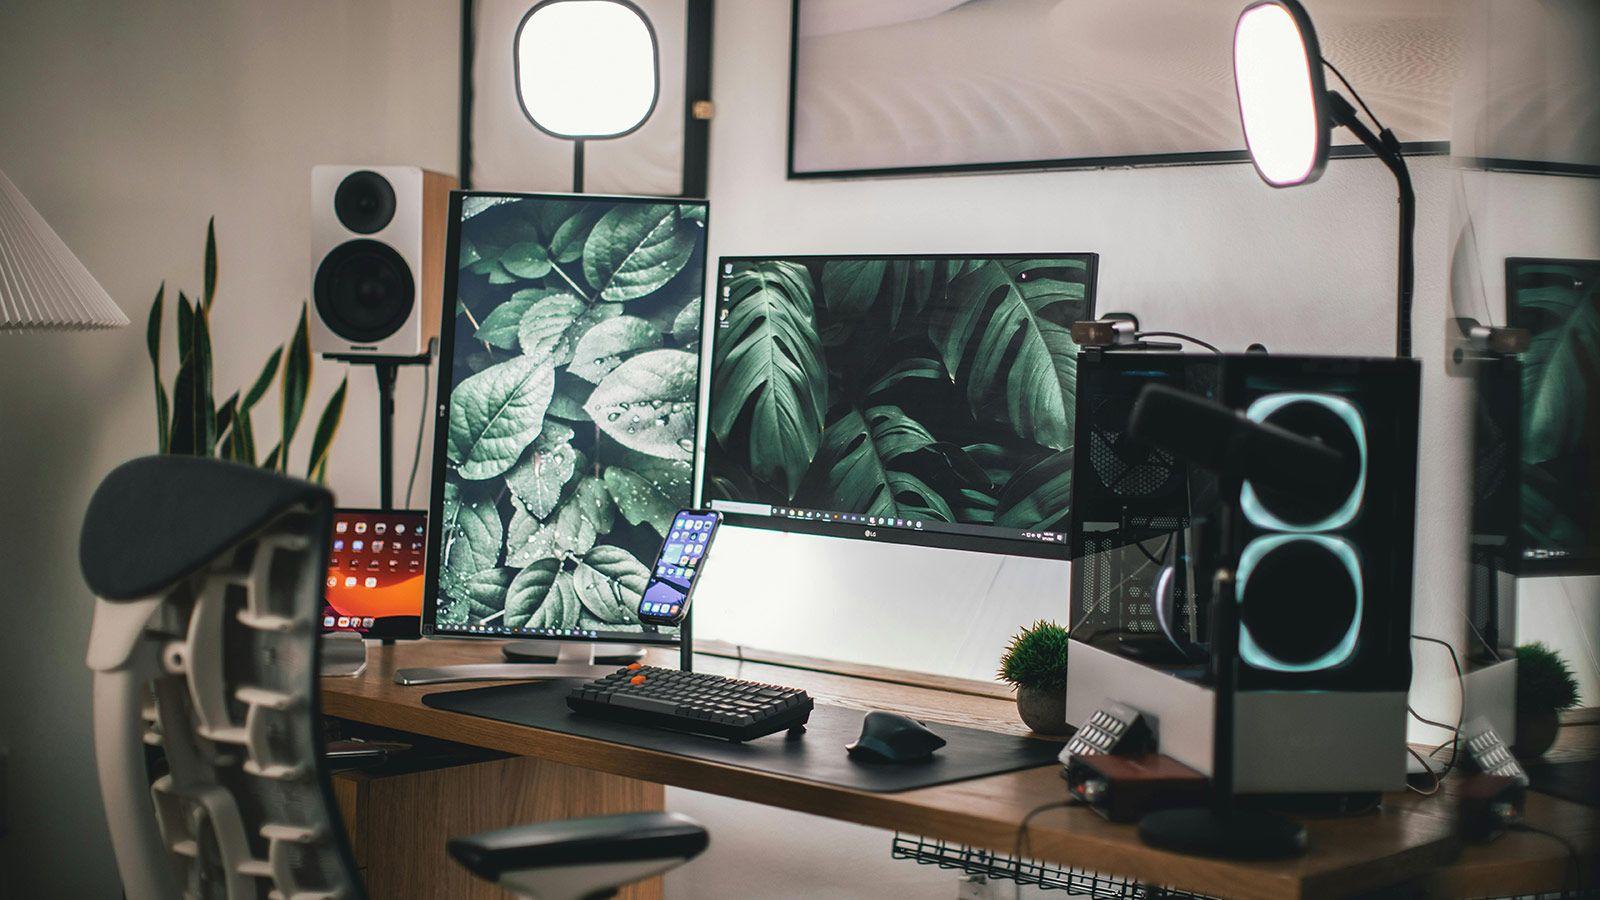
If you use a Windows PC as your primary music source and really want to get the most out of a External DACIt's not enough to just plug in the USB and cross your fingers. There's a whole chain of software layers, drivers, and digital processing that can either enhance or ruin the final sound coming out of your speakers or headphones. With proper setup, a Windows PC, a good player, and a decent DAC can compete head-to-head with many outrageously priced dedicated sources.
The problem is that Windows, by default, is designed so that you can simultaneously hear system sound, a browser video, and the music player. This convenience comes at a cost: the audio passes through a internal mixer and possible resampling that ruin bit-perfect playback. In this article, we'll see, step by step, how the audio path actually works, what role WASAPI, ASIO, and other similar technologies play, how to configure programs like Foobar or JRiver, and how to adjust the external DAC to receive the cleanest possible signal. If you need application-based control, tools like EarTrumpet for audio control help.
Layers of audio processing: from file to analog sound
Before pressing any buttons, it's helpful to understand what happens from the moment you press play on your player until the music comes out of the DAC in analog signal. We can divide the flow into five large blocks which are applied in this order:
1) Multimedia player program
This is the first link in the chain. Applications like Foobar2000, JRiver Media Center, MPC, etc., come into play here. At this stage, things like the following can be implemented:
– Resamplers (SoX, Secret Rabbit Code, etc.)
– Equalization (room, headphone, fine timbre adjustments)
– Various DSPs: crossfeed, ambient effects, volume normalization, etc.
Everything you activate here modifies the original signal, so if you're looking for maximum fidelity, you need to be clear about what you're using and why.
2) Operating system mixing layer (Windows mixer)
This is the layer that allows you to simultaneously hear a Windows notification, a YouTube video, and your media player. In Windows, it has traditionally been responsible for a lot of unnecessary resampling, digital volume changes, and other "tweaks" that prevent bit-perfect output. Something similar happens in Linux with the various sound daemons (PulseAudio, JACK, formerly aRts, esd, etc.), although in that environment, a different approach is usually used. ALSA directly to skip the mix when you want serious audio.
3) Card/DAC drivers
This is where your audio interface's specific drivers come in: those for the USB DAC, a Sound Blaster, a Xonar, etc. Depending on the manufacturer and the chip, these drivers can force a internal resample If the device is configured to work at a different frequency than the file you're sending, this can happen. This is common with some Creative X-Fi or C-Media chips: if the driver is fixed at, for example, 48 kHz and you send it 44,1 kHz, it will resample itself instead of changing modes. If you detect noise or interference, consult [a support team/technical department]. audio cable interference diagnosis.
4) Internal DSP of the DAC or card
Many modern DACs have a dedicated digital processor that does things like upsampling, digital low-pass filtering, and other treatments before delivering the data to the actual DAC chip. This is usually an additional feature that some models allow you to activate or deactivate (buttons like "upsampling", "filter", "mode", etc.). Ultimately, it's software running on a specialized chip.
5) Oversampling and filtering on the DAC chip
At the heart of the DAC, the chip itself that converts from digital to analog does a internal oversampling It applies low-pass filters so that the high-frequency "images" generated during conversion (artifacts due to the discrete nature of the data) are kept out of the audible range. This allows the use of gentler analog filters and prevents the relevant audio band from being altered.
The layers Steps 1 to 3 are executed on the PCLayers 4 and 5 are executed within the DAC or card. Ideally, for quality, decisions at layer 1 should be controlled. skip layers 2 and 3 if possible When they do things we don't want, and let the DAC do its job on layers 4 and 5 with the design intended by the manufacturer.
WASAPI, ASIO, Kernel Streaming and ALSA: what they are and what they are used for
In Windows, there are several ways to communicate with the audio device. Not all of them are the same, nor do they all sound the same when you want unedited playback.
WASAPI (Windows Audio Session API)
This is the modern Windows interface for managing audio sessions. We're particularly interested in exclusive mode. When your player uses WASAPI in exclusive mode with a USB DAC, it bypasses the general Windows mixer and writes directly to the DAC. output deviceThis allows you to output the audio in PCM, maintaining the original file format and, if the configuration is correct, in bitperfect (without Windows touching anything along the way).
ASIO (Audio Stream Input/Output)
Created by Steinberg, it's the de facto standard in professional environments. For our purposes, it serves the same purpose as the exclusive WASAPI: Send the audio stream with low latency and without going through the mixerMany serious DACs and sound cards include their own ASIO drivers. If the manufacturer doesn't provide them, some users use ASIO4ALL, which is a kind of compatibility layer, although it's not always ideal.
Kernel Streaming (KS)
For years, it was a "direct" way to output audio in Windows, bypassing the mixer. In theory, it also allows for a very clean output, but in practice, it can produce problems. more compatibility issues It requires drivers and software, and many users consider it less stable than WASAPI or ASIO. Some players still offer it as an option, but it's becoming less popular.
ALSA on Linux, equivalent to KS/WASAPI
On Linux, if you want to avoid the mixing layer (PulseAudio or whatever it is in your desktop environment), the classic option is to configure the player to use ALSA directly as an exitThis gives it almost exclusive control over the hardware, similar to KS or WASAPI in Windows. Players like MPlayer or Amarok allowed (and still allow) choosing ALSA as the backend.
In practical terms, for Windows the usual approach to quality audio is to prioritize WASAPI exclusive or ASIOKernel Streaming and DirectSound remain as alternatives when there is no other option.
Which layers should be avoided and when does DSP make sense?
Looking at the chain, the general philosophy for a PC music system is usually:
Layer 1 (according to your needs) → Layers 2 and 3, avoid if possible → Layers 4 and 5, let them do their job.
Avoid layer 2: the Windows mixer
With exclusive WASAPI, ASIO or KS, the player takes Exclusive control over the DAC It sends the signal directly, bypassing the mixer. This prevents Windows from resampling everything to the frequency you've set in the sound panel and from mixing in system sounds. If you're looking to listen to music without interference, this is exactly what you want.
Controlling layer 3: DAC drivers / card
In some chips (typical case: certain Creative X-Fi or C-Media chips from Auzentech, Xonar, etc.), if the driver is configured to a different operating frequency than that of the file, a forced resamplingFor example, a file at 44,1 kHz but a driver set to 48 or 96 kHz. To avoid this, there are three commonly used options:
– Set the card's control panel to 44,1 kHz when listening to 44,1 kHz music.
– Use special modes such as “creation mode” (on some X-Fi models) that reduce internal processing.
– Use the device's native ASIO, which in many cases better respects the original flow.
Layer 1: Okay, when is it worth it?
The processing within the player itself can be very useful in specific cases:
– Equalize the room or headphones to compensate for frequency response problems.
– Apply specific DSPs that you like (headphone crossfeed, small loudness adjustments, etc.).
– Resample when the DAC or its drivers don't support a specific frequency. Typical example: files at 88,2 kHz and a DAC that only supports 44,1/48/96/192 kHz. In that case, if you try to send 88,2 kHz as is, the device will complain or won't play it. A good resampler (SoX, SRC) can convert to 96 kHz with minimal loss.
Outside of those cases, using system resampling in the player, especially from 44,1 to 96 or 192 kHz "just because", does not usually provide advantages. The DAC will do its own oversampling (layers 4 and 5), and overloading it with previous resampling can actually make things worse or leave it less room to work as it was designed.
Layers 4 and 5: upsampling, oversampling and filters
The device itself (DAC or sound card) performs an initial analog reconstruction of the signal using "steps" (rectangular pulses). This stepped signal is equivalent to the desired signal plus a series of high-frequency pulses. If these pulses are very close to the audible range, the low-pass filter must be very aggressive and may end up altering the sound you actually want to hear.
To prevent this, the DAC performs upsampling and oversampling Internally, the sampling rate is increased by 2x, 4x, 8x, etc., so that the images are very far apart. Then, using digital and analog filters, these components are cleaned up. Some manufacturers prefer to control this stage with their own DSP (layer 4), while others delegate almost everything to the DAC chip (layer 5). Many DACs have a button to activate or deactivate the DSP, labeled as "upsampling" or "filter"; if you turn it off, the internal logic of the DAC chip usually plays a more active role.
Called DAC NOS (no oversampling) They forgo oversampling and are based on older architectures. They typically have a worse signal-to-noise ratio and more difficulty in properly filtering high-frequency images. Despite a certain trend, technically they are a regression in benefits regarding well-made modern designs.
Basic configuration of an external DAC in Windows
Once we understand the theory, it's time to see how to get Windows and the DAC ready to listen. The first step is always to make sure the operating system recognizes the device. If Windows doesn't detect it, consult error no output device.
1. Select the DAC as the default playback device
In Windows, go to Control Panel or Settings and enter the "Sound" section. On the "Playback" tab, you'll see a list of devices: built-in speakers, digital outputs, HDMI, etc. The DAC will usually appear as... «Digital Audio Interface», «USB-DAC», «SACD 10», «HD-DAC1» or something similar depending on the model and the driver installed.
To set it as the system's general output, click on the DAC name and select "Set as Default"Apply it using the "Apply" button, and if you want to quickly check for sound, click "Test." If everything is properly connected (and on some devices you've selected the USB-DAC input on the front panel), you should hear the test sound on your device.
2. Advanced device settings in Windows
Within the DAC properties, on the "Advanced Options" tab, you can choose the "default format" (sample rate and bit depth). If you're going to use WASAPI or ASIO in exclusive mode from your player, this setting matters less, because the software will take over. Even so, you can set it to 44,1 kHz / 24 bitswhich is a reasonable value for most music collections.
For DACs that are also used on macOS or Linux, the manuals usually indicate equivalent steps: on macOS, for example, you open "Audio MIDI Setup" and mark the device (HD-DAC1, SACD 10, etc.) as the default sound output by checking the "Use this device for sound output" box. Although we're focusing on Windows here, the concepts are similar: The system needs to be told that the external DAC is the main output..
Configure JRiver Media Center with an external DAC
JRiver Media Center is one of the most powerful audio and video players for Windows. It's a true all-in-one: it plays music and video, lets you watch YouTube, rip CDs, burn discs, manage huge libraries… and has an arsenal of options that might seem daunting at first, but when properly configured, it becomes a top-tier audiophile player.
Basic interface and key menus
The main window is organized into several areas: at the top are the main menus ("Player", "Tools", etc.). On the left, a side panel with the sections of audio, video, images, documents, online shoppingetc. On the right, the content view (covers, lists, spectrogram, etc.). Below there is usually a status area where you can see the processes in progress: playbacks, rips, conversions, etc.
In the "Player" menu you will find, among other things, access to the "DSP Study" and the "Audio Path," which graphically shows what JRiver is doing to the signal (whether the volume is being adjusted, if there's resampling, if the stream is bitstreaming, etc.). This view is very useful for verifying that playback is bit-perfect when that's your goal.
DSP Study: Heart of Internal Processing
Within the DSP Studio, you have a list of modules: output format, equalizer, volume normalizer, room effects, headphone crossfeed, convolver, etc. Each box you check will affect the process. the original signal will be modifiedThat's not inherently bad; it depends on what you're looking for. If you want maximum fidelity to the original file, it's best to disable everything you don't need.
One of the most interesting sections is "Output format". Here you can:
– Define the output type (PCM, DSD, etc.) and the support of your DAC.
– Choose the number of channels (2.0, 5.1, 7.1…) and the way to mix, for example by sending the bass to a subwoofer.
– Set sampling rate rules: for example, let everything play back at the native frequency, or force certain conversions if your DAC does not support a particular format.
If you don't want JRiver to touch anything, you can configure it not to make any changes, that is, to no resampling or alterationsThus, as long as you don't activate other DSPs, you'll get direct PCM bitstreaming.
Normalization, clip protection, and replay gain
JRiver includes volume management tools: normalization (similar to replay gain), clip protection (which analyzes track peaks and adjusts to prevent clipping), etc. If you activate them, the program will touch the digital level of the tracks. It can be useful if your library is very unbalanced in volume, but for strictly audiophile listening many prefer to leave them disabled and control the volume on the DAC/preamp.
Equalizer, effects and convolution
The graphic equalizer is straightforward: you can tailor the response to your preferences or the room's needs. Parametric equalization allows for much more precise adjustments, playing with frequency, gain, and Q. There are also room effects (simulating different types of rooms). subwoofer management and surround sound options. For headphones, JRiver offers a configurable crossfeed to reduce the "headphone audio" effect and create a sound closer to that of speakers.
The convolution section allows you to apply correction filters generated with external software (for example, room microphone measurements and programs like Room EQ Wizard). It's a more advanced but very powerful feature: basically, you load an impulse response file and JRiver "corrects" your room in real time. Keep in mind possible incompatibilities with Dirac Audio when using advanced fixes.
speaker setup
If you use a multi-channel system, JRiver allows configure each speaker individually: distance to the listening position, relative level, subwoofer crossover management, phase inversion, etc. You can even play a single channel or generate test tones to adjust volumes with a sound level meter.
Audio Path and bitstreaming control
The "Audio Path" option shows you whether playback is direct or modified. To enable bitstreaming (for example, if you want the DAC to decode DSD), you'll see the option in the DSP Format menu. Bitstreamingwhere you can choose "Special" and then DSD over PCM (DoP) in the most compatible version (DoP 1.0). If you want bitperfect PCM, you must ensure that There should be no active DSPs that alter the signal.
Choose audio output in JRiver: ASIO, WASAPI, Kernel…
The key step for JRiver to communicate properly with your DAC is choosing the "Audio Device" Correct in the Audio Options panel. There you'll see something like:
– WASAPI: Name of the DAC
– ASIO: DAC Driver
– Kernel Streaming: DAC
– DirectSound: speakers, etc.
ASIO output
If your DAC has a native ASIO driver, that's usually a highly recommended option. You can adjust the following in the "Device Options":
– Buffer size (except for stability issues, ideally use the minimum that does not cause cuts to reduce latency).
– Active channels (usually stereo channel 0 for music).
– Integration with the driver's ASIO control panel (accessible from here). If you experience latency issues, see how fix audio latency in Windows.
WASAPI Exit
With WASAPI you have fewer parameters, but the essential thing is to select:
- Exclusive mode so that the DAC is not shared with other programs.
– Disable the “event style” if your DAC is old and causes problems with WASAPI Event.
– Buffer size (same as in ASIO: as small as it allows without errors).
– Bit depth according to your system and DAC (24 bits is usually reasonable).
You can also enable the "play silence" option on certain DSD-compatible DACs to prevent clicks when changing formats or sample rates. The goal is always to make the signal flow to the DAC as smooth as possible. stable and continuous possible.
Kernel Streaming
JRiver continues to offer Kickstarter as an option, but many users report that it gives more headaches What are the advantages over exclusive WASAPI? If WASAPI or ASIO are working well for you, there's usually no reason to complicate things with KeyStrike.
Other important options in JRiver for a HiFi system
In the Playback Options panel there are some settings that you should check to get the most out of your external DAC.
Reading from memory
The option to play from memory (prebuffer) makes JRiver load the file into RAM before sending it to the DAC. This reduces dependence on the hard drive speed (or the NAS, or the external USB drive) and minimizes potential stuttering, jitter, and dropouts if there is system activity. If you have enough RAM, enabling it is highly recommended.
Prebuffer and silences
Setting the prebuffer to the lowest possible setting without causing problems helps make transitions smoother. You can also decide whether JRiver should respect the silences from the beginning and end of the track, very useful if you like the original structure of the albums to remain intact (including ghost tracks or hidden tracks).
Decoding plugins
In the advanced section you can see the plugins that JRiver uses for read different formatsCD, FLAC, MP3 (MPEG), DSD, etc. You don't usually need to touch them, but knowing they're there lets you better understand how it handles files internally and what options are available if a new format or incompatibility appears.
Import and manage the library
In "Tools → Import" you can tell JRiver where your music is located (folders on internal drives, external drives, NAS, etc.). The program does not duplicate files; it only creates and maintains an index. You can enable the folder monitoring so that, every time you add new albums, the library will be automatically updated while JRiver is open.
Among the library tools there are also options for empty and refill metadataIt searches for covers online, corrects faulty or advertising-filled tags, etc. It doesn't always get it right, but it saves many hours for large collections.
Is it worth resampling to 192 kHz from the PC?
A very common question is whether there's any benefit to resampling a file from the player, for example from 44,1 kHz to 192 kHz, when the DAC accepts 24/192. The answer, from the technical point of view that follows from all of the above, is clear: it does not contribute anything good and, in many cases, complicates life.
If your DAC only supports 24/96 kHz, try sending it 192 kHz from your PC using SRC or another resampler. It will not work Unless you're using a bitperfect output that doesn't perform compatibility checks… and even then, if the DAC truly doesn't support 192 kHz, it will eventually fail. And even if it did support it, the DAC already performs its own internal oversampling; adding another presampling step could interfere with that design and leave less headroom for the internal filters.
Furthermore, almost all modern DACs, according to their specifications, have performance slightly worse as the maximum sampling frequency increases (especially at 192 kHz): reduced dynamic range, increased noise, etc. Forcing the entire catalog to 192 kHz "just for the sake of it" is pointless. Resampling in the player is a useful tool for compatibility or certain DSP effects, not a magic quality button.
With everything we've seen, the recurring idea is that the final quality doesn't depend on performing numerical tricks on the PC, but on avoid unnecessary processing in the digital domain and rely on the good design of the DAC hardware in its internal layers (4 and 5), provided that the flow you send it is clean and coherent.
Setting up a system with Windows, a player like JRiver or Foobar, a well-designed external DAC, and a logical configuration (WASAPI/ASIO, layers 2 and 3 under control, DSP only when it has a clear objective) allows you to enjoy playback that has little to envy from much more expensive dedicated equipment, without falling into hype or myths of miraculous oversampling or savior NOS DACs.
Passionate writer about the world of bytes and technology in general. I love sharing my knowledge through writing, and that's what I'll do on this blog, show you all the most interesting things about gadgets, software, hardware, tech trends, and more. My goal is to help you navigate the digital world in a simple and entertaining way.