- OpenMediaVault allows you to build a powerful and flexible home NAS using modest hardware and standard disks.
- The combination of RAID, file systems like Ext4 or Btrfs, and user permissions offers a storage secure and centralized.
- SMB and SFTP facilitate encrypted local and remote access to the NAS from any device, integrating with the router through port forwarding.
- Plugins and additional services turn the NAS into a complete platform for home backups and multimedia.
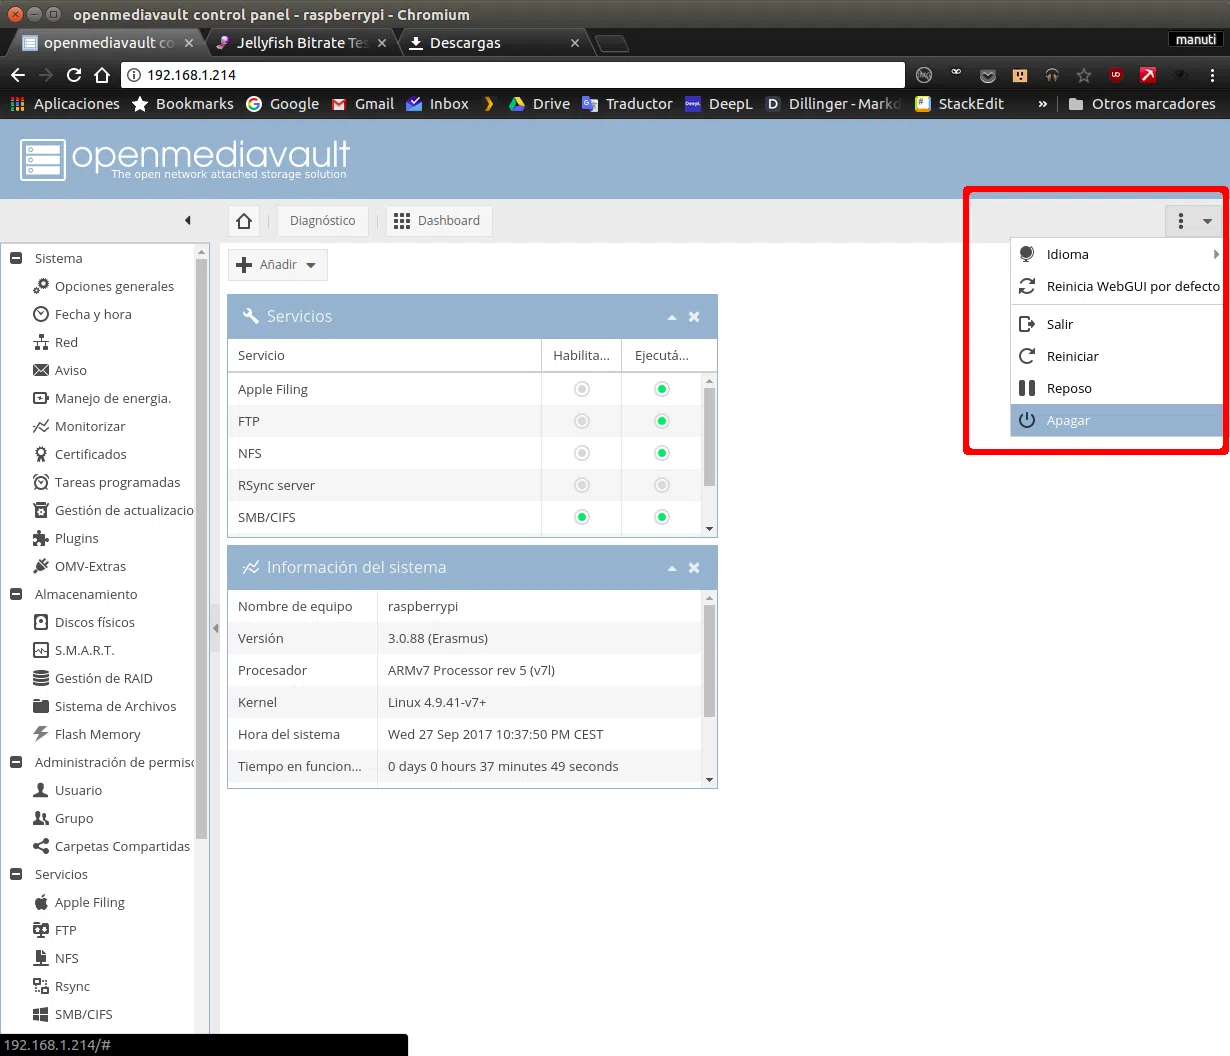
Setting up a home NAS server with OpenMediaVault is one of the easiest and cheapest ways to have your own private, centralized, and always-available cloud at home . With an old PC, a couple of hard drives, and some patience, you can create a system very similar to commercial NAS devices, but with much more flexibility, better performance, and no monthly fees.
Throughout this guide you will learn, step by step and in great detail, how to install, configure and get the most out of a home NAS with OpenMediaVault (OMV) : from hardware requirements and basic installation, to creating RAID volumes, shared folders for Windows and Linux , secure remote access with SFTP and even advanced ideas such as setting up a media server or making automatic backups.
What is a NAS and why set it up with OpenMediaVault
A NAS (Network Attached Storage) is simply a network-connected storage device accessible by multiple devices simultaneously . In practice, it's usually a box or PC with one or more hard drives connected to the router, which can be accessed from mobile phones, computers, smart TVs, etc.
The idea is to have all your important files (backups, photos, videos, documents, multimedia library, etc.) centralized in one place, instead of spreading USB drives, flash drives, and folders across each computer . Furthermore, a well-configured NAS can offer fault tolerance through RAID, remote access via the internet, and additional services (multimedia, backups, downloads , etc.).
OpenMediaVault is a specialized operating system for NAS devices based on Debian GNU/Linux . It's designed from the ground up to function as a storage server: it has a very simple web interface, consumes very few resources, is free and open source, and allows for extended functionality through plugins.
Compared to other solutions like FreeNAS/TrueNAS, OMV offers great flexibility with disks : it uses standard file systems (Ext4, Btrfs, XFS, etc.), so if the computer ever dies, you can connect the disks to another Linux system and continue viewing the data without going crazy with proprietary formats.
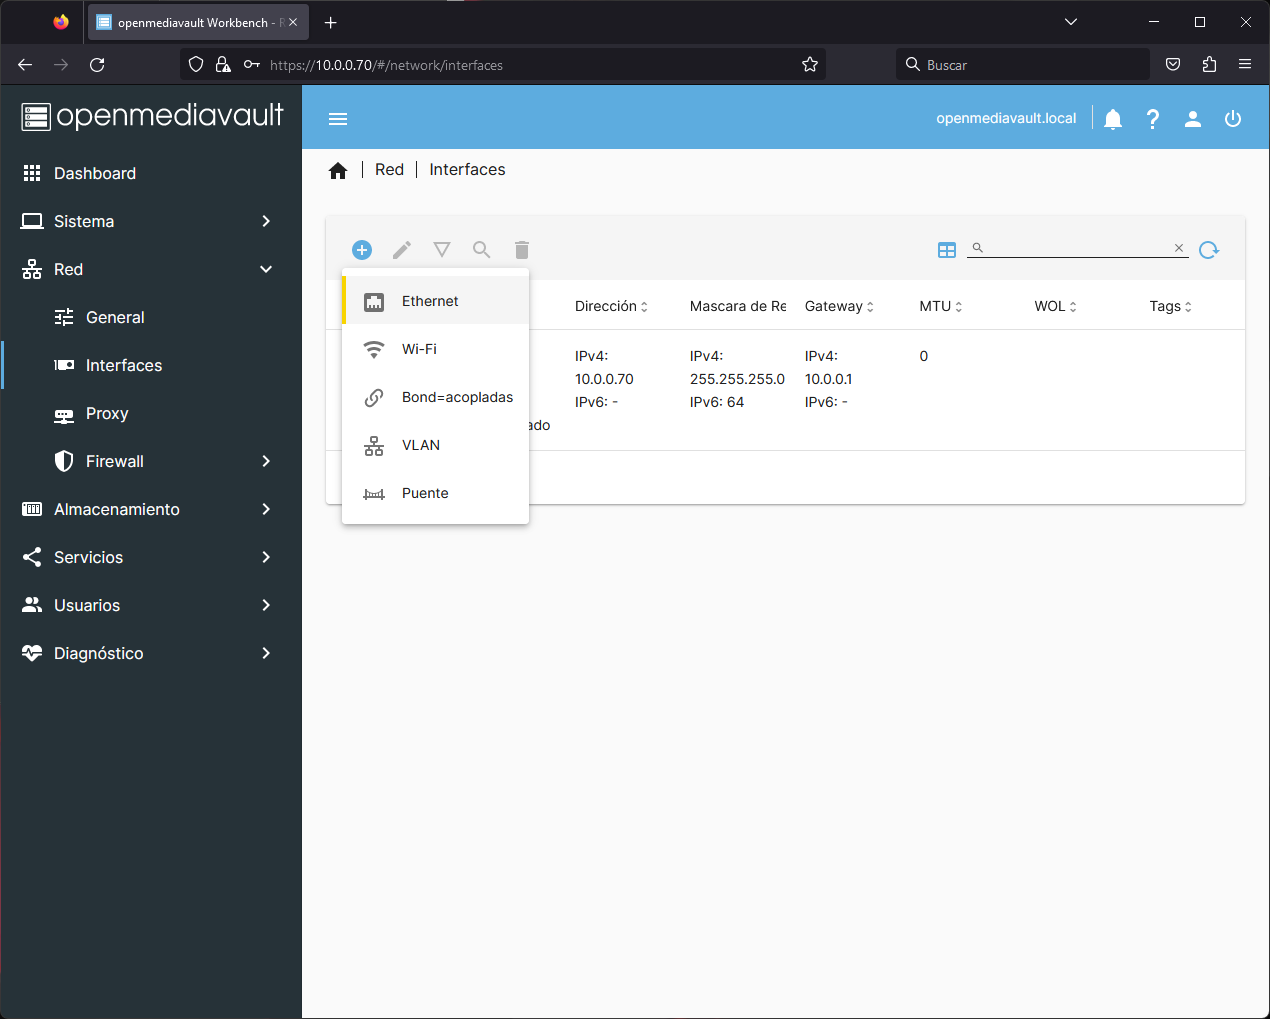
Hardware requirements and preliminary considerations
Before starting the installation, it's important to be clear about what you need. OpenMediaVault has fairly modest hardware requirements , so it's perfect for upcycling an old PC or an inexpensive mini-PC.
The minimum recommended requirements for a home NAS with OMV are as follows, although you can improve them according to your budget and use:
- 64 bit CPU (Intel or AMD). Any modern processor or one from a few years ago will work.
- 8 GB of RAM as a reasonable reference. MVNOs can work with less, but 8 GB is more than enough for most home uses.
- Separate system drive of at least 16 GB (SSD, HDD or quality pendrive) where to install OpenMediaVault.
- One or more hard drives or SSDs dedicated to NAS data storageIdeally, they should be drives designed for NAS or at least of good quality.
It's very important to understand that OMV recommends installing the system on a different disk than the one you'll use for data . The system drive is dedicated solely to the operating system; your files (backups, photos, movies, etc.) go on other disks that we'll later mount and format from the OMV interface.
If you want to add fault tolerance, you'll need at least two identical disks to configure RAID 1 (data mirroring). For RAID 5 or RAID 6, you'll need three or more disks. Ideally, the disks should have the same capacity and, if possible, be the same model to avoid performance issues.
Another point not to overlook is the BIOS type . On older systems, Legacy BIOS mode may not recognize drives larger than 2,2 TB . If you plan to use large drives, enable UEFI in the BIOS so the NAS can recognize much larger volumes without issue.
Downloading OpenMediaVault and creating the installation USB
The first real step in setting up your home NAS is to obtain the official OpenMediaVault ISO image . This can be downloaded from their official website or from their repository on SourceForge.
Once you've downloaded the ISO file, you need to burn it to a USB flash drive or DVD so you can boot your computer from it. On Windows, one of the easiest tools to use is Rufus, which lets you select the ISO file and the USB drive and makes it bootable.
Once you have the USB drive ready, enter the BIOS or the fast boot menu of the computer you'll be using as a NAS and configure it to boot from the USB drive or optical drive where you burned the ISO. On many modern computers, simply pressing a key (F8, F10, F11, F12, Esc, etc.) during startup will temporarily select the boot device.
On ARM boards (Orange Pi, similar), the procedure is different: OMV is usually installed on top of an existing Debian/Armbian distribution. In that case, the OMV repositories are added to the system and it's installed using apt, but the basic idea remains to set up a NAS manager on Debian.
OpenMediaVault installation step by step
To install OMV on a standard PC, connect a monitor and keyboard to the computer that will act as the NAS , insert the installation USB drive, and boot from it. You will soon see the OpenMediaVault installer in text mode.
The wizard is very similar to Debian's and is controlled with the keyboard: arrows to move, Tab to change fields, and Enter or the space bar to confirm options.
The basic installation steps are as follows (the order may vary slightly depending on the version):
- Select "Install" on the installer's home screen.
- Choosing installation language, geographic region and keyboard layout.
- Indicate the name of the team, which will be the name your NAS will appear as on the local network (for example, openmediavault o nas-casa).
- enter a domainOn a home network you can use something simple like local, resulting in a complete name of the type openmediavault.local.
- Set the password of rootThis allows you to access the system locally with full privileges. It's crucial to keep it safe, as you'll need it if you need to make changes via the console.
After these initial steps, the installer will detect the connected disks and display a warning if there are multiple disks. Here, you must carefully choose which disk to install OpenMediaVault on (the system disk). This disk will be partitioned and its data erased.
Once you've chosen the system disk and confirmed the partition creation, the file copying and basic system configuration will begin . From there, the wizard will ask you to choose a Debian package server located near your country, and you can indicate whether or not you use a proxy for your internet connection (most homes don't, so you can leave this blank).
When everything is finished, the installer will install the boot manager (GRUB) on the chosen disk, unmount the installation media, and prompt you to restart your computer . Remove the USB drive so that it boots from the disk.
First startup and access to the web interface
On the first boot, you'll see the GRUB screen and, shortly after, the Debian console system with OpenMediaVault already installed. The text screen will display, among other information, the local IP address that the NAS received from the router (for example, 192.168.1.64).
With that IP address in hand, go to another computer on the network, open a browser, and type http://IP-of-the-NAS in the address bar . You can also try http://openmediavault/ if you kept that computer name and your local network resolves it correctly.
The first time you log in, you will see the OMV login screen. The default credentials for the web interface are:
- User: admin
- Password: openmediavault
It's highly recommended that one of your first steps is to change the web administration password to prevent anyone on the local network from tampering with your NAS. You'll find this option under System → General Settings or something similar, depending on your version.
Since you're already in that settings area, take the opportunity to change the interface language to Spanish and correctly configure your time zone, country, and automatic updates from System → Update Management.
Installing OMV on Debian/Armbian (Orange Pi and similar)
On ARM devices such as certain Orange Pi boards or similar, the typical procedure is to first install a compatible Debian or Armbian-based distribution , and then deploy OpenMediaVault on top of it using the official repositories.
In these cases, work is usually done via SSH , without a monitor or physical keyboard. The typical workflow would be:
- Install Armbian/Debian on the SD card of the board and boot the Orange Pi.
- Locate the IP address of the network card on the router and connect via SSH (for example, with PuTTY on Windows).
- Log in as a superuser with su o sudo -i y add the OpenMediaVault repository file en
/etc/apt/sources.list.d/openmediavault.listwith the appropriate content for the version (usul, shaitan, etc.). - Import the GPG repository key, Do apt-get update and then install the packages openmediavault-keyring y openmediavault with the recommended options (without unnecessary suggested packages).
It is vital to use a Debian-based distro that is compatible with the OMV version you want (OMV 2 with Debian Wheezy, OMV 3 with Jessie, etc.) and avoid Ubuntu-based distributions that install PHP 7 if the OMV version still depends on PHP 5, as this causes broken dependencies.
Once the console installation is complete, the system will display the login information in /etc/issue and you'll be able to enter the MVNO web interface is the same as on a PC, using the IP address of the board in the browser.
Storage preparation: disks, RAID, and file systems
With OMV now installed and accessible from your browser, the next big step is preparing the disks where your data will be stored . Here you configure whether you want RAID, which file system to use, and how the volumes will be mounted.
If you're creating a software RAID, go to Storage → Software RAID and click the Add button. OMV allows multiple RAID levels:
- Stripe (RAID 0): It combines the capacity of multiple disks and offers faster read/write speedBut if a disk fails, you lose everything. It has no fault tolerance.
- Mirror (RAID 1): keeps a identical copy of the data on two disksIf one dies, you still have everything in the other. In return, you sacrifice effective capacity.
- Linear: It joins several disks as if they were one, but without duplicating or distributing data with parity. It does not improve performance or protect against failures..
- RAID 5 and RAID 6: They distribute data and parity across multiple disks, offering a good combination of capacity, performance and fault tolerance (RAID 5 can withstand the failure of one disk, RAID 6 the failure of two).
Select the RAID level that best suits your needs and mark the disks that will be part of the array. OMV will handle initializing the RAID, and when it's finished, you'll have a new "device" available to format.
The next step is to go to Storage → File systems , click Create , choose the device (the created RAID or a loose disk/partition) and the file system. For a home NAS, Ext4 and Btrfs are the most common options.
- Ext4Simple, proven, and highly compatible. It's the most stable and fastest option in most home scenarios.
- BtrfsMore modern, with advanced features such as snapshots, compression, and checksums for data and metadata. Formatting can take a long time on large volumes.
Once the file system has been created, in the same section you can select the volume and click Mount . From that moment on, OMV will have that storage available to create shared folders on top of it.
Install OMV on a single disk and use it for data as well.
The official recommendation is to have one disk for the system and another for data , but sometimes you only have one drive available. While not ideal, it's possible to install OMV on a single disk and then shrink the system partition to free up data space.
The trick is to, once OMV is installed on that disk, boot the computer from a Live CD/USB with GParted (or GParted Live directly), locate the main partition (for example, sda1 ), reduce it to something reasonable (about 16-32 GB for the system) and with the free space create a new Ext4 partition intended for data.
Then, back in the OMV interface, under Storage → File systems, you'll see the new partition. Simply mount it from the interface and you can use it as a data volume, just like any other disk.
Creating shared folders and managing permissions
With the volumes mounted, it's time to organize the storage by creating shared folders where your files will go . These folders are the foundation upon which resources are later offered via SMB, NFS, FTP, etc.
Go to Storage → Shared Folders and tap the button to add. You will need to specify:
- Shared folder name (for example, Data, Copies, Multimedia, Photos, etc.).
- File system or volume where it will be created (the Ext4/Btrfs that you set up earlier).
- Relative path within the volume and base permissions.
Once the folders are created, you need to define who can access them and with what level of permissions. OMV offers several tools for this in Users → Users , Users → Groups , and in the shared folders section itself ( Privileges button ).
It's recommended to create a separate user account for each person who will be using the NAS. Go to Users → Users , add a new user, set their password, and, if you find it useful, assign them to one or more groups (for example, a specific group of users with SFTP access).
In Users → Groups you can create additional groups (family, work, guests, sftp-access, etc.) and then, in Storage → Shared Folders → Privileges , mark for each user or group whether they will have read/write, read only or no access to each folder.
It's best to configure this part carefully when the NAS doesn't yet have much data, because if you make a mistake at an advanced stage, it may be necessary to reformat and reconfigure permissions from scratch , with the possible loss of information if you don't have a backup.
Share files on a local network using SMB/CIFS (Windows, macOS, Linux)
To access the NAS from Windows and most desktop operating systems, the most convenient method is to use the SMB/CIFS protocol , implemented in Linux via Samba. OMV includes it integrated and it's very easy to activate.
Go to Services → SMB/CIFS → Settings and check the Enabled box . You can adjust some general parameters here (workgroup name, comments, advanced options), but for a home environment, the default values usually work fine.
Next, in Services → SMB/CIFS → Shares , click Add and choose the shared folder you want to offer via Samba . Give it a clear name (for example, Multimedia, Backup , Documents), check the "Inherit permissions" option to respect the privileges defined earlier, and save the changes.
From a Windows PC, you can access the NAS in two common ways:
- Typing in the address bar of File Explorer \\IP-of-the-NAS o \\NAS-name, and entering the OMV user credentials when prompted.
- Mapping a network driveOn This PC, under the "Map network drive" option, choose a drive letter and the path to the SMB resource, check if you want to reconnect at logon and save.
On Linux and macOS you can also mount these SMB resources from the file explorer or using commands , so your home NAS with OMV acts as a central file server accessible from all types of devices.
Secure remote access: SFTP vs. classic FTP
Up until now we've been working within the local network, but one of the great advantages of a NAS is being able to access your files remotely . This is where many users consider using classic FTP, but it's not a good idea from a security standpoint.
The traditional FTP protocol sends usernames, passwords, and data in plain text , without encryption. Anyone who can intercept the traffic (for example, on a public Wi-Fi network) could capture your credentials or the data you're transferring.
The recommended alternative is SFTP (SSH File Transfer Protocol) , which reuses the secure SSH connection to offer fully encrypted file transfer. From the user's perspective, it's very similar to FTP, but the underlying channel is protected.
To use SFTP in OMV conveniently, it is very common to install the specific plugin openmediavault-sftp from the OMV-Extras plugin system.
Install OMV-Extras and the SFTP plugin
OMV-Extras is an additional repository that adds a lot of unofficial but very popular plugins , such as SFTP, BitTorrent clients, media managers, etc. It is not enabled by default, but installation is simple.
First, log in to the web interface as an administrator and check if the OMV-Extras section appears under System . If it's already there, simply enable it. If it's not, you'll need to install it from the OMV machine itself via the command line.
Connect a keyboard and monitor to the NAS (or log in via SSH), log in as root with the password you set during installation, and enter the command that downloads and installs OMV-Extras, something like:
wget -O – https://github.com/OpenMediaVault-Plugin-Developers/packages/raw/master/install | Bash
If everything goes well, you'll see the installation process and a final message indicating that it's finished. After that, return to your browser, refresh the OMV interface, and the OMV-Extras section should now appear under System.
From OMV-Extras, you can activate the OMV-Extras.org repository and then go to the Plugins section to search for the SFTP plugin (for example, openmediavault-sftp 3.1.6 or the corresponding version). Select it and install it; the system will resolve dependencies and add a new SFTP section within Services.
Configure specific users and permissions for SFTP
Before activating the SFTP service, it is advisable to prepare a dedicated user and a specific group to control what each person can see and modify when connecting from outside.
In the Access Permissions → Users section , add a new user (for example, user-sftp ) with their password. In the same window, on the Groups tab , select the group that the plugin created for SFTP (something like sftp-access or similar), so that the user is associated with that group.
Next, in Access Permissions → Groups , select the SFTP group and click on Privileges . Here you must select the shared folder or folders you want the group to have access to with Read/Write or Read-only permissions, depending on your needs.
For greater control, you can also go to Access permissions → Shared folders , choose the folder to be offered via SFTP and, under Privileges , ensure that both the SFTP group and the specific user have the appropriate permissions.
This approach allows for flexible things like creating a specific folder for each user with different permissions , or giving global access to some folders and very restricted access to others, depending on who connects.
Activate and fine-tune the SFTP plugin in OMV
With the users and permissions set up, go to Services → SFTP . On the general settings tab, check the Enable box and adjust these basic parameters:
- Port: It is highly recommended to use a port other than 22 (for example, 222) to reduce noise from automatic scans.
- Authentication: The simplest option is to start with password authentication, although in the medium term you can consider using SSH keys for added security
- AllowGroups: Select this option and specify the SFTP group you created or used to limit who can connect.
Save the settings and go to the Access List tab , where you can add entries specifying which user can access which folder . Add the SFTP user, choose the desired shared folder, and save, applying the changes when OMV prompts you.
In some cases, when testing an SFTP connection with a client like FileZilla, you may encounter root directory permission errors. A common solution that resolves many of these issues is to run the following command in the NAS console as root:
chmod 755 /
This establishes reasonable permissions on the root directory, allowing SFTP users to navigate to their authorized directories without breaking other system restrictions.
Test SFTP access with FileZilla
To verify that everything is working correctly, install FileZilla (client, not server) on your computer. It's a free and well-known tool for managing FTP/SFTP connections.
Once installed, open the Site Manager and create a "New Site". Fill in the key fields with something like:
- Protocol: SFTP – SSH File Transfer Protocol.
- Server: the local IP address of the NAS (or the name, if it resolves correctly, like openmediavault).
- Port: the port you configured in the plugin (for example, 222).
- Login Type: Normal.
- User and password: those of the SFTP user that you created in OMV.
Save the settings and connect. If everything is working correctly, you should see the NAS directory tree in the right panel, and within it, the shared folder you granted access to . You can now upload and download files securely from anywhere with an internet connection (provided your router is properly configured, as we'll see shortly).
Configure the router to access from the Internet
To access your MVNO via SFTP from outside your home, it is not enough for the service to be active on the NAS: the router must redirect incoming traffic from the Internet to the server's internal IP address.
Each router has its own interface, but the general idea is always the same. You'll usually need to access the router's configuration panel (usually 192.168.1.1 or similar in your browser) using the credentials found on a sticker on the router itself.
Once inside, look for the section on “NAT/PAT”, “Port forwarding”, “Port mapping”, or something similar. There you will create a redirection rule that says something like:
- Rule name: SFTP OMV.
- External port: a high, rarely used port (e.g., 35000), which is the one you will use from outside.
- Destination internal IP: the NAS one (for example, 192.168.1.20).
- Inner port: the SFTP port you configured in OMV (for example, 222).
- Protocol: TCP.
It is important that you assign the NAS a static IP address or a DHCP reservation on the router, so that the internal IP address does not change over time and the port rule does not end up pointing to the wrong place.
To connect from outside your network (for example, with your laptop in another city), in the SFTP client you will need to use your public IP address (which you can find by searching "public ip" on Google) as the server and the external port you configured on the router (35000 in the example). The rest of the information (username, password, SFTP protocol) is the same.
Advanced uses: media server, backups, and useful plugins
Once you have your home NAS stable and working, that's when you really start to enjoy it, because OpenMediaVault allows you to add a lot of extra features through plugins and additional services.
Some common ideas are:
- Music server with Navidrome: Installable on OMV, it serves your music library to clients compatible with the Subsonic protocol. You can use apps like Substreamer (free) or Symfonium (paid) on your mobile to take your collection everywhere.
- Plex or Emby type multimedia managers: Perfect for organizing and playing movies and series from the NAS to your TV, tablet or computer.
- Automatic synchronization of photos and videos From your mobile phone using apps like PhotoSync, which can send your film reel to the NAS on a scheduled basis via SMB/SFTP.
- Centralized backups using software such as Veeam or native backup tools of each system, pointing to the NAS via NFS or SMB.
- OMV Plugins such as clamav (antivirus), usbbackup (automatic backups to external USB drives), netatalk (AFP for older Apple computers), among others.
All of this is managed through the OMV interface or, in some cases, by combining web browsing with SSH access. The key is for the NAS to become the central hub of your data , not just a simple "network hard drive."
Data recovery, backups, and best practices
No matter how robust your RAID or hardware is, no NAS is 100% safe from failures : power outages, human error, malware , data corruption… That's why it's essential that your design always includes some kind of backup strategy.
Some basic recommendations to avoid taking risks are:
- Having external backups on one or more USB drives (which you can automate with the usbbackup plugin or your own scripts).
- Pose copies in the cloud or in another physical location for the most critical things (family photos, work, legal documents, etc.).
- Test periodically that Copies can be restored And they are not mere decorations.
In the event of a RAID failure or an OMV failure, it's usually possible to recover data using both the system's built-in tools (for example, rebuilding the RAID) and specialized RAID and NAS data recovery software . Even so, the only real protection against disasters is having up-to-date backups.
If you take good care of the hardware (good ventilation, reliable power supply, suitable NAS drives) and follow a consistent backup policy, your home NAS server with OpenMediaVault will become a very reliable ally for many years , with the advantage of being able to expand, repair or customize it to your liking without depending on proprietary firmwares or closed ecosystems.
With everything covered, from the initial requirements and OMV installation to the creation of RAID volumes, shared folders, access from Windows, secure SFTP over the Internet, and advanced backup and multimedia services, you now have a very complete roadmap to set up and take advantage of a powerful, flexible home NAS that is totally under your control , using a system as solid and versatile as OpenMediaVault.

Passionate writer about the world of bytes and technology in general. I love sharing my knowledge through writing, and that's what I'll do on this blog, show you all the most interesting things about gadgets, software, hardware, tech trends, and more. My goal is to help you navigate the digital world in a simple and entertaining way.
Table of Contents
- 1 What is a NAS and why set it up with OpenMediaVault
- 2 Hardware requirements and preliminary considerations
- 3 Downloading OpenMediaVault and creating the installation USB
- 4 OpenMediaVault installation step by step
- 5 First startup and access to the web interface
- 6 Installing OMV on Debian/Armbian (Orange Pi and similar)
- 7 Storage preparation: disks, RAID, and file systems
- 8 Install OMV on a single disk and use it for data as well.
- 9 Creating shared folders and managing permissions
- 10 Share files on a local network using SMB/CIFS (Windows, macOS, Linux)
- 11 Secure remote access: SFTP vs. classic FTP
- 12 Install OMV-Extras and the SFTP plugin
- 13 Configure specific users and permissions for SFTP
- 14 Activate and fine-tune the SFTP plugin in OMV
- 15 Test SFTP access with FileZilla
- 16 Configure the router to access from the Internet
- 17 Advanced uses: media server, backups, and useful plugins
- 18 Data recovery, backups, and best practices