- Windows 11 allows you to list applications from Settings, PowerShell, CMD, and WinGet without the need for external software.
- Third-party tools such as UninstallView, Geek Uninstaller, or Belarc Advisor offer advanced listings and export in HTML or text.
- It is key to distinguish between programs that are safe to uninstall and critical components such as .NET, Visual C++, or drivers.
- Regularly checking your app list helps save space, avoid bloatware, and keep your system stable.
Over time, we tend to install programs and apps haphazardly on Windows 11 : work tools, games, utilities, media players, editors… until one day you can't remember everything you have on your PC. This becomes apparent when your hard drive starts to fill up, you want to switch computers and clone your environment, or you simply need to know what's installed to tidy things up.
Having a clear list of all the applications and programs installed on Windows 11 is much more useful than it seems: it helps you plan a migration to another computer , locate software you don't use, detect manufacturer bloatware, check which apps have pending updates, or see which file formats each program opens by default. And the best part: Windows 11 offers several ways to achieve this without always relying on third-party applications.
Easy ways to view all installed applications on Windows 11
Windows 11 includes several built-in tools for listing programs and apps , without requiring any additional installation. The great advantage is that they are accessible to almost any user, although there are also methods geared towards more advanced users who need more control or want to export the information.
The "for everyone" options are found in the Settings menu , which is where Microsoft has concentrated almost all system management in recent versions of Windows. From there you can view the list, filter it, and even uninstall software directly.
If you want to go a step further , you can use PowerShell, Command Prompt, WinGet, or even the Windows Registry itself as a source of information. These methods allow you to generate much more detailed listings, include data such as version, publisher, or installation date, and even save everything to a text or HTML file.
View installed apps from Settings in Windows 11
The quickest and easiest way to view your apps in Windows 11 is through the Settings app . The process is virtually identical to that of Windows 10, although the design has changed slightly.
Steps to view the list of programs from Settings :
- Press the Windows + I keys to open Settings instantly.
- In the side menu, go to "Applications".
- Then select “Installed Applications” (in some versions it may appear as “Applications and features”).
On that screen, you'll see a complete list of all the apps and programs on your system , including those you installed manually, those that came pre-installed, and those downloaded from the Microsoft Store. You'll usually see a fairly long list, as it also includes components and tools you might not even remember existed.
This view is not only informative but also interactive : from the list itself, you can click on each program and access additional options, such as uninstalling it or, in some cases, modifying its installation. Keep in mind that some system applications appear locked, and the uninstall button will not be available because Microsoft does not allow their easy removal.
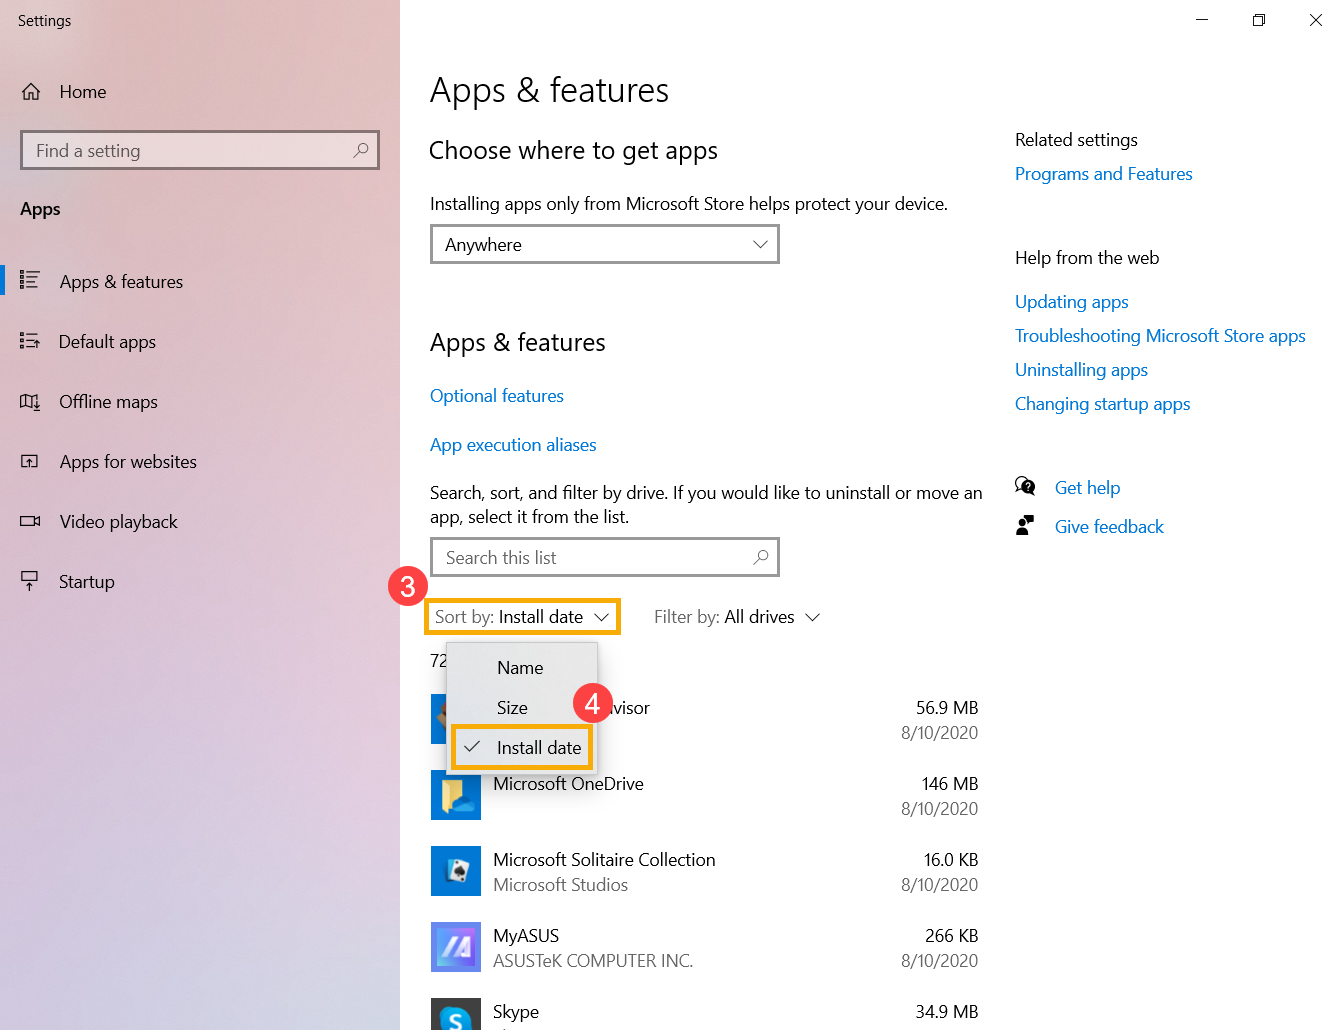
The list is sorted alphabetically by default , but you can change the sort order to include size, installation date, or even filter by location (for example, apps installed on a different drive). This is great if you want to find the apps that take up the most space or those that were recently installed.
Remove programs from the same applications list
One of the strengths of the Settings list is that it's not just for viewing, but also for cleaning up the system . You no longer need to go into the traditional Control Panel to uninstall programs, although that option is still available.
To uninstall an app from Settings, simply find it in the list (you can use the search box at the top), click the three dots or its entry, and then click "Uninstall ." The program's uninstallation wizard will then appear, or, if it's a modern app, Windows will remove it automatically.
You should know that not all entries can be deleted : some system tools, internal Microsoft utilities, or certain pre-installed components are considered essential, and the system hides the uninstallation button. This is the case, for example, with several apps that come pre-installed with Windows and that Microsoft prefers to keep.
Managing the list from here helps you prevent your disk space from disappearing all at once . Regularly reviewing your installed apps, seeing which ones you no longer use, and removing them from this screen is a very practical way to keep your PC running smoothly and with free storage space.
List installed programs using PowerShell and the Windows Registry
If you need a more technical and exportable list, PowerShell is your best ally in Windows 11. This advanced console allows you to directly query the Registry keys where Windows stores information about installed programs.
PowerShell comes pre-installed on Windows and allows you to automate tasks, query the system, and run powerful scripts, including uninstalling applications . For our purposes—viewing a list of programs with detailed information—a couple of well-constructed commands are all that's needed.
First, open PowerShell with administrator privileges :
- Write "PowerShell" in the search bar of the Start menu.
- Right-click on “Windows PowerShell” and choose "Execute as an administrator".
On some systems, a policy may be enabled that prevents certain scripts from running . To avoid problems, the execution policy is usually adjusted with a command like:
Set-ExecutionPolicy Unrestricted
After running it, PowerShell will display a warning , and you'll need to accept by pressing the O key to indicate "Yes to all" (on Spanish systems). This allows commands that query the Registry and format the output to function without restrictions.
To list all installed applications, including name, version, publisher, and installation date , you can use a command based on the Registry path where many of these entries are stored:
Get-ItemProperty HKLM:/Software/Wow6432Node/Microsoft/Windows/CurrentVersion/Uninstall/* | Select-Object DisplayName, DisplayVersion, Publisher, InstallDate | Format-Table -AutoSize
When you run that command, PowerShell will generate a table of all the programs it finds in that branch of the Registry , showing the application's display name, version, publisher or developer, and installation date. It's a fantastic way to get a near-inventory view of your computer.
If you want to keep that list, you can select the entire list with your mouse , press Ctrl + C to copy it to the clipboard, and then paste it into Notepad, Word, or any text editor to save it as a .txt file. This way, you'll always have a reference of what was installed on your PC at that time.
Obtain the listing from the Command Prompt (CMD) using WMIC
Another classic way to get a list of installed programs in Windows 11 is to use the Command Prompt and the WMIC tool . Although Microsoft has marked WMIC as obsolete, it still works in many versions of Windows 10 and Windows 11, so it remains useful for generating software list files.
To use this method, open Command Prompt as administrator :
- Search "Cmd" from the Start menu.
- Right-click on “Command Prompt” and select "Execute as an administrator".
When the black command window opens , type the following and press Enter:
Wmic
You'll see the prompt change to something like “wmic:root/cli” , indicating that you're in the WMIC environment. Now you can run the command that will generate the listing in a text file:
/output:C:/InstalledPrograms.txt product get name, version
This command scans the installed programs on your system and creates a file called InstalledPrograms.txt in the root directory of your C: drive . Depending on the number of programs you have, this may take a few seconds to complete. When it finishes, it returns you to the wmic:root/cli prompt.
To view the results, simply open the file C:/InstalledPrograms.txt with Notepad, Notepad++, or any other text editor. You'll see the program names and their versions in a simple table format, ideal for reviewing or archiving for reference.
It's worth noting that WMIC has been officially declared obsolete by Microsoft (since versions like Windows 10 21H1), meaning it could disappear entirely in future versions of Windows 11. Therefore, if you're looking for a long-term solution, it's more advisable to opt for PowerShell, which is the current technology Microsoft is focusing its efforts on.
See what types of files each application opens in Windows 11
Besides knowing which programs you have installed, you're often interested in knowing what types of files each one opens by default . For example, which application handles .jpg files, which program deals with .pdf files, or what opens .docx files.
Windows 11 lets you view and change these file associations directly from the Settings app , without having to edit the Registry or anything complicated. This is very useful if you've installed a new program and want it to always open with specific file formats.
To see the extensions associated with each app, follow these steps :
- Balance Windows + I to open Settings.
- Go to "Applications" and then enter “Default apps”.
This section displays a list of all programs installed on the system , again arranged alphabetically. Clicking on one of them opens a page showing all file extensions and protocols associated with that specific application, and you can also view camera and microphone permissions related to that app.
The formats are listed alphabetically , making it easy to quickly find the file type you're interested in (.pdf, .mp3, .png, etc.). If you wish, you can change the default application for each file type individually, provided another compatible app is installed on your PC.
This information also helps you identify programs you might not need . If you see that a file type is associated with an application you never use and that was only installed with other software, it might be a good candidate to uninstall and free up space.
Third-party programs for listing and managing applications in Windows 11
Beyond the built-in tools, there are third-party applications that offer much more complete software listings and extra features , such as advanced uninstallation, HTML report generation, or cleaning up leftover files after deleting programs.
These utilities are often highly valued by advanced users and technicians because they allow detailed control over what's installed and how it behaves, but in reality, any user can benefit from them. Many are portable, so you don't even need to install them.
Let's review some of the most interesting ones to see a list of all the apps installed on Windows 11 and, incidentally, have additional maintenance options.
UninstallView: detailed listing and HTML export
UninstallView is a small utility from NirSoft designed to facilitate the uninstallation of programs , but it also works wonderfully for generating complete lists of installed software.
This is a portable program , meaning it doesn't require installation. Simply download it from the developer's website, extract the files, and run the .exe. Upon opening, the application scans your system and displays a list of all installed applications and components.
From the "Options" menu, you can adjust which types of entries are displayed , for example, whether or not to include modern Windows applications or system components. This is useful for focusing solely on user software and avoiding seeing dozens of technical entries.
To export the list, simply go to the "View" menu and select "HTML Report – All Items" . UninstallView will generate an HTML report with all the listed programs, which will open directly in your browser. You can then easily save it or send it by email.
You can also save the list as a text file by pressing the keyboard shortcut Ctrl + S. This option generates a file in your chosen format (txt, csv, etc.), ideal for later processing or saving as part of your computer's software inventory.
Geek Uninstaller: Portable uninstaller with list export
Geek Uninstaller is another free and portable tool focused on completely uninstalling programs you no longer use , including forced removal if a program resists or leaves remnants on the system.
Upon launch, Geek Uninstaller displays an alphabetical list of all installed programs , along with basic information such as name, approximate size, and installation date. Its interface is available in Spanish and is very intuitive.
To generate an HTML list of all applications , you can use the keyboard shortcut Ctrl + S. The program will prompt you to specify a path and filename, and will create an HTML document that will automatically open in your default browser.
The HTML list includes the name, size, and installation date of each program , making it quite convenient to consult and archive. Furthermore, from within the application itself, you can uninstall programs using the standard method or perform a "forced uninstall," which attempts to clean up registry keys and leftover files.
Belarc Advisor: Complete software and hardware audit
Belarc Advisor is a classic tool in computer repair shops . Its main function is to generate a very detailed PC report: hardware, configuration, system updates, and, of course, a complete list of installed software.
After downloading and installing it, Belarc Advisor performs a system audit , a process that can take several minutes depending on the amount of data and programs. When finished, it opens your web browser with a neatly organized HTML report.
Within that report, the "Software Versions and Usage" section displays the installed applications, along with version details and even usage data in some cases. It's a very powerful way to see everything on the system at a glance.
If you want to save the report for later reference , the HTML file is stored in a path similar to: C:/Program Files (x86)/Belarc/BelarcAdvisor/System/tmp . From there, you can copy it to another folder, transfer it to another computer, or attach it to an email if you are documenting the status of a PC.
Bulk Crap Uninstaller: ideal for batch uninstallation
Bulk Crap Uninstaller (BCUninstaller) is designed for those who want to clean their PC all at once , selecting several programs and uninstalling them sequentially, even if some resist.
The application displays an alphabetical list of all applications installed on the system , including information such as the space they occupy, the installation path, and other technical data. From this same view, you can select multiple entries and schedule their batch uninstallation.
One of its advantages is that, after uninstalling, it can search for leftover files, folders, and Registry keys associated with the removed programs, to ensure that you free up as much space as possible and don't leave "junk" on the system.
BCUninstaller is open source and completely free . Its interface is simple and straightforward, so even though it includes advanced options, any user with a little care can use it to see what they have installed and perform a deep clean when their PC starts to run slowly.
Safari: Lightweight explorer of installed applications
Safarp is a veteran tool that, although it hasn't been updated in years, still works correctly even on recent versions of Windows . It's very lightweight and consumes few resources, making it ideal for older or less powerful computers.
The application displays the list of installed programs in a way very similar to the classic "Add or Remove Programs" panel , sorting the entries alphabetically by default. You can also apply additional filters, such as sorting by size, date, or application usage.
This usage data lets you quickly identify programs you haven't opened in a while , which can be a perfect clue for deciding what to uninstall. Although its interface is very simple, it more than adequately serves as a viewer of installed software and a basic uninstaller.
Chocolatey: Package manager for advanced users
Chocolatey is a package manager for Windows that works similarly to apt in Linux . It allows you to search for, install, update, and uninstall programs from the command line, using PowerShell or CMD.
If you already have Chocolatey installed on your system , you can quickly see which programs you have installed through this manager using the command:
choco list
This list focuses on packages managed by Chocolatey , but it already gives a good idea of the software you can control through this system. Furthermore, by combining this command with other options like `choco upgrade`, you can update all programs with a new version available at once.
For advanced users and system administrators , Chocolatey is very useful for keeping multiple computers synchronized in terms of installed software, as it allows you to automate installations and updates with scripts and configuration files.
WinGet: List and update applications from the Windows Package Manager
WinGet is the modern Windows Package Manager, increasingly integrated into Windows 11. With it, you can install, search for, list, and update applications cleanly from the command line.
The key command to view installed apps is “list” . This command not only shows programs installed with WinGet, but also detects applications installed by other means (traditional installers, Microsoft Store, etc.).
The basic syntax would be something like this :
winget list ]
Without parameters, “winget list” displays a table with all the applications it recognizes , including their name, identifier, installed version, and source. Among the most interesting options you can use are:
- –Id: filter by application identifier.
- --name: filter by app name.
- –moniker: limits the results to the app's alias (moniker).
- -s, –source: restricts the list to a specific source (e.g., winget, msstore…).
- -n, –count: limits the number of results.
- -e, –exact: forces the search to use exact match, even with uppercase/lowercase letters.
- upgrade available: shows only the packages that have an available update.
- -u, –unknown, –include-unknown: includes packages whose current version cannot be determined.
- –detailsInstead of a table, it displays detailed information about each package, similar to the "show" command.
If you only want to see apps that have an available update , you can use:
winget list –upgrade-available
In that output, you'll see both the version you have installed and the new version, as well as the source from which it can be updated . It's a very convenient way to find out which programs you can update without having to do it one by one.
Furthermore, from that information you can use the “winget upgrade” command to update specific applications or all at once, taking advantage of the WinGet ecosystem to keep your PC running smoothly with minimal effort.
Locate the pre-installed tools in Windows 11 (Paint, Notepad, etc.)
One of the most confusing changes when switching from Windows 10 to Windows 11 is the Start menu . Many people are wondering where familiar tools like Paint, Notepad, WordPad, and Snipping Tool have gone, as they're no longer as prominent as before.
Although you can't see them at first glance, all those apps are still installed on Windows 11. What has changed is how they are displayed: the Start menu now mixes pinned apps, recommendations, and search, and many classic tools are no longer pinned by default.
To see what tools Windows 11 includes, you can do several things:
- Use the Start menu searchType “Paint”, “Notepad”, “Snipping Tool”, etc., and they will appear immediately.
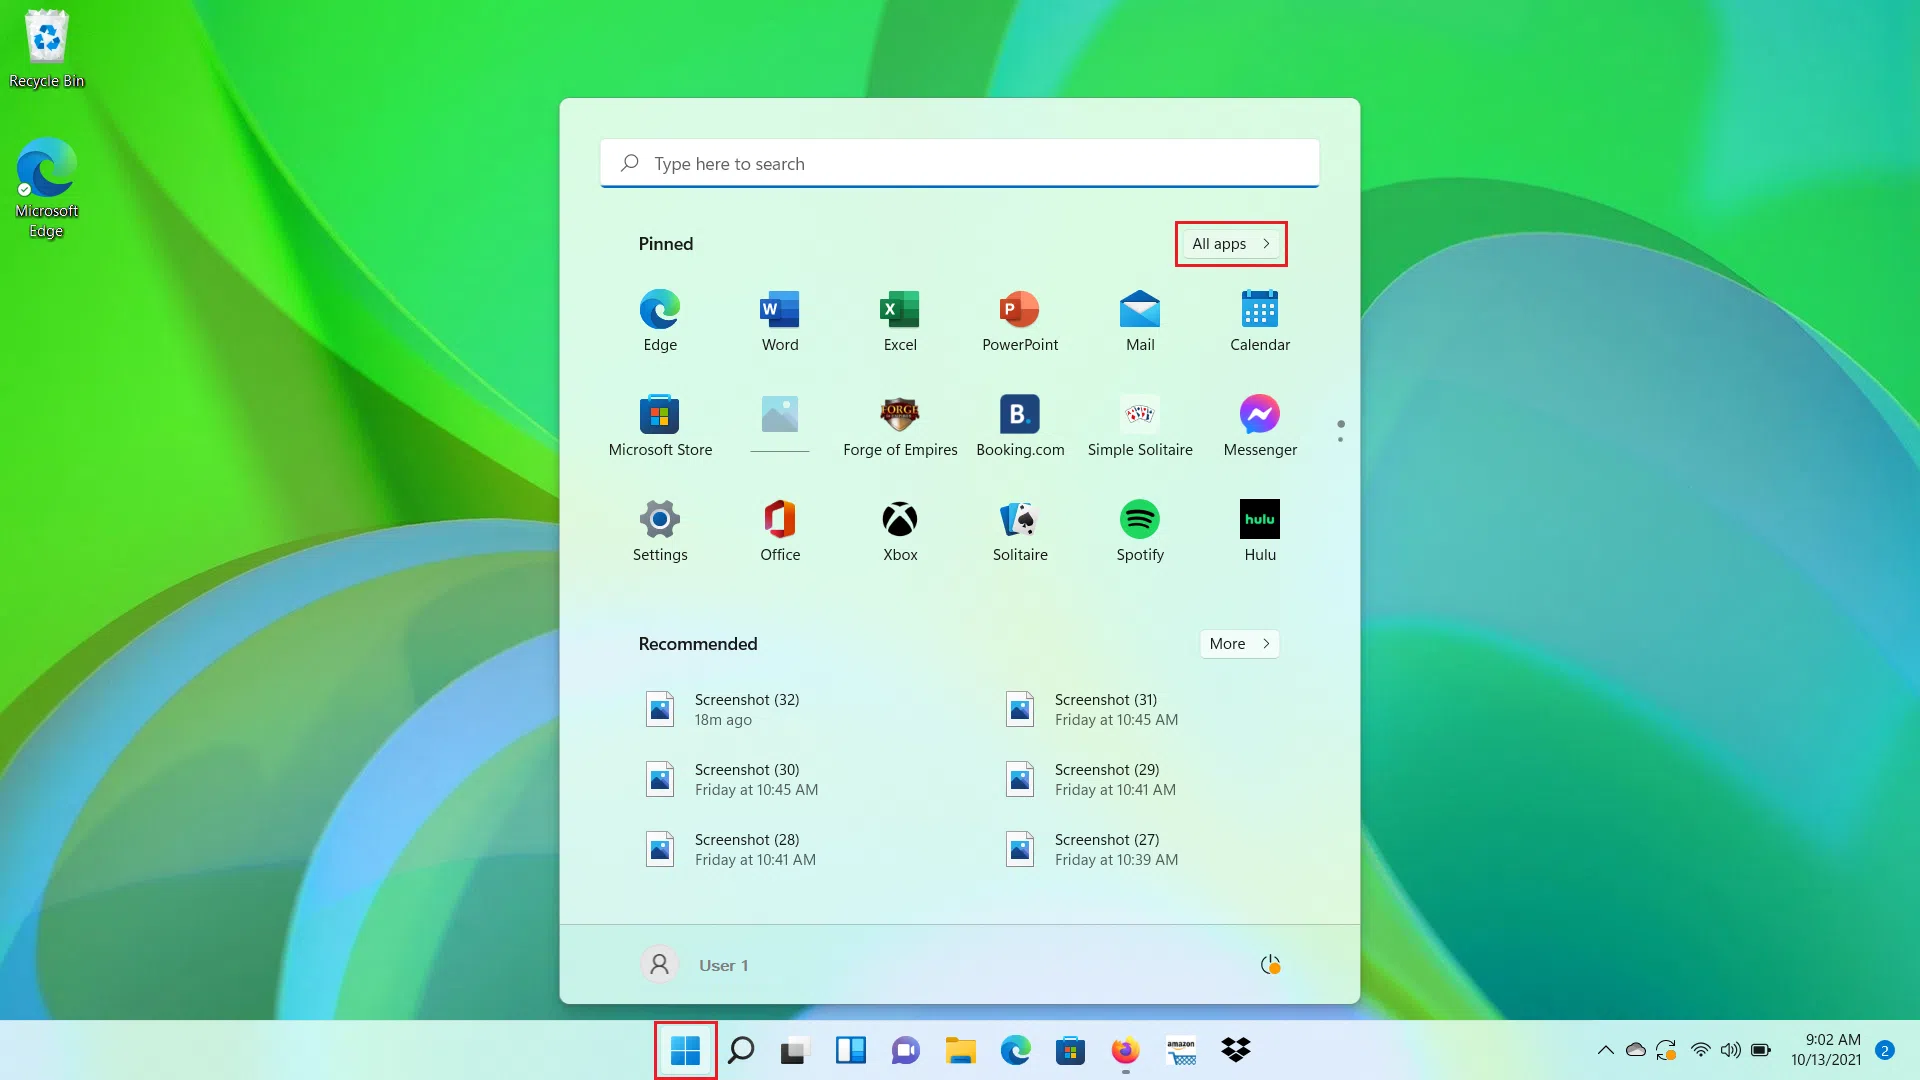
- Review the section "All applications" in the Start menu, where they are listed in alphabetical order.
- Consult the list of “Installed Applications” from Settings, where you will also see the system apps.
If you want to keep them more accessible, you can pin them to the Start menu or the taskbar . Simply find them, right-click, and choose "Pin to Start" or "Pin to taskbar." This way, they'll always be visible, and you won't have to rely on the search bar.
Which programs can you safely uninstall and which ones should you leave untouched?
Having a list of all the apps installed on Windows 11 is great, but what's really useful is knowing what you can delete without breaking anything . Not everything on the list is unnecessary, and there are some components that are best left untouched if you want the system to continue functioning correctly.
Among the types of programs that are usually safe to uninstall , we can highlight:
- Bloatware pre-installed by the manufacturerTrial antivirus software, promotional games, program demos, duplicate utilities, etc. If you don't use them, they just take up space.
- Unwanted toolbars and browser extensionsThey usually come with third-party installers and rarely provide anything useful; moreover, they often affect browser performance.
- Older versions of software: applications that already have a newer version installed or that you no longer need.
- Expired trial programs: demos of antivirus software, multimedia suites, editors, etc., whose trial period expired a long time ago.
- Duplicate apps that do the same thing: several music players, several office suites (for example, having Office and LibreOffice if you only use one of the two), etc.
- Games you no longer use: especially those that take up several gigabytes, very useful for freeing up space quickly.
- Software that displays excessive advertising or acts as adwareIf you see that an app does nothing but show ads, it's best to remove it.
However, there are a number of programs and components that you shouldn't uninstall lightly because they are essential for the functioning of many applications or Windows itself:
- All versions of Microsoft Visual C++ RedistributableMany programs depend on these shared libraries; if you delete them, they will stop running or throw errors.
- Microsoft. NET FrameworkIt is the foundation upon which many modern Windows applications operate; removing it can render key programs unusable.
- Drivers or drivers Graphics card, sound card, network card, etc.: these are what allow Windows to communicate with the hardware. Without them, certain parts of the computer will simply stop working.
- Components related to Windows UpdateThey are essential for receiving security updates and system improvements.
- security software such as antivirus and firewall, unless you are going to replace it immediately with another equivalent solution.
- Equipment manufacturer programs that manage the BIOS/UEFI, laptop power, or special functionalities (Fn keys, performance profiles, etc.).
When you have doubts about a program, it's best to research it before deleting it . A simple internet search using the application's exact name and developer is usually enough to determine whether it's a critical system component or a minor utility you can safely remove.
Having multiple ways to view a list of all apps installed on Windows 11 —from Settings, PowerShell, CMD, WinGet, or through third-party tools like UninstallView, Geek Uninstaller, Belarc Advisor, Bulk Crap Uninstaller, Safarp, or Chocolatey—gives you enormous control over your system: you can plan migrations to another PC, review which programs you no longer use, locate bloatware, check associated formats, and make informed decisions about what to keep and what to remove to keep your computer lightweight, organized, and ready to last for many years without unpleasant surprises.


Passionate writer about the world of bytes and technology in general. I love sharing my knowledge through writing, and that's what I'll do on this blog, show you all the most interesting things about gadgets, software, hardware, tech trends, and more. My goal is to help you navigate the digital world in a simple and entertaining way.