- Windows 11 facilitates printer management through automatic and manual methods.
- There are advanced solutions to remove printers and resolve printer conflicts. drivers.
- Correct configuration and organization of printers improves system performance.
Managing printers in Windows 11 has evolved considerably , making both installing and removing devices easier thanks to new features and a much more intuitive interface. However, not everyone finds the solution they need right away when a problem arises with connecting, configuring, or removing older printers.
In this article, you'll learn in detail how to add, remove, and manage all types of printers in Windows 11 : whether the printer is local ( USB ), network, shared, or even if you need advanced methods like using PowerShell , the Windows Registry, manual IP configuration, or the operating system's built-in utilities for troubleshooting. We'll break down all the available information, clarifying each step so anyone can do it without fear of making a mistake.
Why is it important to know how to add and remove printers correctly in Windows 11?
One of the most common problems after updating the operating system, changing printers, or reorganizing the home or business network is encountering duplicate printers, old printers that you no longer use, or problems installing new printers due to driver, port, or network conflicts.
Knowing how to properly manage your printers in Windows 11 will not only save you headaches, but will also allow you to:
- Troubleshoot recurring printing errors and prevent the system from storing inactive or unwanted printers.
- Optimize system performance, as outdated drivers and configurations can cause crashes and slowdowns.
- Facilitate the incorporation of new printers, both at home and in corporate or study environments, without having to resort to technical support.
Understanding all available options prepares you to face any situation, from the simplest to the most complex.
How to add a printer in Windows 11: USB, network, and Wi-Fi methods
Windows 11 is designed to automatically recognize and add compatible printers , especially newer or more popular models. However, things don't always go smoothly the first time, which is why it's essential to know every available method, from the simplest to the most advanced.
Add a local printer (USB or wired)
Connecting the printer to your computer via USB and turning it on is the easiest way. Windows 11 will automatically detect most recent printers and install the necessary drivers without any further intervention.
- Connect the printer to your PC using a USB cable and turn it on.
- Wait a few seconds. If everything is OK, a message will appear indicating that the device is ready for use.
- In case it is not installed automatically, you can force detection from Start > Settings > Bluetooth & devices > Printers & scanners. Press on Add device beside Add a printer or scanner. Windows will search for available printers and display them in the list.
- Select your printer and click Add.
For printers that require manual installation (for example, older models or those without automatic detection), you can install the driver from the manufacturer's website or using the original CD if you have it.
Install a network printer (WiFi or Ethernet)
Network printers can be connected via Wi-Fi, Ethernet, or shared from another computer . Windows 11 includes several ways to find and install them:
- From Settings: Go to Start > Settings > Bluetooth & devices > Printers & scanners and click on Add deviceThe system will search for both physical and network printers that are available.
- Add manually: If the printer does not appear in the automatic search, select Add manuallyHere you can enter the IP address, share name, or search for specific printers connected to other computers on the network.
Additional steps for shared network printers
If the printer is connected and shared from another computer on the network (the host computer), follow these steps:
- From the client PC, Accede to File Explorer > Network and wait for the shared printer to appear.
- Right click and select Connect (You may be asked for a network username and password.)
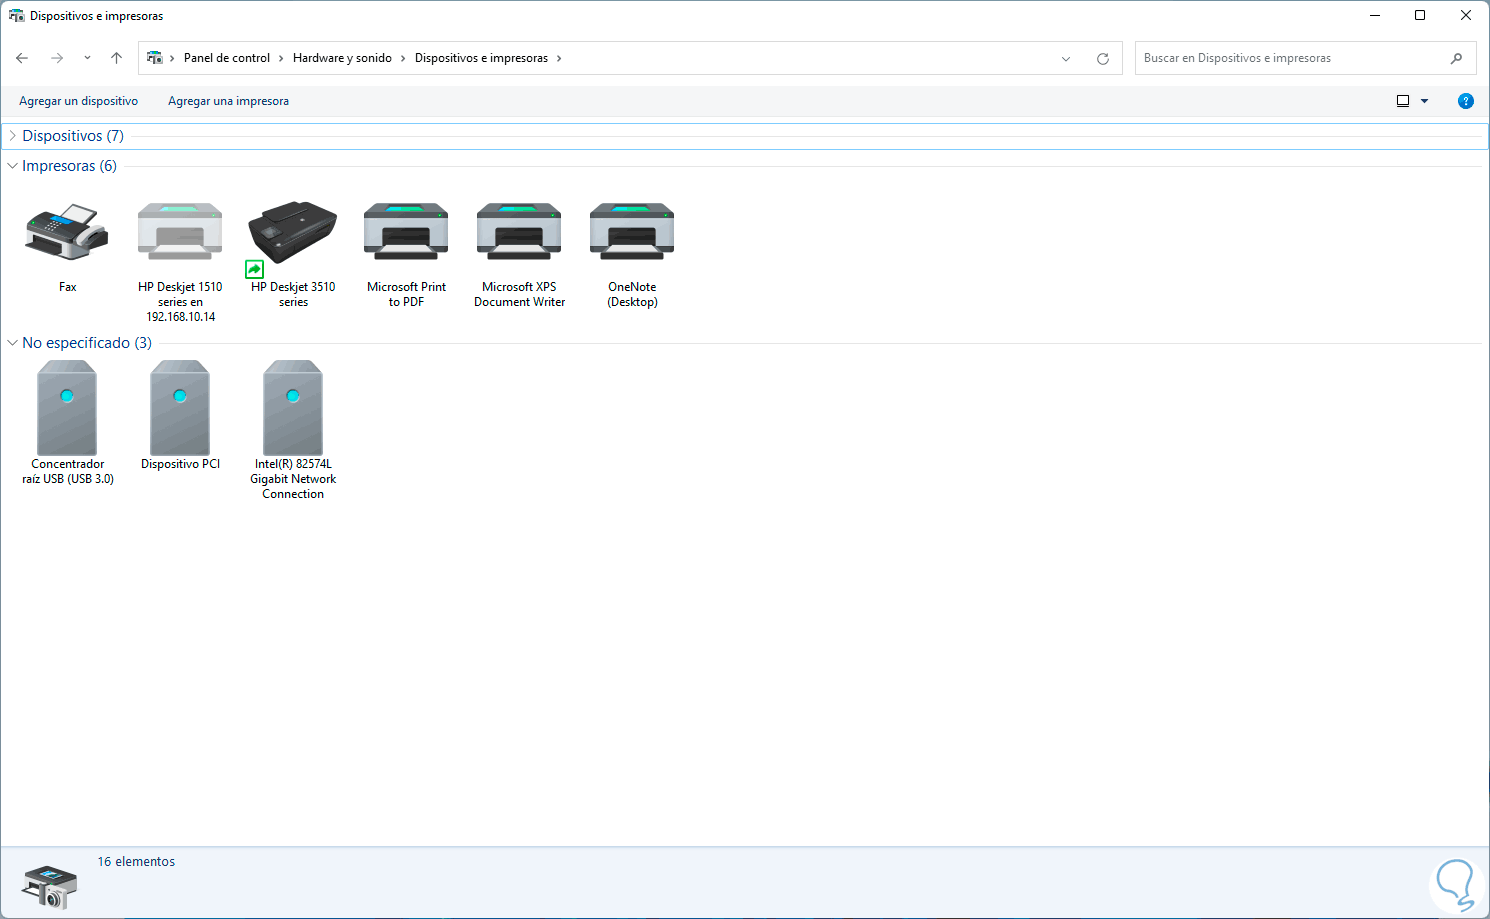
- Alternatively, from Control Panel > Hardware and sound > Devices and printers > Add printer, Select The desired printer is not in the list and add the style path \\PCName\\PrinterName.
Add a printer by IP address
Sometimes, in professional environments, you need to install a printer using its IP address or hostname . Windows 11 simplifies this process if you follow these steps:
- Go to Control Panel > Hardware and Sound > Devices and Printers and click Add Printer.
- When Windows does not automatically detect your printer, select The printer I want is not on the list.
- Choose Add a printer using a TCP/IP address or hostname. Enter the IP and port if requested.
- Complete the installation and, if necessary, install the corresponding driver.
How do I find the printer's IP address? You can find it in the ports or web services tab of the printer's properties, or directly in the router's DHCP client table by searching for your printer's name.
Deleting a Printer in Windows 11: Easy Methods and Advanced Options
Removing old or unnecessary printers from your computer helps prevent conflicts and keeps your system clean . Windows 11 offers several options, from a graphical method to more advanced techniques, which are useful if the system resists deleting a specific printer model.
Remove a printer from Windows 11 Settings
The quickest and easiest way is through the Settings app:
- Open the menu Home and select Configuration.
- Go to Bluetooth & Devices > Printers & Scanners.
- Select the printer you want to remove. Click on Remove and confirm the action.
It's that simple! The printer will disappear from the list and will no longer be active on your system.
Remove a printer from Device Manager
Sometimes, a printer may remain registered in the system even though it no longer appears in the Printers and Scanners panel . In these cases, Device Manager is very useful.
- Right click on the button Home and select Device administrator.
- In the top bar, select View and then Show hidden devices.
- Find the section Used Printing machines, expand and locate the printer to be removed.
- Right click on it, choose Uninstall device and if it appears, mark Try removing the driver for this device.
- Confirm and restart your computer to apply the changes.
This method is very effective for resolving ghost printer problems or driver conflicts.
Delete printers using PowerShell
To quickly remove multiple printers, working with PowerShell commands is very useful. It can also help you troubleshoot errors related to printer drivers or persistent printer registry entries in Windows 11.
- Open PowerShell as administrator (search for PowerShell in Start, right click and select Run as administrator).
- List installed printers with: Get-Printer
- Remember the exact name of the printer you want to delete.
- Run: Remove-Printer -Name «PrinterName» (replace with real name).
This method permanently removes the printer from the system, ideal for advanced cleaning.
Deleting registry keys after uninstalling a printer
Even after removing the printer, traces may remain in the Windows Registry that could cause future conflicts. To remove them:
- Accesses Registry Editor (Regedit).
- Navigate to HKEY_LOCAL_MACHINE \ SYSTEM \ CurrentControlSet \ Control \ Print \ Printers.
- Locate the key corresponding to your printer, right-click and select Delete.
- Reboot the system for the changes to take effect.
Caution! Editing the registry can be dangerous if you don't know exactly what you're doing. Back up your data before making any changes.
How to fix common problems adding or removing printers in Windows 11
Windows 11 has tools to resolve the most common printer management conflicts . Here are the recommended actions if you encounter difficulties during the process.
Update Windows and printer drivers
Make sure you have the latest version of Windows and your printer drivers before looking for alternative solutions:
- Press Win + I to open Settings.
- Login to Windows Update and check for any pending updates.
- Check the manufacturer's website for the latest drivers if problems persist.
An outdated driver is often the main cause of printing errors.
Check and restart print services
If the printer is not responding, even though it is installed correctly :
- Type in Windows search Services and open it.
- Search Print spooler, right click and select Restart.
This step can resolve blockages or stuck states in printing processes.
Use the Windows 11 Troubleshooter
The system includes a wizard to detect and fix common errors :
- From Settings, go to Solve other problems.
- Choose Printer problems and follow the instructions.
It allows automatic error detection and corrects many errors without manual intervention.
Temporarily disable the firewall (Windows Defender)
The firewall may be blocking communication with the printer or preventing its installation . To check this:
- Opens Firewall Windows Defender from the search bar.
- Choose Deactivate for public and private networks during testing.
- Try adding or removing the printer again.
- Don't forget to reactivate the firewall after the test is over.
This step is only recommended temporarily and with caution for safety reasons.
Solutions to advanced problems and special cases in printer management
Some specific situations, such as older network printers or configuration changes after updates, require more advanced solutions . Here are some options for specific cases.
Enable support for legacy protocols (SMB 1.0/CIFS)
Very old network printers may require protocols that Windows 11 does not have enabled by default . This is common in environments with legacy hardware.
- Accede to Control Panel > Programs > Turn Windows features on or off.
- Check the option SMB 1.0/CIFS support.
- Confirm and restart the computer.
Allows communication with very old network printers that use obsolete protocols.
Find the printer's IP from the system or router
If you need to locate your printer's IP address and don't know it, you can do so in several ways:
- From windows: In Control Panel > Devices and Printers, right click on the printer, select Properties, and check the tab ports o Web services. You can also consult the section of What you should do if your HP printer doesn't scan.
- From CMD: Execute netstat –r on the command line to see connected devices.
- From the router: Go to the configuration (usually at 192.168.1.1) and look in the DHCP client table to locate it by name.
This way, you can add the printer via IP if it is not automatically detected.
Install printers compatible with older versions of Windows
Many printers designed for Windows 10 work seamlessly on Windows 11. For older models:
- En Start > Settings > Devices > Printers and Scanners.
- Click on Add a printer or scanner and select The printer I want is not on the list.
- Enter the name or IP address if necessary and continue with the installation.
- Install the manufacturer's drivers if required.
Remember to print a test page to verify that it is working correctly.
General recommendations for managing printers in Windows 11
Perform regular maintenance on your printer list by removing obsolete or duplicate devices to maintain an organized and efficient environment.
- Update drivers and Windows frequently to take advantage of improvements and fix bugs. You can also check out our article on troubleshoot printer connection errors.
- Use advanced methods with caution, only when necessary and if you have technical knowledge.
- Temporarily disable antivirus or firewall only if you find that they interfere with installation or removal, and re-enable them if there are no security reasons.

Passionate writer about the world of bytes and technology in general. I love sharing my knowledge through writing, and that's what I'll do on this blog, show you all the most interesting things about gadgets, software, hardware, tech trends, and more. My goal is to help you navigate the digital world in a simple and entertaining way.