- GRUB is usually broken by partition changes, installations of other systems, or update errors, but it is almost always recoverable.
- It is possible to manually boot from the GRUB console, locate the correct partition, and reinstall the bootloader from within the system itself.
- With an Ubuntu Live USB you can use Boot-Repair or a manual chroot to reinstall GRUB and regenerate its configuration.
- Even on encrypted systems, by correctly mounting the partitions and reinstalling the GRUB packages, the boot process can be restored.

When GRUB breaks and your GNU/Linux system stops bootingThe feeling of having lost your machine is quite real: black screen, strange errors, or worse, a direct jump to the BIOS/UEFI. Luckily, in most cases you haven't lost anything; what's broken is the boot manager, and it can be recovered by following a few steps carefully. If you need to diagnose timings and bottlenecks, you can use the... profiling the boot process with systemd-analyze.
In this article we will see, in great detail and using the clearest language possibleWe'll cover how to repair GRUB using both its command line and various methods with Live CDs/USB, including automated tools like Boot-Repair and manual procedures with chroot. We'll also review why GRUB often breaks and what to do when commands like [commands missing] are missing. update-grub or even grub-install.
What is GRUB and why can it break?
GRUB (GNU GRand Unified Bootloader) is the boot manager used by the vast majority of GNU/Linux distributionsIt's that initial screen where you choose which operating system to boot when you have several installed, or where you select recovery mode or a different kernel.
If GRUB is damaged or disappears from the MBR or EFI partitionThe computer will simply stop booting and will get stuck on an error message, a GRUB console, or directly in the BIOS/UEFI settings. This doesn't mean the system is lost, only that the machine doesn't know "where" to boot from.
The most common reasons for GRUB to break They are usually these:
- Installing Windows after GNU/LinuxWindows often overwrites the MBR or EFI partition with its own bootloader, deleting the reference to GRUB. If this happens to you, it may be helpful to follow a specific guide on the GRUB rescue in Windows 10.
- Touching disk partitions carelesslyResizing, deleting, or moving partitions can cause the path where GRUB expects to find its files to no longer exist or to change its number. To minimize risks, it's advisable to learn how to... manage partitions without losing data.
- Some strange updateIt's not the most common thing, but a system update or an update of GRUB itself can be incomplete or misconfigured and leave the boot unusable.
- Changes to UEFI/BIOS settings or boot orderDisabling Secure Boot, changing the boot mode (Legacy/UEFI), or modifying the main disk can cause the GRUB entry to be lost; if in doubt, check what happens if you touch secure boot.
The good news is that in almost all of these cases GRUB can be rebuilt and restart without reinstalling the entire system, either from the GRUB menu itself, from a rescue mode, or using a Live USB.
Repair GRUB from your own command line (without Live USB)

If when you turn on your computer you still see the GRUB menu or, at least, a GRUB consoleYou can try manually booting the system from there and then reinstalling the boot manager to restore everything to its previous state.
Access the GRUB menu and stop the countdown
As soon as the GRUB menu appears, press the cursor keys (up or down) To stop the timer that triggers the automatic boot. If GRUB is reasonably functional, this will leave you stuck in the menu without any system starting.
If the error is more serious and GRUB fails to display its graphical menuIt is possible that a console will appear directly with a message like grub> o grub rescue>In that case, we'll work from there without going through the menu.
To access GRUB's advanced command line from the menuSimply press the key cThis will take you to a GRUB prompt where you can type the commands we're going to use next.
List disks and partitions with GRUB
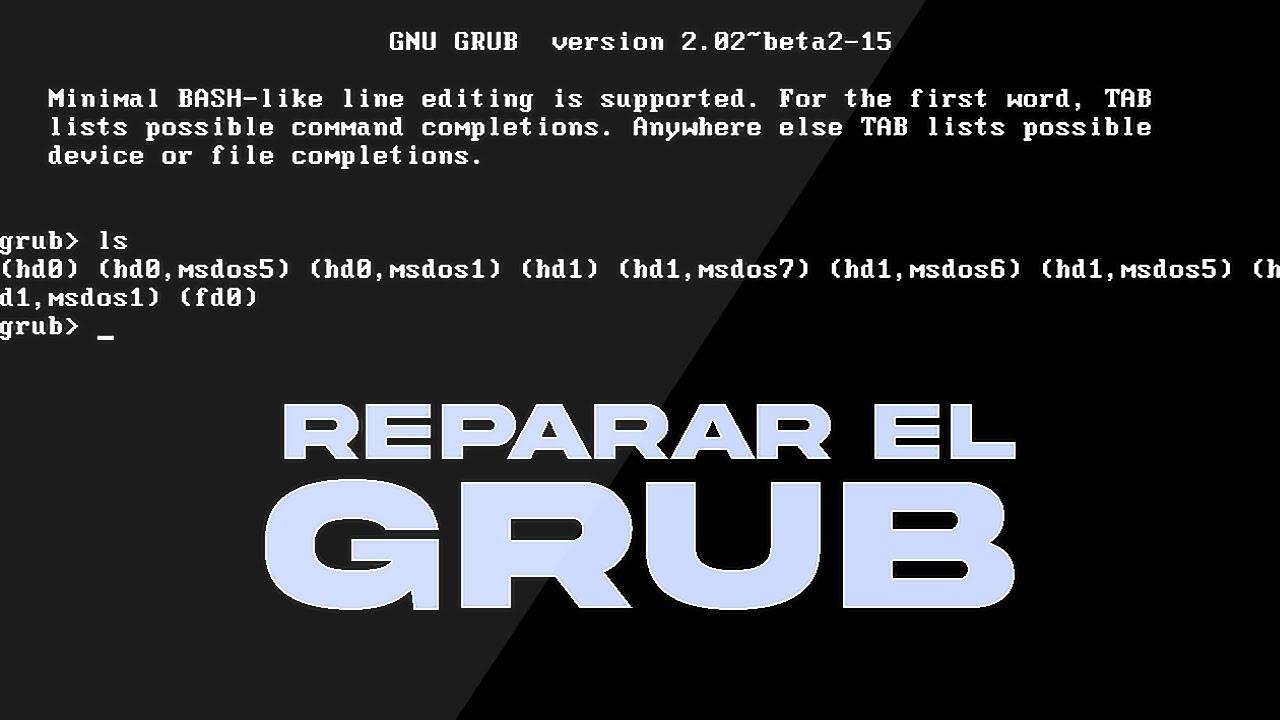
The first thing to do is find out which disks and partitions GRUB seesIn the GRUB console, type:
ls
The command ls GRUB displays the disks as (hd0), (hd1), etc., and its partitions as (hd0,1), (hd0,msdos1), (hd0,gpt2) and similar combinations depending on whether the partition table is MBR or GPT.
A simple example would be that only one disc appears: (hd0) with partitions like (hd0,msdos1) y (hd0,msdos5)On machines with multiple disks, you might see something like this:
(hd0) (hd0,1) (hd1) (hd1,1) (hd1,5) (hd2) (hd2,1) (hd3) (hd3,1)
Each of those elements is a candidate to host your system and directory /bootwhich is what we need to identify now.
Locate the /boot folder and the GRUB directory
The next step is to find out which partition GNU/Linux is installed on. and, within it, where is the directory where GRUB stores its files, normally /boot/grub.
To investigate each partition, use again ls but specifying disk and partitionalways ending with a slanted bar at the end:
ls (hd0,1)/
Note that the keyboard layout in the GRUB console is usually American.So the opening and closing parentheses are usually on the 9 and 0 keys, and the slash / It can be where the hyphen normally goes. - on a Spanish keyboard.
If you see typical GNU/Linux directories like bin, etc, home, usr, etc.You are looking at a system partition. Inside it you should find a directory boot:
ls (hd0,1)/boot/
If files like these appear in that path vmlinuz-... e initrd.img-... and a directory grubYou have already located the partition we need to tell GRUB where to look for the kernel.
Define the GRUB path and the system root
Once the correct partition has been identified, GRUB needs to be told where its directory is and what the system root is.Let's assume it's (hd0,1)In the GRUB console, run:
set prefix=(hd0,1)/boot/grub
On some keyboards, the key where the question mark is normally located may produce the equal sign. =So if you see strange behavior, try different keys until the correct character appears.
Next, it sets the root of the file system that will be used to boot.:
set root=(hd0,1)
With these two commands, GRUB now knows where its configuration is located and which partition to use. as a reference for starting.
View the available kernels and load one manually
Now it's time to check which kernels we have in /boot and load one of themYou can use it again. ls to take a look:
ls (hd0,1)/boot/
You should see one or more files with a name similar to vmlinuz-6.1.0-10-amd64, and their corresponding initrd images, for example initrd.img-6.1.0-10-amd64If you need to compile or install kernels manually, see How to download and compile the Linux kernelChoose one of the kernels and load it with:
linux /boot/vmlinuz-6.1.0-10-amd64 root=/dev/sda1
The path to the root device (root=/dev/sdXn) must correspond to the partition where your system is locatedGRUB numbers the disks as hd0, hd1etc., while in GNU/Linux they appear as /dev/sda, /dev/sdbetc. The typical equivalence is:
- hd0 → / Dev / sda
- hd1 → / Dev / sdb
- hd2 → / Dev / sdc
- hd3 → /dev/sdd
To make it easier to type long paths and names in the GRUB console you can use the key TAB to autocomplete both file names and directory paths.
Don't forget to also upload the corresponding initrd imagesomething like:
initrd /boot/initrd.img-6.1.0-10-amd64
Once you have defined the kernel and the initrdAll that remains is to start the boot process with:
boot
If everything goes well, the system should boot with the kernel you have chosen.If you encounter problems, you can repeat the procedure with another available kernel, for example, an older one, until it boots correctly. If you also need to pass temporary options to the kernel, see how. Add boot parameters to GRUB.
Reinstall GRUB from the already booted system
Once you manage to log back into the system, it's crucial to ensure GRUB is properly installed. so you don't have to repeat this manual process every time you restart.
Open a terminal with superuser privileges (either logging in as root or using sudo) and run:
grub-install /dev/sda
Make sure to specify only the entire disk and not a specific partition., in other words, /dev/sda and not /dev/sda1Also check which is your main hard drive (/dev/sda, /dev/sdb, etc.) before launching the command.
After that, it's advisable to completely regenerate the GRUB configuration and the initramfs. so that all systems and kernels are detected:
update-grub2
update-initramfs -u
After this, you should have GRUB fully operational.with its menu updated and ready for the next reboots.
Repair GRUB with Boot-Repair from an Ubuntu Live CD/USB
When the system won't start at all or we prefer an automatic solutionThe Boot-Repair tool is one of the most convenient options. It works primarily from a live Ubuntu (or derivative) environment and reinstalls and reconfigures GRUB almost without user intervention.
Prepare the Live USB/CD
The first step is to create a bootable medium with Ubuntu in Live modeDownload the Ubuntu ISO image from the official website and, on another computer, create a bootable USB drive:
- On Windows you can use Rufus to burn the ISO onto the USB drive.
- In other GNU/Linux distributions you can use tools like Startup Disk Creator (included in Ubuntu) or
ddvery carefully.
Once you have the USB or CD readyConnect it to the device that has a broken GRUB.
Boot from the Ubuntu Live USB/CD
Turn on or restart your computer and enter the fast boot menu, which is usually one of these keys: F12, Esc, F2, F10 (This depends on the manufacturer.) From there, select the USB drive or CD drive as the boot device. If you need to update the BIOS due to incompatibilities, check how. update BIOS firmware.
When the Ubuntu menu appears, choose the option to try the system without installing (Something like “Try Ubuntu without installing” / “Try Ubuntu”). This will load the Live environment from memory, without touching disks yet.
Install Boot-Repair in the Live environment
Once inside the Live desktop, open a terminal. (usually from the applications menu or with Ctrl + Alt + TFrom there, you'll need to add the Boot-Repair repository and install the tool; the procedure varies over time, but generally it's something like this:
sudo add-apt-repository ppa:yannubuntu/boot-repair
sudo apt update
sudo apt install boot-repair
This process will download Boot-Repair and its dependenciesYou will need an internet connection, so check that the Live has access to the network (wired or wifi) before starting.
Run Boot-Repair and use the recommended repair
When the installation is complete, launch the tool with:
boot-repair
A graphical window will open, automatically analyzing the installed disks and systems.You'll see two main options: the recommended one and the advanced one. For most users, simply clicking on the recommended option is sufficient. "Recommended repair".
Boot-Repair will reinstall GRUB, regenerate its configuration, and adjust the boot entry to UEFI or MBR.Depending on the system type, during the process it may display messages about what it is doing and, in some cases, ask for confirmation of certain steps.
When the repair is complete, the tool usually displays a report with the result. and a link to a log (unless you specify otherwise in its options). This log is useful if something has gone wrong and you need to ask for help in forums or communities.
Restart your computer and check the GRUB menu
Once Boot-Repair finishes its work, close the tool, shut down the Live system, and remove the USB/CD.Then, turn on your computer normally.
If everything has gone as it should, you should see the GRUB menu again. With all systems detected: your main GNU/Linux, other Linux distributions you may have, possible Windows systems, etc. Choose the one you want and check that it boots up without problems.
If there are still errors, you can repeat the Boot-Repair process.But this time testing the advanced settings: choosing which disk to install GRUB on, forcing file system repair, changing the default boot system, or adjusting the menu timeout.
Repair GRUB with an Ubuntu Live CD/USB manually (chroot)
When we don't want to rely on Boot-Repair or it's not availableWe can repair GRUB from a Live USB in a more manual way, using the classic trick of chroot: mount the system partition and "enter" it as if we had booted it.
Identify and mount the GNU/Linux partition
Boot from the Ubuntu Live USB/CD Just like before, choose the option to try without installing. Once on the desktop, open a terminal.
Start by listing the system partitions with a tool like lsblk o fdisk:
sudo lsblk
sudo fdisk -l
Find the partition where your GNU/Linux system is installed.It will usually be something like /dev/sda1, /dev/sda2, /dev/nvme0n1p2etc. You can use size, type (Linux filesystem), or mount point as a guide if the graphical environment has already mounted it automatically. Take this opportunity to check the disk's health and perform basic maintenance using guides from hard drive maintenance in Linux.
Once you have it clear, create a mount point and mount the root partition (assuming it is) /dev/sda1):
sudo mount /dev/sda1 /mnt
If you have a partition /boot separate or independent EFI partitionYou will also need to mount them inside /mnt for the chroot to function correctly:
sudo mount /dev/sdaX /mnt/boot        # si /boot está separado
sudo mount /dev/sdY /mnt/boot/efi    # si hay partición EFI
Mount the necessary file systems and use chroot
Before using chroot Some file systems from the Live system need to be "injected" into the mounted environment.using assemblies of the type bind. For example: uterine
for i in /dev /dev/pts /proc /sys /run; do sudo mount --bind $i /mnt$i; done
If when running this loop you see a “syntax error near do” messageCarefully check that you have entered the spaces, periods, and semicolons correctly. If in doubt, you can mount each directory one by one:
sudo mount --bind /dev /mnt/dev
sudo mount --bind /dev/pts /mnt/dev/pts
sudo mount --bind /proc /mnt/proc
sudo mount --bind /sys /mnt/sys
sudo mount --bind /run /mnt/run
Once you have everything set up, log into the installed system with:
sudo chroot /mnt
From this point on, the commands you execute will behave as if you had booted your installed GNU/Linux system.not the Live system. This allows you to reinstall GRUB and regenerate its configuration just as you normally would.
Reinstall and configure GRUB from the chroot
Within the chroot, reinstalling GRUB is as simple as running (adjusting the main disk according to your case):
grub-install /dev/sda
If when you try you receive a message that grub-install does not existThe GRUB package may not be installed or may be corrupted. In that case, try reinstalling it:
apt update
apt install --reinstall grub-pc        # para sistemas BIOS/MBR
apt install --reinstall grub-efi-amd64 # para sistemas UEFI x86_64
Once the command grub-install be available and working, regenerates the GRUB configuration. If you don't have update-grubRemember that it's basically a "shortcut" to grub-mkconfigso you can use it directly:
grub-mkconfig -o /boot/grub/grub.cfg
This command will analyze the system, detect kernels, and other installed operating systems. and will generate a file grub.cfg complete with all necessary boot entries. If you are working in UEFI and encountering problems related to Secure Boot, consult the guide on Secure Boot Violation: Causes and Solutions.
Exit the chroot, unmount, and reboot
When you have finished reinstalling GRUB and regenerating the configurationExit the chroot by typing:
exit
Next, unmount the file systems you had mounted (in reverse order is the cleanest):
sudo umount /mnt/run
sudo umount /mnt/sys
sudo umount /mnt/proc
sudo umount /mnt/dev/pts
sudo umount /mnt/dev
sudo umount /mnt/boot/efi  # si la montaste
sudo umount /mnt/boot      # si la montaste
sudo umount /mnt
Now you can restart your computer, remove the USB/CD Live, and try a normal boot.Usually, the GRUB menu reappears and the system functions normally.
Special cases: encrypted systems and missing GRUB tools
In encrypted systems (for example, with LUKS) or more complex installationsGRUB problems can become a bit more delicate, especially if you mix encrypted partitions, EFI partitions, and kernel changes.
A typical scenario is wanting to boot with a new kernel. (for example, upgrading from version 6.4.xa to 6.5.x) and finding that the GRUB menu still points to the old kernel or directly to one that no longer exists. If at that moment you run update-grub And it turns out it's not installed, and you're pulling strings grub-mkconfig -o /boot/grub/grub.cfgYou can leave the configuration in an inconsistent state. If the problem is caused by a bad entry in /etc/fstabCheck the guide on how fix a boot problem using fstab.
In encrypted systems, it often happens that after entering the decryption passwordInstead of continuing with the boot process, the machine jumps to the UEFI configuration or gets stuck with minimal messages, indicating a serious problem in the GRUB or kernel loading phase.
If you follow a guide from a Live USB and encounter a syntax error when executing loops for or compound commandsDouble-check spaces, quotation marks, and punctuation. Many guides copy commands with line breaks or unusual characters that the shell doesn't interpret correctly if you type them manually.
When grub-install It's not even available within the chroot. (it's not in) /usr/sbin nor in /usr/bin), indicates that the GRUB package is not installed or that the system is partially corrupted. In that case, try recovering the tool first:
apt update
apt install grub-pc grub-efi-amd64
If the package manager is working and downloads the necessary packages, you can recover grub-install and continue with the normal reinstallation. If you can't even install packages, you might want to consider a data backup and a clean reinstall, although this is usually a last resort.
In any case, even in encrypted configurationsThe general idea remains the same: locate the correct partition, mount everything necessary, chroot, reinstall GRUB, and regenerate the configuration. The trickiest part is correctly identifying which partitions are involved in the boot process (EFI, /boot unencrypted, LUKS volume, LVM, etc.).
Calmly, checking each command and noting down the error messagesIt is perfectly possible to rescue a system that at first glance seems "dead" because of GRUB, whether you use graphical tools like Boot-Repair or prefer to do it manually with chroot and traditional commands.
Passionate writer about the world of bytes and technology in general. I love sharing my knowledge through writing, and that's what I'll do on this blog, show you all the most interesting things about gadgets, software, hardware, tech trends, and more. My goal is to help you navigate the digital world in a simple and entertaining way.