- The Debug LEDs (CPU, DRAM, VGA, BOOT) indicate at which phase of the POST the device failed. Boot.
- The order and colors vary by brand (ASUS Q-LED, MSI EZ Debug, GIGABYTE Status).
- Each LED has a clear checklist: reinstall, clean, check cables, QVL and BIOS.
- Alternatives: speaker beeps and code display, useful if there are no LEDs.
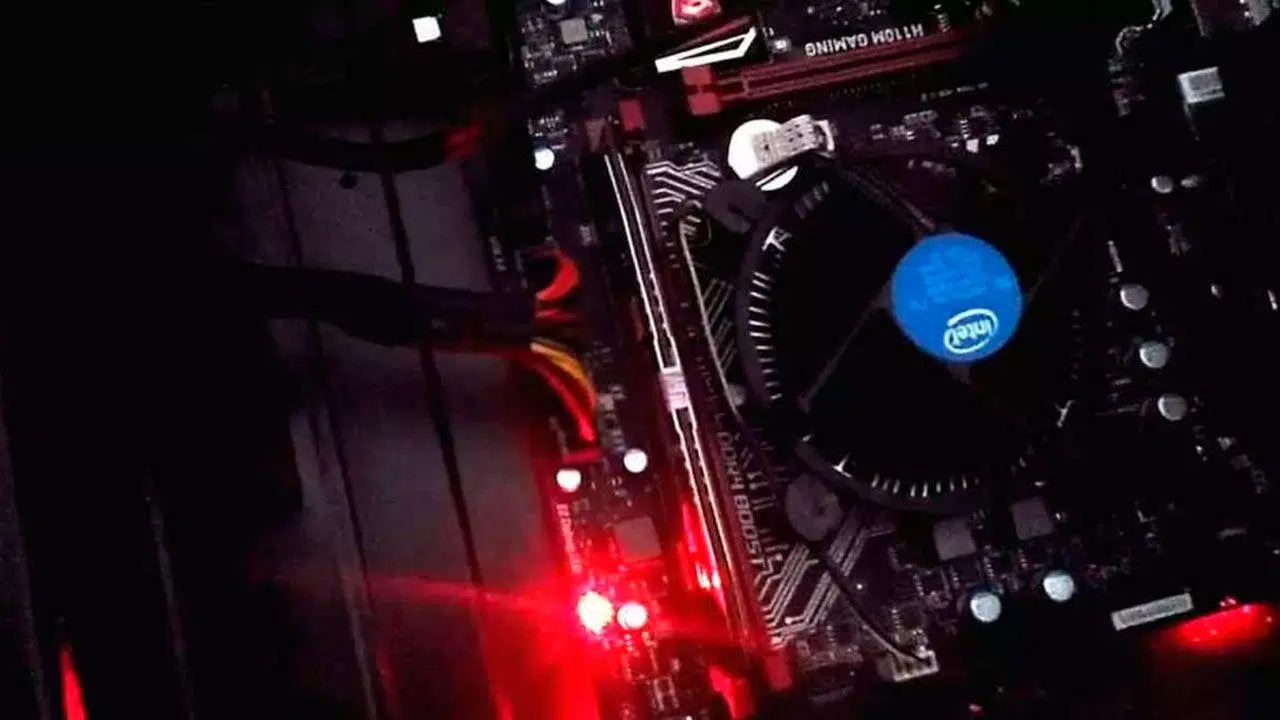
If you see a solid light next to the words CPU, DRAM, VGA, or BOOT when you turn on your PC, don't worry: those are the Debug LEDs, and they're there to help you pinpoint the problem in seconds. On modern motherboards, these lights are part of the POST diagnostics and allow you to identify which component is failing even when there's no image on the screen.
It's important to know that the behavior and colors may vary depending on the manufacturer, and that during startup it's normal for the LEDs to light up sequentially or even all at once for a moment. You should only be concerned if a light remains on after the POST is complete, as this indicates a genuine error related to that component.
What are Debug LEDs and how do they work?
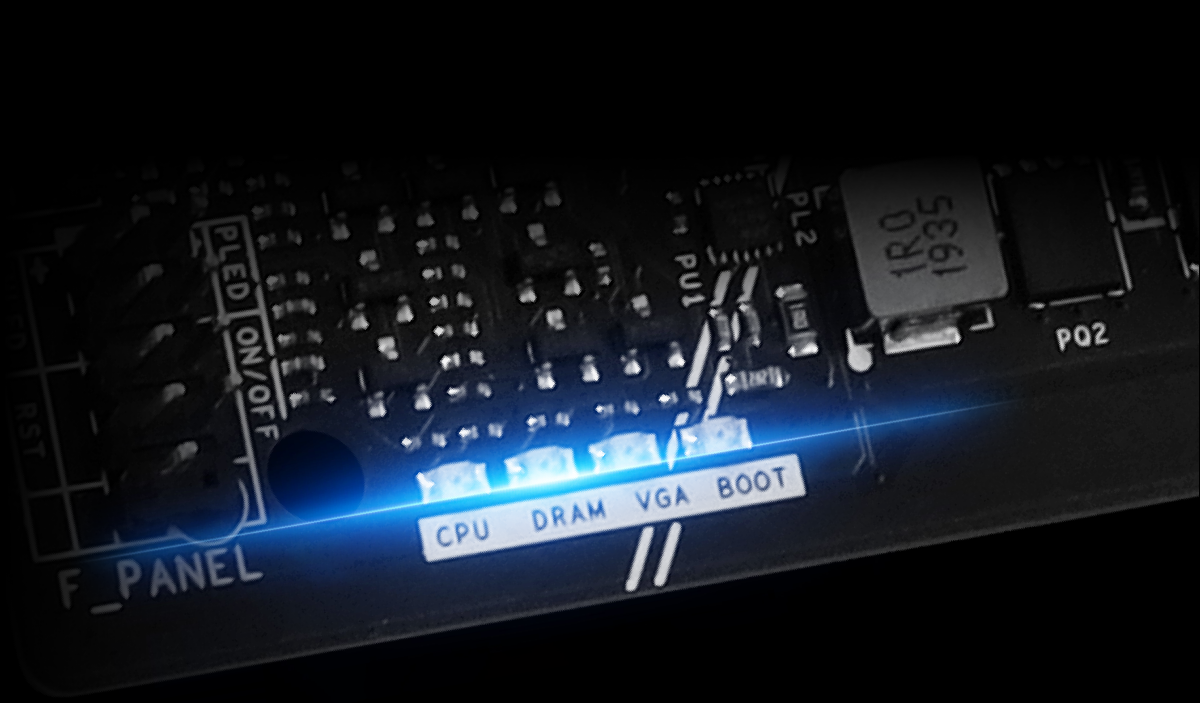
Debug LEDs are a set of indicator lights typically labeled CPU, DRAM, VGA, and BOOT. Their function is simple: they monitor power signals and the status of subsystems to identify which phase of the Power-On Self-Test (POST) is causing a fault. If the motherboard fails to correctly detect one of these components, the corresponding LED will illuminate.
Some brands use a single color for all indicators, while others use a color code (green/white/yellow/red) . There is no universal standard: in some models, red always indicates a problem, and in others, the color may vary or even show red even when the device is working. Therefore, it's crucial to check your motherboard's manual.
On mid-range and high-end motherboards, it's common to find, in addition to these LEDs, a small two-digit display (sometimes called a debug display) that shows numeric/hexadecimal error codes . Reading this requires consulting the manufacturer's table, but it's very useful for refining the diagnosis. If your motherboard doesn't have a display, the diagnostic LEDs, or failing that, the speaker beeps, will serve the same purpose.
Where are they and what manufacturers name them?
The typical location for these indicators is on the right side of the motherboard, next to the memory slots and near the 24-pin ATX power connector. On many GIGABYTE motherboards, for example, they appear below the ATX connector in a 2x2 array , while on other brands they form a horizontal row directly above the ATX connector.
Each manufacturer gives them their own commercial name: MSI calls them EZ Debug LEDs , ASUS calls them Q-LEDs , and GIGABYTE identifies them as Status LEDs . ASRock, for its part, maintains a straightforward nomenclature (CPU/DRAM/VGA/BOOT) similar to the generic one and very easy to recognize.
If you have doubts about the placement or order in your specific model, the most effective approach is to review the manufacturer's manual or specifications section, looking for terms like debug, troubleshooting, or layout . Official documentation usually includes location diagrams and code meaning tables.
Order of LED lights by brand
The physical order of the LEDs is not identical between manufacturers, although it remains consistent within each brand. This is important because, if you can't read the markings clearly, remembering the typical order will help you identify the lit LED without error.
ASRock
- CPU
- DRAM
- VGA
- Boat
In this case, the first LED on the left usually corresponds to the processor and the last one to the boot system; if the fourth LED remains lit , consider storage and boot order.
ASUS (Q-LED)
- Boot (green)
- VGA (white)
- DRAM (yellow)
- CPU (red)
ASUS also uses a highly recognizable color scheme: CPU in red, DRAM in yellow, VGA in white, and BOOT in green . This visual coding greatly speeds up diagnosis at a glance.
GIGABYTE (Status LEDs)
- VGA
- CPU
- BOOT
- DRAM
GIGABYTE motherboards typically feature LEDs arranged in a 2x2 configuration below the ATX power connector. Keep in mind that the physical location may vary between models, but the label next to each LED is unambiguous.
MSI (EZ Debug)
- CPU
- DRAM
- VGA
- Boat
In MSI systems, the order usually matches the POST check sequence: first CPU, then memory, graphics card, and finally boot . If it stops at one of these, it indicates where to investigate.
What each LED indicates and how to act
First of all: during the initial startup, it's normal for the LEDs to flash sequentially. Only when one remains lit after about a minute should you begin the diagnostic process. Below you'll find the meaning of each LED and a list of practical checks to resolve the issue.
CPU LED (processor)
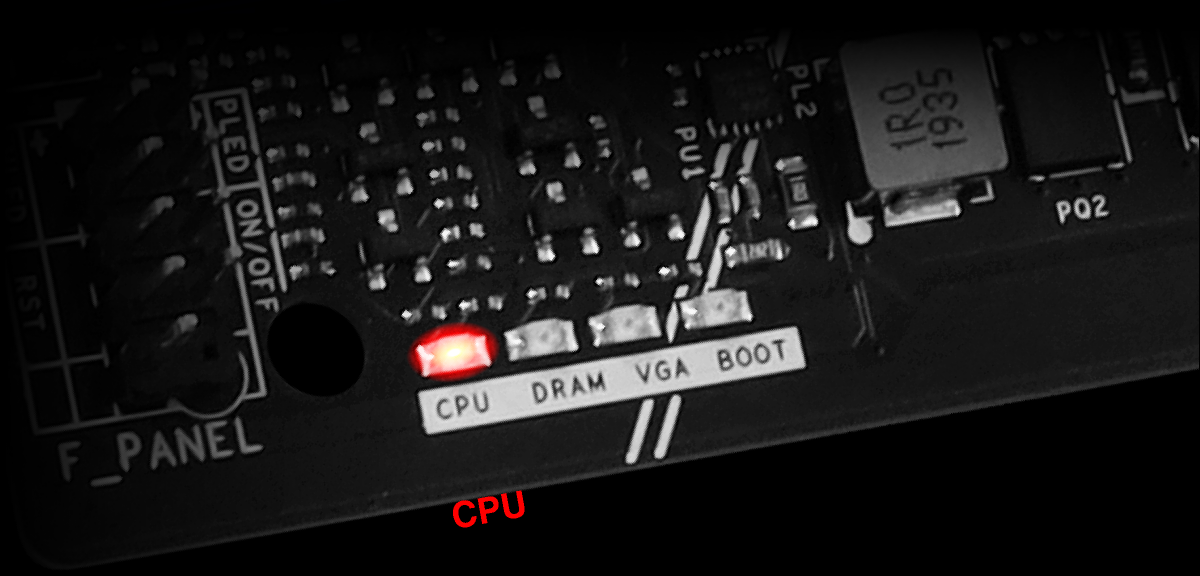
This LED illuminates when the motherboard fails to detect a valid processor or encounters a fault related to it. The most common causes are an improperly seated CPU, damaged pins, or a disconnected EPS power supply ; it can also be due to an outdated BIOS that doesn't recognize your CPU model.
Troubleshooting Guidelines: 1) Power off and unplug the computer. 2) Remove the heatsink, extract the CPU, and check for bent pins and excess thermal paste on the contacts. 3) Carefully reinstall the CPU , applying thermal paste and reattaching the heatsink. 4) Ensure the CPU power cables (4/8 pin) are connected to the power supply. 5) Clear the CMOS to rule out unstable settings. 6) If your motherboard allows it, update the BIOS ( USB BIOS FlashBack on ASUS, for example) to add compatibility with newer CPUs.
In rare scenarios, the CPU may function but with erratic performance due to a non-essential signal pin with poor contact; in that case, the computer may start without the LED lighting up , but you will notice performance drops or instability under load.
DRAM LED (RAM memory)
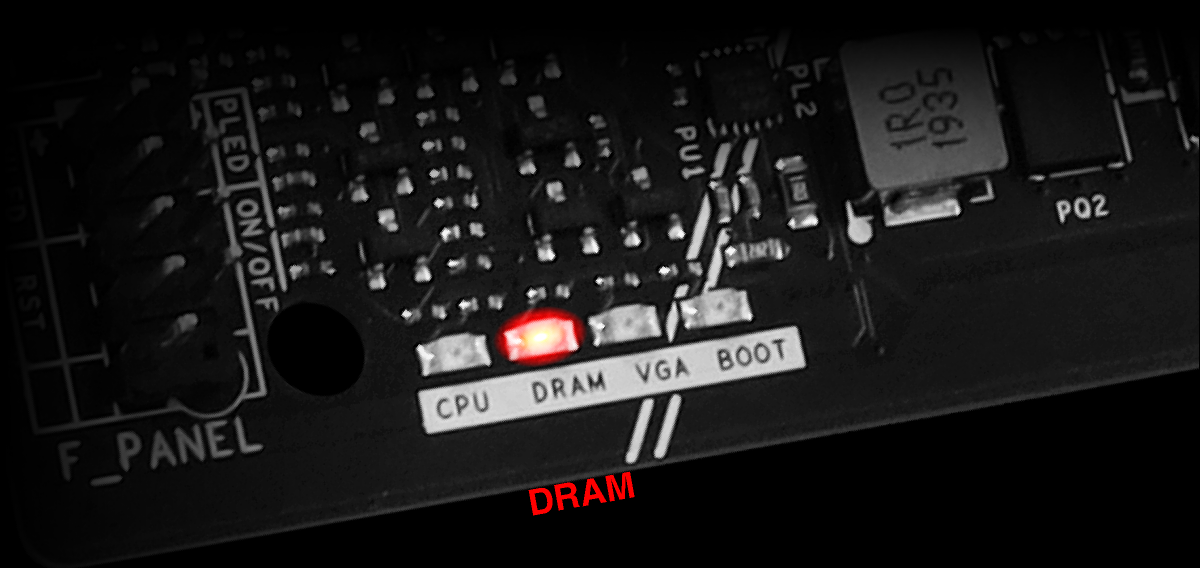
It lights up when no modules are detected or there's a memory problem. This is often because the modules aren't inserted until both tabs are clicked . Aggressive XMP/EXPO profiles or combinations of different kits can also cause this.
Recommended steps: 1) Reinstall the RAM and check that the tabs close automatically when pressed. 2) Try booting with only one module in the correct slot (usually the second one from the CPU). 3) Swap modules and slots to identify if one is faulty. 4) Clean contacts and sockets for dust. 5) Disable XMP/EXPO or reduce frequency/voltage in the BIOS if the memory was overclocked. 6) Check the manufacturer's QVL (Qualified Value List); if your kit is not listed, there may be incompatibilities. 7) If the problem persists, check the CPU pins: a bent pin can cause DRAM errors even if the modules themselves are good.
VGA LED (graphics card)
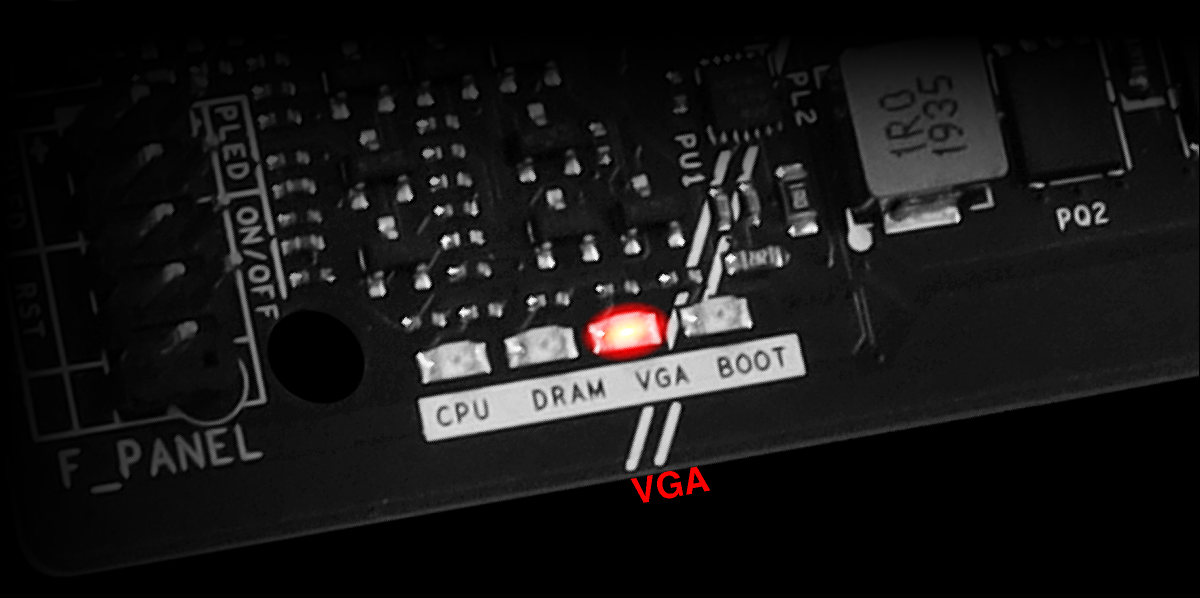
This LED illuminates when no GPU is detected or there is a video output failure . The most common causes are forgetting the 6/8-pin PCIe connectors or the card not being properly seated in the slot, so start by checking the physical installation.
Checklist: 1) Secure the PCIe power cables to the GPU and ensure the PCIe slot latch is engaged. 2) Try a different PCIe x16 slot if your motherboard has one, or inspect the current slot for damage. 3) Clean the contacts and the PCIe slot . 4) Verify that the monitor is connected to the dedicated GPU output if you're using one, or to the motherboard if you're using an integrated GPU (iGPU). 5) Test the card in another PC or install a different GPU in your system to isolate the problem. 6) If the LED illuminates when the system is running ( black screen on the desktop, fans at full speed), it could be a driver/VBIOS issue or a faulty GPU.
Important: Many AMD Ryzen processors without a G suffix and Intel processors with an F suffix do not include an integrated GPU . In these cases, without a dedicated graphics card, there will be no video signal, and the VGA LED may remain lit.
BOOT LED
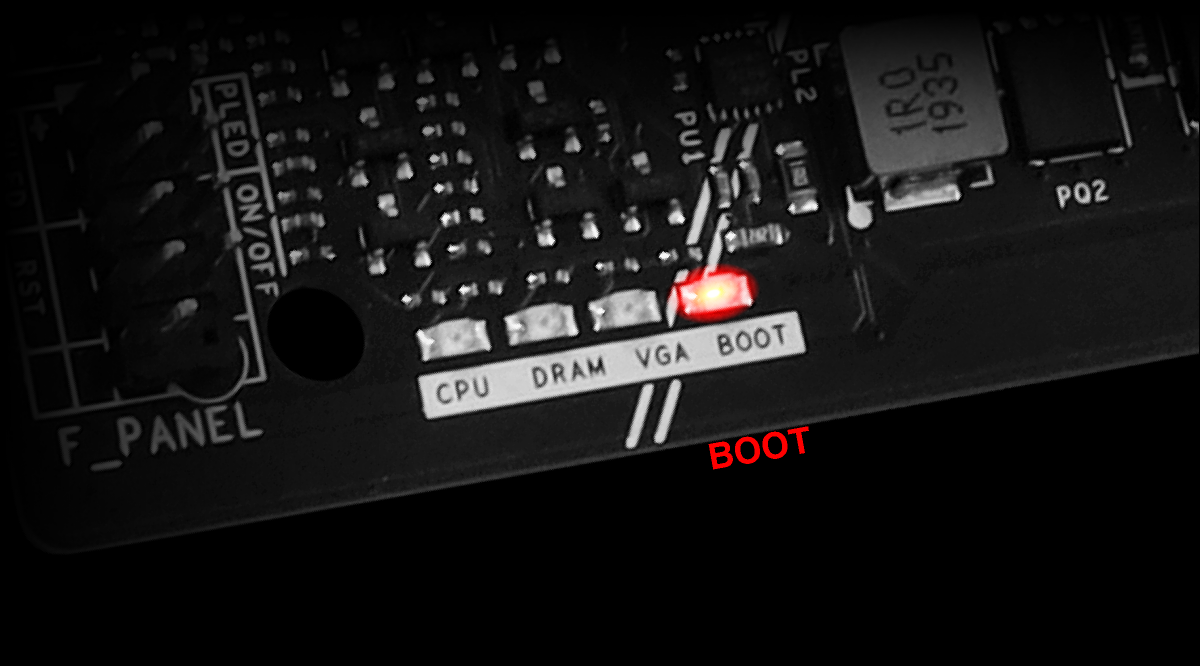
It lights up when the motherboard doesn't detect a valid boot device or can't find an operating system. If you've just built your PC and haven't installed Windows or your Linux distribution yet, this is normal: install the system before you worry.
For SATA drives: 1) Check data and power cables. 2) Try a different SATA port in case one is sharing bandwidth and disabled. 3) Try a different SATA cable . For M.2 drives: 1) Check slot compatibility (SATA vs. NVMe) and chipset compatibility. 2) Reinstall the M.2 SSD and screw it in securely. 3) Ensure the contacts are clean. 4) Consult the manual in case certain slots are disabled depending on the configuration.
Don't forget to enter the BIOS/UEFI to confirm the boot order and prioritize the correct drive. On some motherboards, instead of the BOOT screen appearing, you'll see an on-screen message indicating that there is no boot device.
When your board doesn't have diagnostic LEDs
Many entry-level or older motherboards lack debug LEDs. In that case, there are two classic alternatives: the system speaker and the code display. The speaker emits short/long beeps that encode POST errors ; the exact table depends on the BIOS (AMI, Award, etc.).
High-end motherboards commonly feature a two-digit display showing hexadecimal codes. This is very practical for accuracy, although consulting the manual is necessary to interpret each value. In terms of convenience, LEDs are the most visually appealing and simplest , while the speaker allows for troubleshooting without opening the case if it's already installed.
If your computer doesn't have a built-in speaker, you can easily add one, as it usually connects to a four-pin header on the motherboard. Again, your model's manual will show the exact connector and the beep code table for your BIOS.
Preliminary steps and resolution tips
Before you delve into the disassembly process, perform these quick checks: 1) Let the system attempt to boot for a minute: the LEDs may blink without indicating a fault. 2) Check all power cables (ATX 24-pin, EPS CPU, PCIe GPU, SATA). 3) Disconnect USB and non-essential peripherals during testing.
Compatibility: Verify that your CPU, memory, and SSD are supported by your motherboard (refer to the QVL and CPU list). For older motherboards with modern CPUs, a BIOS update may be necessary to add support . Some ASUS motherboards allow USB BIOS FlashBack without the processor installed, which greatly simplifies the update process.
Minimal configuration: Try booting with the bare essentials (CPU, one RAM stick in the recommended slot, GPU if needed, and a single hard drive). Clearing the CMOS helps rule out overclocking or unstable settings (XMP/EXPO) as the source of the problem.
Other common causes: A dead CMOS battery can erase settings and prevent the computer from booting; replacing it (CR2032 in most ATX/mATX systems) is cheap and quick. A faulty power supply can also cause identical symptoms: try the PSU in another computer or swap out the modular cables if you have spares.
Keep in mind that some motherboards display red lights even when functioning; if the device starts without symptoms, consult your model's manual to confirm the exact meaning. When the LED remains solid and there is no POST, it indicates a real error that requires further investigation in the relevant section.


Passionate writer about the world of bytes and technology in general. I love sharing my knowledge through writing, and that's what I'll do on this blog, show you all the most interesting things about gadgets, software, hardware, tech trends, and more. My goal is to help you navigate the digital world in a simple and entertaining way.