- A disk image is a sector-by-sector copy that includes system, data, and boot metadata.
- Windows and macOS offer built-in tools, but specialized software provides more control and reliability.
- Images allow for quick restoration, migration to new disks, and working on copies instead of damaged disks.
- Advanced read and error handling options are key when dealing with faulty drives or professional environments.
If you're planning to replace your hard drive, upgrade from an HDD to an SSD, or protect your PC from failure, creating a full disk image is one of the best things you can do. Essentially, it allows you to have a bit-by-bit copy of your entire system—Windows, programs, settings, and data—ready to restore if something goes wrong or you get a new drive.
Instead of reinstalling Windows from scratch, downloading programs, entering license keys, and configuring everything again, you can create a full disk image and copy it to another disk . It's like freezing your PC in a specific state and being able to return to it whenever you want, whether after a disaster or on a new computer with compatible hardware.
What exactly is a disk image and how does it differ from a clone?
A disk image is a single file that contains a sector-by-sector replica of an entire disk or partition. It saves not only the files visible in Explorer, but also the file system, boot sector, partition tables, and other metadata that Windows needs to boot and function.
When you create an image, the software generates a file (or several, if it's split) that you can save to another internal drive, an external hard drive, a NAS, or a network drive . Later, that image can be restored to the same drive or a different one, leaving the system in the exact state it was in when you made the backup.
In contrast, disk cloning is a process in which data is copied directly from one physical disk to another , sector by sector, without passing through an intermediate file. The result is a second, bootable disk that is a functional and independent copy of the original.
While cloning is ideal when you want to migrate from one disk to another on the spot (for example, swapping your HDD for an SSD on the same computer), disk images are more flexible as a backup solution: you can store them compressed, schedule them, and maintain multiple points in time.
Common image formats vary depending on the platform and use: on Windows you'll see many ISO, VHD, or VHDX files ; on macOS the DMG format is very common; and in virtualization environments, containers like VDI (VirtualBox) or VMDK (VMware) are used. They all share the basic idea: to simulate a real disk or volume within a file.
Why creating a full disk image is worthwhile
The main advantage of a disk image is that it protects absolutely everything on your drive , not just individual documents. This includes the boot sector, system settings, installed applications, drivers, and user data—crucial when your priority is getting back to work quickly.
From a data recovery perspective , a disk image allows you to work on a copy rather than the damaged physical disk , reducing the risk of the device failing completely while you attempt to recover important files. Recovery tools can read the image as if it were the original disk.
Furthermore, disk images are a lifesaver for reducing downtime at home or in a business . By regularly creating system images, you can restore your computer to a working state after a serious hardware failure or malware attack in far less time than by reinstalling and configuring everything.
They are also widely used in system deployment: with a single master image you can clone identical Windows configurations and applications to multiple computers or servers, always ensuring hardware compatibility to avoid driver or activation problems.
If you're going to upgrade your storage, for example by installing a faster SSD or a larger capacity hard drive, you can directly restore the image of your old drive to the new one and continue working as if nothing had changed, saving you the hassle of reinstalling everything from scratch.
Creating a disk image in Windows 10 and 11: options and limitations
Windows 10 and Windows 11 include a legacy feature called Backup and Restore (Windows 7) that still allows you to create system images. It works, but it's an outdated tool with a somewhat clunky interface and is quite prone to errors when you start using large external drives or network locations.
Common messages you might encounter when using this utility include warnings like “The drive is not a valid backup location ,” space issues with volume snapshots, or the dreaded “No disk found that can be used to recover the system disk.” All of this means that, while it can be a temporary fix, it's neither the most convenient nor the most robust option.
For all these reasons, many users end up using specialized disk imaging software , which offers better compatibility with modern hardware (SSD, NVMe, RAID, NAS), more formats, compression, encryption, scheduled tasks, and options to accelerate transfers . The idea is the same, but with more control and much less frustration.
In practice, today you have three main paths in Windows: use a free disk copying program , opt for an enterprise-level solution to manage many computers, or stick with Microsoft's built-in tool, knowing its limitations.
Freeware to create a complete disk image in Windows
In the field of free software, the idea of using tools capable of creating complete hard drive images, including hidden partitions , at the sector level, stands out. This approach applies to Windows versions ranging from XP and Vista to 7, 8.x, 10, and 11.
Serious programs of this type are usually compatible with multiple file systems (NTFS, FAT16/32, EXT2, EXT3, etc.) and allow you to save the image to almost any type of media: USB disks, SSDs, flash drives, network storage (NAS), hardware RAID arrays, or even dynamic disks.
In addition to full disk images, many of these utilities allow you to back up specific files and folders, individual partitions, or just the operating system . In other words, you can decide whether you want a general copy of the entire disk or something much more granular.
A key point is that they usually offer advanced options such as email notifications, different levels of compression (to save space at the cost of longer processing time) or "smart" copy modes, which only read used sectors instead of doing a bit-by-bit dump of the entire disk, which speeds up the process considerably.
It's also very common for these programs to allow you to create WinPE-based boot media . Thanks to them, you can boot your PC from a USB drive or DVD even if Windows won't start, and from that environment restore a disk or system image without loading the installed operating system.
Enterprise-level disk backups and centralized management
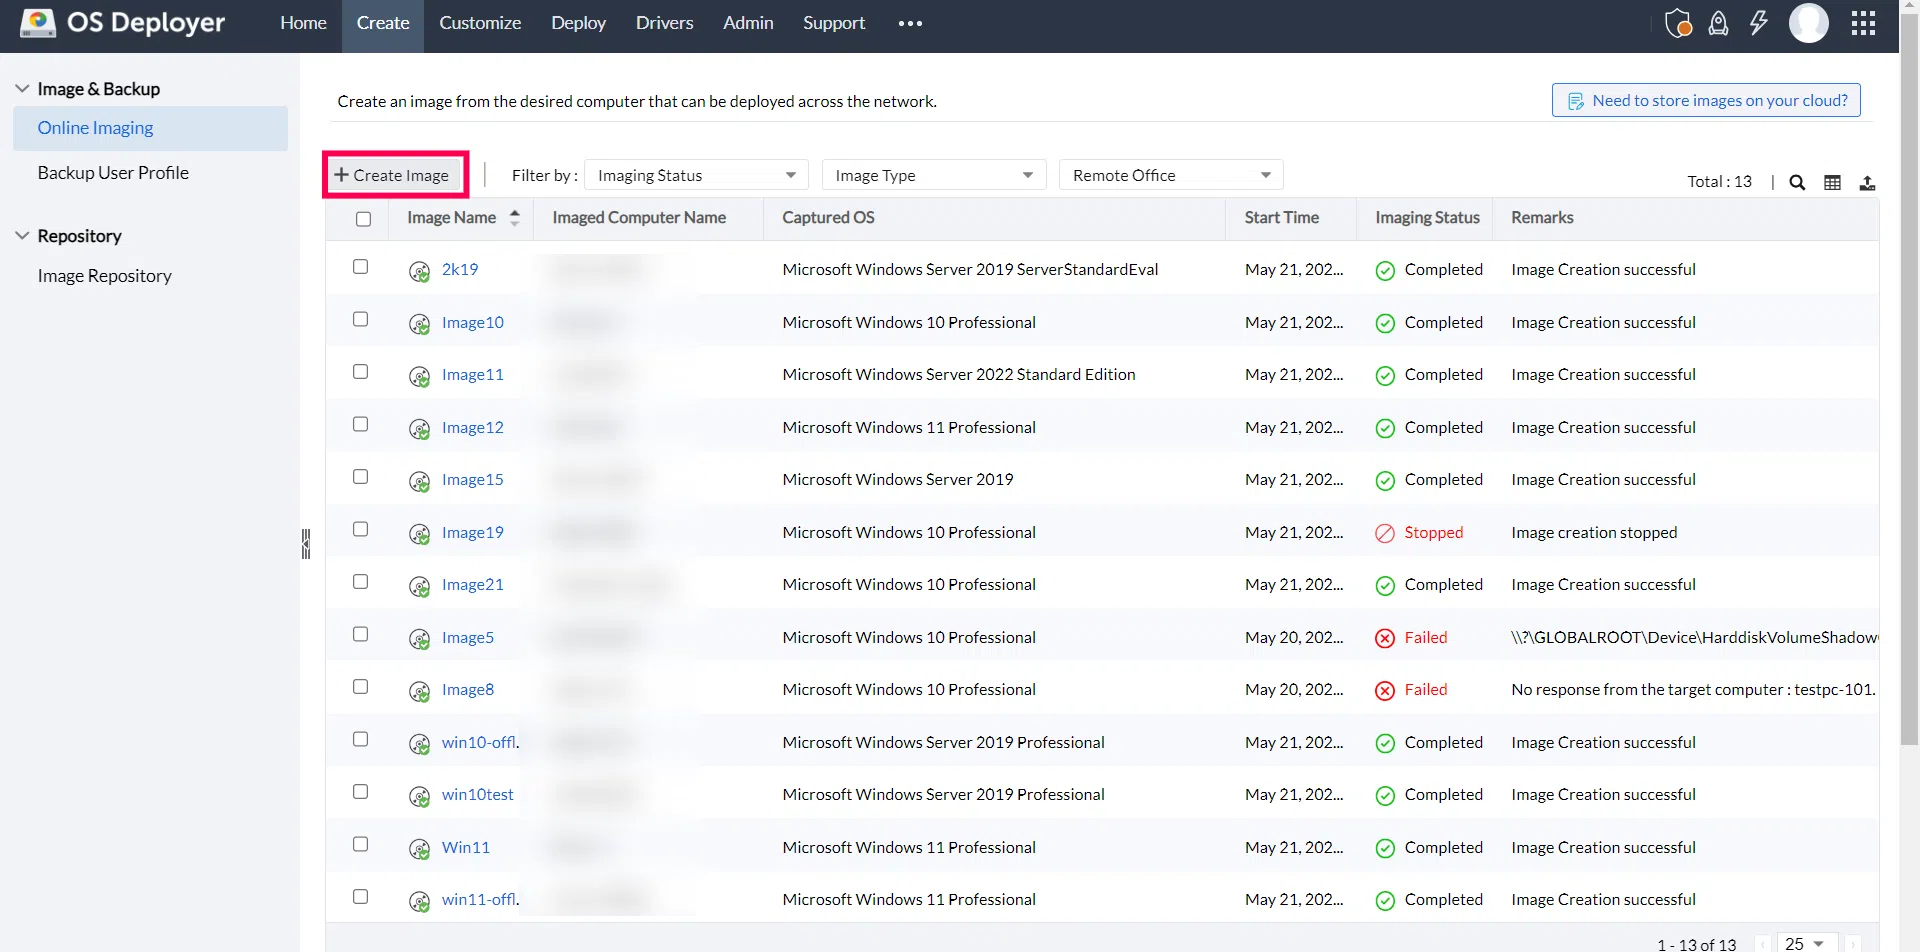
When dealing with multiple machines, such as in an office or small business, the ideal solution is to use enterprise backup software with a centralized console . This allows you to manage backups of systems, disks, or partitions across a group of PCs from a single control panel.
This type of solution allows you to register each Windows computer with its IP address, username and password , assign it to a disk backup task, define which drives are included and choose where the images will be saved (local server disk, NAS array, shared resource, etc.).
Typically, they accept scheduled daily, weekly, or monthly backups , and you can choose between full, incremental, and differential backups. This reduces disk space usage and network traffic, as only the blocks that change are copied.
The main advantage is that, in the event of a system failure, you can restore its image from that console , using the most recent backup or a previous version. In environments with many computers, this type of tool saves hours of manual work.
In their most powerful version, some suites even allow you to deploy or restore system images to multiple computers at once over the network, ideal for classrooms, training rooms or companies that frequently renew their PC fleet.
Use the built-in Windows tool to create a system image
If you want to use what the system already has, Windows offers the option to create a system image from the Backup and Restore panel (Windows 7) . It's a bit hidden, but it still works in Windows 10 and 11.
The standard method is to search for "backup" in the Start menu , open Backup settings, and click the link to "Backup and Restore (Windows 7)." From there, the "Create a system image" option appears on the left.
When you launch it, Windows automatically selects the drives needed to boot the operating system (usually the system reserved partition and the C: drive), and lets you choose a destination: external hard drive, DVD, or a shared network folder.
If you want to include other partitions (for example, D: with your data), you can manually select the additional drives you want to protect . When you accept and click "Start backup," the disk image will begin to be generated and stored in the chosen location.
Later on, if you change your hard drive or have a serious problem, you can boot from a Windows recovery medium and restore that image to a new disk, leaving your PC as it was at the time of the copy.
Popular programs for creating and restoring disk images in Windows
In the Windows ecosystem, there are several widely used tools for creating and cloning disk images , some free and others paid, each with its own approach. It's helpful to know the most prominent ones to choose the one that best suits your needs.
Macrium Reflect is one of the most highly rated solutions because it allows you to create full, incremental, or differential images , so that not all the content is repeated each time, only what has changed since the last backup. This significantly reduces the space occupied on your external hard drive.
Among its interesting features is the ability to create a bootable USB drive or disk directly from the program. This way, if Windows fails to start, you can boot from that media and restore an image saved in the help partition or on another disk.
For those who want something extremely simple, tools like ODIN focus on the basics: creating and restoring images . They typically use formats like IMG, offer compression to save space, and in some cases, don't even require installation: just run them and you're done.
Active Disk Image takes this a step further by allowing you to create and restore images on almost any media : internal and external hard drives, SSDs, USB drives, CDs, DVDs, and even Blu-ray discs. Furthermore, it offers the option to mount the image as a new drive visible in Windows Explorer, letting you access your files without having to restore the entire disk.
If you're looking for something lightweight and straightforward, utilities like Dubaron DiskImage follow a philosophy of simplicity: create the image, compress it, verify its integrity, and restore it wherever needed . They're good options when you only want a one-off backup of your main disk.
For pure cloning, HDClone focuses on creating exact copies of entire hard drives , both internal and external. You can use it as a regular Windows program or boot from a USB drive or DVD using its own ISO image, which is very useful when the system won't boot or when you want to clone drives without interference.
Seagate, for its part, offers DiscWizard, designed to migrate data from an old disk to a new one (HDD or SSD, internal or external). Its features include creating compressed images, subsequent restoration, scheduling backups, and incremental and differential modes to save space.
Creating disk images in macOS with Disk Utility
On a Mac, you can also create full disk images using the Disk Utility app included in macOS . This tool allows you to create a file that contains both the data and the free space of a physical disk or connected device.
For example, if you have an 80GB USB drive with only 10GB occupied, the created image can reserve the entire 80GB logically, including data and empty space , which is very useful if you want to replicate the device exactly as it is on another volume later.
The typical procedure involves opening Disk Utility, selecting the disk, volume, or device in the sidebar, and going to the File menu > New Image > “Image of”. There you choose a filename, tags, and the location where the image will be saved in the Finder.
Next, you select the image format . Common options include read-only images (UDRO), compressed read-only versions (ULFO), RAW images that allow you to add or delete files after creating them, or the "DVD/CD master" format, which copies all sectors, whether in use or not, ideal for creating identical optical discs.
If needed, you can also protect the image with encryption from the Encryption menu. Once you confirm, Disk Utility creates the file, saves it to the chosen location, mounts the icon on the desktop, and displays it in the Finder sidebar as if it were another drive.
Disk imaging on damaged media and advanced read control
When the disk you want to image is damaged by hardware or gives constant read errors, it is advisable to take extra precautions and use imaging tools with advanced I/O control options , such as those integrated into professional suites like UFS Explorer.
The idea in these cases is to first create an image of the problematic disk and only then work on that copy with data recovery tools , reducing risks to the physical device. To achieve this, the software offers very fine-tuning of the read operation: block size, number of retries, wait times, and handling of bad sectors.
The first step is to select the affected disk or partition and choose an option such as “Save content to image file .” Before proceeding, many tools display warnings reminding you not to save the image to the same damaged disk or to drives that also need recovery.
Next, you choose the source area: you can copy the entire storage bit by bit , just a specific partition (with predefined sector ranges), or even several custom ranges, including or excluding specific areas. This is useful when you know which parts of the disk are in the worst condition or if you want to reread specific blocks.
Depending on the software, you can also choose simple images the same size as the chosen area , sparse images that only save relevant blocks (e.g., file system metadata), or proprietary forensic analysis formats such as E01, as well as directly generating a VHDX virtual disk that you will then mount in Windows.
If you want to clone instead of creating an image, some programs allow you to copy directly from the source disk to another physical disk . In this case, it's crucial that the destination has at least the same capacity as the selected area. For example, if you're cloning a 1 TB partition, the destination must offer at least 1 TB of free space.
Key settings for reading problematic disks when creating the image
In professional recovery environments, parameters such as the minimum sector size for imaging are fine-tuned . Many modern disks have 4 KB physical sectors, so the software usually sets this value by default. For other disks, you can choose between 512 bytes or 4 KB depending on whether you want to reduce retries or minimize the loss of blocks adjacent to a damaged sector.
The read buffer size is also defined ; that is, how much data is read "at once." Values around 64–128 KB typically balance performance and accuracy, allowing for efficient linear reading without skipping errors or putting undue stress on the disk interface or USB adapters.
Another important parameter is the read direction . Normally, you read from beginning to end, but if you suspect that the defects are concentrated at the beginning of the disk, you can reverse the strategy and start reading from the end in large blocks, to reduce the risk of aggravating mechanical damage in the most affected area.
The access mode is also adjustable: you can use the operating system's procedure , which is compatible with everything but offers little control over errors, or direct modes such as Direct SCSI or Direct ATA (depending on the platform), which allow for more accurate diagnostics of read failures and prevent the system from hanging up on severely damaged blocks.
The combination of read timeout and retry count is critical: if the timeout is too short, you'll end up skipping many barely readable sectors; if it's too long, you can put excessive stress on the disk. Similarly, a high number of rereads of a problematic block can cause rotation defects, while a very low value can leave potentially recoverable data unread.
Finally, the location of the defect map and the log file are defined , where unrecoverable blocks and error events are stored. These files are then used to diagnose the physical condition of the disk and decide whether it is worthwhile to continue the recovery process or to consider certain sectors lost.
Two-step strategies for managing errors when generating the image
When dealing with severely damaged disks, some programs use two-step or multi-step read strategies: for example, a number of blocks can be automatically skipped after a certain number of consecutive bad sectors , resuming the read from a later position to avoid getting stuck.
If errors persist after resuming the read operation, a second and third skip can be configured with different skip sizes until the software finds a stable area to continue in "normal mode." This technique prevents the drive from repeatedly attempting to read unsuccessfully from the same broken section.
Some tools even allow you to check, after each serious error, whether the disk is still responding with test reads in a known "safe zone" (for example, sector zero or sectors near the end of the disk). If even that block is unreadable, it might be best to stop the process before causing further damage.
The combination of these advanced options makes professional image generators indispensable allies when the goal is to rescue data from disks on the verge of collapse , always with the image as an intermediate copy on which to do the actual recovery work.
Disk images that contain other images and special fonts
In forensic analysis or complex migration contexts, there is software capable of creating a disk image that, in turn, includes other images and files of different formats . This allows for creating sub-images, converting between formats (for example, from a proprietary container to VHDX), or transferring data from an image file to a physical disk.
When the original source is connected via specialized recovery devices (such as DeepSpar-type hardware), the tools usually display specific dialog boxes that allow you to coordinate the imaging process with that external equipment, viewing the progress and result directly in the main software.
These types of workflows are somewhat more advanced than what a home user needs, but they illustrate the extent to which disk imaging is the foundation of any serious recovery and analysis strategy , in both home and professional environments.
Mastering disk imaging allows you to preserve your computer's contents, maintain clean copies of your operating system, migrate to new disks seamlessly, and minimize the risk of data loss when something goes wrong. By combining the right tools for each platform (Windows, macOS, damaged hardware, or corporate networks), you'll always have a robust backup plan for your most important information.


Table of Contents
- 1 What exactly is a disk image and how does it differ from a clone?
- 2 Why creating a full disk image is worthwhile
- 3 Creating a disk image in Windows 10 and 11: options and limitations
- 4 Freeware to create a complete disk image in Windows
- 5 Enterprise-level disk backups and centralized management
- 6 Use the built-in Windows tool to create a system image
- 7 Popular programs for creating and restoring disk images in Windows
- 8 Creating disk images in macOS with Disk Utility
- 9 Disk imaging on damaged media and advanced read control
- 10 Key settings for reading problematic disks when creating the image
- 11 Two-step strategies for managing errors when generating the image
- 12 Disk images that contain other images and special fonts