- GRUB_TIMEOUT_STYLE controls visibility; GRUB_TIMEOUT defines how long the menu remains.
- Special values: 0 starts immediately; -1 waits indefinitely without selecting input.
- Apply changes by regenerating with sudo update-grub and, if necessary, use Grub Customizer.
- For display problems, try i915.modeset=1 and GRUB_GFXMODE=auto.
When you change the GRUB_TIMEOUT value but the boot menu doesn't appear, it feels like you're adjusting something the system is ignoring. In practice, there's usually another setting that takes precedence over the timeout, which is why the menu remains hidden even though you've correctly modified the configuration file. The key is understanding how GRUB_TIMEOUT and GRUB_TIMEOUT_STYLE interact and applying the changes safely.
In this article, you'll find a clear and in-depth explanation for resolving the common issue of "the GRUB menu not displaying after changing GRUB_TIMEOUT." We'll review the /etc/default/grub file , discuss inherited variables that might still be interfering, go over special timeout values, and also show you a graphical alternative with Grub Customizer if you prefer not to use the command line. Additionally, we've included diagnostic solutions in case the problem persists on systems with Intel graphics or in other specific scenarios.
Why doesn't the GRUB menu appear even if I change GRUB_TIMEOUT?
The first thing is to understand that GRUB_TIMEOUT does not decide on its own whether the menu is displayed. The visibility of the menu is mainly controlled by GRUB_TIMEOUT_STYLE, which can be configured as hidden (hidden) or menu (show menu). If you are in hidden, time passes “in the shadows” and, therefore, you do not see the list of systems or cores. Setting GRUB_TIMEOUT=10 will not make the menu appear si GRUB_TIMEOUT_STYLE remains hidden.
In modern systems, the relevant setting is in /etc/default/grub. If you want to see the menu, make sure that Grub_timaout_style = menu. This is especially useful if you need change boot order in dual-boot configurations. Otherwise, even if you set a generous time, the user won't see anything on the screen. This setting is the one most overlooked when you change only GRUB_TIMEOUT and you notice no effect.

It is worth remembering the special values de GRUB_TIMEOUT: if you put 0, the system boots immediately without showing the menu at all; if you put -1, the charger will wait indefinitely to choose an entry. In addition, in many distributions the value GRUB_TIMEOUT=5 is the default, meaning that if the menu is displayed, the default option will be selected after five seconds of inactivity. Choosing the right value It depends on whether you want interaction or auto-start.
On single-OS machines, some distributions configure the boot so that the menu is not displayed by default. This is intentional to simplify the experience for newcomers, but advanced users prefer to see the menu to choose older kernels or access advanced options. In these cases, putting GRUB_TIMEOUT_STYLE=menu or with a GRUB_TIMEOUT greater than zero is usually sufficient. If you still don't see anything, review the inherited variables we discussed below.
Historically, some configurations included GRUB_HIDDEN_TIMEOUT y GRUB_HIDDEN_TIMEOUT_QUIET. These lines can hide the menu silently and cancel your intention to show it with GRUB_TIMEOUT. If you find them, the most practical thing is to comment on them by prefacing them with the character # so that they do not apply. This way you avoid conflicts with modern GRUB logic; if you reach a critical point you may also be interested in how fix GRUB rescue when the charger does not start.
Finally, do not forget that after any change in /etc/default/grub you must regenerate the configuration running sudo update-grub. This command recreates the effective configuration file from your preferences. If you skip this step, you won't see any effect upon restart, even if you've edited everything correctly; it's also good to know practical examples of efibootmgr if you work with UEFI entries.
Quick checks of the /etc/default/grub file
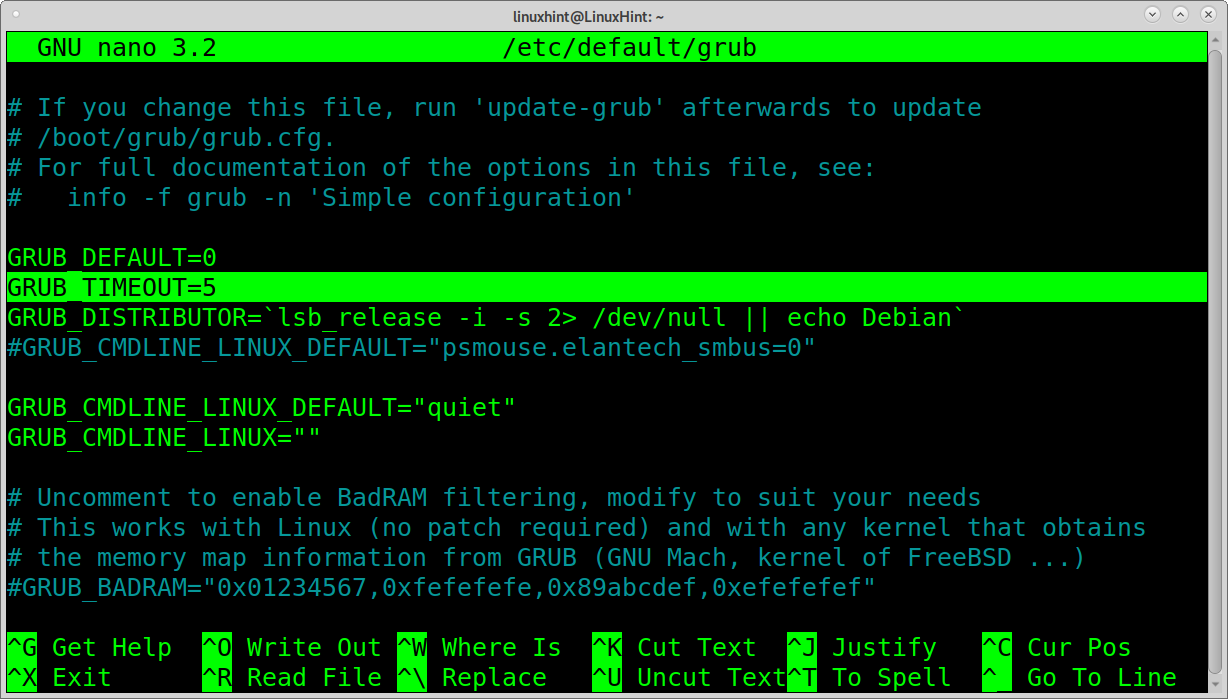
Open the configuration file with your favorite text editor and administrator privileges. On GNOME systems, you can use gnome-text-editor or gedit , and of course, you can also opt for nano or vim. A couple of convenient examples would be: `sudo gnome-text-editor /etc/default/grub` or `sudo gedit /etc/default/grub` , depending on what you have installed.
sudo gnome-text-editor /etc/default/grub
# o bien
sudo gedit /etc/default/grub
Once opened, look for the line GRUB_TIMEOUT_STYLE. If it is like hidden, change it to menu. Then check the time and the special value you set. An example of a functional block could be the following:
GRUB_TIMEOUT_STYLE=menu
GRUB_TIMEOUT=10
GRUB_DEFAULT=0
#GRUB_HIDDEN_TIMEOUT=0
GRUB_HIDDEN_TIMEOUT_QUIET=true
GRUB_CMDLINE_LINUX_DEFAULT='quiet splash'
GRUB_CMDLINE_LINUX=''
Note that the lines GRUB_HIDDEN_TIMEOUT y GRUB_HIDDEN_TIMEOUT_QUIET can force silent behavior. If you want to make sure you see the menu, leave the first one commented out as in the example. Also, if you wish, change GRUB_TIMEOUT a -1 will allow the menu to remain on hold indefinitely. Useful for laboratory equipment or to diagnose complex startups.
Save the changes and perform a GRUB regeneration. Without this step, as mentioned, the system will continue using the previous configuration, and your edit will appear ineffective. The key command is:
sudo update-grubWhen finished, restart to validate. On many computers, you can force the menu to appear during startup by holding down the Shift key on systems with legacy BIOS or the Esc key on systems with UEFI, which is very useful for testing. If it still doesn't appear , continue with the troubleshooting section; and if you're working with UEFI firmware, you can consult how to use the UEFI shell for advanced diagnostics.
GRUB2 vs GRUB Legacy: Where to Change the Timeout
The vast majority of current distributions use GRUB2, but there are still old systems with GRUB Legacy. Knowing which version you have is very simple: go to /boot/grub and see if it appears grub.cfg (GRUB2) or, instead, menu.lst (Legacy). This detail determines the file and configuration keys you need to modify.
In GRUB2, as we have seen, preferences live in /etc/default/grub, and the correct flow is edit, save, and then run sudo update-grub for the file to be regenerated grub.cfg. This process is the recommended one by GRUB documentation and by most Debian and Ubuntu based distributions.
If, however, your system uses GRUB Legacy, the timeout is in the file menu.lst. You would just have to edit it as administrator with a graphical or terminal and adjust the directive timeout. An example of a typical line would:
timeout 10Save and restart to apply the change. Although this scenario is becoming less common, it's helpful to recognize it to avoid confusion. If you're unsure , check for the presence of the mentioned files and act accordingly to avoid editing the wrong locations; in some cases, it may be necessary to restore the original Windows bootloader if the previous installation used a different bootloader.
Activate and adjust the menu with Grub Customizer (graphical interface)
If you prefer to avoid the console, you can use Grub Customizer , a graphical tool that simplifies managing the boot menu in GRUB2 and Burg. With it, you can show or hide the menu, change the order of the entries, modify the default option, adjust the timeout, and even customize colors and the background image. It's very practical when you're looking for convenience and visual control.
On Ubuntu and its derivatives (such as Linux Mint), you can install it from its official PPA. The commands are simple and can be entered one after another in a terminal. Be sure to review the packages being installed and confirm when prompted.
sudo add-apt-repository ppa:danielrichter2007/grub-customizer
sudo apt update
sudo apt install grub-customizer
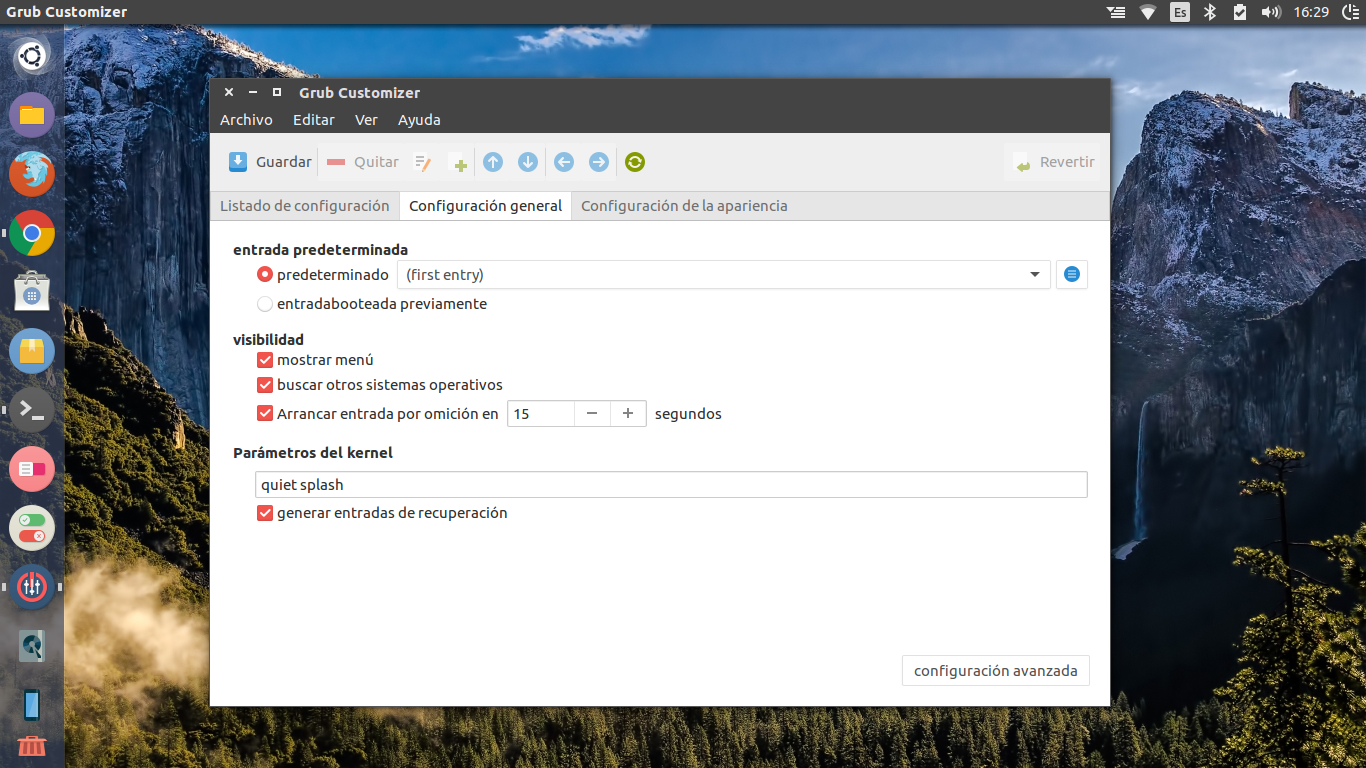
After installation, open it from the applications menu. You'll find three main tabs: List Settings , General Settings , and Appearance Settings . In the General tab, you can adjust the menu's visibility and the timeout. Don't forget to click Save to apply the changes, and reload the settings when prompted.
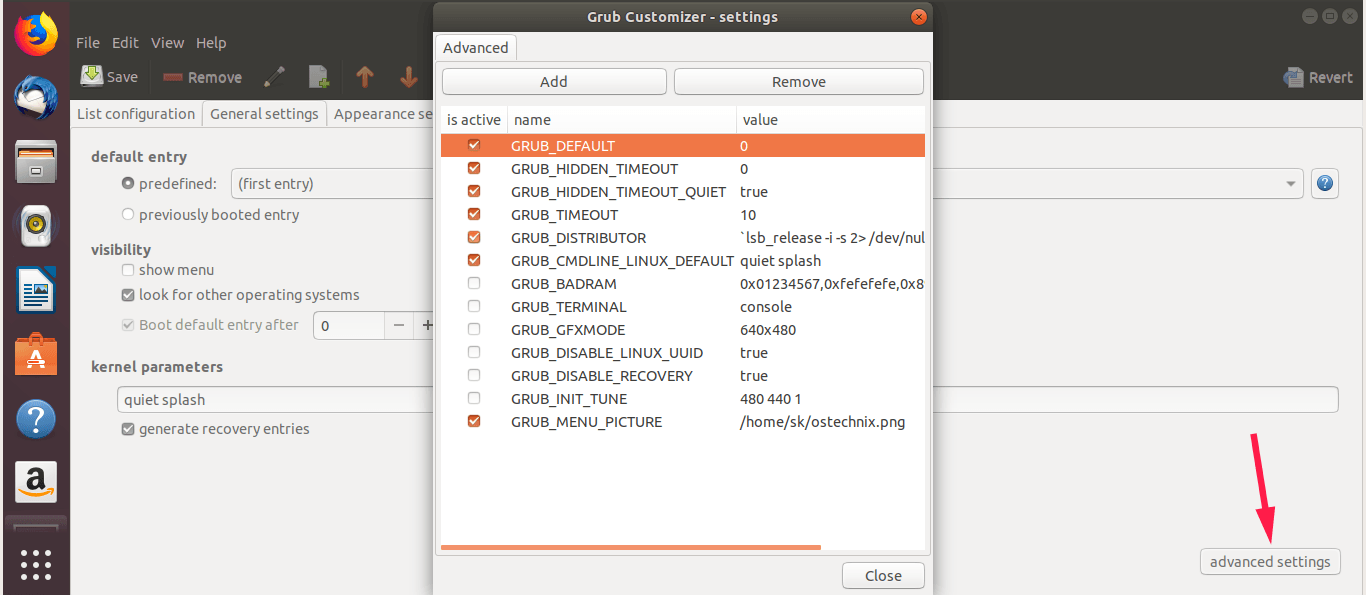
In the list tab, you can rename, delete, or reorder entries with a right-click, and change the font, colors, or background. There's also a section for Advanced configuration which exposes values such as GRUB_DEFAULT, GRUB_TIMEOUT o GRUB_MENU_PICTURE. Handle with caution if you are not familiar with each parameter.
Common problems and effective solutions
If you have adjusted GRUB_TIMEOUT_STYLE y GRUB_TIMEOUT and yet the menu still doesn't appear, think of causes related to graphics or video mode. On some computers with Intel HD Graphics, add the kernel parameter i915.modeset=1 has helped resolve display issues during boot. The idea is to stabilize the graphic mode which uses GRUB and the kernel at early boot.
To test it, edit /etc/default/grub and add that parameter in GRUB_CMDLINE_LINUX_DEFAULT along with others you already have (for example, quiet splash). In addition, it is advisable to return GRUB_GFXMODE a if you had him forced into a specific resolution. An example how it would look:
GRUB_CMDLINE_LINUX_DEFAULT='i915.modeset=1 quiet splash'
GRUB_GFXMODE=auto
Save, run sudo update-grub and reboot to check if the menu is now displayed correctly. If you don't notice improvement, removes the parameter i915.modeset to leave it as it was and regenerate GRUB again. On Manjaro-based systems, some users prefer to reinstall the card drivers with the utility mhwd After tweaking GRUB, using a command like sudo mhwd -a pci free 0300. This step is specific of that ecosystem and does not apply to all distributions. It is also worth reviewing problems arising from Secure Boot and UEFI which may prevent unsigned loaders from running correctly.
Another typical source of confusion is forgetting that, with GRUB_TIMEOUT=0, even with the style in menu, the boot will be immediate and you won't see anything. Raise that value 5, 10, or 15 seconds (depending on your preference) to give yourself room to maneuver. And if you're diagnosing a specific problem, GRUB_TIMEOUT=-1 It may be convenient for you because forces indefinite waiting until you choose.
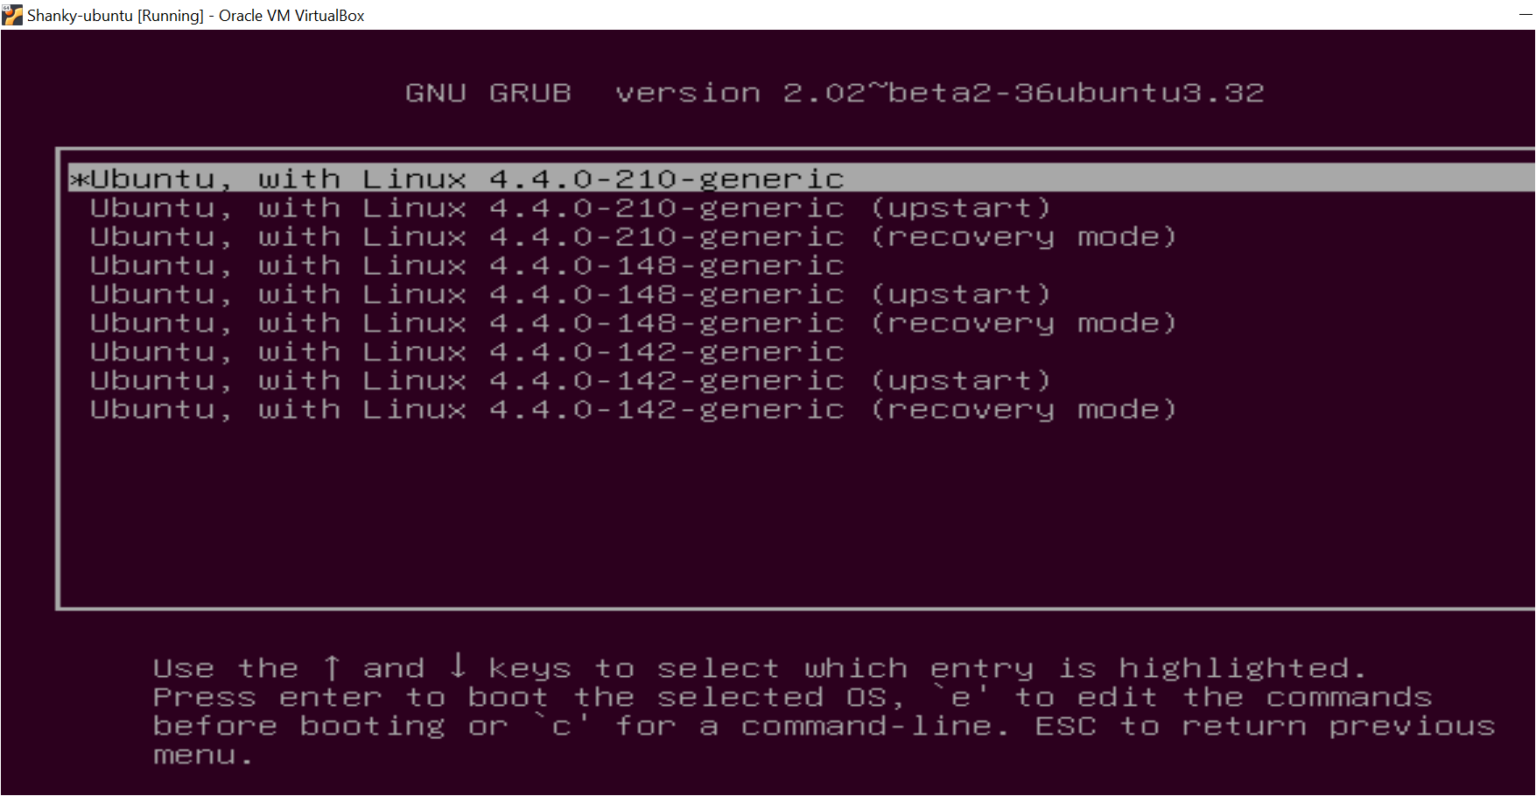
If you have multiple kernels installed, remember that in the GRUB menu's "Advanced Options" you can choose an older kernel if the latest one causes problems with a driver or module. Many distributions keep multiple kernels installed precisely for these situations. For example, if something goes wrong with a newer kernel, you can boot with the older one until you can apply a fix or reinstall a driver. This is a great lifesaver when a recent change breaks something.
Finally, avoid making changes to production systems while they're still active: ideally, test changes in a virtual machine or a controlled environment, verify that you get the desired behavior, and then deploy them to your main system. A small syntax error in the file can complicate the boot process if you don't catch it in time.
GRUB_TIMEOUT values and their actual effect
To recap precisely: GRUB_TIMEOUT=0 causes an instant boot without displaying the menu; GRUB_TIMEOUT=-1 keeps the menu on screen indefinitely; and any positive integer sets the number of seconds the menu remains visible before selecting the default option. The default value is usually 5 in many distributions.
The other piece of the puzzle is GRUB_TIMEOUT_STYLE. With menu, the menu is displayed and the time counts down on the screen; with hidden, time runs hidden. If you want to always see the menu, set menu. If you prefer to hide it but give a window to press a key, you can play with hidden and a time greater than zero, although the most direct way to debug is to use menu and positive time.
Also remember that some remnants of old configurations with GRUB_HIDDEN_TIMEOUT may interfere. Comment them with # It is a safe practice to prevent them from being triggered if your distribution still reads them somehow. In general, modern setup focuses on / Etc / default / grub and in regenerating with update-grub.
Display the on-demand menu during boot
Even with the menu hidden, many motherboards and firmware versions allow you to force its appearance with a key. In traditional BIOS systems, hold down the Shift key immediately after the BIOS screen appears; in UEFI systems, Esc usually works . This trick is very useful when you don't want to permanently change the settings but need to access advanced options occasionally.
If it doesn't work the first time, try restarting and pressing the key a little earlier. the exact moment in which it should be maintained can vary from one team to another. Have it clearly configured GRUB_TIMEOUT_STYLE=menu It's still the cleanest solution, but this shortcut can get you out of a tight spot. Don't rule it out if you urgently need to enter an older kernel or recovery mode.
Reference and additional documentation
To learn more about the configuration, available variables, and their syntax, you can consult the GRUB Texinfo manual in the section (grub) Top > Configuration > Simple configuration . It's the official source and will help you understand why certain combinations work the way they do, as well as cover less common options that we don't usually use on a daily basis.
And remember: if after editing /etc/default/grub the changes are not reflected, please reconfirm that you have executed sudo update-grub no errors and restarted. If the problem persists, check video parameters, custom entries, and the presence of files indicating whether you are using GRUB2 or Legacy in /boot/grub. A methodical verification usually solves 99% of cases.
You already know how to force the menu to appear, adjust the timeout to your liking, and what to do when nothing seems to work. From adjusting GRUB_TIMEOUT_STYLE and special values to using Grub Customizer or fine-tuning video parameters, you have a full range of solutions at your fingertips to make the GRUB menu reappear whenever you want.

Passionate writer about the world of bytes and technology in general. I love sharing my knowledge through writing, and that's what I'll do on this blog, show you all the most interesting things about gadgets, software, hardware, tech trends, and more. My goal is to help you navigate the digital world in a simple and entertaining way.