- Publisher allows you to create professional graphic materials quickly and easily.
- Includes editable templates and intuitive tools to customize text, images, and building blocks.
- Facilitates printing and exporting professional-quality projects from within the program itself.
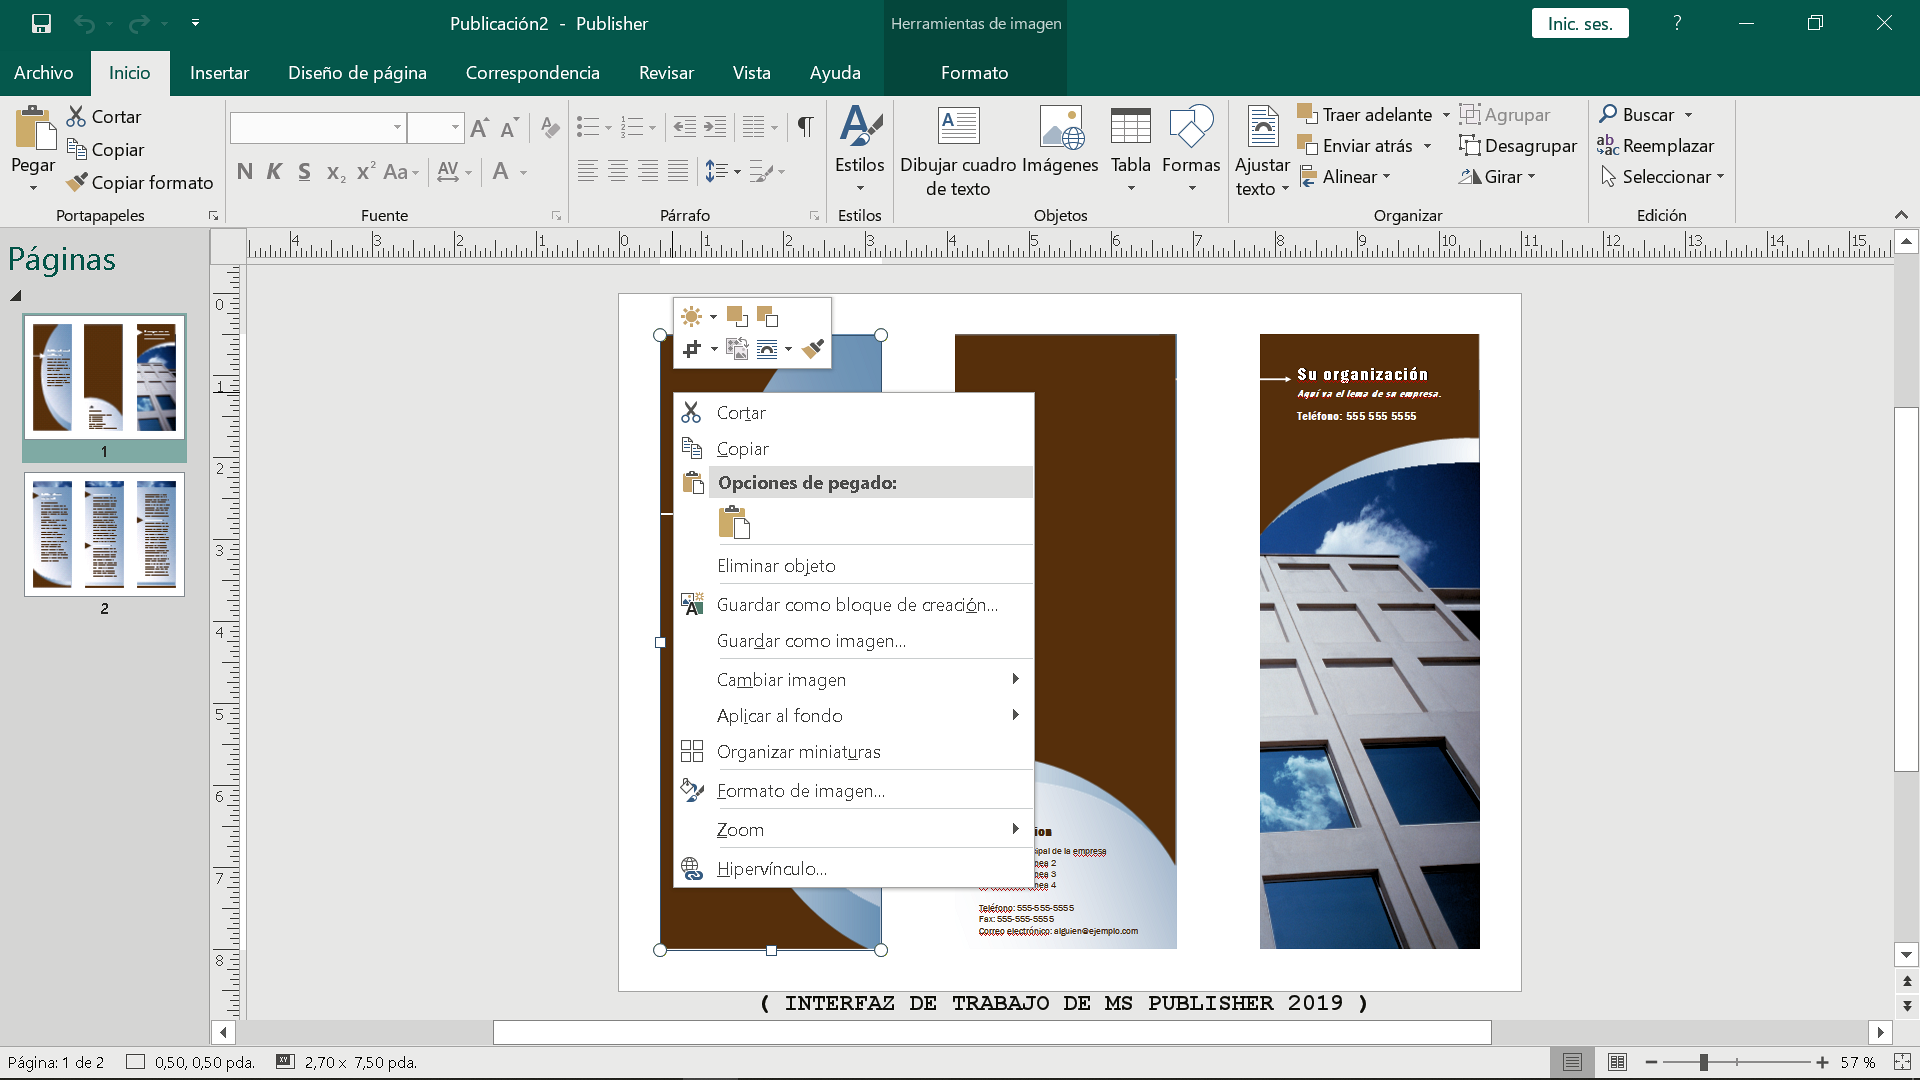
Would you like to design impactful advertising materials without being overwhelmed by complicated software? Microsoft Publisher is designed just for people like you, who want professional results quickly and easily without a long learning curve. With its intuitive approach and a wide range of ready-to-use templates, Publisher has become the ideal partner for business owners, teachers, students, and anyone who wants to stand out with unique designs.
This guide offers a detailed and engaging tour of all Publisher's key features, breaking down everything from the fundamentals to helpful tips and tricks that will save you time and help you get the most out of every graphic design project. If you're a beginner, you'll discover how to transform your ideas into tangible and attractive documents: cards, catalogs, brochures, labels, calendars, and much more—without being a design expert!
What is Microsoft Publisher and what are its benefits for beginners?
Microsoft Publisher is a desktop publishing program designed for creating visual and advertising documents . Its main appeal lies in its ease of use, especially compared to other professional design programs. While applications like InDesign or CorelDRAW require prior experience or specific training, Publisher provides any user with effective tools for laying out ideas and preparing them for printing or digital publication.
Among its advantages are the wide variety of pre-designed templates, which you can customize to your liking, and its seamless integration with other Office applications . This allows you to easily import data from Excel, insert charts, or link text from Word , further optimizing your workflow.
Publisher is ideal for creating everything from simple documents like invitations, labels, or business cards to more complex projects such as catalogs, newsletters, and school or business magazines . All this without needing to invest in expensive software or spend excessive hours learning the basic commands.
- Ease of use: perfect for those starting from scratch in graphic design.
- Templates for all types of projects: brochures, flyers, menus, posters, newsletters, calendars, etc.
- Flexible customization: Fully editable text, images, colors, shapes, and building blocks.
- Professional printing: settings and previews specifically geared towards the printed result.
Getting Started: Selecting Templates and Creating a Post
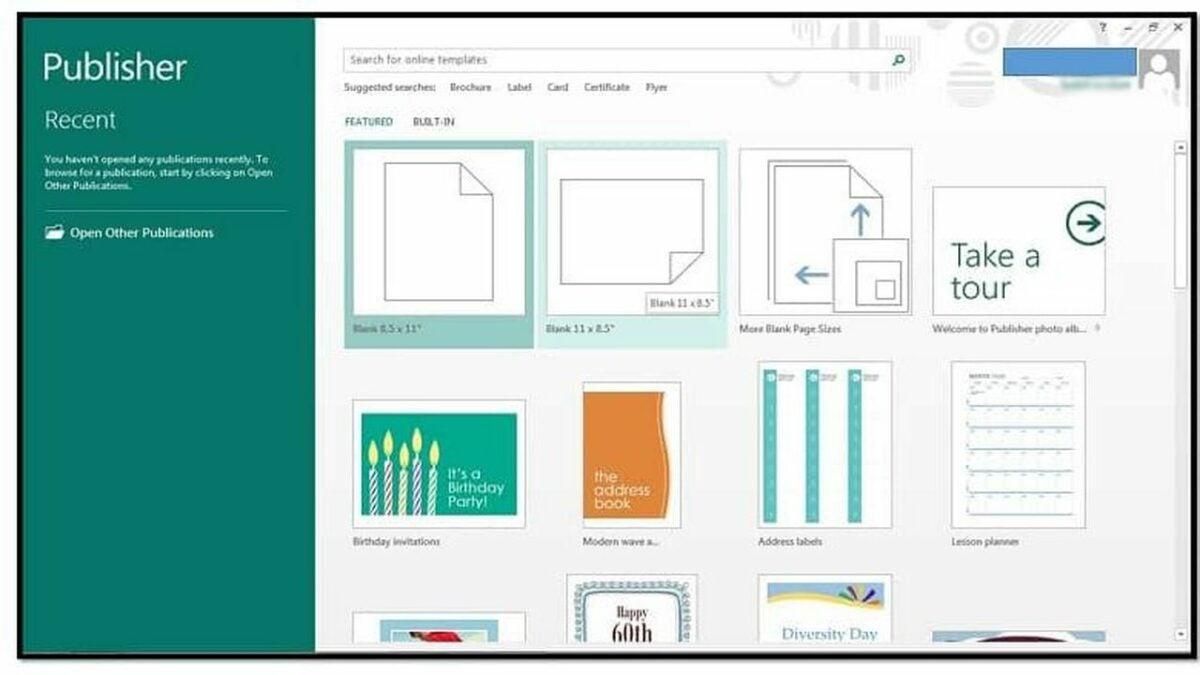
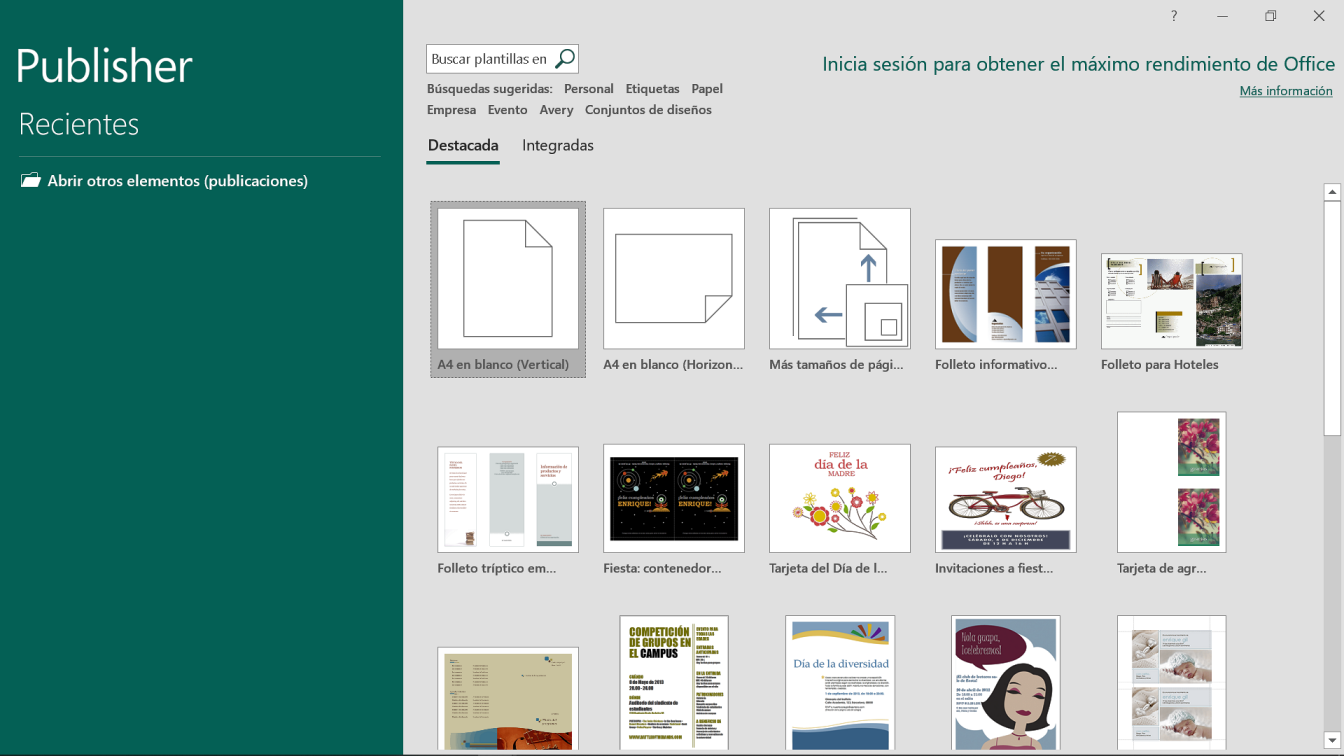
The vast majority of projects in Publisher start with a template, which greatly speeds up the design process. Templates are like pre-designed foundations where you simply replace the elements with your own content.
To start a new post, follow these steps:
- Open Publisher and, on the Home screen, select File> New.
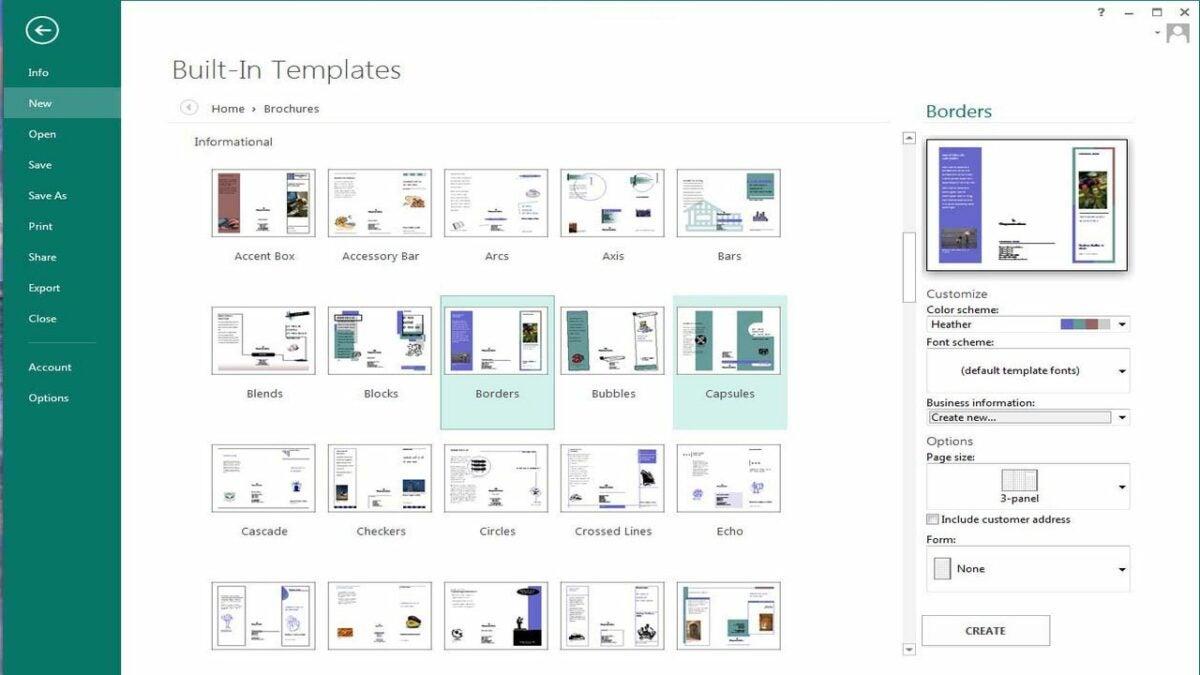
- Choose one of the featured templates or browse the categories to find the one that best suits your needs: newsletters, cards, catalogs, calendars, brochures, etc..
- You can also choose built-in templates or search for templates online by typing in keywords like "invitation" or "catalog."
- Once you have selected the template, click on CreateA new project will open, ready for customization.
Remember that the templates are fully editable: once selected, you can change any text, color, image, or format . This allows you to adapt the design to your company's branding or the specific theme of your event.
Saving Your Posts: Essential Tips
Saving your work regularly is essential to avoid losing changes to your document. Publisher lets you save your publications in multiple locations and formats :
- Click on File> Save As when you save for the first time.
- You can choose to save to your computer, a local network folder, or OneDrive (storage in the Microsoft cloud) or other web locations.
- If you'd like, you can add a new online location to save your posts so you can access them from multiple devices.
- Enter the desired name for your file and click on Save.
To keep your work safe, use the Save function (Ctrl+S) frequently , especially if you make significant changes to the design. If you need to change the file name or location, repeat the "Save As" process.
How to insert and customize images in your designs
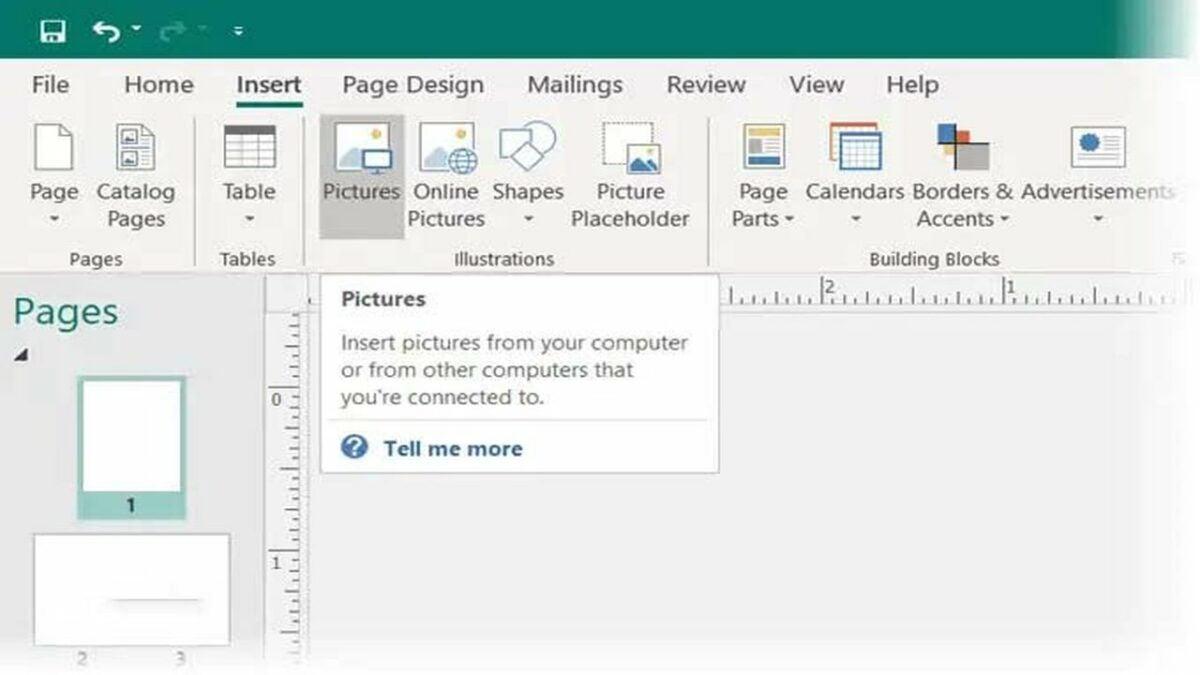
Images add visual appeal to any publication , capturing attention and making your message more effective. Adding images in Publisher is a quick and easy process:
- Click on Home > Images.
- Choose where you want to insert the image: your computer, an online source, or the image gallery.
- Select the desired image and click Insert.
Once inserted, you can resize, move, crop, or apply filters and special frames to better integrate it with the rest of the design. Publisher also lets you wrap text around the image, giving the overall look a more professional finish.
Working with Text: Text Boxes, Editing, and Linking
Text control is essential in any publication . In Publisher, text is entered, organized, and adapted using text boxes that you can position and resize as needed.
Here's how you can add and manage text in your project:
- To insert a new text area, click on Home > Draw Text Box.
- Drag the cursor to draw a rectangle in the area where you want to place the text.
- Enter the content directly into the newly created box.
Most templates already include text boxes; you'll just need to replace the predefined content with your own. If the text is too long to fit in a single box, you can link multiple text boxes so the content flows automatically from one to another , easily creating newsletter or magazine-style layouts.
When a text box fills up and the overflow symbol (three dots) appears, follow these steps:
- Create a new text box where you want the content to continue.
- Click the overflow indicator in the first box: the cursor will change shape.
- Click the second text box. Any excess text will flow there automatically.
This way, you can link as many tables as you need and organize the information across different pages.
Using building blocks and reusable elements
Publisher makes it easy to add standardized and decorative elements using building blocks . These are reusable pieces that can be headers, borders, logos, calendars, dividers, ads, or photo frames.
To insert a building block into your post:
- In the sidebar navigation, select the page where you want to add the block.
- Go to Insert > Building Blocks to open the gallery.
- Browse the different categories, choose the block you're interested in, and click on it to automatically add it to your page.
You can modify these blocks just like any other element: change their color, size, or text to perfectly match your design. You also have the option to create your own building blocks by saving your favorite elements for use in future posts.
Prepare and print the publication with professional results
Once you've finished your design, Publisher makes it easy to print copies or export to PDF without losing quality or formatting. The printing process includes advanced options to ensure the result meets your expectations :
- Accede to File> Print from the ribbon.
- Select the desired printer and configure the number of copies you want to produce.
- In the settings section, adjust the page range, print format, and paper size.
- If your printer allows it, choose between single-sided or double-sided printing, and between color or grayscale.
- Preview your document to make sure everything is correctly positioned and formatted.
- When you're ready, click Print to submit the publication.
Don't forget to save a copy as a PDF if you're going to email or publish your work online, as this format preserves layout settings and will be compatible with almost any device.
Tips and tricks to get the most out of Publisher
- Take advantage of the help tools: Publisher offers wizards and alignment guides to help you achieve a harmonious and balanced design.
- Use mail merges If you want to create personalized documents for multiple people, such as invitations with different names or event cards.
- Don't overload the design: Use white space, limit your color palette, and use recommended fonts to maintain readability and visual appeal.
- Save your own building blocks to reuse elements that work well for you in future projects.
- Check the print preview before sending to the printer to avoid unpleasant surprises.
Mastering Microsoft Publisher gives you the freedom to create your own graphic materials for any occasion, from small invitations to large catalogs. The best part is that the program is designed to guide you step-by-step, without complications, and with a completely practical approach . If you want to get started in the world of design and desktop publishing without using complex tools, Publisher is one of the best options you can choose. With the tips and examples in this guide, you have everything you need to take the leap and produce publications that stand out. Explore all its possibilities and see how your ideas become reality!


Passionate writer about the world of bytes and technology in general. I love sharing my knowledge through writing, and that's what I'll do on this blog, show you all the most interesting things about gadgets, software, hardware, tech trends, and more. My goal is to help you navigate the digital world in a simple and entertaining way.