- Robocopy is the most powerful native copy and synchronization tool for Windows, ideal for advanced file and folder management.
- Allows multi-threaded copies, interrupt tolerance, logs, filtering and mirror synchronization between local and network folders.
- Its multiple parameters make it easy to customize copies, automate backups, and optimize transfers of large volumes of data.
- Perfect for professional environments, migrations and scripts, robocopy offers reliability and versatility unattainable by others commands classics.
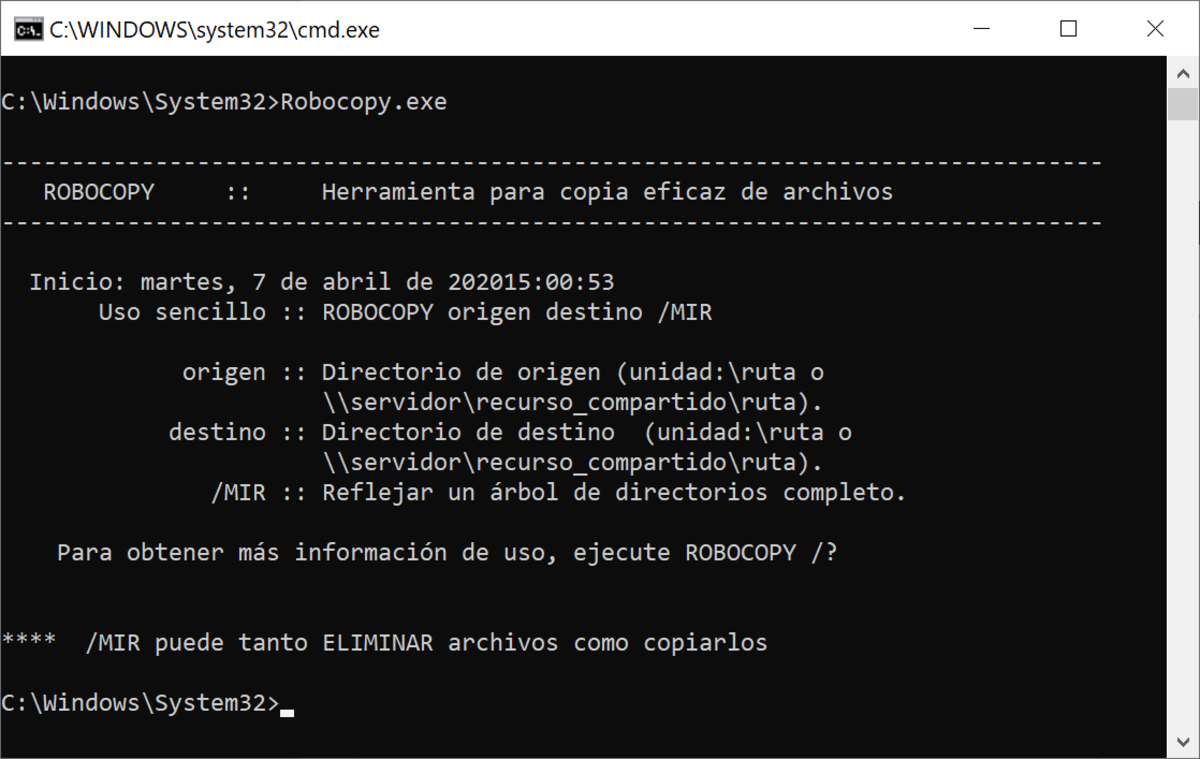
Robocopy is one of those tools that, while it might go unnoticed by the average Windows user, becomes indispensable for anyone who needs to reliably and efficiently copy, move, or synchronize large amounts of files. If you've ever navigated the Windows command line or managed backups, Robocopy is undoubtedly the most powerful and versatile command you can find in any modern version of the operating system. And best of all, it comes pre-installed, with no need for external downloads .
In this article, we'll clearly and practically explain what Robocopy is, how it works, its parameters, advanced options, and useful tips so you can get the most out of your copying tasks, whether for backups, data migrations, or synchronization between folders and servers. Whether it's your first time using it or you've worked with it before, this is the definitive guide in Spanish to mastering Robocopy from start to finish.
What exactly is Robocopy and why is it special?
Robocopy , whose name comes from "Robust File Copy," has been the Swiss Army knife of administrators, technicians, developers, and advanced users for years. It's designed to perform robust copies of files and directories (folders) , handling interruptions and restarts where other commands like `copy` or `xcopy` fall short. Its main advantage is the number of built-in features: multithreaded copying, network fault tolerance, NTFS permission management , exclusions and inclusions, network copying, detailed logs, and much more.
Robocopy is ideal for both local and network backups , allowing you to schedule backup tasks , migrate large volumes of data, or keep two directories synchronized even if they belong to different servers. Furthermore, unlike other graphical utilities, Robocopy stands out for its speed, customization, and automation through scripts or scheduled tasks.
General syntax of the Robocopy command
The basic structure of the command is very simple, but extremely powerful:
robocopy <origen> <destino> - the origin: Folder from which you want to copy the files.
- final destination: Folder where the copied files will be saved.
- files: You can specify naming patterns (e.g. *.docx) or leave it empty to copy everything. The default is *. *.
- Options: This is where robocopy shines, as it allows you to add all kinds of parameters to fine-tune the operation.
Basic usage example:
robocopy C:\Users\Juan\Documentos D:\Backups\Documentos /E /Z /LOG:C:\Logs\backup.txtThis will copy all files and subfolders, including empty ones, in restartable mode and generate a detailed log.
Main Robocopy parameters explained
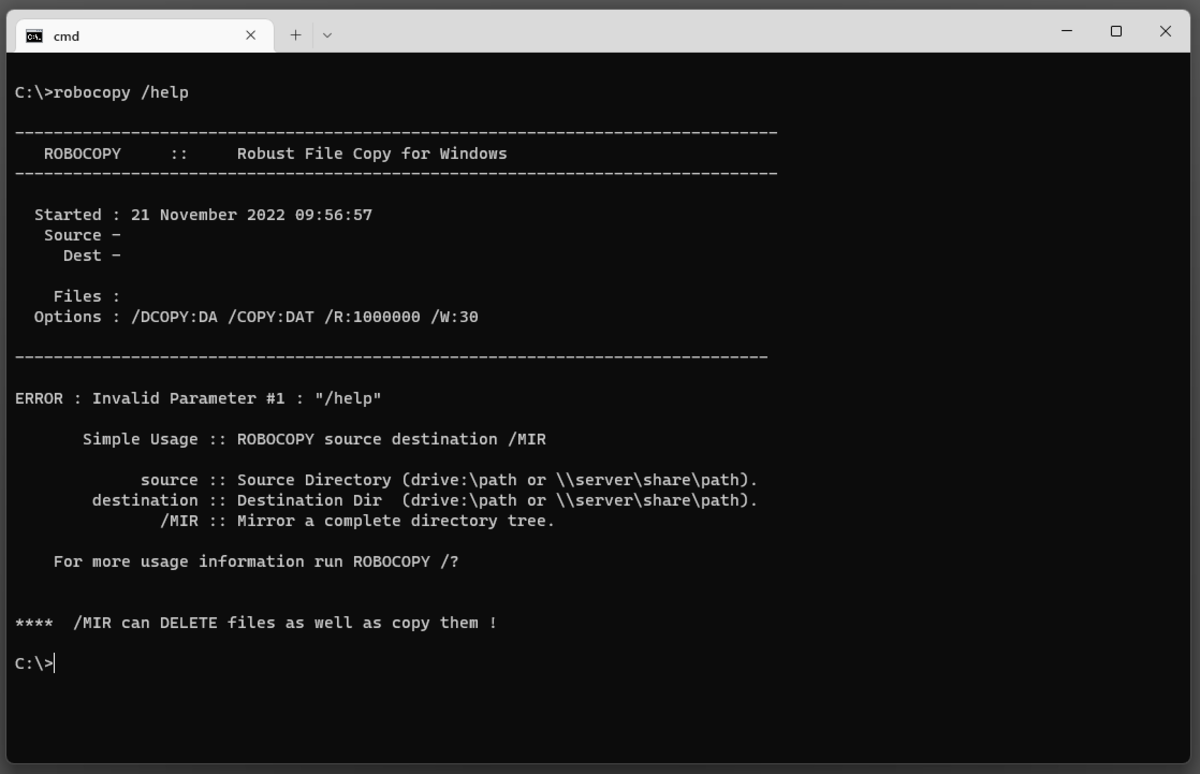
Robocopy has dozens of options you can combine to achieve the exact behavior you need. These are the most important and commonly used:
Copy options
- /S: Copies subdirectories but excludes empty ones.
- /E: Copies subdirectories including empty ones.
- / MIR: Replicates the source folder structure to the destination, deleting files in the destination that no longer exist in the source.
- /Z: Use restartable mode. If the backup is interrupted, resume from where it left off.
- /B: Copy in backup mode, bypassing permission limitations (requires elevated privileges).
- /ZB: Combination of /Z and /B: first tries bootable mode, if it fails uses backup mode.
- /MT:n: Enables multithreaded copying (very useful for large folders). Change “n” to the number of threads (between 1 and 128, default: 8).
- /COPY:flags: Specifies what to copy in addition to the data (e.g., attributes, dates, security, owner, auditing, etc.). For example, /COPY:DAT copy data, attributes and dates.
- /SEC: Copies the NTFS security code along with the files (equivalent to /COPY:DATS).
- /COPYALL: Copy as much information as possible.
- /DCOPY:T: Copies timestamps from directories.
- /MOVE: Moves files and folders, deleting them from the source after copying.
- /MOV: Moves only the files (the folders remain in the original).
- /PURGE: Deletes in the destination what is not in the source (full synchronization).

Selection and filtering options
- /MAX:n: Copy only files smaller than 'n' bytes.
- /MIN:n: Copy only files larger than 'n' bytes.
- /MAXAGE:n: Excludes files older than 'n' days or date.
- /MINAGE:n: Excludes files newer than 'n' days or date.
- /XF file: Excludes individual or wildcard files.
- /XD folder: Excludes folders from copying.
- /XA:attributes: Excludes files by attribute (for example, hidden: /XA:H).
- /IA:attributes: Include only files with specific attributes.
- /ES: Forces inclusion of identical files.
- / IT: : Includes modified files.
- /L: Shows what would be copied, but does not execute the copy (simulation mode).
Error handling and retry options
- /R:n: Number of retries if there is an error (default: 1.000.000 retries).
- /W:n: Seconds to wait between retries (default: 30 seconds).
- /REG: Saves the /R and /W values as default options in the registry.
Reporting and Logging Options
- /LOG:file: Saves the copy result to a log file.
- /LOG+:file: Adds the result to the existing log file.
- /V: Detailed mode, shows everything that happens.
- /TS: Include date and time on departure.
- /FP: Displays the full paths of the copied files.
- /TEE: Displays the result in the console and writes it to the log.
- /REMOTE: Shows There estimated to finish the copy.
- /NJH y /NJS: Removes the console header and summary respectively.
Examples of common use of Robocopy
The best way to learn robocopy is to see practical examples and adapt them to your situation. Here are some very common scenarios:
- Simple copy of all files and subfolders (including empty ones):
robocopy "C:\Mis Doc" "D:\BackupDoc" /E - Move all content and delete it from the source after copying:
robocopy "C:\Fotos" "E:\FotosBackup" /MOVE /E - Recursive copy of recent files only (last 7 days):
robocopy D:\Carpeta1 F:\Respaldo1 /S /MAXAGE:7 - Sync two folders in mirror mode (any file deleted on the source is deleted on the destination):
robocopy \Servidor\Carpeta1 D:\BackupServidor /MIR - Filtered copy of documents only Word:
robocopy C:\Documentos D:\BackupDocs *.docx *.doc /S - Scheduled network backup excluding folders and logs:
robocopy \\Servidor\Datos \\Backup\Central /E /XD "CarpetaPrivada" /LOG:C:\Logs\robocopy-red.log - Simulation mode (to verify without running the copy):
robocopy C:\Origen D:\Destino /E /L /V
Differences between Robocopy and other copy commands in Windows
Many users wonder if it's worth the hassle of using Robocopy when Copy or Xcopy exist . The reality is that Robocopy far surpasses both:
- Allows you to copy millions of files and thousands of subfolders without errors.
- Supports paths longer than 256 characters and large files.
- Manage security permissions, owners, and advanced attributes.
- It is capable of resuming interrupted backups and tolerating network or power outages.
- Includes options for multi-threaded backups and detailed logs.
In short, robocopy is designed for professional environments and large tasks, where copy or xcopy may fall short or fail due to system limits.
Tips, tricks, and best practices with Robocopy
- If the path includes spaces, enclose the folder name in double quotes.
- Always use a log /LOG:file.log to be able to review any errors or incidents later.
- If you automate copies, use robocopy return codes in scripts to detect errors and act accordingly.
- The /L parameter allows you to simulate the operation and check that everything is correct before actually launching it.
- To schedule automatic backups, integrate robocopy into Windows scheduled tasks or batch scripts.
- If you copy between network computers, first verify user permissions and authentication.
- /MT greatly improves disk speed SSD and fast networks, but don't overuse the wires if your equipment isn't powerful.
Robocopy exit codes and how to interpret them
Robocopy returns an error code upon completion, which is crucial if you use it in scripts or automated tasks. The main codes are:
| Dress | Meaning |
|---|---|
| 0 | No files were copied. Source and destination are synchronized. |
| 1 | Files copied successfully. |
| 2 | There are additional files in the destination that are not in the source. |
| 3 | Files were copied and there are additional files at the destination. |
| 5 | Files were copied and some files do not match. |
| 6 | Additional and unmatched files found. |
| 7 | Correct copies but with discrepancies and additions. |
| 8 | Copy failures in one or more files. |
For automated tasks, you can use `if errorlevel` in your scripts to make decisions after execution.
Troubleshooting common issues with Robocopy
- insufficient permissions: Run the console as an administrator if you are copying protected or elevated files.
- Long routes: Add the parameter /256 to disable extended support, or adjust the system if you need long routes.
- Files in use: Robocopy cannot copy files opened by other processes. Use tools like Volume Shadow Copy o disk shadow if you need to copy volumes in use.
- Log too big: Divide the operation into two parts, or use /LOG+ to add information without overwriting.
- network errors: Adjust /R y /W to control retries and waits.
Robocopy script templates and examples
Robocopy's true power is realized when integrated into batch scripts or PowerShell , for example:
@echo off
set origen=%userprofile%\Documents
set destino=D:\Backup\Documentos
set opciones=/E /MT:16 /LOG:%userprofile%\Desktop\backup.log
robocopy "%origen%" "%destino%" %opciones%
For an advanced backup with logs and error reporting:
robocopy "C:\Datos" "F:\Respaldo" /MIR /LOG:C:\Logs\robocopy.log
if errorlevel 8 (
  echo Error grave en la copia. Consulta el log.
) else (
  echo Copia realizada correctamente.
)
Robocopy in database and server administration
Although Robocopy isn't designed for databases themselves, it's very useful for moving and backing up associated files . For example, you can copy log files, data files, or automatically generated backups using Robocopy in safe mode . However, it's best to do this when the database processes are stopped or the files aren't in use.
Robocopy and the evolution of the command line in Windows
In recent years, Microsoft has promoted the use of the command line through Windows Terminal and PowerShell . Robocopy works perfectly in both classic CMD and PowerShell, and remains a go-to tool for system administrators, programmers, and support technicians. Its integration with modern technologies and Microsoft's openness to more professional environments have made Robocopy more relevant than ever, even allowing it to operate on remote paths, network shares, and complex structures.
Robocopy is the top choice for large-scale file transfers, backups, folder synchronization, and data migrations on Windows . Now you know its fundamentals, options, and best practices to get the most out of it.

Passionate writer about the world of bytes and technology in general. I love sharing my knowledge through writing, and that's what I'll do on this blog, show you all the most interesting things about gadgets, software, hardware, tech trends, and more. My goal is to help you navigate the digital world in a simple and entertaining way.