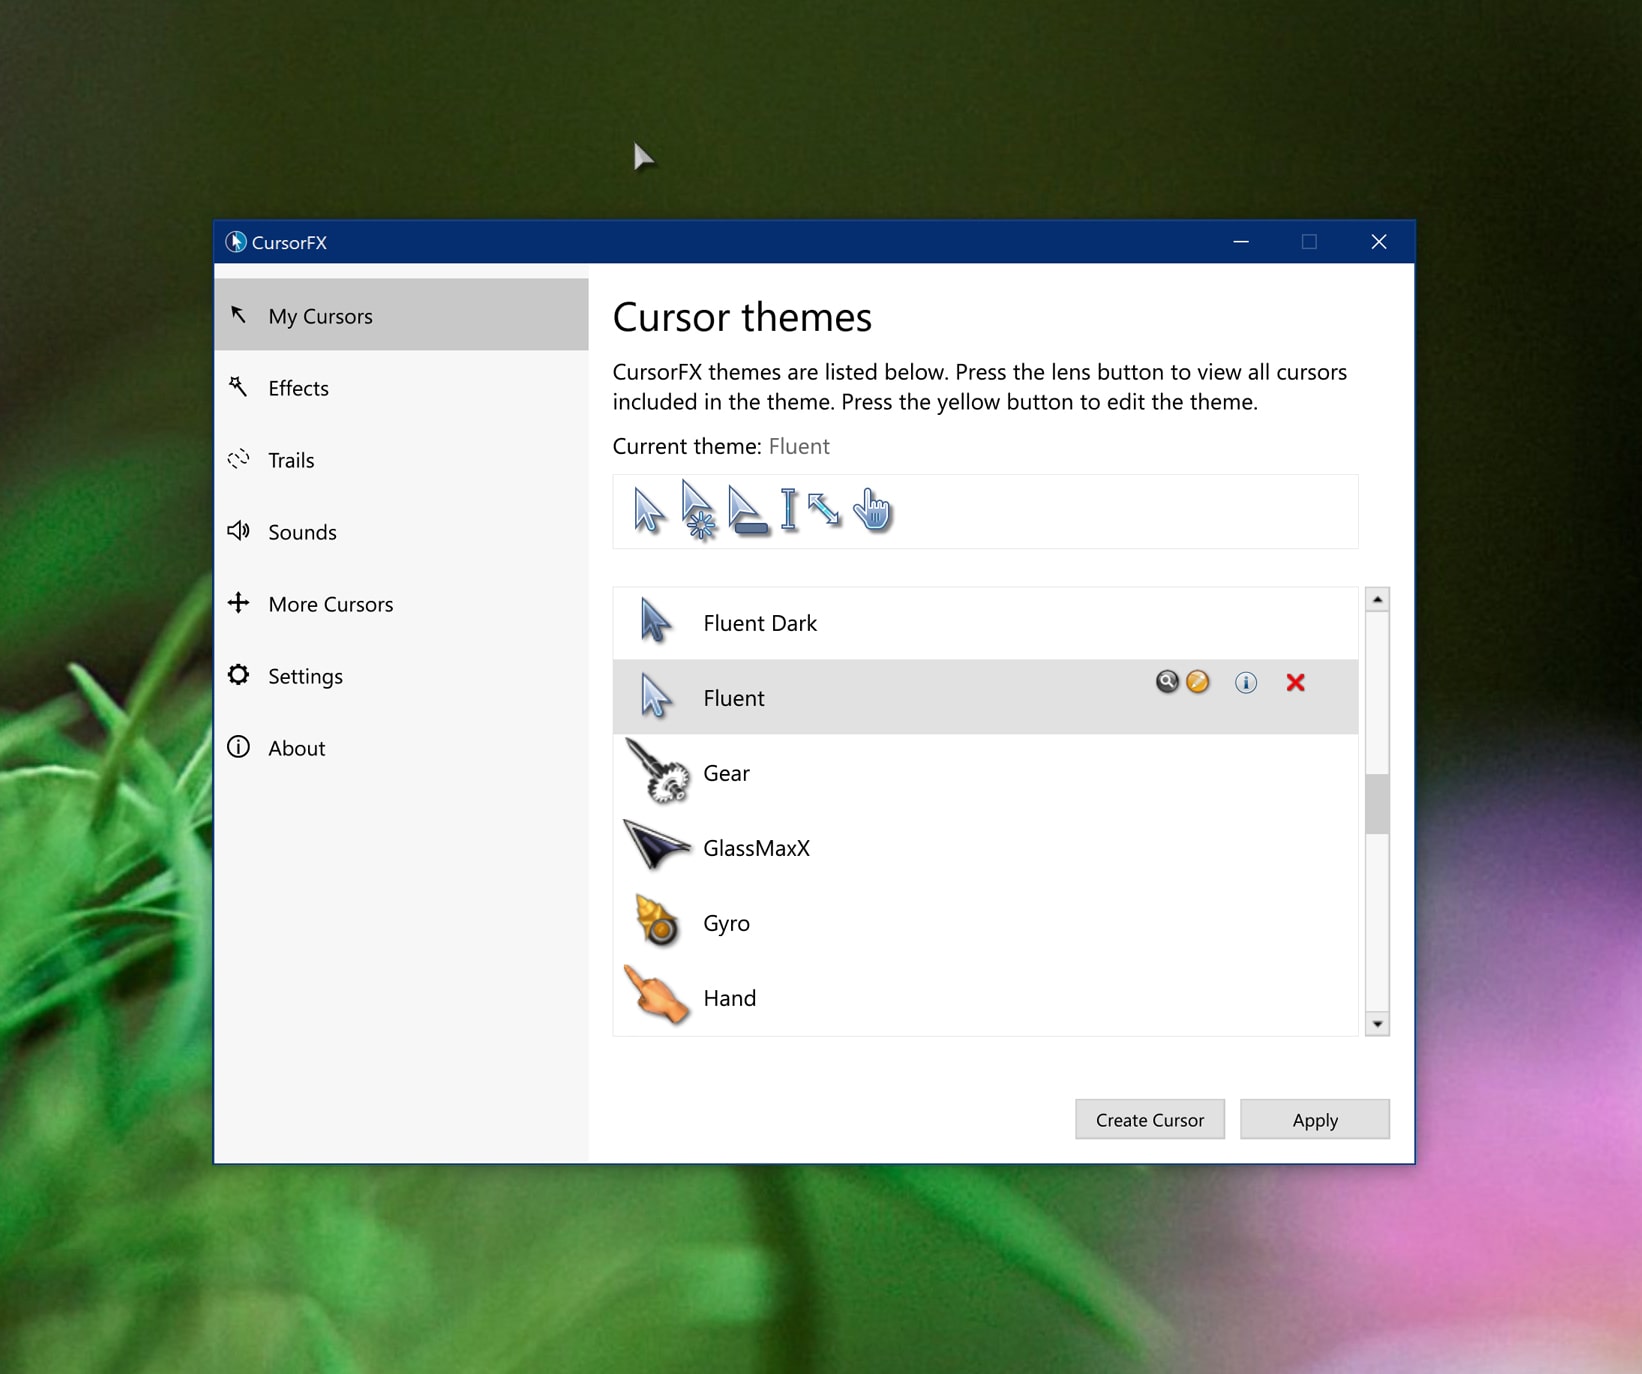
- CursorFX allows you to apply themes, effects, trails and sounds to your pointer with support for Windows 11.
- Windows 11 offers useful native tweaks and advanced control in the classic Pointers panel.
- Download cursors from trusted sources or create your own in .cur and .ani formats with supported editors.

If you're looking to give your PC a unique touch, customizing your mouse pointer is a quick change that's noticeable with every click. With CursorFX and Windows 11 Native Options You can apply styles, animations, shadows, trails, and sounds, as well as adjust size, color, and speed to make everything run smoothly.
In this guide we bring together the best of both worlds: How to customize the cursor in Windows 11 with system tools, how to get the most out of Stardock's CursorFX, where to download ready-made pointers and what you need to create your own, including animated ones in .ani format, along with pricing, pros, cons and Tricks practical.
What is CursorFX and why is it worth it?
CursorFX WinCustomize is Stardock's software program specializing in cursor customization. It allows you to apply complete themes, visual effects, motion trails, soft shadows, animations, and click sounds. It comes with over a dozen unique cursors and gives you access to thousands more in the WinCustomize community.
The program stands out for its support for Windows 10 and Windows 11, support for high pixel density monitors, improvements to cursor drawing performance, and a clear interface for applying and adjusting changes in seconds.
If you like to adapt the desk to your style or you need more visibility to find the pointerCursorFX helps you with ready-to-use themes and an editor to create your own designs from scratch using PNG images.
Key Features of CursorFX
The catalog of functions is extensive, so it's a good idea to be clear about the most useful ones. Capabilities that make the difference in front of the default system cursor:
- Cursor themes: A collection of pre-designed layouts, from minimalist styles to packages with intricate animations and details.
- Custom effects: Motion trails, shadows, and animations for superior visibility and a more polished aesthetic.
- Custom Cursors: Integrated editor that allows you to create your own designs and import PNG images to compose a unique cursor.
- Size change: Simple adjustment to make the pointer larger or smaller based on preference or accessibility needs.
- Wide compatibility: Support for common cursor formats and packages available from communities like WinCustomize.
- Ease of use: intuitive interface and contextual tips to guide us through themes, effects and settings without technical complications.
- click sounds: Sound effects associated with mouse actions for richer feedback.
Highlights in the workflow
To navigate CursorFX without getting lost, keep these four basic actions in mind. You'll work faster and with more control if you follow these steps:
- Apply: Choose a theme from the preview and click Apply. You can return to the Windows cursor whenever you want from the panel or with the Ctrl+Shift+C shortcut.
- Customize now: Adjust size, color, drop shadow, trails, and special effects; add click sounds to enhance interaction.
- Create: Import your PNGs into the CursorFX Theme Editor and assemble a custom cursor, with animations if you wish.
- Download- Access thousands of cursors in WinCustomize and other reputable libraries to expand your collection instantly.
User interface and experience
The app features an organized main panel where it's easy to jump between sections for themes, effects, and settings. Each option is clearly labeled and contextual help appears to quickly complete the configuration.
You'll find large previews and direct controls for instant switching. The learning curve is gentle for new users and agile for those who want to fine-tune without hesitation.
Installation and first steps
Installing CursorFX is no mystery. Follow this basic scheme and in just a few minutes you'll be testing themes:
- Download: from the official Stardock website or reliable software repositories.
- Install: Run the installer and complete the wizard; it usually takes very little time.
- Starts: Open the app from the desktop or the Start menu.
- setup: in the first Boot You can select a default theme and adjust initial preferences; everything can be changed later.
How to use CursorFX on Windows 11
Once installed, the mechanics are straightforward. These are the basic blocks of use To apply, adjust, and save your style:
- Select topic: Go to the themes section, browse through the options, and apply the one you like best.
- Add effects: In the effects section, activate trails, shadows and animations and regulate their intensity and behavior.
- Customize cursors: If you want something of your own, use the editor to modify size, color, shadow and frames of your cursors.
- Fine adjustments: In the settings section, define the pointer speed and visibility according to your habits.
- Save and apply: When you're happy with it, apply it and save it as a scheme for easy reuse.
Native customization in Windows 11
Windows 11 includes useful options without installing anything. To get there quickly, open Settings with the Windows + I and go to Accessibility > Mouse Point & Touch.
From there you can change the pointer style with multiple schemes and adjust the size using a slider until you find the visibility that is most comfortable for you.
If you choose the custom pointer, the system allows you to define the pointer background color, an ideal extra to distinguish it better without effort and with total coherence with the theme of the system.
In addition to the main pointer, it is worth checking the text pointer or I-Beam. Improving your contrast and thickness can speed up editing and keep you from losing track of where you're writing.
If you want to get more specific, go to Settings > Bluetooth & Devices > Mouse and look for the option to Additional mouse settings to access the classic panel.
Classic Panel Advanced Options
In Mouse Properties, on the Pointers tab, you'll find full control over each cursor state. This is the place to assign a different cursor to each function and save your scheme.
- Scheme: Select one from Windows or one you saved with your changes.
- Save as: Create a named scheme so you don’t lose your customization.
- Enable shadow: adds a helpful shadow to help you locate the pointer.
- Browse: Assigns a .cur or .ani file to each pointer role.
In the Pointer Options tab you can customize the behavior. Here you make a difference in feel and precision:
- Pointer speed: Increase or decrease sensitivity to move faster or with more control.
- Attach to: Automatically places the cursor over the default button in dialogs.
- Pointer trail: leaves a visible trail that helps to follow the movement.
- Hide while typing: The cursor disappears when typing to avoid inconvenience in text fields.
- Localization with CTRL: When you press CTRL, a circular animation appears indicating where the pointer is.
.cur and .ani formats, and how to create animated cursors
Windows uses .cur for static cursors and .ani for animated objects. The first is perfect for simple pointers; the second groups frames and sets the playback speed to bring the cursor to life.
To convert images to .cur, services like ICO Convert They allow you to upload PNG, JPG or ICO and generate a file compatible with the classic Windows panel, ideal if you are creating a custom scheme.
If your goal is an animated pointer, you need an editor that assembles several frames and set hotspots and timings. The CursorFX theme editor supports importing PNGs and building custom cursors that you can then use within CursorFX itself.
Another alternative is to use specialized cursor animation tools such as RealWorld Cursor Editor, with which you can start from images, GIFs or exported sequences and create an .ani by adjusting duration, frame order and active click point.
A practical tip: pay attention to the weight and number of frames. Very detailed animations can slightly affect performance On older or resource-limited computers, a smooth, optimized animation looks good and runs more smoothly.
Where to download pointers for Windows 11
If you prefer downloading rather than designing, there are reliable repositories with thousands of options. These sources offer packages in formats .cur y .ani with styles for all tastes:
- Cursors‑4u: A wide variety of fun, themed, and animated cursors ready for Windows 11.
- Cursor.cc: an active community for sharing designs and creating cursors online easily.
- DeviantArt: Find cursor packs for Windows 11 created by artists with very careful styles.
- Real World Graphics: Community library with cursors in .cur and .ani for download and use.
- custom cursor: A collection geared toward a variety of styles; also available from the Microsoft Store.
- WinCustomize: The official CursorFX community with thousands of cursors to download.
How to apply downloaded pointers in Windows 11
After downloading the supported files to your local folder, simply go to Additional Mouse Settings and open the tab Pointers. There, select each cursor role, press Browse, and choose the .cur or .ani file you want to assign.
When you complete replacing all states, use Save as to create your scheme and be able to activate it or switch between schemes in two clicks. Finally, click Apply to see the changes system-wide.
CursorFX Pricing, Versions, Languages, and Requirements
The tool is available in version Delivery to Italy takes one or two business days with basic features and in CursorFX Plus with everything unlocked for a very reasonable price.
- CursorFX Free: sufficient basis for testing essential themes and effects.
- CursorFX Plus: Full version with all features for $5,99.
- Object Desktop: annual subscription with more apps from Stardock, 5 active installations and early access.
In languages it covers English, Arabic, Dutch, French, German, Hungarian, Italian, Japanese, Polish, Portuguese, Russian, Simplified Chinese, Spanish, and Turkish, so the experience is comfortable whatever your language.
The requirements are modest for most computers. Works on Windows 10 and previous supported versions, requires about 100 MB of free space and 512 MB of RAM as a minimum reference.
Take into account the existence of a 30 day trial so you can evaluate the flow and visual impact before upgrading to the Plus version.
Advantages and points to consider
Before you jump in, it's a good idea to consider what it offers and what it might lack. These are the highlighted pros and cons Based on experience with the tool and reference information:
- Pros: Extensive customization options, clean interface, minimal performance impact, third-party theme support, and affordable price.
- Cons- Some advanced features are behind the paid version, there may be periods with fewer updates and more complex effects. can be penalized on older PCs.
Passionate writer about the world of bytes and technology in general. I love sharing my knowledge through writing, and that's what I'll do on this blog, show you all the most interesting things about gadgets, software, hardware, tech trends, and more. My goal is to help you navigate the digital world in a simple and entertaining way.
