
Would you like to know how to automatically build a lighthouse in Minecraft ? A lighthouse is a perfect way to make your coastline look more impressive, especially if you build one with automatically rotating lights.
You're a Minecraft fanatic , and your favorite activity in this popular video game is exploration. However, you unfortunately have a poor sense of direction and are constantly at risk of getting lost and not being able to find your shelter. What's the word? Is that right, and would you like some advice on how to fix the problem? How about building a lighthouse?
In this guide, we're going to explain how to craft the lighthouse itself and how to create the automatic rotating light system.
Here you can read about: How to Have Less Lag in Minecraft – Complete Guide
Methods to create a lighthouse in Minecraft
Now, let's see what are the best methods or ways that you can put into practice to create a lighthouse in Minecraft:
Part 1: Creating the Lighthouse in Minecraft
The lighthouse itself is very easy to build, let's see what you need to do:
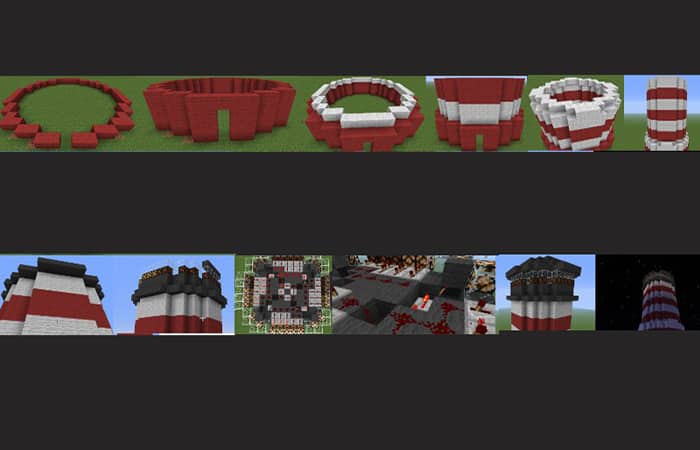
- Step 1:: You simply alternate layers of red and white wool and slowly narrow the building towards the top.
- Step 2:: Then, you must use circles to create the base of the lighthouse and then slowly climb up.
NOTE : Occasionally you can use a smaller circle to narrow the headlight a little.
We've covered the lighthouse construction in one large image, as it's much easier to show what I'm doing rather than trying to explain it through text. You can check out the image below for a larger version.
Part 2: Creating the Lighthouse in Minecraft (Light Mechanisms)
- Step 1:: To get the rotating lights, use redstone lamps, and turn them on and off in a sequence.
NOTE : This particular lighthouse requires quite a few lamps, which can cause significant lag on slower computers or servers. Therefore, we advise you to use the smaller version below on smaller servers or slower computers.
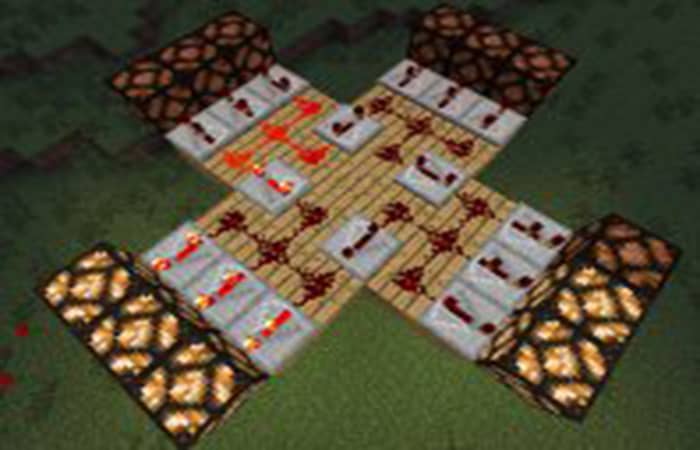
The larger version is more or less an extension of the smaller version mentioned above. The image below should give you a good view of where everything should be placed, with the exception of the redstone torches under the grey wool blocks in each corner, as they can't be seen in that image.
Make sure to place them on the side of the block connected to the redstone repeater in that same corner.
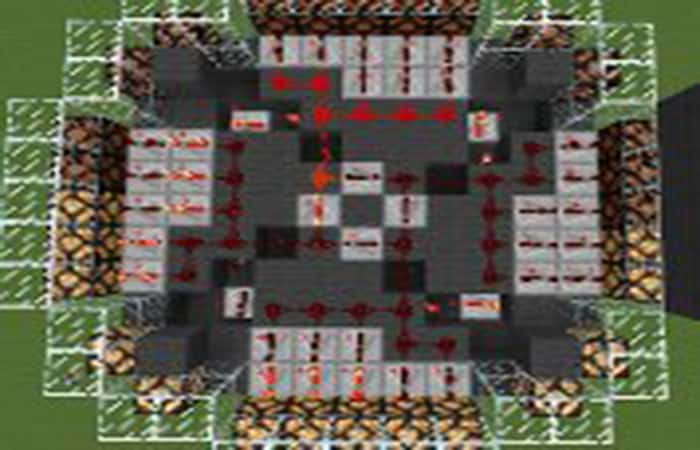
The clock in the middle can be activated by simply placing and destroying a redstone torch very quickly. The best place to do this is next to either of the 2 repeaters with a total of 7 ticks, as any other place will usually cause the redstone torch to activate too many wires, which will often cause the lights to stay on for too long or jam the clock from turning everything on.
Method 2: How to make a lighthouse in Minecraft
Before explaining the second method for building a lighthouse in Minecraft , it is our duty to tell you what materials you need for this project and, in case you don't know, what purpose it is used for.
The lighthouse can be thought of as something similar to the real structure that is built on the coasts of cities to indicate the position and, therefore, serve as a reference point for maritime navigation.
In Minecraft, however, the beacon is useful for another purpose : it allows you to signal your position thanks to the beam of light it emits, but it also allows you to acquire temporary bonuses that can help improve certain abilities of your avatar.
For more details, the beacon grants you an upgrade to your avatar's movement and attack speed . It also allows you to dig faster and jump higher . Finally, you can activate buffs that reduce damage taken and increase health regeneration or melee damage.
Since building the lighthouse requires erecting a pyramid , the upgrades I mentioned earlier become available depending on the pyramid's height; otherwise, they wouldn't be active. Furthermore, the taller the pyramid, the longer the upgrade lasts and its range of influence, but the avatar will lose its bonuses.
That said, know that to build the lighthouse you will need:
- 5 units of glass blocks
- 3 units of obsidian
- y 1 Nether Star Unit, which you must place in a station work.
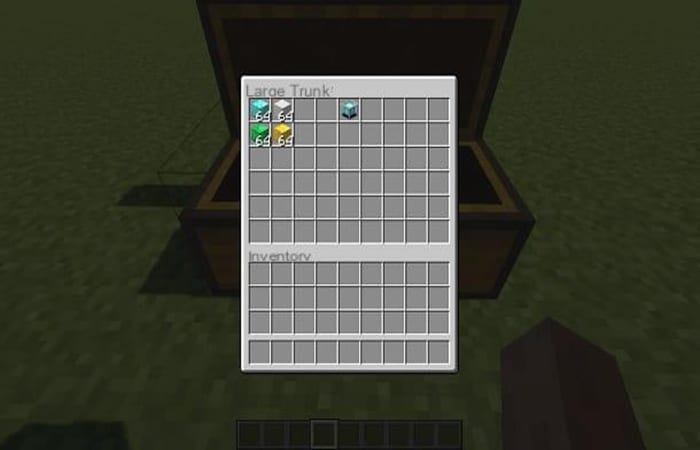
Ossidian , on the other hand, can be created by pouring water onto lava and using a diamond pickaxe to collect the material. In Stella of the Nether , you can obtain it by defeating Sad.
Finally, regarding the pyramid, you cannot use blocks to build it, only those of a specific material: you can use metal , gold , emerald or diamond blocks, which you can build by placing them in a Player 9 workbench of the respective resource.
Part 1: How to Build a Lighthouse in Minecraft
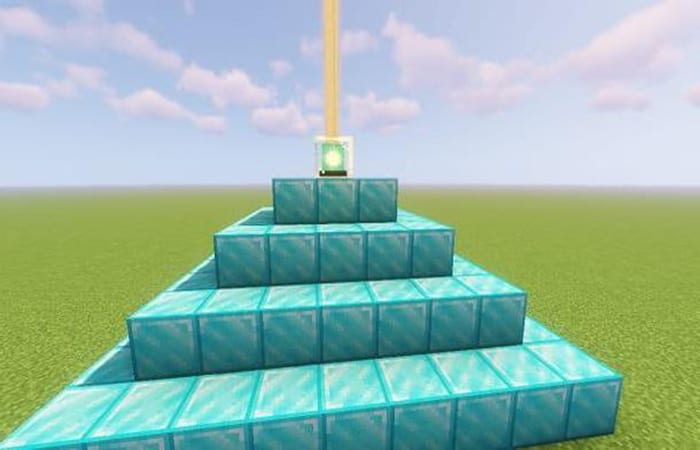
Now that you know what a lighthouse is in Minecraft and what resources you need to use to make one, it's time to move on to building it.
We warn you that in this part of the chapter we will show you how to build a beacon for the activation of a single bonus at a time or the one that will allow you to activate them all at the same time. But let's go in order.
As for building the lighthouse base, you must construct a pyramid with a 9x9 base . Therefore, you will need to level an area of ground and place it on top of the blocks, following the instructions we provided.
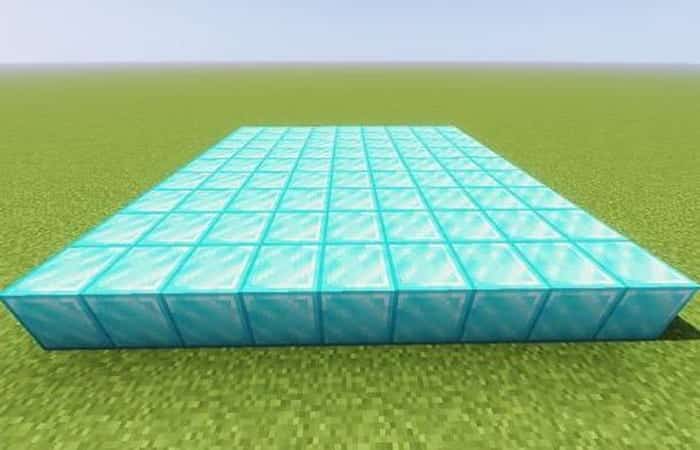
For the following levels, you should first place a 7x7 level on its base , then a 5x5 level . Finally, build the last 3x3 level with the blocks and place one Beacon unit in the center of it so you can activate it instantly.
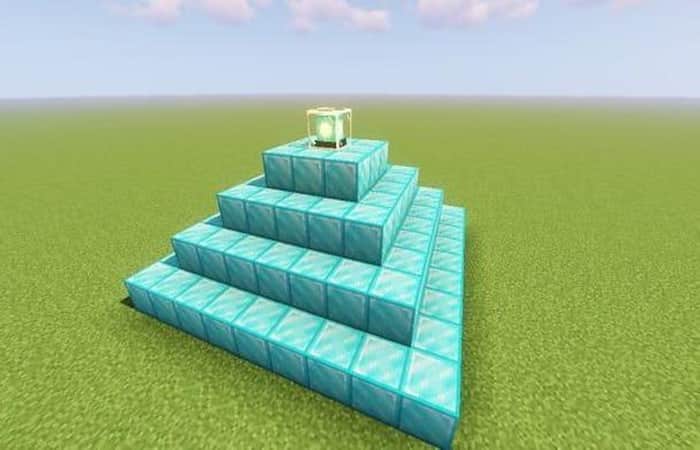
By building a smaller pyramid, you will gain access to a limited number of upgrades.
In fact, a simple pyramid with a 3x3 base only grants you access to first-level bonuses, such as movement speed and digging speed.
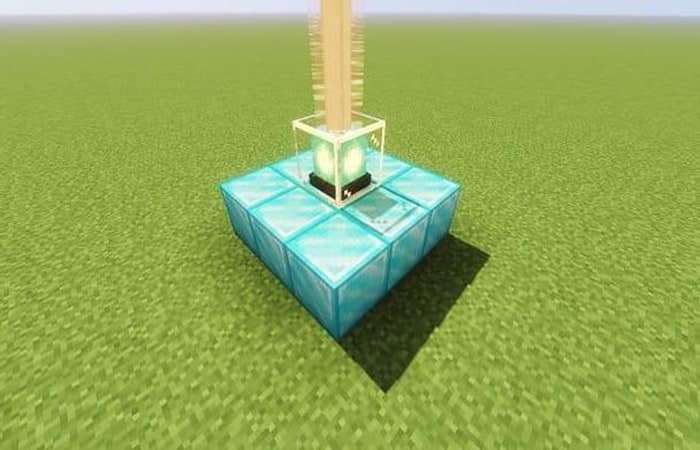
If, on the other hand, you are interested in creating a more complex structure that allows you to activate all the bonuses at the same time, you must follow the procedures that we will show you in the following lines.
- Step 1:: First, build the base of a pyramid that is sized 10 × 11.
- Step 2:: Then add three more layers of dimensions 8×9, 6×7y 4 × 5.
- Step 3:: On this last level, which is the highest level, place 6 units Lighthouse, providing you with a foundation 2×3.
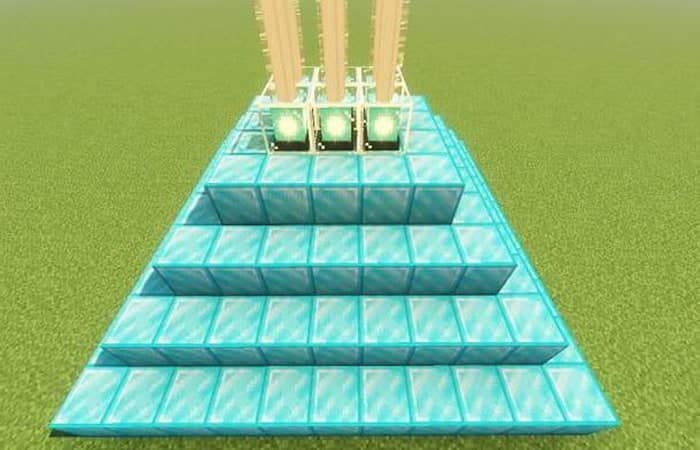
If you have followed the instructions we gave you to the letter, you will have the possibility to activate the bonuses in each lighthouse, thus keeping them all active on your avatar. However, we will explain in detail how to turn on the lighthouses in the next part.
Part 2: How to turn on a lighthouse in Minecraft
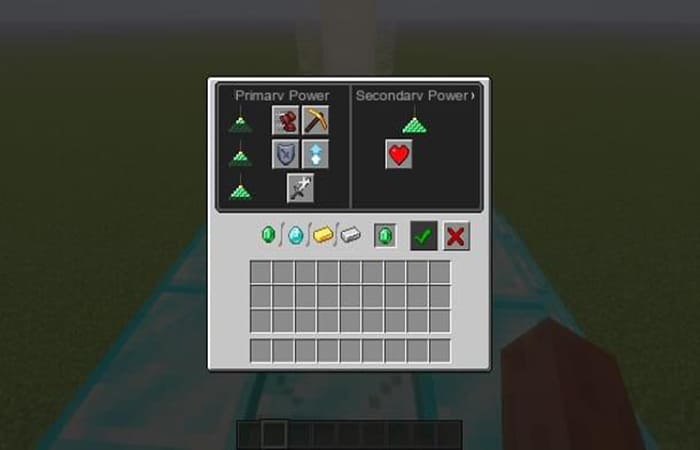
After building the lighthouse in Minecraft , it's time to light it up. Even if, after placing the building, it illuminates and emits a beam into the sky, the bonuses won't have been applied to your avatar, at least not until you activate them manually.
So, what you have to do is interact with the lighthouse , that is, the object at the top of the pyramid that emits the beam of light: on the screen that appears, you can see a diagram that tells you what bonuses you can activate, depending on the pyramid's height level.
If you followed the procedures I indicated in the previous chapter to the letter, you will surely have built a four-level pyramid, which will allow you to access all the bonuses that can be attributed to your avatar.
To activate the latter, do the following:
- Step 1:: select one in the section Primary energy
- Step 2:: then choose the one available in the other section (Secondary energy).
- Step 3:: Once this is done, you will need to supply the lighthouse using one of the four resources presented to you in the center of the screen: the emeralds diamonds gold bullion o iron.
NOTE : All you have to do is place one of the resources I indicated in the previous lines into the corresponding free slot and press the button with the green tick.
In a few moments, the bonus will be applied to the avatar (you can see it on the icons that appear in the upper right corner) and will be available up to a certain radius of the lighthouse: the limit is 50 block houses per four-level pyramid.
Method 3: How to make a lighthouse in Minecraft
In this method, we'll show you how to make a lighthouse in Minecraft that can help you with orientation and make it easier to find your shelter. So follow the tips I'm about to give you:
- First we will explain to you what are the main purposes of a lighthouse in Minecraft
- Then we will show you the materials you need.
- You will need to complete the project and we will guide you through how to build and activate the beacon.
We bet you can't wait to work on this project, right? So let's get started right away! What you need to do is just sit back and carefully read all the information we're going to give you in the following chapters.
Materials needed to create a lighthouse in Minecraft
Before explaining how to build a lighthouse in Minecraft, we should tell you what materials you need to carry out this project and, in case you don't know, what its purpose is.
You might think that the lighthouse is something similar to the real structure that is built on the coasts of cities to mark their position and, therefore, serve as a reference point for maritime navigation.
In Minecraft, however, the lighthouse has another purpose: it allows you to indicate your position thanks to the beam of light it emits, but it also allows you to acquire temporary bonuses that can help improve certain skills of your avatar.
To build the pharaoh you will need:
- 5 units of glass blocks
- 3 units of obsidian
- and 1 Voidstar unit, which you must place in a station work.
Ossidian , on the other hand, can be created by pouring water onto lava and using a diamond pickaxe to collect the material. Stella of the Nether can be obtained by defeating the Wither.
Finally, regarding the pyramid, you cannot use any block to build it, only those of a specific material: you can use metal , gold , emerald or diamond blocks, which you can create by placing 9 units of the respective resource in a workbench.
Part 1: How to Build a Lighthouse in Minecraft
Now that you know what resources you need to use to make a lighthouse in Minecraft, it's time to move on to construction.
Building the base and levels
- Step 1:: As for building the base of the lighthouse, you must build a pyramidwith a base 9×9. Therefore, you will need to level a piece of land and place it on top of the blocks.
- Step 2:: As for the later levels, you must first place a level at their base 7×7, then another 5×5.
- Step 3:: Finally, build the last level 3 × 3with the blocks and, on these, place in the center 1 unit of headlight, so you can activate it instantly.
Minecraft Lighthouse Structure
- Step 1:: First, build the base of a pyramid that is sized 10 × 11.
- Step 2:: Then add three more layers of the dimensions 8×9, 6×7mi 4 × 5
- Step 3:: On this last level, which is the highest level, place 6 units Lighthouse, providing you with a foundation 2×3.
If you followed the instructions we gave you to the letter, you will have the possibility to activate bonuses on each tag, to keep them all active on your avatar.
Part 2: How to turn on a lighthouse in Minecraft
After building the lighthouse , it's time to light it. Although the building caught fire after you placed it, shooting lightning into the sky, the bonuses won't have been applied to your avatar, at least not until you activate them manually.
Therefore, what you need to do is interact with the lighthouse , that is, the object at the top of the pyramid that emits the beam of light. On the screen that appears, you can see a diagram indicating the bonuses you have. You can activate them depending on the pyramid's height.
If you followed the procedures we indicated in the previous chapter to the letter, you will surely have built a four-level pyramid, which will allow you to access all the bonuses that can be granted to your avatar.
To activate the latter, you must do the following:
- Step 1:: select one in the section Primary energy
- Step 2:: Then choose the one available in the other section (Secondary energy).
- Step 3:: Once this is done, you will need to light the lighthouse using one of the four resources shown in the center of the screen: the emeralds, diamonds, gold barso the iron.
- Step 4:: All you have to do is place a unit of the resources we indicated in the previous lines in the corresponding free space and press the green check mark button.
In a few moments, the bonus will be applied to the avatar (you can see it on the icons displayed in the upper right corner) and will be available up to a certain radius of the lighthouse - the limit is 50 blocks for a four-level pyramid.
You might also be interested in reading about: Watermill in Minecraft. What it does, how to create it, and what it's used for.
Conclusion
As you can see, these are the best methods you can use to create a beacon in Minecraft . Each of these options will help you improve your game's performance, earn bonuses, and optimize your PC's resource usage. We hope this information has been helpful.

My name is Javier Chirinos and I am passionate about technology. Ever since I can remember, I have been interested in computers and video games, and that passion has turned into a job.
I have been publishing about technology and gadgets on the Internet for over 15 years, especially in mundobytes.com
I am also an expert in online marketing and communication and have knowledge in WordPress development.