- Unigine Superposition is Unigine's most advanced benchmark, based on the UNIGINE 2 engine and designed to measure GPU performance and stability.
- It includes several modes (Benchmark, Game and Virtual Reality) and a very complete free version, with advanced stress options and global ranking in the paid edition.
- It allows you to evaluate overclocking and stability by letting the test run for long periods, offering detailed metrics of FPS, temperatures and frequencies in real time.
- is available for Windows y LinuxIt can use DirectX and OpenGL, and is integrated into the family of classic Unigine benchmarks such as Heaven or Valley.

If you like tinkering with your PC, do overclocking the graphics card Or simply compare your system with others; you've surely heard of Unigine benchmarks. Among them, the most widely used today is... Unigine Overlay, a test as visually striking as it is demanding, which has become a benchmark for measuring GPU performance and system stability.
In the following lines you will find a very complete guide about How to run the Unigine Superposition benchmarkWhat usage modes does it offer, what exactly it measures, how to download and install it on Windows and Linux, what the difference is between the free and advanced versions, and even real-world use cases with overclocking and typical minor problems you might encounter when trying to get the most out of your graphics card.
What is Unigine Superposition and what makes it special
Unigine Superposition is the most modern benchmark Created by the benchmarking team at Unigine, and introduced in 2017 as an evolution of their classic tests (Sanctuary, Tropics, Heaven, or Valley), it is designed to push the GPU, video memory, and, to a lesser extent, CPU performance to its limits. UNIGINE 2 Engine graphics engine, the same one the company uses for professional simulators, Smart City projects and experiences of virtual reality.
This graphics engine allows you to create an incredibly detailed scene: a laboratory full of machines, instruments and objects Featuring complex physics and advanced effects, the game plays with concepts of quantum mechanics and superposition. The story behind it is that of a solitary professor conducting dangerous experiments in an abandoned classroom; you arrive after hearing a loud explosion from the lab and, to unravel what happened, you must explore the environment through benchmarking and interactive mode.
One of the key features of Superposition is that it generates a workload very similar to that of a demanding video gameThe scene is rendered in real time with lighting, shadows, particles, and physics simulation. This way, the results are quite representative of the performance you can expect in modern games, and also provide useful metrics for checking stability and the impact of overclocking.
What Unigine Superposition offers: versions and features
Superposition is distributed in a free version and an advanced paid versionThe good news is that most of the relevant features are available for free: you can run the main benchmarks, test virtual reality configurations, use "Game" mode, and get all the basic performance metrics.
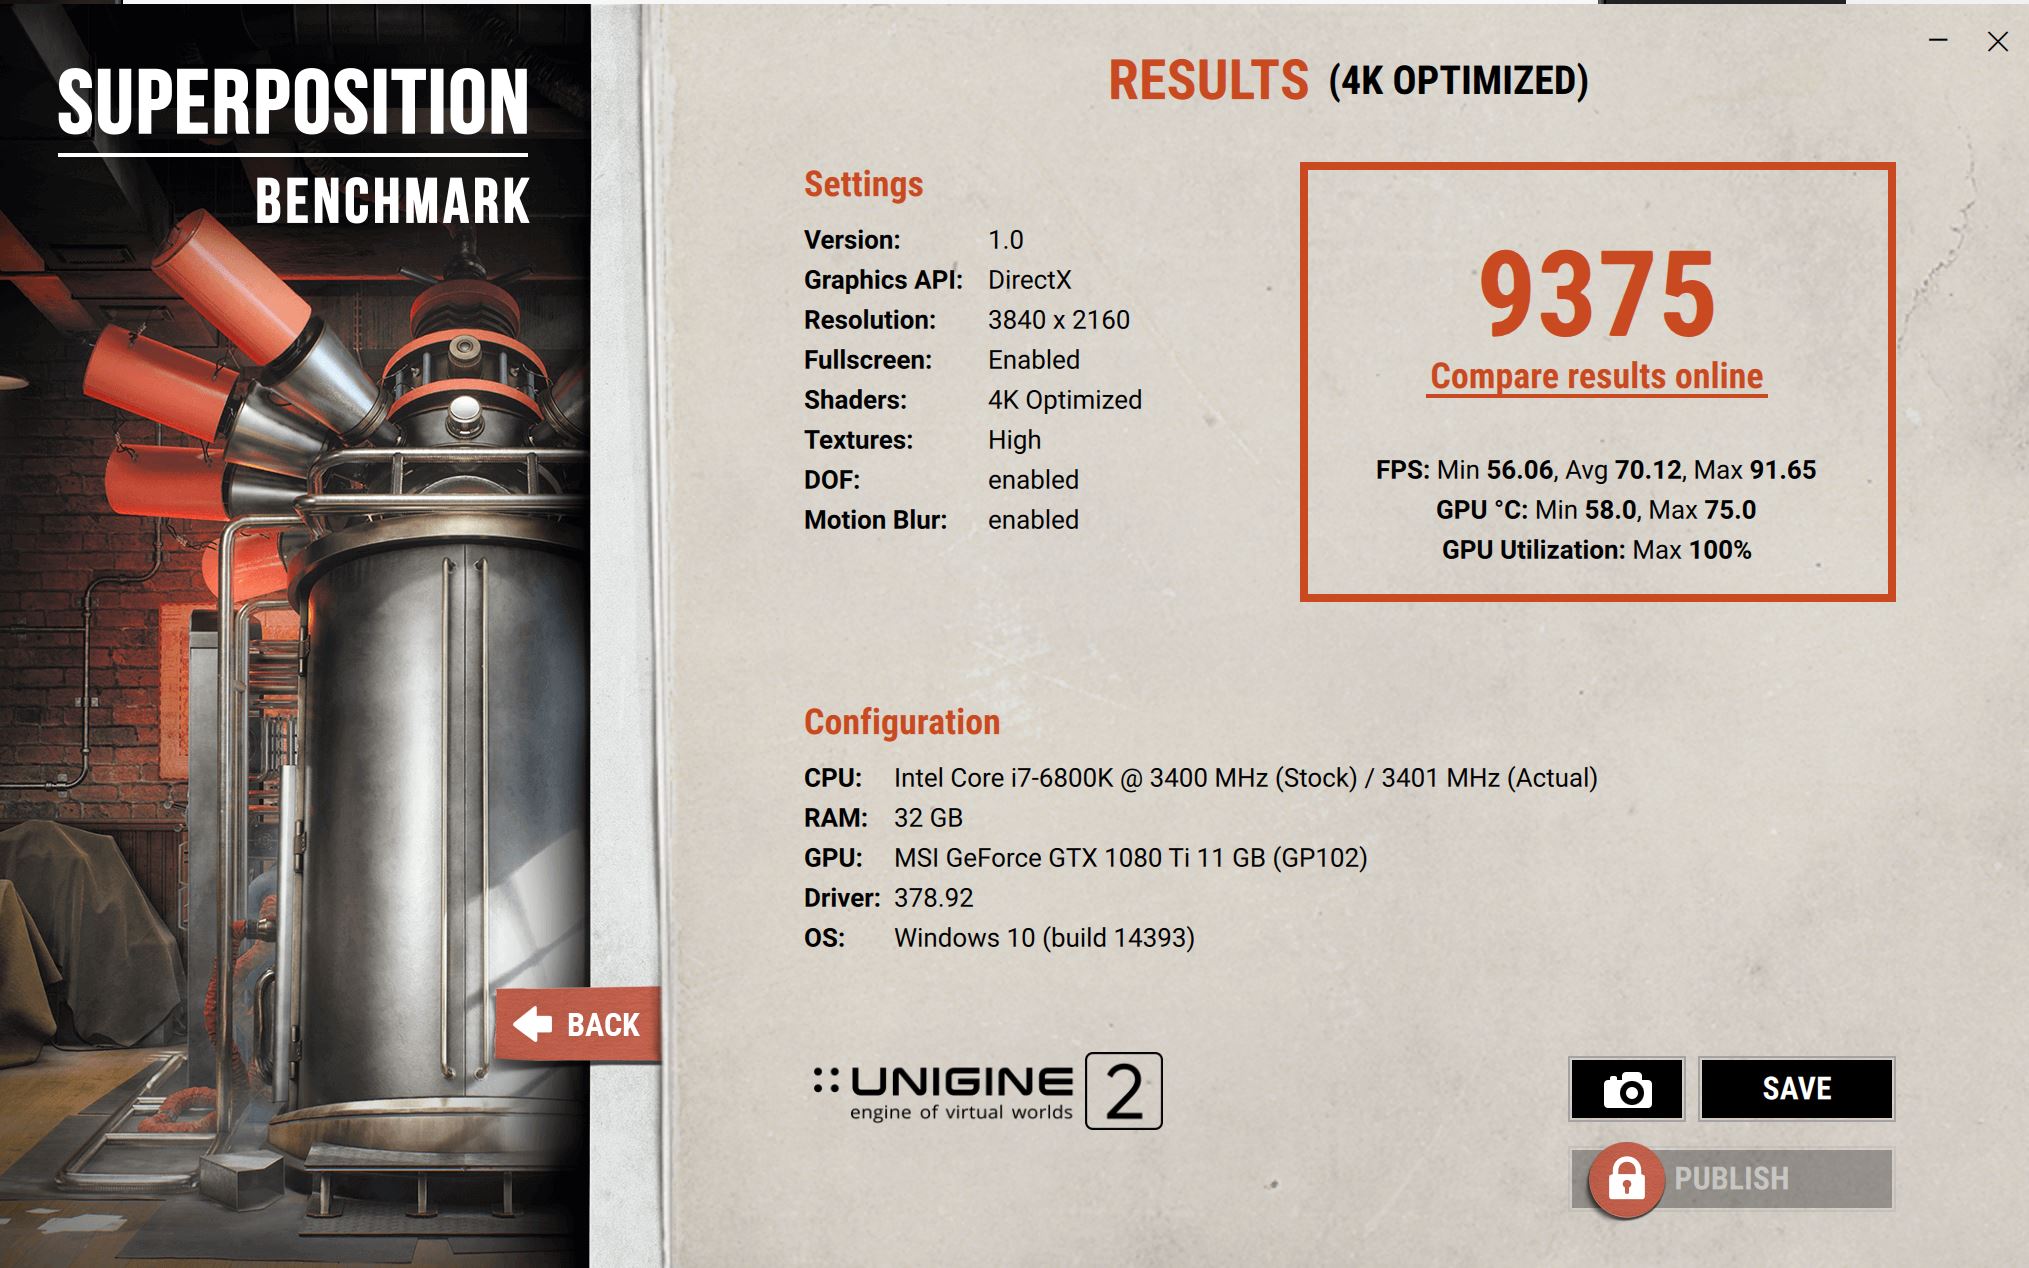
In the upper right corner of the screen, while the test is running, you will be able to see real-time data about your graphics card: GPU model, core frequency, effective VRAM frequency, GPU temperature, percentage of use and, of course, the FPS (both instantaneous and minimum, average and maximum once the test is over).
The advanced version unlocks features such as full access to the global rankings and dedicated stress/stability testsvery useful if you're going to do aggressive overclocking or if you're a professional reviewer. hardwareIt also enables certain additional options for exporting results and publishing directly from the program itself.
How to download and install Unigine Superposition
Download and installation on Windows
To install Superposition on Windows, you need to go to the Official page of the Unigine Superposition benchmark and click the download button. The file is around 1,2 GiB, so depending on your connection, it may take a while to complete. Once the installer is downloaded, run it and follow the typical wizard: accept the license agreement, choose the installation directory, and decide whether you want shortcuts on the desktop or in the Start menu.
After the installation is complete and you launch the program for the first time, you will see a very simple main windowThe name "Superposition Benchmark" appears alongside "UNIGINE 2," both clickable links that take you to the official website for the test and the graphics engine. A large "RUN" button stands out, used to start the selected test, and next to it is a progress bar. VRAM required and the VRAM available on your graphics card.
Below the "Virtual Reality" section you will see four small icons with various functions: the button for General adjustments (for minor details such as screenshot path, language, or display of credits and EULA), the question mark icon that opens the user guide PDF (a 26-page manual that explains everything in detail), the padlock that serves to purchase or activate the advanced version, and the podium icon that opens the page in the browser with the global ranking of scores.
Installation and execution on Linux (example on Arch/Manjaro)
On Linux, the process can be a bit more complicated, especially if you're running it on distributions like Arch or Manjaro. A typical workflow involves downloading the Superposition package from the community repositories and manually resolve Qt dependenciesbecause newer versions of Qt can cause conflicts.
One procedure that has proven functional is to download the Qt version 5.9 for Linux in .run format From the official Qt website (for example, "qt-opensource-linux-x64-5.9.0.run"), make the file executable with chmod a+xRun it, skip the registration, and select only Qt 5.9 with the default path. Then, install the package. unigine-superposition with an AUR tool such as yay, yaourt or pakku; if during installation it fails due to size of /tmpIt can be recovered with something like sudo mount -o remount,size=20G,noatime /tmp and try again.
Once Superposition is installed, it is common delete the program's own "qt" folder located in /opt/unigine-superposition/bin/qt and create a symbolic link to the Qt 5.9 folder you just installed, for example with sudo ln -s $HOME/Qt5.9.0/5.9/gcc_64 /opt/unigine-superposition/bin/qtAfter this, the benchmark usually starts correctly, although it may display a network error that can be ignoredIt's not advisable to touch the variable LD_LIBRARY_PATH at the script launch.
If you're using Wayland and the program isn't starting properly, the solution is to log into a GNOME session with Xorg, and then Launch Superposition from the menu (searching for "Superposition" with the Windows key). Once configured, the benchmark also works without major problems on Linux.
How to use Unigine Superposition
The program offers three main modes From its initial window: Benchmark, Game, and Virtual Reality. Each has a different objective and it's worth understanding them to get the most out of the tool.
Benchmark Mode
The heart of Superposition is the mode Classic benchmarkwhere a sequence of predefined scenes is executed to measure the team's performance. Within this mode there are three variants:
- Performance (Performance)
- VR Ready? (designed for Virtual Reality)
- Stress (Stress/Stability, in the advanced version)
Performance mode is a typical general benchmarking test. It subjects the system to a heavy graphics load with physics, complex polygons and advanced effects, which allows you to get a fairly realistic idea of how the GPU will perform in demanding games. It's very common to see it in review videos because it shows a very striking laboratory scene with floating elements and changing lighting.
The VR Ready option runs virtually the same test, but with a specific configuration for virtual reality systemsThis results in a slightly different, duplicated image on the screen (designed for the headset's two lenses). Before launching, it makes sense to specify which VR platform you're testing on, since An Oculus Rift is not the same as an HTC Viveboth in terms of resolution and technology.
Stress mode focuses on checking the stability of the processor, GPU, and the rest of the system Under very intense and prolonged loads, it's ideal for long overclocking sessions, because if there's even the slightest problem (memory errors, voltage drops, temperature spikes), the system usually crashes or the benchmark itself closes. This feature is reserved for the paid version, but it can be partially simulated by repeating the free test several times.
In all these modes, while the benchmark is running you will see the following in the upper right corner: Real-time FPS And, at the end, a results screen appears with the overall score, minimum, average, and maximum FPS, as well as information about the GPU used. From that screen you can open the online comparison tool (Compare Results Online), save the data to a file, capture an image, or, if you have the advanced version, publish your score in the global ranking.
Game Mode
Mode Game is one of the coolest features Superposition features that other benchmarks don't usually have. Instead of just watching the scene as a spectator, here you enter the lab directly and can move around, interact with objects, and tinker with the experiment's controls.
Inside the laboratory you will be able to to pick up chalk, folders, and other itemsOpen drawers, press buttons, and, above all, play with several levers located next to the central machine. These levers allow you to modify parameters such as the severity or time of daychanging the scene's behavior and lighting in real time. It's almost like a technical minigame that, besides being fun, lets you observe how your GPU responds to dynamic changes.
Before starting Game mode, you will only need to select the overall graphic quality and the API which you want to use (DirectX or OpenGL, depending on the platform). There are usually no major differences unless your graphics card has a greater affinity for one API or the other, but it can be useful for checking compatibility and minor performance variations.
Virtual Reality Mode
Mode Virtual Reality It replicates the Game mode experience, but designed for virtual reality glasses and motion controllersIn other words, you'll be able to virtually walk around the lab, pick up objects, and manipulate machines in a much more immersive way than in front of a monitor.
In addition to choosing the graphics quality and the API, you will need to indicate What virtual reality device do you use? (For example, Oculus Rift, HTC Vive, or other compatible headsets). Each headset has different resolutions and technologies, so Superposition internally adapts the graphic output. This option is usually more integrated in the advanced version, and in the free edition, it may be limited or conditional on certain configurations.
How to use Superposition step by step to perform a benchmark
In practice, using Superposition to measure your computer's performance is quite simple. Once the program is installed and launched, you'll see the main window with the different graphic presets (1080p Medium, High, Extreme, 4K, 8K, etc.) and Custom mode for complete customization. In Custom mode, you can adjust resolution, quality, antialiasing type, API, and other options.
Once you have the parameters clear, you just have to press the button "RUN" to launch the benchmarkThe scene will begin playing for a set amount of time (usually a couple of minutes). While it plays, look at the upper right corner: there you'll see your graphics card model, the FPS it's achieving, the GPU temperature, core frequencyThe frequency of the VRAM and the percentage of utilization are also displayed. At the end of the entire run, the final score will be shown, along with the minimum, average, and maximum FPS.
This score allows for easy comparison. Your team compared to others with the same GPU or with similar configurations. Although the full global ranking is reserved for paying users, you can check the official website or specialized forums where people share their results to see if your PC is performing as it should, if it's underperforming, or if the overclocking you've applied is actually paying off.
Superposition, stability and overclocking: a real-world example
A very common use of Superposition is to check How high can the GPU overclock be pushed? without the system becoming unstable. For example, a user with an Acer Nitro 5 (processor Intel (i5-9300H, 8 GB of RAM and a mobile GTX 1650) uses Superposition at 1080p Extreme to test its overclock.
In your case, the CPU is running on a -80 mV undervoltMeanwhile, the GPU has been configured with a +190 MHz core boost, reaching a total boost of around 1845 MHz. Above that figure (for example, +200 MHz), the laptop freezes during the benchmark. As for the VRAM, it's been boosted to +999 MHz (around 5000 MHz effective), and it has been verified that each increase in +50 MHz increments... The score improves slightly.This indicates that overclocking translates into a real performance increase.
The problem arises when trying to go from +999 to +1000 MHz in the memory: the benchmark It stops starting properly. and displays error messages such as "cannot set fullscreen video mode 1920×1080" or "could not apply 1600×900 in fullscreen." In other cases, even if it boots, the VRAM overclock reverts to the default values. Interestingly, other applications like NiceHash work without crashing at +999, but throw immediate errors when attempting +1000 in MSI Afterburner.
All this suggests that, although the temperatures are correct (around 67 °C on the GPU die and 78-80 °C on the hot spot After a benchmark run (with the laptop slightly elevated to improve airflow), the GPU and/or VRAM reach their stability limit at a certain point. Superposition is very useful here because it is sensitive enough to detect instabilities which other, less demanding programs might miss. If the benchmark doesn't start, displays video mode errors, or closes unexpectedly, it's a clear sign that you've overclocked too far; to analyze these issues, it's advisable export logs from GPU-Z.
In situations like this, the most sensible thing to do is slightly reduce offsets (both core and memory) until finding a point where Superposition can run smoothly from start to finish repeatedly. This ensures that the system is stable not only for mining or light tasks, but also for demanding games that push the GPU to its limits.

Passionate writer about the world of bytes and technology in general. I love sharing my knowledge through writing, and that's what I'll do on this blog, show you all the most interesting things about gadgets, software, hardware, tech trends, and more. My goal is to help you navigate the digital world in a simple and entertaining way.