
Want to learn how to vectorize an image in Inkscape? This function was used to leverage the paths of the vectorized result. If you're expecting to find an identical image in vector format, you'll be disappointed. Stay tuned.
You might also be interested in reading about: 10 Types of Design Software You Should Download
Ways to vectorize an image in Inkscape
Ideally, this function vectorizes dark silhouettes against a light background very well. There is an option to include color, but Inkscape will create as many layers as there are colors. This results in several objects stacked one on top of the other, which can become complex to modify. Let's look at some methods that might help:
Method 1: Vectorize an image in Inkscape (Pictogram)
To vectorize a pictogram:
- Step 1: : Through the menu Resource > Import , imports a simple bitmap image.
- Step 2: : Select the image with the Selection tool.
- Step 3: : Run the convert command Shortcut > Vectorize Bitmap .
- Step 4: : A dialog box appears allowing you to refine the options.
- Step 5: : When you are satisfied with the preview result, click Validate . The result is immediately visible on the canvas. It is located exactly above your image.
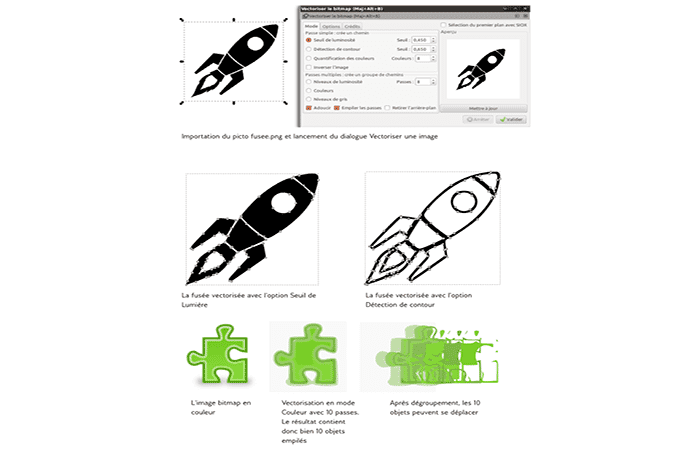
Let's look at the options of this great tool. The first tab contains several modes:
- Brightness threshold mode . Most commonly used, this creates a silhouette type path of a shape like the pictogram.
- Edge detection mode . Useful if you only want to vectorize the outline of a shape.
- Color quantification . Useful if you want a colored result.
The Multiple Steps option will allow for a much finer result, but will create as many objects as passes.
On the right side of the dialog box, don't forget to update the preview with each change and validate to get the result.
Method 2: Vectorize an Image in Inkscape (Basic Mode)
Use Inkscape to vectorize a captured image in 3 simple steps.
Part 1: Open the PNG image in Inkscape
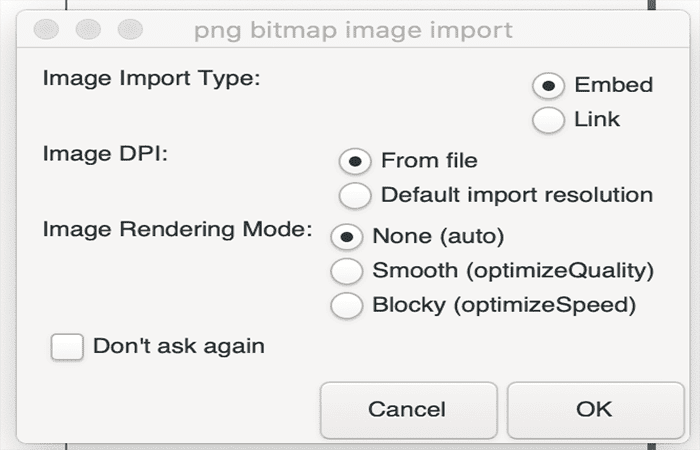
- Step 1: : Open an image in Inkscape or drag an image into your Inkscape document. If you drag it into your document, you may see the following message (uses the default settings below):
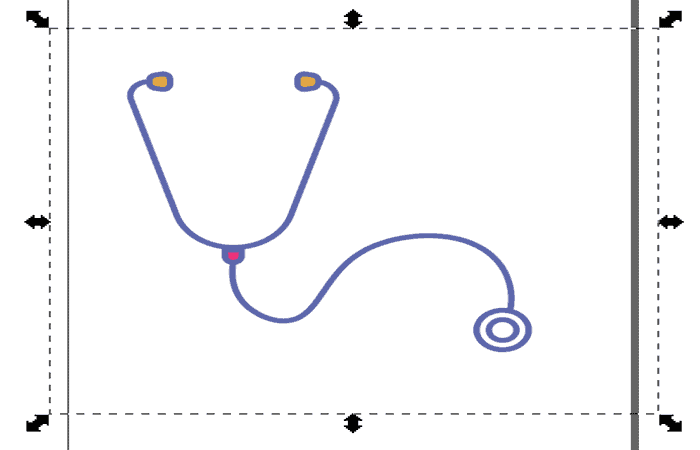
- Step 2: : Click on your image to select it.
Part 2: Trace Bitmap (Path -> Trace Bitmap)
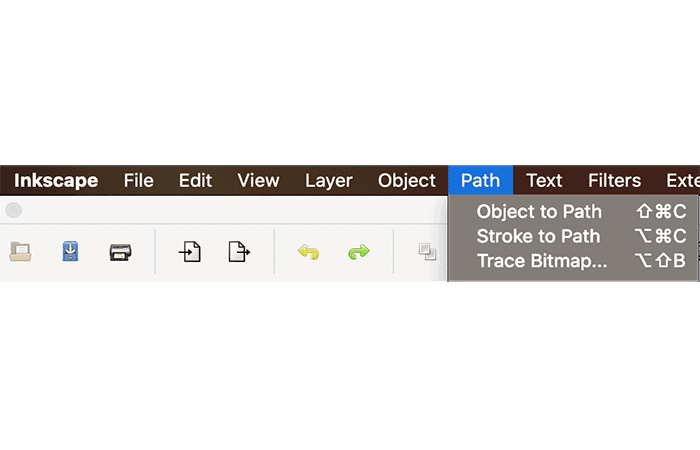
- Step 1: : Then, hover over Ruta in the top toolbar of Inkscape and click Plot bitmap .
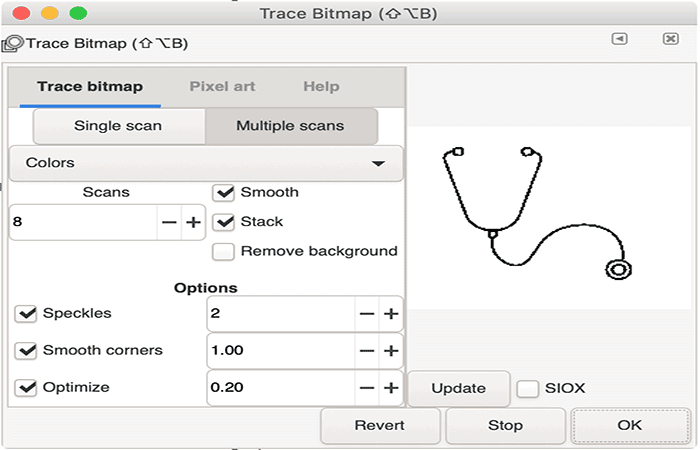
- Step 2: : This opens the following window. You will want to use multiple scans, so click the Multiple Scans button and select Colors from the drop-down menu to change the existing colors in the image to the new vector.
NOTE : You may need to increase the number of scans to cover all colors.
Part 3: Complete the Vectorization
- Step 1: : Once you click Accept in the window Plot bitmap , Inkscape will take a few minutes and vectorize your image.
- Step 2: : Once your image has been successfully vectorized, click on the icon Editing routes by nodes (it looks like a cursor with dots in a circle, see image below).

- Step 3: : Now when you click on the image you will notice a bunch of dots around the image. These points allow you to adjust the shape of the newly created vector to whatever you want.
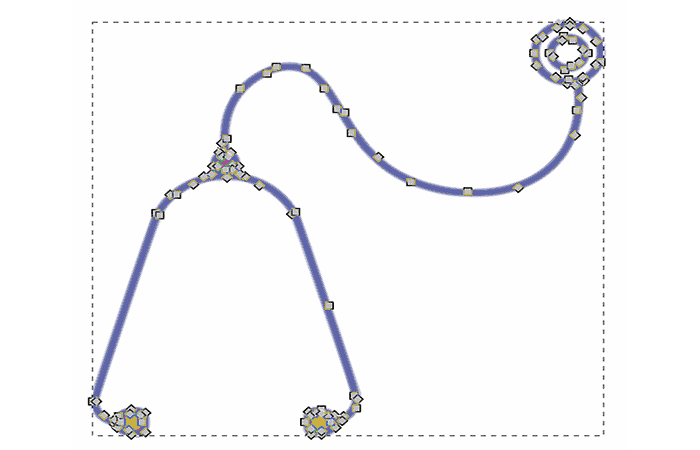
Now you can use your newly created vector on the web and not worry about pixelation on different device widths.
Method 3: Vectorize an Image in Inkscape (Trace an Image)
You can use the keyboard shortcut Shift+Alt+B, Path ‣ Trace Bitmap to use image trace mode for this method. You can use this function to convert a raster image into paths that you can use and edit in your design.
This process is called ' Tracing ' or ' Vectorization '. However, if you expect a 100% faithful representation of your image, only in vector format, you will be disappointed.
This feature is ideal for vectorizing dark silhouettes against a bright background. There is an option to keep the colors, but Inkscape will then create a separate object for each color. You'll end up with a stack of objects, each a different color. This can be difficult to edit, especially for a beginner.
To vectorize an image in Inkscape you must do the following:
- Step 1: : Import a suitable bitmap image using the menu Archive ‣
- Step 2: Select the image with the Selector tool .
- Step 3: In the menu, go to Ruta ‣ Draw bitmap .
- Step 4: A dialog box opens where you can configure different options.
- Step 5: Use the Refresh button to get a new preview image every time you change settings.
- Step 6: When the preview result looks correct, click Accept . The vectorized image will be available directly on the canvas. It will be placed exactly above your image.
NOTE : Sometimes, the vectorized version will be so similar to the original bitmap image that you won't notice the difference. Use the selection tool to move it to a different location on the canvas so you can examine it properly.
Preview of options for vectorizing an image in Inkscape
Now, let's take a closer look at the options of this wonderful tool. The first tab offers several different options under the Mode tab :
- Brightness cut mode : This is the most used mode. It will create a silhouette-like path that follows the shape of your image.
- Edge detection mode : Useful if you only want to vectorize the outlines of a shape.
- Color quantization mode : This traces along the edges between different colors.
- Multiple Scan Mode: will give you a more detailed result, but will create a separate object for each scan.
Don't forget to refresh the preview on the right side of the dialog box and click OK to create the vector object. Let's see how to vectorize this example image:
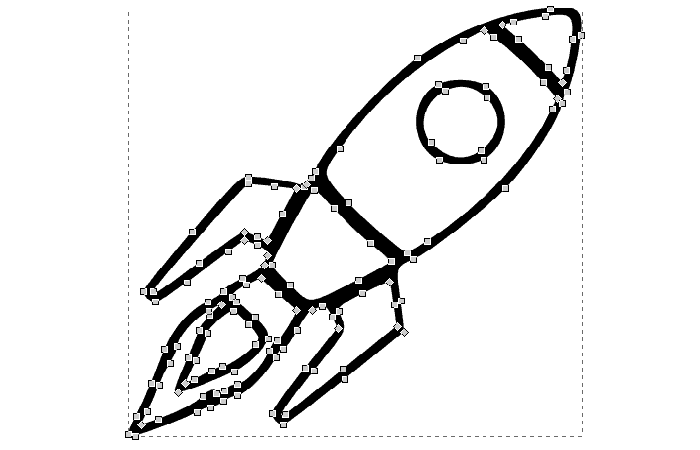
- Step 1: : We will use the image called “rocket.png”, to track in this example

- Step 2: : The rocket.png image was imported and the Trace Bitmap dialog box opened. Live preview can be activated to show a rough preview of the result.
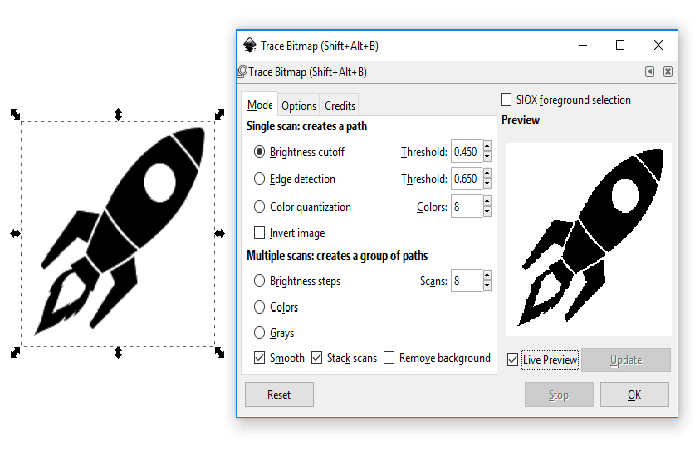
- Step 3: : The rocket was drawn with the glow cut option.
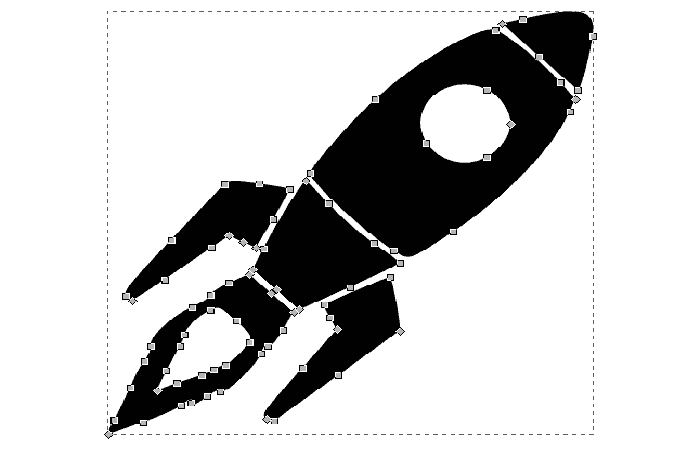
- Step 4: : The vectorized rocket with the Edge Detection option
This is a color bitmap image that can also be traced.

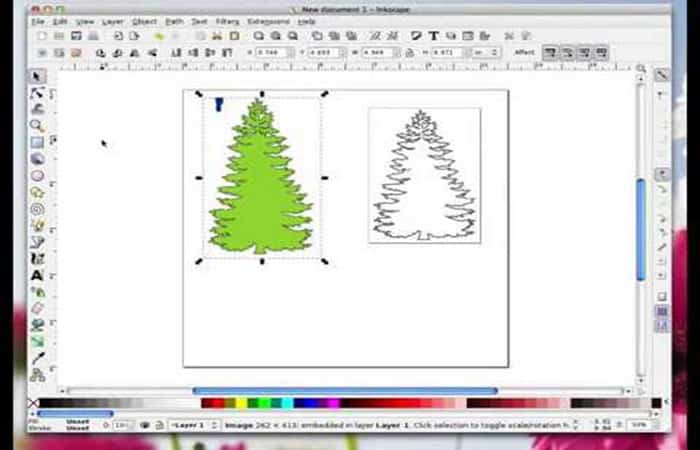
- Step 1: : Here you will use Multiple Scans : color option with 10 scans. There are 10 objects stacked in the result.

- Step 2: : After ungrouping, all 10 objects can be moved

Method 4: Vectorize an image in Inkscape
Use Inkscape to vectorize a captured image in 3 simple steps.
- Step 1: : Open the PNG image in Inkscape. Open an image in Inkscape or drag an image into your Inkscape document.
- Step 2: : Trace Bitmap (Path -> Trace Bitmap) Then, place the cursor over Ruta in the top toolbar of Inkscape and click Plot bitmap .
- Step 3: : Complete Vectorization.
How to convert an image to a vector?
- Step 1: : Choose an image to convert to vector.
- Step 2: : Select an image tracking preset.
- Step 3: : Vectorize the image with Image Trace .
- Step 4: : adjust your traced image.
- Step 5: : Choose, Ungroup Colors.
- Step 6: : edit your vector image.
- Step 7: : Save your image.
How to use an image in Inkscape?
- Step 1: : Go to File menu > Import (or drag and drop), to bring the image into Inkscape.
- Step 2: : Use the tool Feather/Bezier from Inkscape, the tool Pencil/Hand raised or the tool Calligraphy (depending on the effect or style you want) to draw right on top of the imported image.

How to convert an image to a line drawing in Inkscape?
To convert JPG to Line Art Select a file and do the following:
- Step 1: : Download a copy of Inkscape. Install Inkscape on your computer.
- Step 2: : Open the conversion tool.
- Step 3: : Click the button "To update" in the frame «Draw Bitmap»
- Step 4: : Adjust the settings of » Plot bitmap » to create the look of your final conversion.
How to convert an image to a vector for free?
This is how to use the online PNG or JPG to SVG converter
- Step 1: : Choose an image in PNG or JPG format from your computer.
- Step 2: : Select the number of palettes for your output vector file.
- Step 3: : set the option Simplify to soften your exit.
- Step 4: : Click on » Generate » Vectorize images.
How can you vectorize an image in inkscape for free?
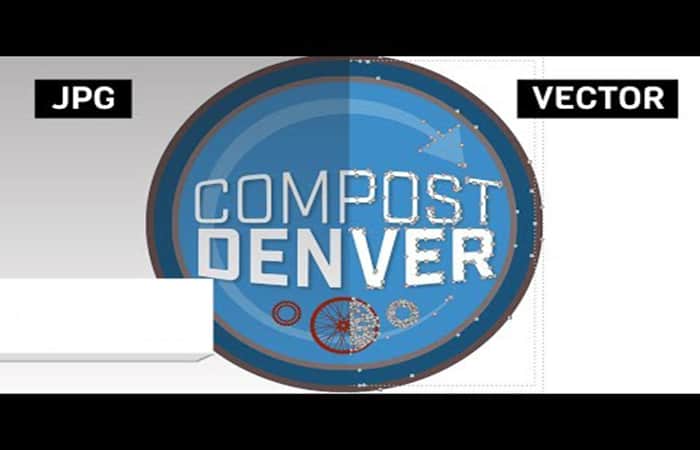
Vectorization (or image tracing) can be done online for free.
- Step 1: : go to Photopea.com
- Step 2: : Press File - Open and open your raster image.
- Step 3: : Then press Image – Vectorize bitmap .
Can you convert a PNG file to a vector?
Since PNG is a raster format, there's no way to directly convert it to a vector format. To create a vector trace of your PNG file, you'll need to use a vector graphics application, such as Inkscape or Adobe Illustrator.
How to change a vector image from black to white?
- Step 1: : Select the objects whose colors you want to convert.
- Step 2: : Choose Edit > Edit Colors > Convert to Grayscale .
NOTE : Use the Edit > Edit Colors > Adjust Colors command to convert objects to grayscale and adjust gray shades at the same time.
How to fill an image with black in Inkscape?
Open the Fill and Stroke dialog box by selecting Object >> Fill and Stroke (alternatively you can use the keyboard shortcut, Shift + CTRL + F ).
How to fix a pixelated image in Inkscape?
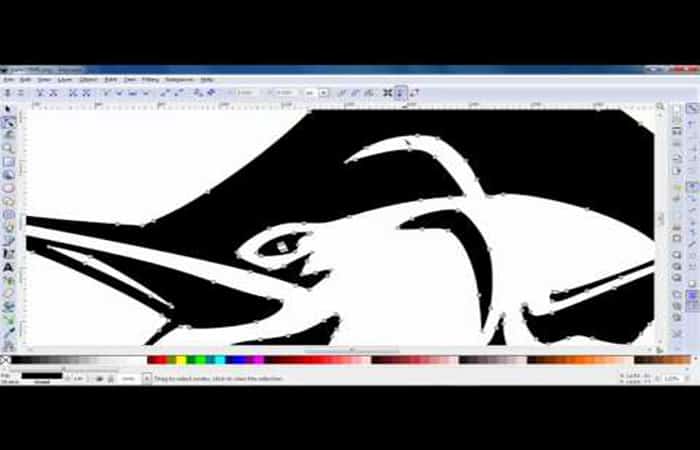
- Step 1: : Select the full image by browsing to Edit > Select All in the Inkscape menu or by pressing Ctrl + A on your keyboard.
- Step 2: : Then go to Path > Trace Bitmap or press Shift + Alt + B on your keyboard.
- Step 3: : In the dialog box Plot bitmap , Choose Colors as a mode and make sure that Smooth is not marked.
How to fill an image?
- Step 1: : To fill a selection or layer with color
- Step 2: : Choose a foreground or background color.
- Step 3: : Select the area you want to fill.
- Step 4: : Choose Edit > Fill to fill the selection or layer.
- Step 5: : In the dialog box Filling , choose one of the following options to use, or select a custom pattern: Specifies the blending mode and opacity of the paint.
How to convert a jpeg to a line drawing?
- Step 1: : Configure your layers.
- Step 2: : Convert the image to grayscale using an adjustment layer.
- Step 3: : Turn your photo into a line drawing.
- Step 4: : Sets the background and foreground colors.
- Step 5: : Add pencil shading to your image.
- Step 6: : Add a crosshatch effect to your image.
How to convert an image into a wireframe?
To convert a Photoshop image to a wireframe in Inkscape, you need to do the following:
- Step 1: : Open an image in Photoshop and press «Ctrl – J» to create a duplicate layer of the original image.
- Step 2: : Choose "Filter" in the menu bar and then click "Blur" .
- Step 3: : Choose "Gaussian blur" and drag the slider to the right to increase the amount of blur.
Is a JPG file a vector file?
JPEG, GIF, and PNG are common raster image types. Vector images, on the other hand, allow for greater flexibility. Built with mathematical formulas rather than individual blocks of color, vector file types like EPS, AI, and PDF* are excellent for creating graphics that frequently need to be resized.
Is an SVG a vector file?
An SVG (Scalable Vector Graphics) file is a vector image file format. A vector image uses geometric shapes such as points, lines, curves, and polygons to represent different parts of the image as discrete objects. These shapes can be edited individually.
How can you change an image to black and white?
To change an image to grayscale or black and white you must do the following:
- Step 1: : Right-click the image you want to change, and then click Image format in the context menu.
- Step 2: : Click on the Image tab .
- Step 3: : In Picture Control, in the Color list, click in Grayscale o Black and white.
Why is the recolor illustration grayed out?
The option is probably gray because your current primary color (fill) is empty. Pressing D selects the default colors (white fill/black stroke) and also resets your stroke, so the action is pointless in your case.
How to fill and stroke in Inkscape?
- Step 1: : The menu of Fill Dialog y Stroke Object ‣ Fill and Stroke . (keyboard shortcut Shift + Ctrl + F) via its icon. or by double-clicking on the fill and stroke fields at the bottom left of the Inkscape window.
How do you fill a bounding area in Inkscape?
The keyboard command Shift + click fills from the click point and then joins the resulting path with the selected path.
This way, if your first attempt didn't fill the entire desired area, you can Shift + click on the remaining corner to fill it separately and combine the result with the result of the previous fill.
How do you outline a shape in Inkscape?
Use the Stroke to Path button. When you hover over a button, Inkscape will tell you what that button does. You'll now see that the path has changed; it's outlining the stroke you created. You can now edit the fill with any stroke you like.
You might also be interested in reading about: 8 programs for creating vector images
Conclusion
As you can see, these are the methods you can use to vectorize an image in Inkscape. There are also other methods and design programs like Photoshop and Illustrator that can be very helpful when trying to convert a JPG image to a bitmap for vectorization. We hope this information has been helpful.

My name is Javier Chirinos and I am passionate about technology. Ever since I can remember, I have been interested in computers and video games, and that passion has turned into a job.
I have been publishing about technology and gadgets on the Internet for over 15 years, especially in mundobytes.com
I am also an expert in online marketing and communication and have knowledge in WordPress development.