- Updating the SSD firmware on Linux improves stability, performance, and fixes serious controller errors.
- Each manufacturer offers different methods: bootable ISOs, specific executables, or dashboards only for Windows.
- In addition to the firmware, the following are key: AHCI mode, TRIM, secure spot erase, and correct mounting configuration.
- After updating, it's advisable to check SMART and, if errors persist, contact technical support or the warranty.
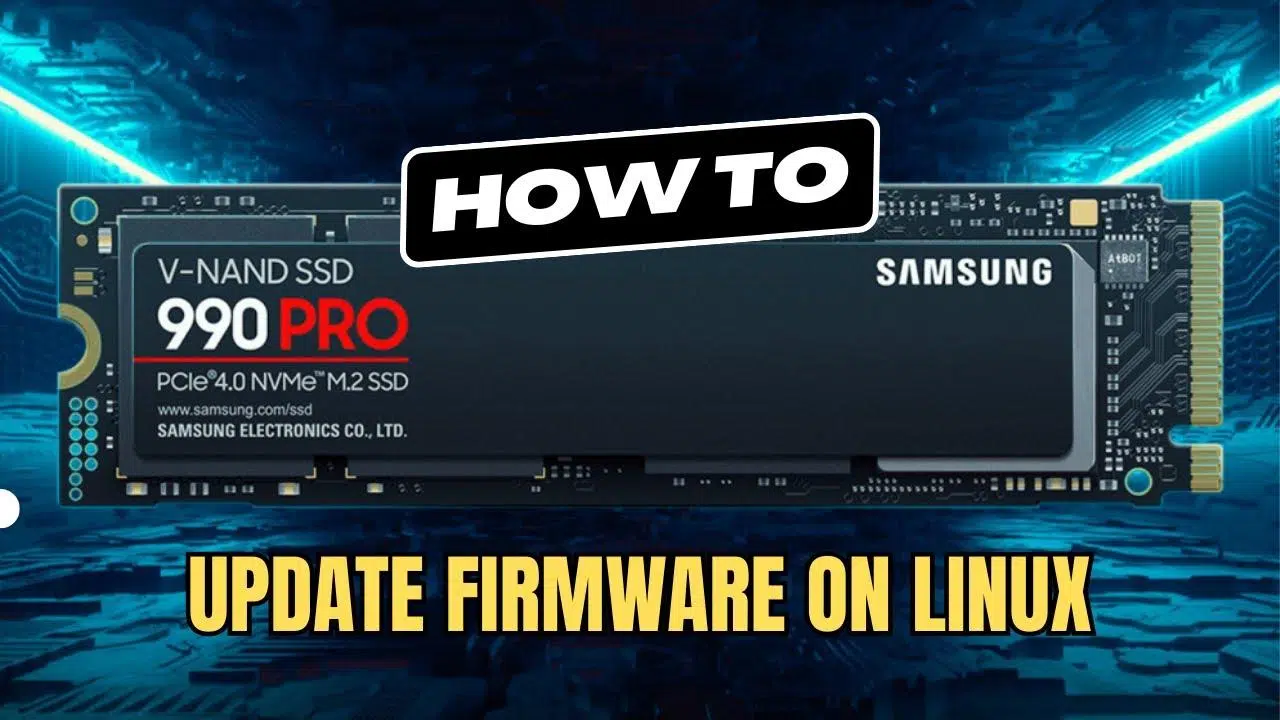
If you use Linux daily and have a modern SSD, sooner or later you'll have to deal with the disk firmware updatesIt's not exactly the most fun thing in the world: each manufacturer does its own thing, many only offer utilities for Windows, and in the case of some brands, they don't even release a simple binary that you can use directly with typical Linux tools like nvme-cli o hdparmEven so, with a little know-how, you can keep your SSD up to date without leaving your favorite distribution.
Updating firmware isn't a whim. In practice, it can mean the difference between a stable system and one that freezes with constant iowait errors, random crashes, and boot problems , especially with some older SSD models. Furthermore, many firmware updates fix critical bugs with certain file systems, improve performance, or add proper support for features like TRIM. Let's take a detailed look at how this is handled in Linux with different manufacturers and what precautions should be taken.
Why is it so important to update the SSD firmware?
Before we delve into commands and tools, it's important to understand what's at stake. Firmware is the SSD's "internal operating system" : the code that manages how data is written and read, the flash memory controller, the internal block tables, wear leveling, and so on. An error there is no small matter; it can cause anything from performance loss to critical failures.
Some users, after a few days of enjoying their new SSD, have started experiencing extremely long I/O wait times, extreme slowness, and system freezes , even to the point where fresh Linux installations refuse to boot. In many of these cases, the first step to rectify the situation has been to update the firmware to a version corrected by the manufacturer.
In specific models (such as some older OCZ Octane or Vertex drives), the firmware update has not only eliminated stability issues but also resulted in a noticeable performance boost. It's an adjustment we usually leave for "another day," but in the case of SSDs, it should be treated almost as an integral part of the system setup.
However, while the process typically doesn't erase your data, any flashing operation falls into the category of "if something goes wrong, it will happen at the worst possible moment." Therefore, it's highly recommended to have a backup or system image before modifying the firmware.
Firmware manufacturers and support on Linux: the real picture
The biggest problem you'll encounter isn't technical, but rather an ecosystem issue: each brand handles firmware updates differently, and official support often focuses almost exclusively on Windows . For Linux, you often have to resort to bootable ISO images, specific utilities, or simply improvise workarounds.
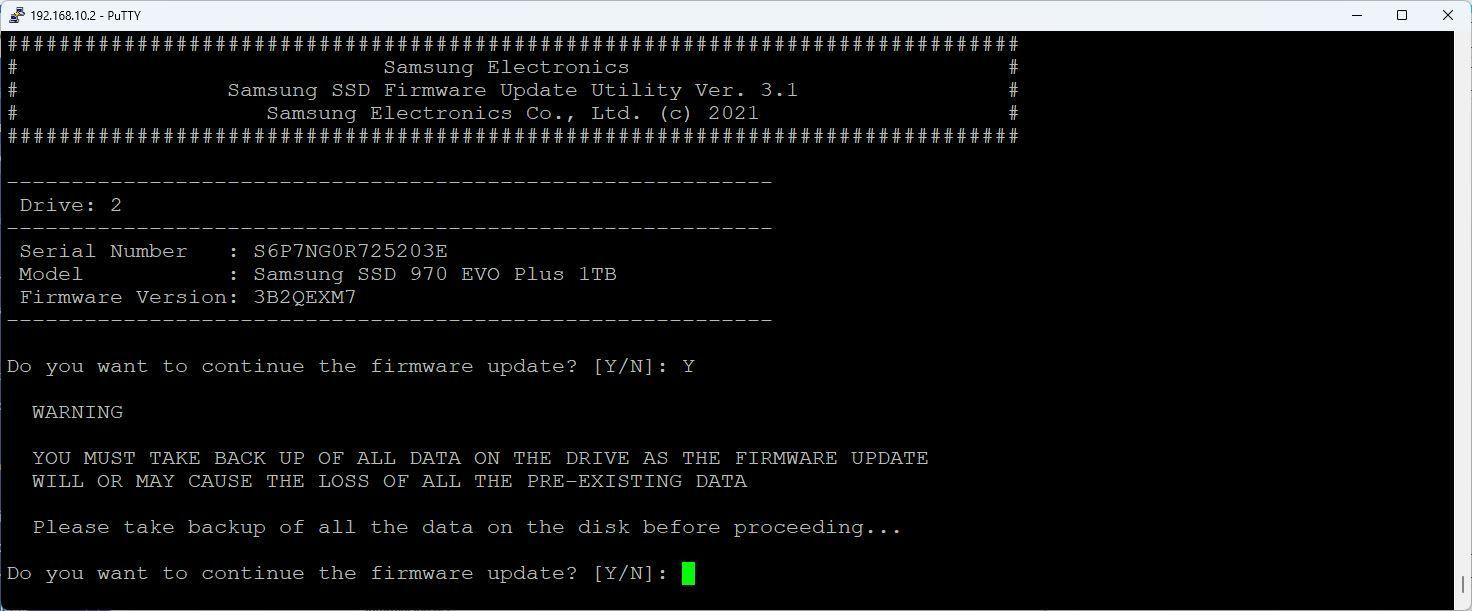
In the case of Samsung, for example, there are situations where a direct binary for use with is not provided. nvme-cliThis forces us to resort to update ISO images These are designed to boot into their own environment and flash from there. However, from Linux we can "unpack" that ISO and run the update tool directly.
Other manufacturers, such as OCZ (before its acquisition, very popular with the Vertex and Octane), distributed Linux-specific utilities as executables that connect to the internet, detect the model, and download the latest firmware version. The process typically involves preparing a USB drive with a live distribution and working from there to avoid using the hard drive.
At the other extreme, some brands offer virtually no official Linux tools, or only allow updates from Windows or the motherboard's built-in utility. This is the case with many OEM systems (Dell, HP, Lenovo, etc.), where SSD updates are integrated into the manufacturer's update mechanisms and are not offered directly to the user as a generic firmware file.
Updating the firmware of a Samsung NVMe SSD (example with 980 Pro)
Let's take the example of a fairly common NVMe SSD, such as a Samsung 980 Pro . The manufacturer provides firmware update ISO images that, in theory, are intended to be burned to a USB drive and booted from there. However, from Linux, we can use that ISO without needing to reboot into a different environment.
The basic procedure would be as follows. First, locate the ISO corresponding to your SSD model in the Samsung support tools section, within their storage utilities (the typical path is something like “consumer storage / support / tools” on their website). Once you've identified the correct ISO, download it using something like:
wget https://semiconductor.samsung.com/resources/software-resources/Samsung_SSD_980_PRO_5B2QGXA7.iso
Next, create a mount point and mount the image using the loop option:
sudo mkdir /mnt/iso
sudo mount -o loop Samsung_SSD_980_PRO_5B2QGXA7.iso /mnt/iso
Within that ISO there is usually an initrd containing the entire upgrade environment . From Linux you can extract it with a command like this:
sudo unmkinitramfs /mnt/iso/initrd ~/980
Once unpacked, you'll see that inside is the binary responsible for the update, known in this context as fumagicianYou mark it as executable and launch it directly:
sudo chmod +x 980/root/fumagician/fumagician
sudo ./980/root/fumagician/fumagician
The tool will guide you through the process and, at some point, will ask for confirmation. Click "yes" to accept the process and let the program write the new firmware to the NVMe drive . Do not interrupt the process under any circumstances, and definitely do not turn off the machine.
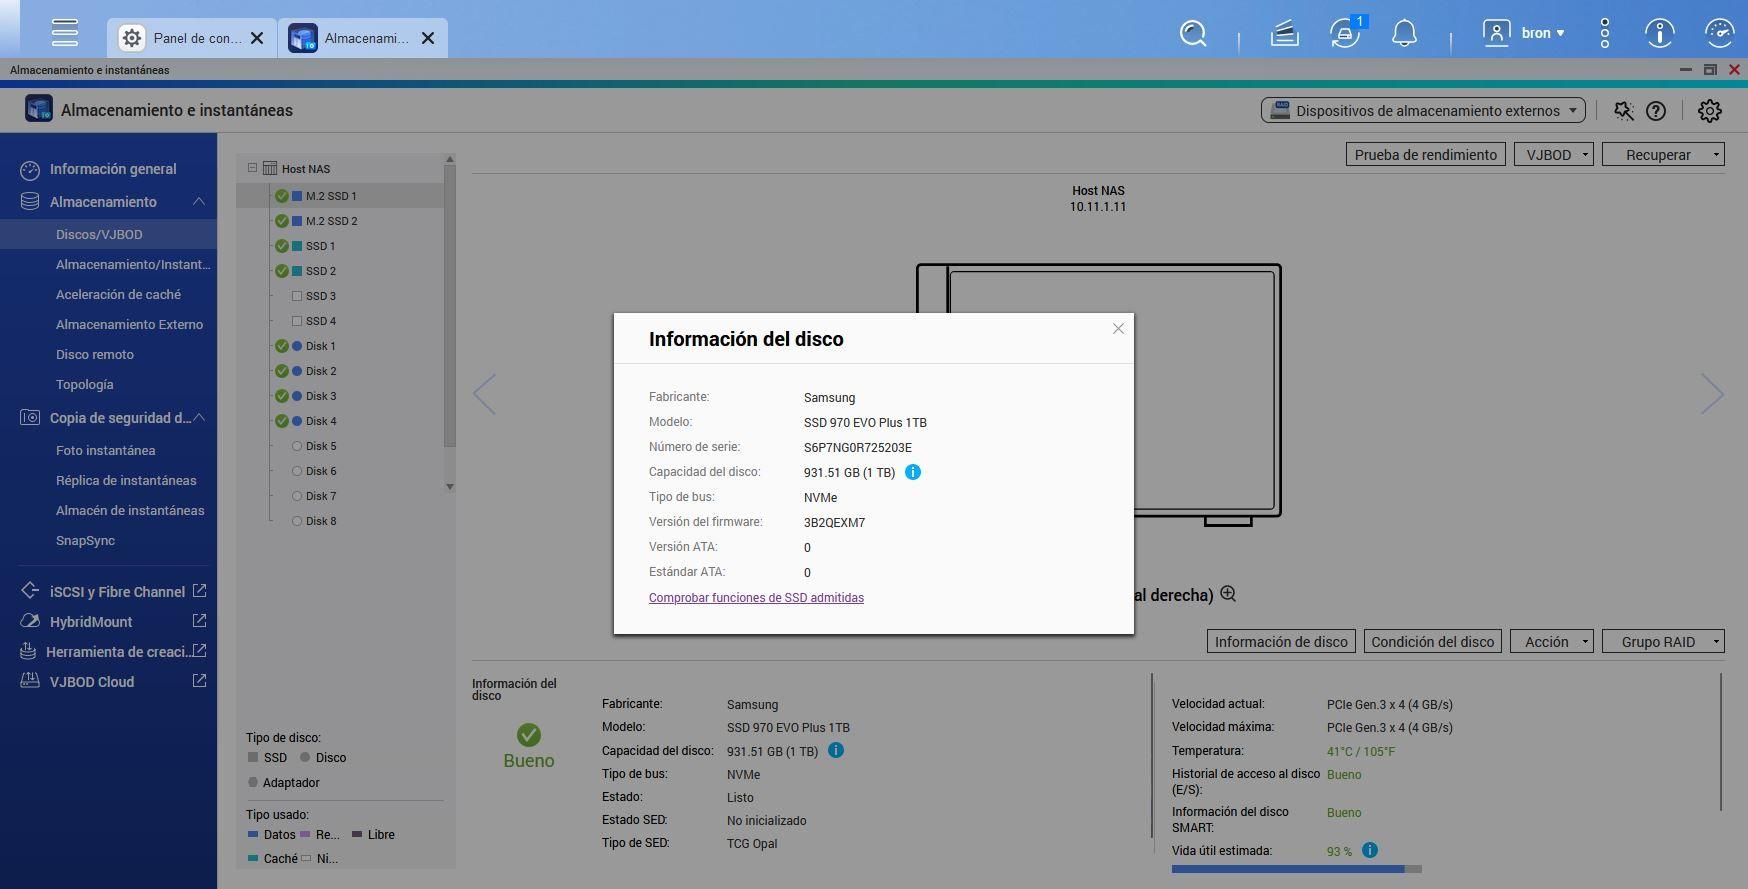
When finished, it's advisable to turn off or restart the device to force a complete power cycle. After restarting, you can verify that the firmware version has been updated correctly with:
sudo nvme list
The output of this command will show the SSD model and the updated firmware field. If the revision number matches the expected one, the operation has been completed successfully and your Samsung 980 Pro is now up to date.
Updating firmware of classic SATA SSDs (e.g., OCZ Octane / Vertex)
Moving on to older SATA SSDs, the approach is usually different. A typical example is the OCZ Octane or Vertex , very popular in their time, which suffered from some stability issues in older firmware versions. Users with these drives have experienced extremely high boot times, partial freezes, and recurring failures when booting various distributions.
For these types of drives, the manufacturer offered specific tools (like OCZ Toolbox for Windows) with several limitations: for example, they didn't allow flashing the drive from the same system SSD , they required the operating system to be installed on a separate drive, and they could fail if you had certain drivers installed (like specific versions of Intel RST). A significant inconvenience, especially if you already use the SSD as your primary drive.
The practical solution for most users was to use a bootable USB flash drive with a live Linux distribution (such as Ubuntu), copy the firmware update executable provided by OCZ onto it, and perform the entire process by booting from that USB drive. The procedure, in general terms, would be:
First, prepare a USB drive of at least 1 GB and write a live Ubuntu image to it using utilities such as unetbootinThis tool allows you to both download the ISO directly (if you don't already have it) and reuse a downloaded ISO to write it to a USB drive, after formatting it in FAT32. It is essential to select the correct unit from the USB drive so you don't accidentally flash another hard drive.
Next, you download the OCZ firmware executable (a file named something like fwupdand place it in the root directory of the USB drive. When you restart your computer, enter the BIOS, restore the default settings if you wish, change the SATA controller mode to AHCI, and select to boot from the Ubuntu live USB.
When you load the live environment, you confirm that you have internet access (for example, by opening Firefox and verifying that you can browse) and locate the file fwupdwhich in many cases will appear mounted under a route type /cdromThis distribution treats the USB drive as if it were an optical drive, so it's normal to see the contents under that directory.
From a terminal, you run the utility using sudo and pointing to the corresponding SATA device , for example:
sudo /cdrom/fwupd /dev/sda
The program should identify the SSD model (for example, OCZ-VERTEX2), display the serial number, the current firmware version, and, if everything is correct, proceed to flash the new revision. You will see a success message on the screen, and when you check again, the firmware version will have changed to the new one (for example, from 1.24 to 1.29).
It is possible that the SSD is in a state “locked” or “frozen”This prevents flashing. In that case, the tool will display an error message indicating that the drive is locked and suggesting a power cycle. A common way to unlock the drive in this context is to force the computer to suspend from within Ubuntu Live (standby mode), wait a few seconds, and resume. After this cycle, many drives will no longer be frozen and will allow you to run the program again. fwupd successfully.
Once the drive is updated, restart, return to the BIOS, restore any previous settings (including overclocking), and boot your usual operating system from the SSD. Windows, if it's your primary operating system on that machine, will detect changes to the device and prompt you to restart once more. From then on, the drive will operate with the new firmware applied.
Secure erase, AHCI mode and TRIM: key steps around firmware
Firmware updates are often accompanied by other important adjustments to extend the SSD's lifespan and prevent unusual problems. One key concept to understand is that an SSD is not treated like a traditional mechanical hard drive: solid-state drives emulate the interface of an HDD, but internally they are a different story . Therefore, rather than simply formatting them, it often makes sense to perform a secure erase.
Secure erase is simply a secure erase at the controller level that It resets the flash cells and leaves them like new.It can be launched from the manufacturer's own utilities (for example, the OCZ tool) or from Linux using commands such as hdparmAlways with great care. Before you start, it's a good idea to correctly identify the disc with:
sudo fdisk -l
There you'll see something like:
Disk /dev/sda: 128.0 GB, 128035676160 bytes
255 heads, 63 sectors/track, 15566 cylinders, total 250069680 sectors
and the partition details. To find out if the disk is frozen or supports secure erase operations, the following is usually used:
sudo hdparm -I /dev/sda
At the output there is a “Security” block where the status can appear “frozen” or “not frozen”If it is frozen, some guides recommend unplugging and replugging the data/power cable while the system is running (with extreme caution) until the status changes to "not frozen", or resorting to suspending and resuming the system, similar to what was discussed earlier with fwupd.
Another key aspect is how the SATA controller is configured in the BIOS. It's crucial that the SSD operates in AHCI mode and not in IDE/Legacy mode , unless you're using an outdated kernel. Leaving it in IDE mode means losing features like NCQ and, in many cases, proper TRIM support, which ultimately leads to performance degradation and potential problems as the drive fills up.
With Linux installed and running on the SSD in AHCI mode, the next step is TRIM. On systems with ext4 It is common to enable the mounting option discard so that the file system tells the SSD which blocks are no longer in use. This can be done by editing the file. /etc/fstab and adding the corresponding option to the SSD partition lines, for example:
UUID=... / ext4 discard,errors=remount-ro,relatime 0 1
UUID=... /home ext4 discard,defaults,relatime 0 2
With discard activated, the system launches TRIM in real time When you delete files or free up blocks. The option relatime (which is already the default in recent kernels) reduces the frequency with which file access times are updated, slightly lowering the write load on the SSD. Another common strategy is to move things like swap space to a traditional mechanical hard drive. /var or browser caches, especially if you're concerned about the longevity of the solid-state drive.
When the firmware is only updated from Windows or OEM
Not all scenarios are so "Linux-friendly." In many cases, especially with SSDs sold under brands like SanDisk or WD, the official tool for managing the drive and updating its firmware is a dashboard available only for Windows . This program detects both SanDisk and WD drives, communicates directly with the SSD, and if it finds a newer firmware version hosted in the manufacturer's cloud, it downloads and installs it.
In these environments, Mac and Linux versions of the Dashboard simply don't exist. If you have a pure Linux system and your SSD is from one of these brands, you'll find there 's no official application to flash it from your system . The alternative usually involves one of these options: temporarily booting Windows from another disk or USB drive, using a different Windows computer to update the drive, or, in the case of OEM machines (Dell, HP, Lenovo, etc.), relying on the update utilities built in by the computer manufacturer.
In OEM systems, things get a bit more complicated: even if the SSD is physically a SanDisk or WD model, its firmware is usually a variant specific to that manufacturer . Firmware updates are then distributed through tools like "Dell Updates," "HP Support Assistant," and similar programs, and the retail dashboard doesn't apply them because they're designed for the specific OEM configuration, not for consumer drives.
Very important: If the Dashboard indicates that your firmware is up to date, but you've seen a newer version elsewhere, this could be due to the difference between retail and OEM firmware . It's not recommended to try mixing firmware from different channels, because OEM SSDs may have different features or operating parameters.
Regarding receiving the default firmware file for manual application, manufacturers are usually very clear: the manual Dashboard update option is intended for special cases where technical support provides a very specific test file and precise instructions for loading it. It's not common for them to freely provide you with that binary for you to run from Linux on your own.
If your SSD is already at its end of life (EOL), the official utilities usually allow you to apply the last firmware version released while the product was on sale , but there won't be any further revisions after that. And if the Dashboard fails to flash the drive, your only option is to open a support case and see if they offer any alternative solutions.
Checking the SSD status after the upgrade
After tinkering with the firmware, it's a good idea to perform some disk health checks. Beyond simply checking the version number with nvme list or through the BIOS, it is advisable to take a look at the SMART data of the unit to confirm that no unusual relocated sectors, critical errors, or anything out of the ordinary are detected.
On Linux you can install the package smartmontools and use smartctl To read this information. For example:
sudo apt-get install smartmontools
sudo smartctl -a /dev/sda
This will show you a wealth of metrics: error count, number of reallocated blocks, temperature, power-on hours, and so on. Some graphical interfaces, such as the "Disks" utility in GNOME environments, also offer a SMART status tab and basic benchmarks . Note that if the disk is mounted, certain benchmarks may fail, indicating that the device is busy.
If, after updating the firmware, configuring AHCI, enabling TRIM, and checking parameters, the SSD continues to have serious problems, the wisest course of action is to prepare the SMART data and contact the manufacturer's technical support . It wouldn't be the first or last unit that needs to be replaced under warranty because it was defective from the factory or has suffered abnormal degradation.
Ultimately, although the process of updating SSD firmware on Linux might seem like a bit of an ordeal involving ISOs, specific tools, AHCI modes, and "frozen" states, it's worth having it under control: having stable firmware, with TRIM properly configured, secure erase when necessary, and regular SMART monitoring makes a huge difference in ensuring your SSD-based Linux system runs fast, reliably, and without unexpected issues for years to come.

Table of Contents
- 1 Why is it so important to update the SSD firmware?
- 2 Firmware manufacturers and support on Linux: the real picture
- 3 Updating the firmware of a Samsung NVMe SSD (example with 980 Pro)
- 4 Updating firmware of classic SATA SSDs (e.g., OCZ Octane / Vertex)
- 5 Secure erase, AHCI mode and TRIM: key steps around firmware
- 6 When the firmware is only updated from Windows or OEM
- 7 Checking the SSD status after the upgrade