- Native tools (Explorer and Photos) rotate with EXIF in 90/180° rotations, without loss of quality.
- Pixel-by-pixel rotation rewrites the JPEG and may minimally degrade the image.
- Batch processing works per folder; for multiple locations, a cataloger is a good idea.
- Don't confuse rotating photos with rotating the screen: they are different functions in Windows.

If you want to fix the orientation of a photo or rotate it because it looks better that way, it's a piece of cake in Windows 11 , and best of all, without adding any extra programs. With the built-in tools, you can instantly rotate images , both individually and in groups, and choose whether to overwrite the file or save a copy.
In this guide, you'll find the fastest methods using File Explorer and the Photos app, along with a very useful technical overview of the difference between rotating using EXIF metadata and rotating pixel by pixel. You'll also see tips for batch editing , how to do it in Paint or Word without installing anything, what happens on mobile devices and Linux , why some online services might reduce quality, and what to do if your screen or photos aren't rotating correctly.
Rotate an image from File Explorer
File Explorer is the quickest way to rotate images left or right without opening any image editors. With File Explorer open (Windows + E), locate the image, right- click , and choose Rotate Right or Rotate Left. It's instant.
To process multiple photos at once, select all of them before rotating. You can select a contiguous block by holding Shift and clicking on the first and last photos, or select individual items by clicking Ctrl+clicking . If you make a mistake, simply repeat the process in the opposite direction, and the photos will return to their original orientation.
Selection tricks: In viewers or galleries with thumbnail or strip view, you can advance using Next/Previous buttons to change the active image; and if the program has an Edit menu, you'll find Select All to encompass all the thumbnails on the screen.
Rotate with the Windows 11 Photos app
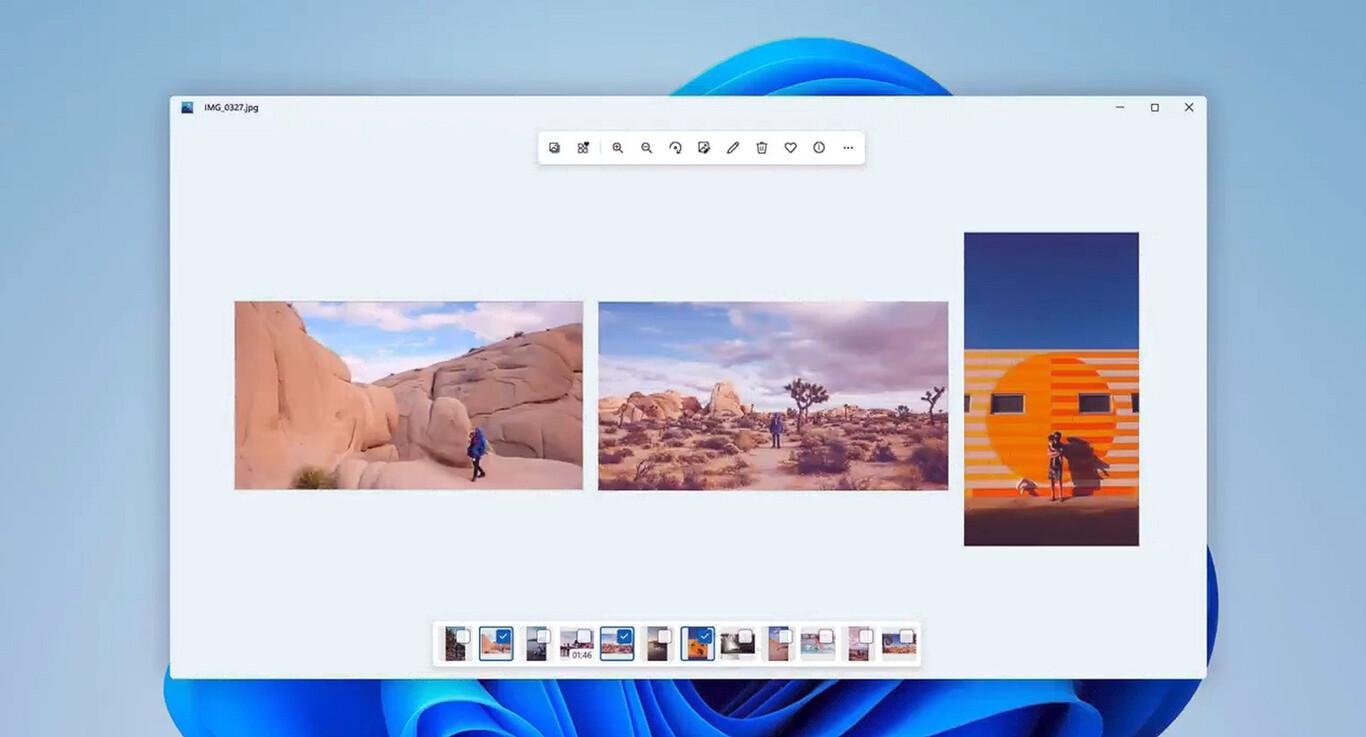
The Photos app allows for quick 90-degree rotations (clockwise and counterclockwise). Open the image with Photos (double-click if it's the default viewer, or right-click > Open with > Photos) and access editing mode using the Edit Image icon in the top bar or Ctrl + E.
In the editor, use the rotation buttons at the bottom: the arrow pointing to the right rotates 90° clockwise; the one pointing to the left, 90° counterclockwise. You can repeat these steps as many times as you like until you achieve the exact orientation.
When saving, you'll see three options: Save as copy (creates a rotated file and keeps the original), Save (overwrites the image), or Copy to clipboard (leaves the rotated version ready to paste into compatible apps ). This is a key decision if you want to avoid accidentally overwriting the original photo.
Rotate with Paint (without installing anything)
Paint also comes pre-installed on Windows 11 and can be used for quick flips. Open the image by right-clicking > Open with > Paint (if it doesn't appear, choose "Choose another app"). You'll then see Rotate/Flip options in the ribbon: you can rotate 90°, 180°, or flip horizontally/vertically.
In native methods (Explorer, Photos, and even Paint for standard rotations), Windows leverages metadata when appropriate, so photo quality remains intact during EXIF-compatible 90/180° rotations. I'll explain why below.
EXIF vs. Pixel-by-Pixel Rotation: What Nobody Tells You
There are two ways to correct an image's orientation: modifying the EXIF Orientation tag or rewriting the image itself (pixel-by-pixel rotation). The first method doesn't alter the photo's data; it simply saves an instruction for the viewer to display it rotated. The second method manipulates the pixels and saves the file again.
What does this mean? JPEG is a lossy compression format. Every time you save it after editing, it's recompressed, and "less significant" details are discarded. This means that if you rotate pixel by pixel and save it again as a JPEG, however small the modification, there will be a minimal loss of quality. This is especially noticeable when enlarging areas with sharp colors or edges and can be related to issues like blurry images and incorrect frame rates.
With EXIF data, this degradation doesn't occur: the original photo remains intact, and the viewer displays it correctly according to the tag. The drawback is that EXIF only considers certain angles and mirrors: 0°, 90° clockwise, 180°, 90° counterclockwise, and horizontal/vertical reflections. To straighten at an arbitrary angle (for example, 2° to correct the horizon), you'll have to perform an actual pixel rotation , which may also require cropping the edges.
In Windows 10 and 11, the built-in photo rotation options work well with EXIF data and usually support this lossless method for 90/180° rotations. You can check the metadata with tools like XnView to see the Orientation tag. When editing with heavyweight editors ( GIMP or Photoshop ), the results may vary: depending on compression settings, the file size may increase or decrease, and sometimes metadata is deleted during saving, something to keep in mind if you value the capture data.
Want to fix a precise angle or straighten a photo? (GIMP/Photos and Mobile)
If you need a precise angle that isn't a multiple of 90°, you'll need to use an editor that rotates pixel by pixel (GIMP or Photoshop). The trade-off is that the program rewrites the JPEG, with the slight losses that are unavoidable due to compression. Furthermore, rotating a pixel array creates "gaps" in the corners, so cropping is usually applied to maintain aspect ratios.
On mobile devices, Google Photos ( Android ) and Photos on iOS allow you to tilt or rotate images in both small increments and 90° increments. These are very convenient for quick fixes, but they don't allow batch processing of multiple images , and when saving, the file is usually overwritten, resulting in minimal data loss and changes in file size. On iOS, even 90° rotations often end up being re-exported because the file size decreases after several rotations; if you're working on an iPhone , learn how to rotate an image vertically on an iPhone.
Rotating many photos at once: limits and alternatives
Windows 11 lets you select a set of photos in the same folder and rotate them all at once from Explorer. The practical limitation is that if the images are scattered across different locations, you'll have to go folder by folder or temporarily group them together to process them in a single action, which isn't always convenient.
If you're dealing with hundreds of files spread across multiple folders, third-party catalogs like Tonfotos allow for bulk metadata editing, including EXIF orientation , without compromising quality. The idea is to select multiple photos (press Ctrl for non-contiguous selections) within the catalog and apply the necessary rotation. Even on Linux, where you can't install Photoshop, Tonfotos works and handles these tasks without recompression.
Rotate within Word (shapes and images) once you have it installed
Although Word isn't part of the base system, many people have it on their PCs without needing to install anything extra. In Word, insert the image or shape and select it: you'll see the rotation handle on the border. Drag it to rotate freely; if you hold Shift, the rotation will be locked in 15° increments.
For an exact value, with the image selected, go to the Format Picture or Format Shape ribbon, click Rotate, and then More Rotation Options. There you can enter a specific number in the Rotation field and also flip it horizontally or vertically.


Passionate writer about the world of bytes and technology in general. I love sharing my knowledge through writing, and that's what I'll do on this blog, show you all the most interesting things about gadgets, software, hardware, tech trends, and more. My goal is to help you navigate the digital world in a simple and entertaining way.