- Windows 11 offers built-in options to customize and make the Start menu more useful without external apps.
- The recovery environment and the BOOTREC, CHKDSK, and SFC commands allow you to repair critical boot failures.
- System restore, uninstalling updates, and resetting the PC are key when the menu and boot process fail.
- Hacks to bring back the Windows 10 menu are experimental and may require reinstalling the system.
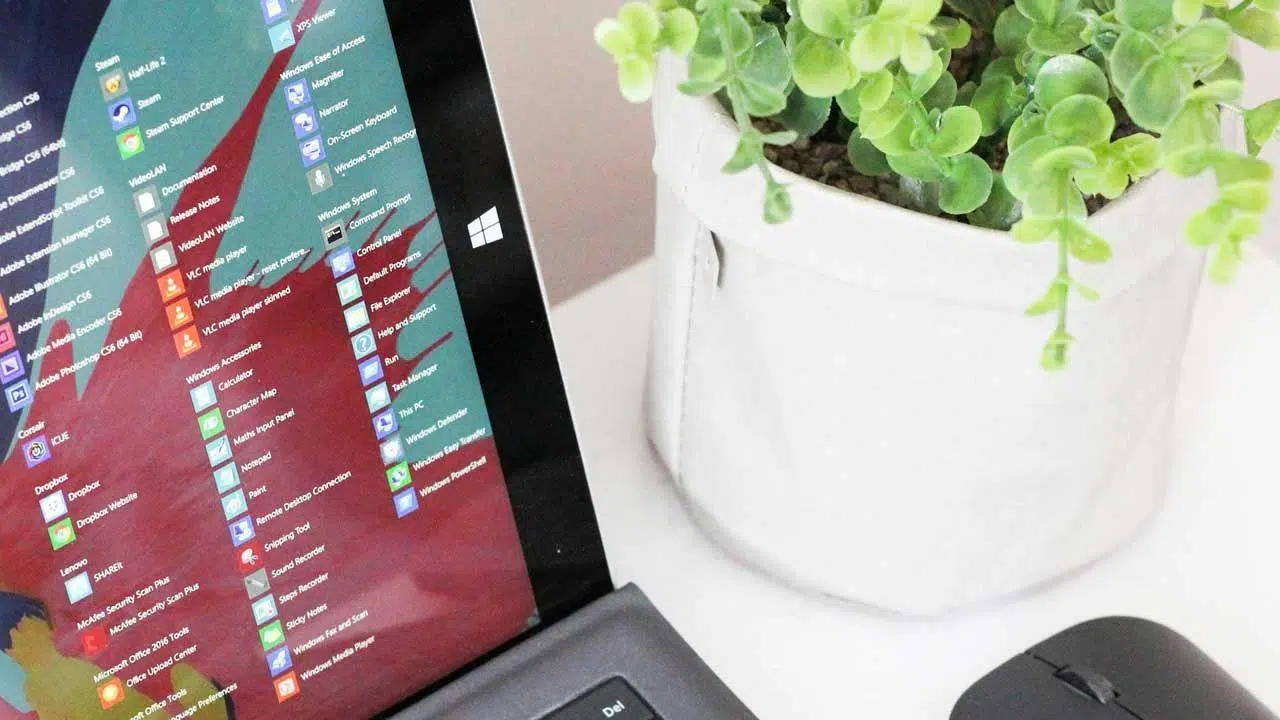
If you've landed here, it's because you can't stand the Windows 11 Start Menu , or you've actually broken it by tinkering with it too much. You're not alone: lack of customization, too many clicks to see all the apps, recommendations that no one cares about… and sometimes, startup errors that leave the system completely unresponsive. The good news is that there are many ways to rebuild or improve the Windows 11 Start Menu without having to install any external programs.
In the following lines, you'll find a comprehensive guide to repairing, tweaking, and maximizing the performance of the Windows 11 Start Menu and boot process using only built-in system tools. You'll also learn what to do when the problem is more serious (damaged critical files, corrupted BCD, boot loops, etc.) and what precautions to take if you're considering more advanced experiments inspired by Windows 10 hacks.
Since the release of Windows 11, the taskbar and Start menu have received constant criticism . For many users, the change from Windows 10 has been for the worse: fewer customization options, difficulty grouping items, wasted space, and too many steps to access certain functions.
Microsoft has, however, been introducing small improvements and offers built-in options to customize the interface , although many people aren't even aware of them. Before you drive yourself crazy looking for third-party software or frantically tinkering with system files, it's worth familiarizing yourself with all the possibilities that Windows 11 offers by default to make the Start menu more user-friendly and functional.
It's important to distinguish between two scenarios: first, when the Start menu works but you don't like its layout or what it displays ; and second, when the PC malfunctions, throws errors, or gets stuck on a black screen or in an automatic repair loop. In both cases, there are built-in tools that can save the day.
For many people, the Start menu is the starting point for opening almost everything : applications, recent documents, key folders, etc. That's why it's so annoying that Windows 11, by default, prioritizes recommended items and leaves little room for pinned apps. Fortunately, this can be largely managed using customization options.
The first setting you should adjust is the Start menu layout . Windows 11 offers a default layout with pins at the top and recommendations at the bottom, but you can tell the system you want more space for pinned icons. To do this, go to Settings > Personalization > Start and, in the layout section, choose the option that prioritizes "More pins" (more pinned apps and fewer recommendations) . This will give you a grid more similar to the one many had in Windows 10.
Another common problem is that the Start menu doesn't display shortcuts to frequently used system folders like Documents, Downloads, Pictures, Network, or File Explorer. If you're someone who always opens the same folders, it's pointless to have to search for them manually. From Settings > Personalization > Start > Folders, you can enable the folders you want to appear next to the power button in the Start menu, gaining very practical shortcuts without installing anything extra.
All of this is part of customizing the Windows 11 interface , which also extends to the taskbar, lock screen, and other elements. By adjusting the layout, visible folders, and what's shown in the recommendations section, you can make the Start menu much more tailored to your daily needs, without resorting to third-party applications.
It's worth remembering that some visual and behavioral features of the Start menu also depend on general system settings (light/dark theme, animations, taskbar behavior, etc.), so it's worth taking a look at the Personalization section as a whole to achieve a more coherent environment.
One of the most frequent requests from advanced users is to bring back a Start menu similar to that of Windows 10 , with more control over tiles and groups. In some builds and test environments, internal options have been seen that allow changing the menu style from the taskbar properties, something like choosing "Start menu style: Windows 10" in an advanced settings panel.
In some cases, this style change has been related to utilities like ExplorerPatcher , which modify the behavior of Explorer and the taskbar to emulate features from earlier versions of Windows. Some users, after installing something like this and forgetting about it, have believed they've discovered a native option, when in reality it was just the effect of that external patch.
It's important to clarify that if your goal is to rebuild the Windows 11 Start Menu without external software , you shouldn't rely on tools like ExplorerPatcher, StartIsBack, StartAllBack, and similar programs. While powerful, they violate the requirement of not using third-party software and, in some cases, can cause incompatibilities after major system updates.
However, these kinds of experiments have shown that, internally, Windows 11 retains much of its legacy shell logic and that the Start menu's behavior can be altered by modifying certain system components. If you don't want to risk system stability, it's best to stick to the official customization options and, at most, use test builds in virtual machines to explore more complex changes.
When Windows 11 fails to even load the desktop correctly , the problem is no longer just "I don't like the Start menu," but likely system file corruption, boot configuration errors, or damage from a failed update. In that scenario, the primary goal is to regain access to the operating system.
Serious boot failures are often accompanied by error messages in the first few seconds after startup, or by black screens where you only hear the PC running. Among the most frequent causes are problems with the Boot Configuration Data (BCD) , the file where the information needed to boot Windows is stored, and errors in WINLOAD.EXE, the executable that locates and loads the operating system from the active partition.
In these cases, all is not lost, because Windows 11 includes a powerful recovery environment (Windows RE) with several tools to diagnose and correct startup errors. If the system detects recurring startup errors, it will usually take you automatically to this environment, where you can run Startup Repair, restore the system to a previous point, or access a command prompt.
It's important to distinguish whether the problem originates from hardware ( damaged hard drive , blocked fans, burnt components) or software. Strange noises, a burning smell, or sudden shutdowns clearly point to hardware issues, while blue screens, repair loops, and crashes after an update usually indicate an operating system or driver failure.
If the problem is software-related, the recovery environment is your best bet. From there, you can first try automatic startup repair and, if that doesn't solve the problem, move on to more manual solutions using CMD, system restore, or, as a last resort, a complete reinstallation.
Use Windows 11 Automatic Startup Repair
The quickest option for many users is to let Windows attempt to repair itself . Automatic Startup Repair is activated from the recovery environment and tries to detect and correct common startup errors without you having to type anything.
If your PC doesn't automatically enter the recovery environment, you can force it by turning your computer off and on several times during the boot process. After a few attempts, Windows should display a blue recovery options menu . There, you'll need to go to "Troubleshoot" > "Advanced options" > "Startup Repair".
When you launch this function, the system performs an automatic boot diagnostic , checking key files, BCD settings, and other related items. The process may take several minutes; when it finishes, your computer will restart, and you can check if Windows 11 boots normally again.
If you see a message like “Automatic Repair couldn’t repair your PC” , you’ll need to resort to alternative methods: restoring the system to a previous point, uninstalling problematic updates, or running advanced commands like BOOTREC, CHKDSK, and SFC from the command prompt of the recovery environment itself.
Sometimes, automatic repair can leave you stuck in a boot loop , always showing the same screen or a black screen after the Windows logo. At that point, it's especially important to use advanced options instead of just restarting randomly, because you risk worsening existing corruption.
Troubleshooting from the recovery environment and CMD
When startup repair doesn't fix the problem, the most effective approach is usually to work directly from the recovery environment using manual tools. The typical path is "Troubleshoot" > "Advanced options" > "Command Prompt," which opens a CMD window similar to the one you're already familiar with, but running outside of the main Windows environment.
From there you can use specific commands to rebuild the boot process and repair disk or system file damage. One of the most important is:
BOOTREC /FixMbr
This command rewrites the Master Boot Record (MBR) on the system partition, replacing the existing one. After running it, it's recommended to restart your computer and check if the problem has disappeared. If it persists, the next step is usually:
BOOTREC /FixBoot
In this case, the command writes a new boot sector compatible with Windows 11. The `/FixMbr` and `/FixBoot` commands resolve many typical boot errors, especially when the problem originates in the BCD configuration or the disk's boot sector itself.
If you suspect physical or logical damage to the disk, you can run CHKDSK to analyze and correct drive errors. For example:
chkdsk C: / f / r
The `/f` command requests automatic repair of logical errors, while the `/r` command requests the location of bad sectors and an attempt to recover readable data. Depending on the disk size and condition, this process can take a considerable amount of time, but it is essential when there are signs of corruption on the drive where Windows is installed.
Finally, another key command is SFC (System File Checker) , which scans system files for corruption and replaces them if it finds correct versions in the Windows cache or on the installation media. In the recovery environment, it is used as follows:
sfc / scannow
This scan checks all protected operating system files and restores any that are damaged or modified . It is particularly useful when an update, a sudden power outage, or malware is suspected of having corrupted critical system components, which in turn can cause boot failures and problems with user interface elements, including the Start menu.
System restore, uninstall updates, and other resources
In addition to manual commands, Windows 11 integrates several more "user-friendly" recovery tools that allow you to return to a previous system state without having to know which specific file is damaged.
One of the most useful is System Restore . From the recovery environment, you can follow the path "Troubleshoot" > "Advanced options" > "System Restore". This feature uses restore points created automatically or manually to revert to a previous Windows configuration , where, hopefully, startup and the Start menu worked correctly.
During a system restore, your personal files (documents, photos, etc.) remain untouched , but drivers, updates, and programs installed after the selected point are rolled back. In other words, the system returns to its exact state at that point, which is usually enough to undo problems caused by faulty drivers or conflicting updates.
Another useful option is to uninstall updates from "Troubleshoot" > "Advanced options" > "Uninstall updates". Here you can remove both quality updates (monthly cumulative patches) and feature updates (larger version jumps) that may have made the system unstable or prevented it from booting correctly.
If Windows continues to boot, even if it does so with errors or unusual behavior, it's recommended to also use the Advanced Startup options from the settings menu . By going to Settings > System > Recovery and using the "Advanced Startup" option, the system will restart directly into the recovery environment so you can use all these tools without having to force a shutdown.
It's important to remember that many visible problems in the Start menu (missing icons, apps that won't open, frozen interface) are actually symptoms of deeper issues . Therefore, combining system restores, uninstalling conflicting updates, and running SFC/CHKDSK commands is usually the safest way to get everything back to normal.
When and how to create an installation USB to repair Windows 11
There are situations where the built-in recovery environment isn't sufficient or doesn't even load . In those cases, it's best to have a Windows 11 installation USB drive on hand to boot the computer from and access the repair tools from outside the installed system.
To create that USB drive, you need another computer with an internet connection . From that second machine, you can download Microsoft's official media creation tool, which guides you step-by-step through creating a bootable USB drive with the Windows 11 image. It's also possible to download the ISO and use utilities like Rufus, but if you want to stick to the official method, Microsoft's tool is sufficient.
Once you have the USB drive ready, turn off the problematic computer, connect the USB drive , and turn it on while repeatedly pressing the corresponding key to bring up the boot menu (depending on the manufacturer, this may be F2, F8, F10, F12, Esc, etc.). Select the USB drive as the boot device and wait for the Windows installation wizard to appear.
Instead of installing directly, choose the "Repair your computer" option , which will take you to the same type of recovery environment offered by Windows RE, but loaded from external media. From there, you'll have access to System Restore, Startup Repair, Command Prompt, image recovery options, and, if all else fails, the installer to reinstall the system.
This type of repair from USB is very useful when Windows 11 itself is so damaged that it can no longer boot its internal recovery environment or when you have manually modified sensitive system files (for example, by trying to force the Start menu of another version of Windows) and the system has become unstable.
Reset or reinstall Windows 11 when there is no other option
If, after trying startup repair, system restore, uninstalling updates, and running BOOTREC, CHKDSK, and SFC commands, Windows 11 still doesn't work properly , it's time to consider more drastic measures: resetting the computer or reinstalling from scratch.
The "Reset this PC" option , accessible from both the recovery environment and Settings > System > Recovery (if Windows still boots), allows you to restore your system to its factory settings while keeping your personal files, if you wish. However, applications and settings will be deleted, so you'll have to reinstall and reconfigure everything afterward.
If you choose to erase everything, the reset will format the system partition and install a clean copy of Windows 11. This is a very effective solution when there is massive file corruption or when you've been accumulating problems for a long time after installing and uninstalling many programs. However, it's essential to have a recent backup of your data, either on an external drive or in the cloud.
The next step is to reinstall Windows 11 from the installation USB drive . Here you can delete all partitions, create new ones, and install the system from scratch as if the computer were brand new. This option usually resolves any issues stemming from corrupted files, extreme configuration problems, or experiments with shell files that have rendered the Start menu and desktop unusable.
Although it may sound very radical, a well-prepared clean reinstall (with backups, a list of essential programs, and license keys on hand) allows you to have a fully functional Start menu and system again in less time than is sometimes wasted trying to revive badly damaged installations.
Advanced hacks inspired by Windows 10: risks and limitations
Experimental methods for restoring the "real Start Menu" of Windows 10 within Windows 11 have been circulating in the advanced user community . These tricks, tested on virtual machines and specific builds, involve taking system files from a leaked Windows 10 build and injecting them into the Windows 11 installation.
The technique usually involves taking ownership of critical system folders and DLLs (such as ShellExperience, Microsoft.Windows.StartMenuExperienceHost, Windows.UI.ShellCommon.pri and other files related to tiles and the tile database) to rename them with a .BACKUP suffix and then replace them with the equivalents from the source build.
After killing processes like startmenuexperiencehost.exe and restarting Explorer, the system loads a classic Windows 10 Start Menu , where the tiles work (with some limitations) and an experience very similar to the one many users miss is restored. However, this type of manipulation has significant side effects.
Known problems include, for example, slow Start menu closures , erratic behavior when pinning or unpinning tiles (in some cases, it only works by dragging from the menu itself or using "Pin to Start" from outside), and system tray icon failures when the Windows 11 taskbar is retained. It has also been observed that restoring certain SystemResources files fixes the tray click, but breaks the right-click on the Start menu.
These types of hacks are considered highly experimental and should not be run on your main computer under any circumstances. They are fine for investigating in a virtual machine and understanding how the Windows shell components are structured, but they involve modifying protected files, the corruption of which can render the system completely unusable, forcing complex repairs or a clean reinstall.
Furthermore, with each new build (for example, builds like .258), Microsoft internally changes the structure and behavior of many of these components, causing tricks that worked in one version to become incompatible or generate new errors in later versions. Therefore, if your priority is stability and rebuilding the Start menu without relying on external software, the sensible thing to do is stick with the official tools.
The Windows 11 Start menu can be quite a pain, both in its design and when it malfunctions, but with the built-in customization options, the recovery environment, repair commands, and ultimately, the reset and reinstall functions, you have plenty of leeway to make it usable again without resorting to third-party programs ; you just need to combine each tool well and know how far it's worth experimenting before risking damaging the main system.

Table of Contents
- 1 Why does the Windows 11 Start menu cause so many headaches?
- 2 Improve and customize the Windows 11 Start menu without external programs
- 3 Revert to a Windows 10-style Start menu
- 4 Repair startup problems that affect the Start Menu
- 5 Use Windows 11 Automatic Startup Repair
- 6 Troubleshooting from the recovery environment and CMD
- 7 System restore, uninstall updates, and other resources
- 8 When and how to create an installation USB to repair Windows 11
- 9 Reset or reinstall Windows 11 when there is no other option
- 10 Advanced hacks inspired by Windows 10: risks and limitations
