- The automatic repair loop in Windows is usually due to corrupted system files, registry entries, or boot managers.
- WinRE allows you to use tools such as SFC, DISM, CHKDSK, and System Restore to repair the boot process.
- It is essential to recover the data before applying advanced solutions or reinstalling Windows.
- If software repairs don't work, there may be a physical disk failure or other hardware failure.
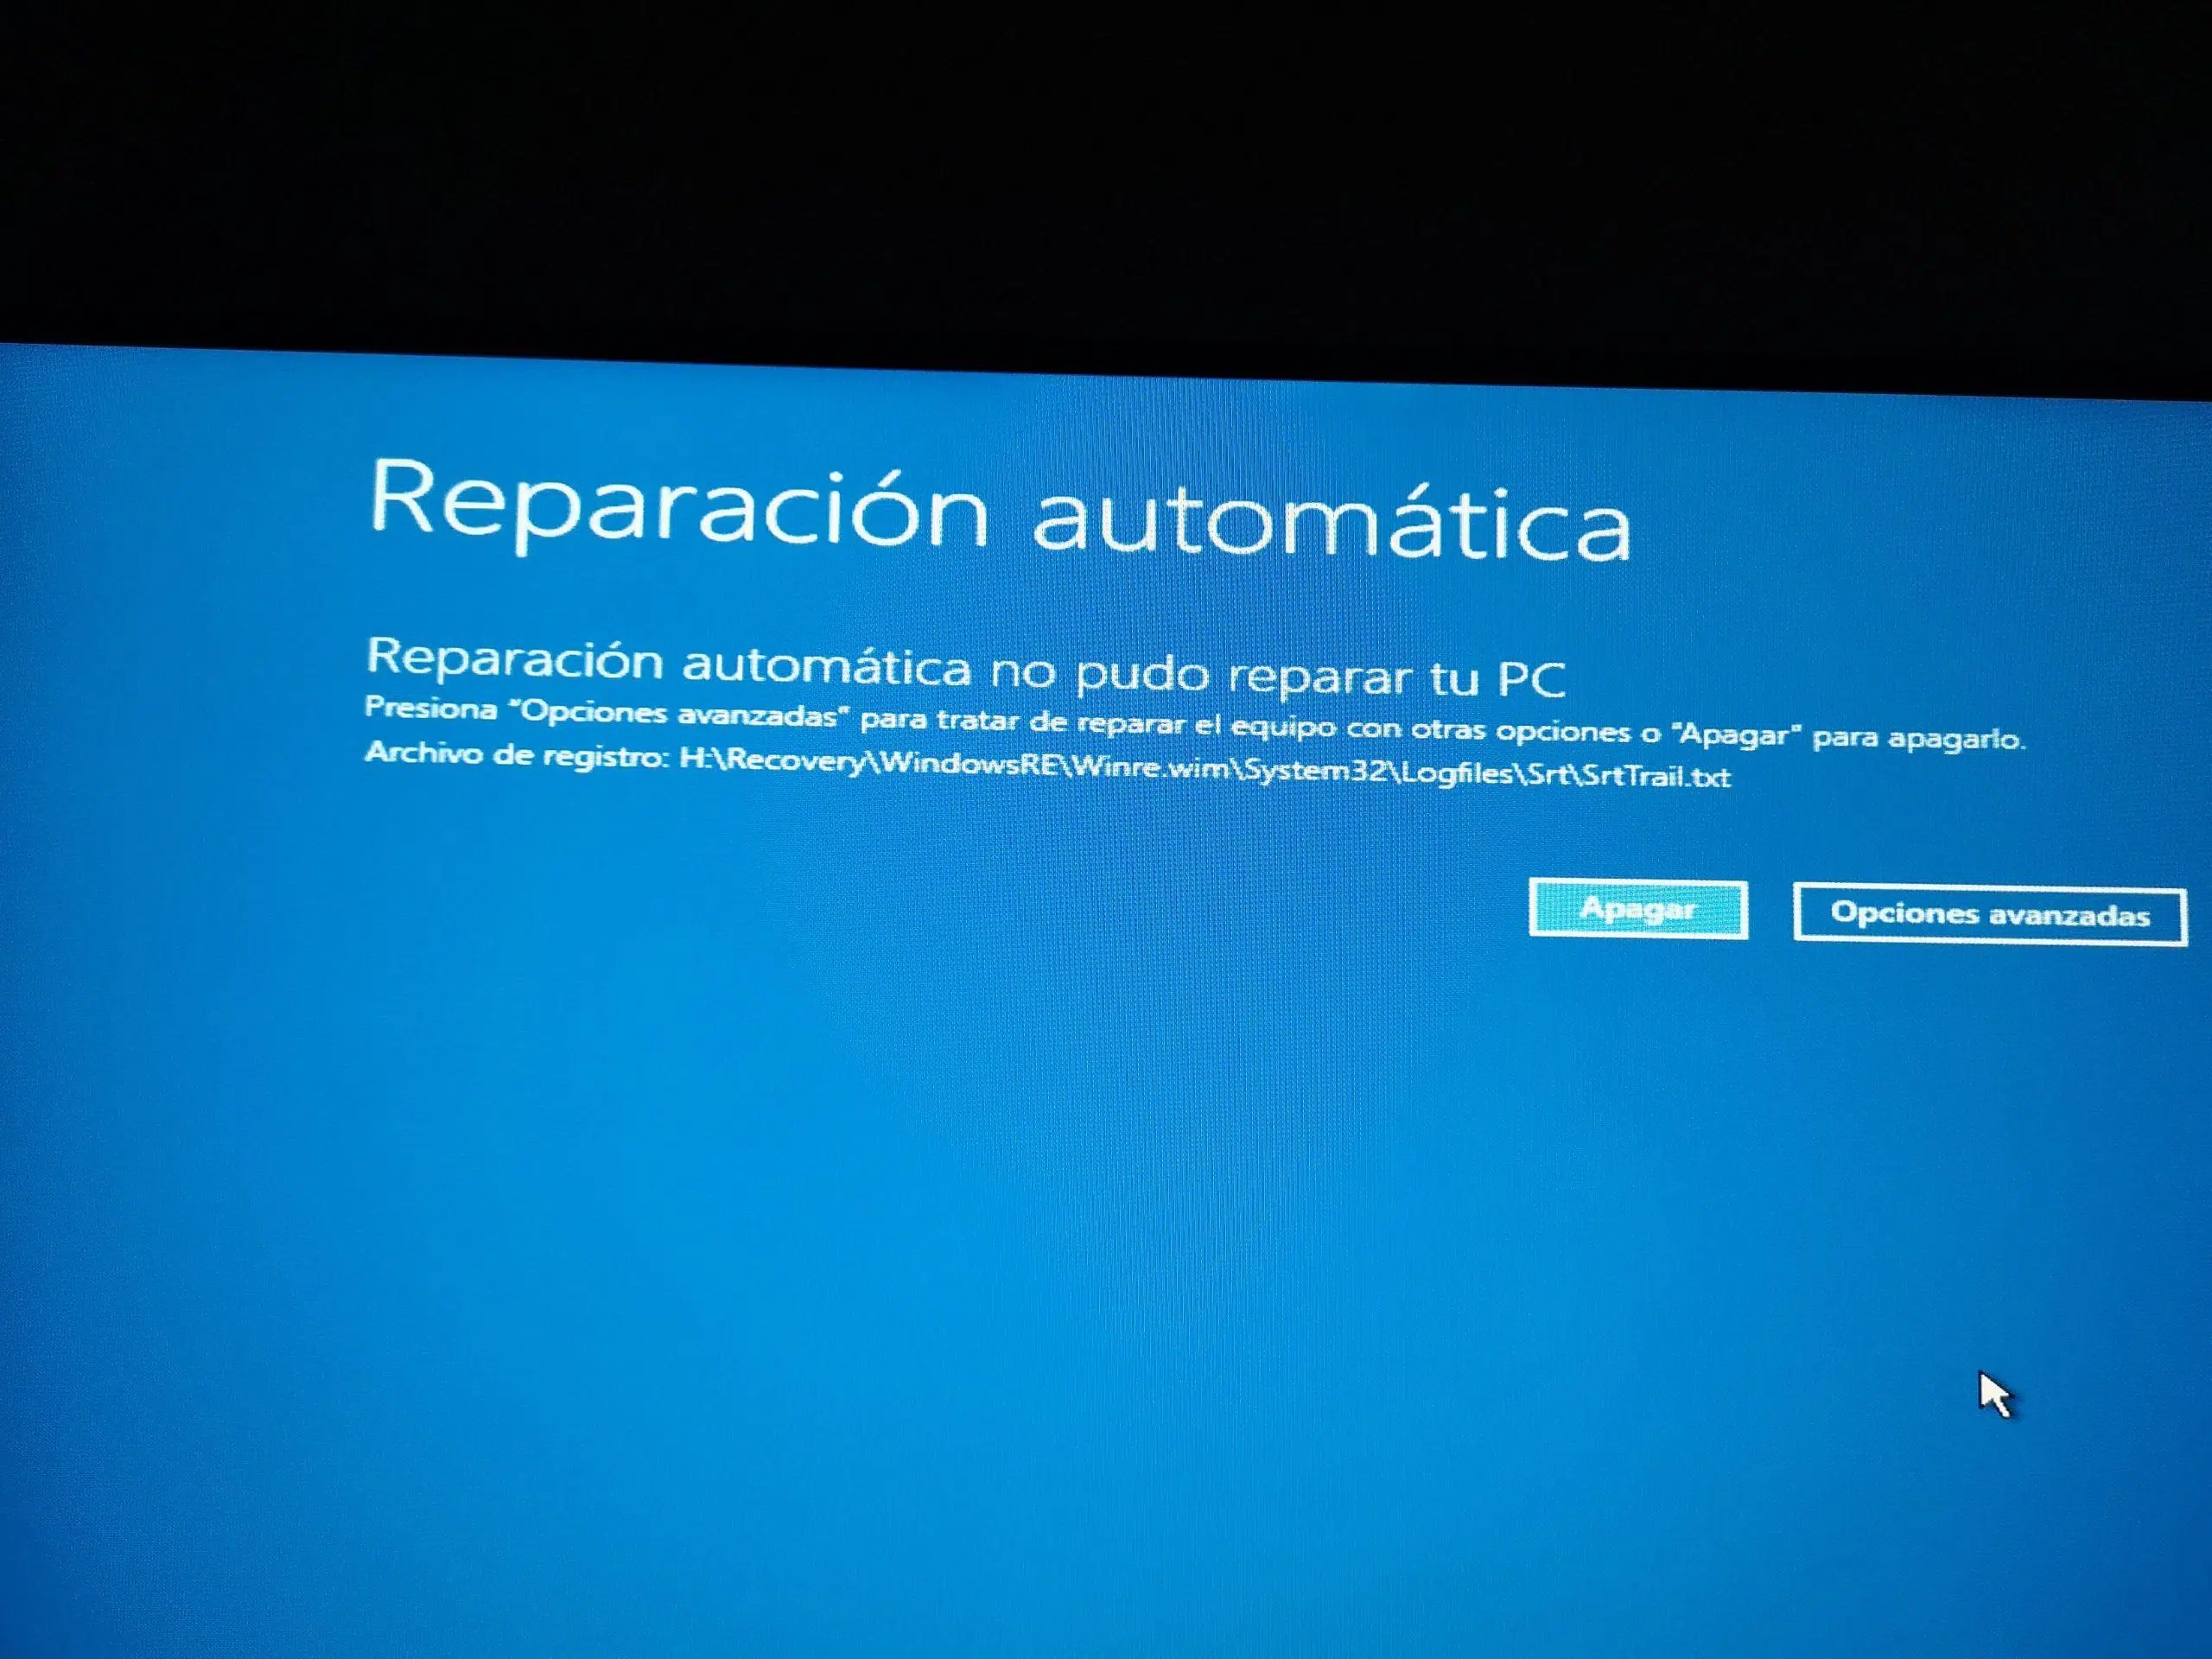
If your PC gets stuck on "Preparing automatic repair" and enters an infinite repair loop , it's normal to panic: the system won't boot, you can't use your programs, and nothing seems to respond. This problem is very common in Windows 10 and Windows 11 , and it can be caused by software issues (corrupted system files, a damaged registry, failed updates, etc.) as well as physical failures of the hard drive or other components.
The good news is that, although the situation is very frustrating, in most cases you can break out of this loop without losing data. Throughout this guide, you'll find all the known solutions to break the loop , recover your files if Windows won't start, and get your system booting normally again. We'll go from the simplest to the most advanced: from easy restarts and safe mode, to advanced startup repairs, registry restoration, and, only as a last resort, a complete reinstall.
What is Windows automatic repair and why does it get stuck in a loop?
The Automatic Repair tool (or Startup Repair) is a built-in Windows component designed to activate when the system detects that it has failed to boot several times in a row. After two consecutive failed startup attempts, the system automatically activates this special diagnostic environment (WinRE) to attempt to recover the boot process unattended.
When everything is working correctly, this utility analyzes the boot environment, looks for common errors in the boot manager , file system, or configuration , applies corrections, and, if successful, restarts the computer normally. The process can take anywhere from a few minutes to over an hour, depending on the condition of the disk and the amount of data.
The problem arises when the tool itself is unable to repair the fault. At that point, you see messages like "Automatic Repair couldn't repair your PC" or it gets stuck indefinitely on "Preparing Automatic Repair"/"Diagnosing your PC," entering a loop where the computer restarts repeatedly without ever reaching the desktop.
This automatic repair loop can manifest in two typical ways: a blue screen with an error message (for example, "Your PC didn't start correctly") or a black screen that gets stuck on the "Preparing automatic repair" or "Diagnosing your PC" message . In both cases, the system fails to complete the boot process and attempts repair again.
The most common causes of this behavior are quite varied: from damaged or deleted system files , to a corrupted Windows Registry , to a broken BOOTMGR or BCD , hard drive errors, problematic hardware drivers, power outages during an update, abrupt shutdowns, or even a disk that is starting to physically fail.
Typical symptoms of the automatic repair loop
Before diving into the solutions, it's helpful to identify which symptoms match this automatic repair loop problem in Windows 10/11 . Not all startup errors are caused by the same thing, and understanding the specific symptoms helps you choose the best steps to try.
Some of the most common issues are that the PC gets stuck on a black screen with the message "Preparing automatic repair" or "Diagnosing your PC," and after many minutes, it doesn't progress or show a progress bar or anything else. Sometimes it even seems like the hard drive is barely working.
In other cases, after the repair message, the system displays a blue screen indicating "Your PC didn't start correctly" or "Automatic Repair couldn't repair your PC," offering only two buttons: "Restart" or "Advanced options." If you choose to restart, it returns to the exact same point, entering an endless loop.
It's also relatively common for the problem to appear right after a Windows update or after a forced shutdown due to a power outage or holding down the power button. These types of abrupt shutdowns can leave system files partially written or damaged disk sectors, causing boot failures.
When there is damage to the boot manager (MBR, BCD) or the registry, the symptom can be exactly the same: the system detects a problem, tries to repair it automatically, fails, and restarts, getting stuck in an "automatic repair" loop that never succeeds unless we intervene manually.
First things first: protect and recover your data
As soon as a loop like this appears, the priority should be securing your important files . While the system is in this unstable state, there's a risk that trying solutions will worsen a disk problem or require reinstalling Windows. Ideally, back up your data before taking any drastic measures.
The safest way is to use data recovery software with a bootable disk . Tools like EaseUS Data Recovery, iMyFone D-Back for Windows, and similar programs allow you to create a bootable USB drive or CD on another working computer. From this external drive, you can turn on the broken PC, scan the disk, and copy your documents, photos, and other files to an external hard drive.
If you prefer a more manual approach, you can also remove the hard drive or SSD from the computer experiencing the boot loop and connect it to another computer as a secondary drive (via SATA, USB, or an external enclosure). From this second computer, you'll have direct access to the file system and can copy the folders you need, typically the user folders within C:\Users.
On computers that still allow access to the Windows Recovery Environment (WinRE) and the Command Prompt , it's also possible to copy files from the command line to a USB drive, although it's a less convenient procedure. In any case, the important thing is that, before rebuilding the boot process, disabling automatic repair, or reinstalling, you have a backup of anything you can't afford to lose.
Once your key data is safe, you can proceed with the remaining steps with much more peace of mind, because if something goes wrong you'll always have a backup ready to restore it in another clean Windows installation.
First attempts: forced restart and safe mode
Before moving on to advanced boot repairs, it's worth trying some simple actions that, surprisingly, solve the problem in many cases of automatic repair loops , especially when the failure comes from a recent update or a temporary system crash.
The most basic thing to do is perform a hard reset . Press and hold the power button until the computer shuts down completely, wait a few seconds, and then turn it back on. Sometimes this simple shutdown helps the system get out of the stuck state it was in during the repair and allows it to boot correctly on the next attempt.
If the loop continues, the next very useful step is to try booting into Safe Mode . This mode loads only the bare minimum of Windows, without drivers or third-party services, allowing you to uninstall drivers, remove problematic software, roll back updates, or run antivirus scans without any extra interference.
To enter safe mode from a boot loop, you can force entry into the recovery environment by interrupting the startup process: forcefully shut down your computer (using the power button) just as Windows begins to load, and repeat this a couple more times. After several failed attempts, Windows will launch WinRE , where you will see the "Choose an option" screen.
Within WinRE, go to "Troubleshoot" > "Advanced options" > "Startup Settings" and click "Restart". When your computer restarts, a list of options will appear: choose "Enable Safe Mode" or "Enable Safe Mode with Networking" (options 4 or 5, or F4/F5). From there, you can, for example, uninstall suspicious programs or drivers , run a full antivirus scan, or undo the latest Windows update.
Use SFC, DISM, CHKDSK and startup repair
If Safe Mode doesn't solve the problem, or if you can't even access it, you'll need to use Windows' built-in tools to check and repair system files , the disk structure, and the boot manager itself. This is done from the recovery environment, either using the Windows installation disc/USB or WinRE, which opens after several failed boot attempts.
First, enter WinRE (by interrupting the boot process or booting from the Windows installation media and choosing "Repair your computer" instead of "Install now"). Once on the "Choose an option" screen, go to "Troubleshoot" > "Advanced options" > "Command Prompt". There you can type a series of key commands.
The first one to try is the System File CheckerIn the command window, type sfc /scannow and press Enter. This utility scans all protected Windows files and replaces any that it finds corrupted or missing with correct copies. The process takes a while; wait until it reaches 100% and check if it indicates that it has found and repaired errors.
After SFC, it's advisable to check the disk's status with CHKDSKExecute a command like chkdsk /f /r /x C: (replacing C: with the drive where you have Windows installed if it's different). This scan locates bad sectors, attempts to recover readable data, and corrects file system inconsistencies, which can resolve many boot problems caused by abrupt shutdowns or disks with bad sectors.
On computers with Windows 10/11, it can also be helpful to use DISM to check the system image. If you manage to boot into safe mode with command prompt, you can run DISM /Online /Cleanup-Image /RestoreHealthThis repairs components of the Windows image that SFC alone cannot fix. Combining DISM and SFC covers a large portion of potential system file damage.
In addition to these commands, within "Advanced Options" you'll find the "Startup Repair" option (sometimes called "Automatic Repair"). It's a graphical tool that attempts to fix startup problems without you typing any commands. If you haven't already run it from here, it's worth giving it a try before resorting to more drastic measures.
Rebuild the boot manager (MBR and BCD)
When the damage affects the Master Boot Record (MBR) Due to errors in the Boot Configuration Data (BCD), Windows can get stuck in a repair loop because it either can't find or doesn't correctly interpret the information needed to start the system. In these cases, rebuilding these structures with the tool is very effective. bootrec.exe.
To do this, boot your PC from the Windows installation USB or DVD (or from recovery media), choose your language and keyboard layout, click "Next," and then "Repair your computer." From there, go to "Troubleshoot" > "Advanced options" > "Command Prompt."
In the command window, you must enter the following commands one by one, pressing Enter after each line: bootrec /fixboot, bootrec /scanos, bootrec /fixmbr y bootrec /rebuildbcdEach instruction has a different function: repair the boot sector, detect Windows installations, fix the MBR and completely rebuild the BCD store.
During this process, if the system detects Windows installations that are not included in the BCD, it will ask if you want to add them; answer yes (Y) to register them again. When finished, type exitClose the console and restart the computer to see if it is now able to start without entering automatic repair again.
In many cases of loops that originate after disk changes, altered SATA connections, cloning, or similar problems, a complete reconstruction of the BCD and MBR with these commands is precisely what brings the system back to life without needing to reinstall anything.
Restore the Windows Registry from RegBack
The Windows Registry is a vast database that stores system settings, driver configurations, and configurations for many applications . If it becomes corrupted, the system can become completely unresponsive at startup, leading to the familiar automatic repair loop. Fortunately, Windows typically maintains a backup of the main Registry files in the RegBack folder.
To restore this backup, re-enter the recovery environment, access “Advanced Options,” and open the Symbol of the systemOnce inside, navigate to the Registry location by successively typing commands like C: & AFTER cd \Windows\System32\config. You can use dir to list the files and confirm that you are in the correct folder.
Before restoring anything, it is advisable Rename the current Registry files Just in case, so they're kept as an extra copy. For example, you can run commands like this: ren DEFAULT DEFAULT.bak, ren SAM SAM.bak, ren SECURITY SECURITY.bak, ren SOFTWARE SOFTWARE.bak y ren SYSTEM SYSTEM.bakThat way, if something goes wrong, you'll still have those files if you need them.
Then enter the RegBack subfolder with cd RegBack and review its content with dirIf you see that the DEFAULT, SAM, SECURITY, SOFTWARE, and SYSTEM files have a size other than zero, you can copy them to the main config folder using a command like copy * C:\Windows\System32\configIf it asks you to confirm to overwrite, accept.
Once the changes have been made, write exit To close the console, select "Shut down PC" from the options screen. Then turn it back on normally. If the problem stemmed from a corrupted registry entry, this restoration from RegBack It usually has a good chance of returning the system to a previous functional state.
However, keep in mind that this operation may undo recent configuration changes, program installations, or drivers that were made after the Registry copy, but it's a reasonable price to pay when the system won't even boot.
Temporarily disable automatic repair
In some scenarios, the automatic repair mechanism itself becomes part of the problem: it triggers unnecessarily or conflicts with a driver or component, causing an endless loop. In these cases, it can be helpful to temporarily disable automatic repair at startup to see if the system can boot without it.
To do this, go back to WinRE's "Advanced Options" and open the Symbol of the systemFrom there, execute a command similar to bcdedit /set {default} recoveryenabled NoThis tells the boot manager not to attempt to launch automatic recovery for the system's default boot.
After running the command, close the console, restart your computer, and see if, instead of entering "Preparing Automatic Repair," it attempts to boot Windows normally. If so, you'll have the opportunity to correct whatever was causing the problem (faulty drivers, recently installed software, conflicting antivirus software, etc.).
There is also the opposite option, which is to verify that the recovery option is correctly activated with bcdedit /set {default} recoveryenabled YesThis is in case an incorrect configuration change has disabled it. The important thing is to control when and how this function is activated to prevent it from repeatedly blocking your computer's startup.
Keep in mind that disabling automatic repair doesn't fix the root cause of the problem; it simply allows you to see the actual error message when you try to boot up (the specific blue screen, error code, corrupted file, etc.). This additional information is invaluable for finding the right solution, especially if the problem stems from a driver or a specific file.
Restore system to a previous point
If you had System Restore enabled before the problems started, you have a very powerful tool to get out of the loop without having to mess with the startup too much: you simply go back in time to a system state where everything was working correctly.
To use it, enter the recovery environment and choose “Advanced options” > “System Restore”. The wizard will open, showing you the available restore points, usually created automatically when major Windows updates, drivers, or some applications are installed.
Select a restore point prior to when the repair loop began (for example, the day before the last problematic update) and follow the wizard's instructions. The system will restore system files, settings, and the Registry to that previous state.
Keep in mind that any system changes made after that date (program installations, drivers, certain settings) will be lost, but your personal documents on the C: drive should be preserved. Even so, if you haven't backed up your data, now is a good time to do so as soon as your system restarts.
When the restore process is complete, your computer will restart and, if all goes well, it should boot directly to the desktop without going through automatic repair . If the problem persists, you can always try another solution or choose a different, older restore point, if one exists.
Black screen cases: hard restarts and access with external media
A particularly troublesome variation of this error occurs when, after the "Preparing automatic repair" or "Diagnosing your PC" message, the screen goes completely black and nothing seems to happen. The computer can remain in this state indefinitely, without even displaying the blue screen of death.
The first thing you should do is a hard reset (press and hold the power button until the computer shuts down, wait a moment, and then turn it back on), and repeat if necessary. Sometimes the repair process gets stuck, and a power outage is enough for Windows to detect boot errors again and launch the recovery environment correctly.
If WinRE still doesn't appear, having a Windows installation or recovery USB drive is very useful . From another working computer, you can use Microsoft's official media creation tool to create this bootable USB drive. Then, turn on the problematic PC, enter the BIOS/UEFI (usually by pressing F2, F11, Delete, etc., depending on the brand), and select to boot from the USB drive.
Once the computer boots from that external drive, you'll have access to the same "Advanced Options" we've been discussing: Command Prompt, System Restore, Startup Repair, etc. From there, you can apply all the commands and solutions even if the operating system installed on the disk isn't able to launch the recovery environment on its own.
For laptops and desktops from specific manufacturers (Lenovo, HP, Dell, etc.), it's also advisable to consult the official support page for that model . Many include special keys or combinations (for example, a "Novo" button on some Lenovo models) to directly access the recovery environment or their own hardware diagnostic tools, which can help you rule out physical problems with the disk or memory.
If, despite everything, you still can't get the system to detect the disk or proceed with the boot process, even from an external source, the problem may no longer be solely software-related and could indicate a serious hardware failure, particularly with the hard drive or SSD. At that point, it would be advisable to consider contacting a specialized technical service to assess the condition of your computer and recover data using professional tools if it hasn't already been backed up.
After applying all these methods—from basic restarts and safe mode to SFC, DISM, CHKDSK, BCD reconstruction, Registry and system restore, or even disabling automatic repair—you will usually be able to break the loop and recover a normal Windows boot; if not, you can always resort to a clean reinstall, knowing that your important files will already be safe.


Passionate writer about the world of bytes and technology in general. I love sharing my knowledge through writing, and that's what I'll do on this blog, show you all the most interesting things about gadgets, software, hardware, tech trends, and more. My goal is to help you navigate the digital world in a simple and entertaining way.
Table of Contents
- 1 What is Windows automatic repair and why does it get stuck in a loop?
- 2 Typical symptoms of the automatic repair loop
- 3 First things first: protect and recover your data
- 4 First attempts: forced restart and safe mode
- 5 Use SFC, DISM, CHKDSK and startup repair
- 6 Rebuild the boot manager (MBR and BCD)
- 7 Restore the Windows Registry from RegBack
- 8 Temporarily disable automatic repair
- 9 Restore system to a previous point
- 10 Black screen cases: hard restarts and access with external media