- Properly configure default applications, activate and keep them up to date Windows 11 It reduces many warnings and errors when running programs.
- A stable startup menu, functioning system services, and no issues malware They are key to ensuring that apps work without crashes or strange alerts.
- The correct management of TPM, Boot Secure hardware requirements prevent installation errors, incompatibilities, and unstable application behavior.
- Updating, optimizing, and cleaning up unnecessary software improves performance and minimizes Windows 11 security warning messages.
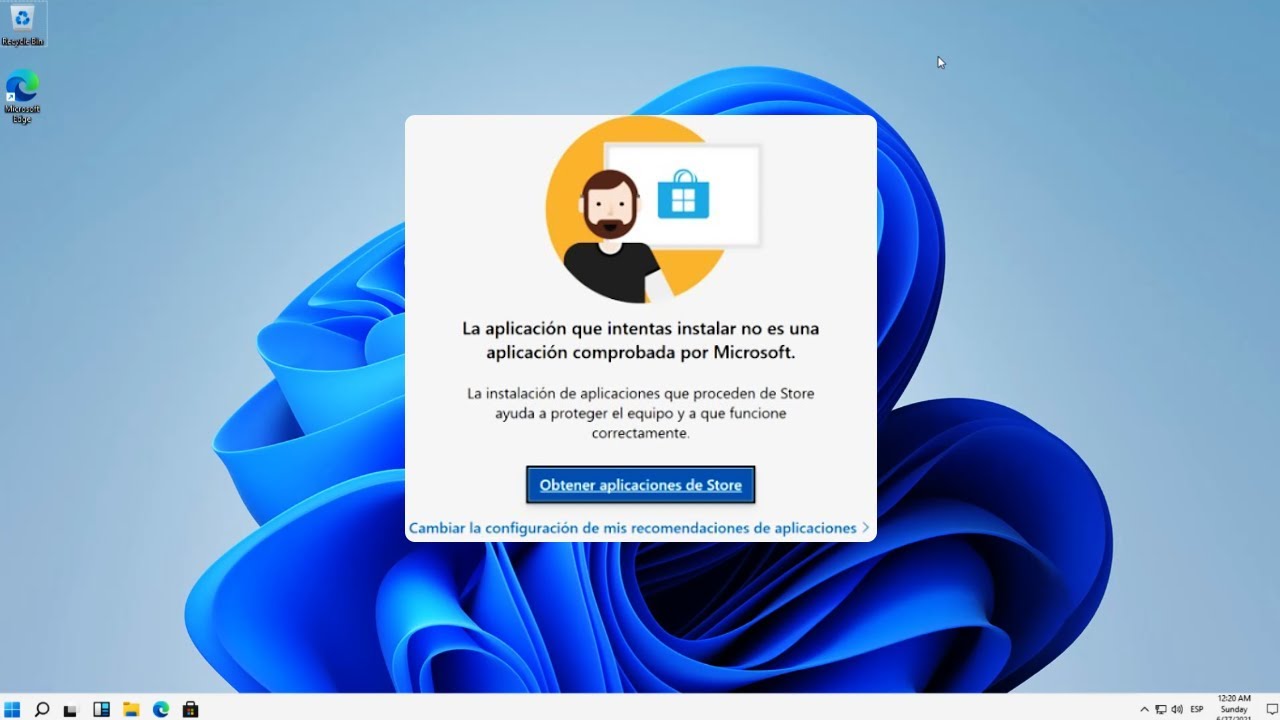
If you encounter the message "This application is not verified by Microsoft" when trying to open a file or run a program on your PC , it's normal to feel uncertain and even a little scared. Windows 11 has significantly tightened its security and compatibility measures, so this warning can appear for several reasons: from a simple change of default application to problems with digital signatures, TPM, Secure Boot, or modified installations.
The good news is that in most cases the problem can be solved by following a few well-explained steps. Furthermore, by taking advantage of these settings, you can not only deal with the "unverified applications" warning, but also improve the performance, security, and overall functionality of Windows 11 , preventing errors with the Start menu, app installation, or system activation.
Why does Windows 11 warn that an application is not tested?
Windows 11 incorporates several layers of security designed to prevent potentially dangerous or uncertified applications from running . When the system determines that an app does not meet certain requirements (origin, signature, permissions, or compatibility), it displays warnings such as "This app is not verified by Microsoft" or similar.
This type of warning is usually related to programs outside the Microsoft Store , tools that modify system elements (such as the start menu or taskbar), old software without a modern digital signature, third-party applications to install Android or Play Store, or even executables on computers where the TPM, secure boot or Windows activation are not properly configured.
Before you start disabling anything, it's important to understand that these warnings are meant to protect you from malware . The best approach is to combine caution (not running just anything you download) with a good system configuration, so you can use legitimate applications even if they aren't officially endorsed by Microsoft , while minimizing the risks.
Change default apps in Windows 11
Often the conflict stems not so much from security as from compatibility: Windows 11 tries to open a file with an app that doesn't support that format or that you simply don't like, and may display warnings that the source is untrusted or that the application is not verified.
The correct way to solve this is by properly configuring your default applications so that each file type opens with the appropriate program. Windows 11 maintains a system very similar to previous versions, but with a more comprehensive settings panel.
Configure a default app by extension
If you know exactly which file type is giving you trouble (for example, JPG, MP4, PDF , or DOCX ), you can tell Windows which program to always use for that extension. This reduces errors and prevents the system from launching apps it considers less reliable or untested.
- Click the Windows 11 Start button and enter Configuration.
- In the left sidebar menu, access the section Applications.
- Within this menu, select Default applications.
- In the search box type the file extension that interests you, for example “JPG” or “PDF”.
- Click on that extension when it appears in the list.
- Select the app you want to use always to open that type of file and confirm with “Accept”.
Keep in mind that this setting only applies to that specific file extension . Changing the default program for JPG won't affect PNG or BMP, even though they are also images. It's a good idea to check the most common file extensions you work with to make sure they open with reliable and compatible programs.
Choose the app from the file properties
If you get lost within the default applications menu or can't locate the file type that's giving you trouble, you can resort to a more direct method: change the associated program from the file's properties.
- Open the folder where the file that generates the warning or opens incorrectly is located.
- Right click on it and select "Properties".
- In section “It opens with”Press the “Change” button.
- Choose your preferred application from the list (or find one on your PC) and confirm with “Accept”.
This way, you only adjust the association for that file type , and you can also see at a glance which program Windows is trying to use. If the "application not verified" warning always appears when opening a certain type of document, configuring them correctly from here is usually a quick and practical solution.
Windows 11 activation and feature limitations
Something many people overlook is that an unactivated Windows 11 has several restrictions . Although you can use the system relatively normally, you'll see a constant "Activate Windows" watermark and several customization options and advanced settings will be locked, including some related to applications.
When the system isn't activated, Microsoft limits some aspects of the experience to encourage you to use a legitimate license . These limitations can include issues with properly managing default apps, security options, or even certain features that affect the Start menu or app behavior.
Risks of using activators and why they are not advisable
It's relatively easy to find "activators" or "cracks" for Windows 11 online , but 99% of them contain some type of malware, spyware, or adware, and are also illegal. They typically pretend to activate the system, remove the watermark, and, in the process, install viruses or remote control tools.
These programs not only put your data at risk, but can also cause strange errors with applications, constant security warnings , and odd behavior when running software that the system considers untrustworthy.
Activate Windows 11 safely and cheaply
If you want to avoid restrictions and limited configurations, the sensible thing to do is buy a legal license . These days it's relatively easy to find OEM keys for Windows 11 for under €10 at stores like Amazon or specialized websites . You can also opt for inexpensive Windows 10 licenses and then upgrade to Windows 11 for free on a compatible PC.
Once you activate your copy, the watermark will disappear and you will have access to all system functions, reducing the likelihood of errors related to blocked applications, constant warnings, or limitations when configuring the environment.
Windows 11 Start Menu and problems running applications
Another key area to consider when app errors occur is the Start menu . If it malfunctions, freezes, or won't open, launching programs, searching for files, or accessing tools like Settings or the Microsoft Store will be much more difficult . Some users attribute these issues to problematic updates, apps that modify the Start menu, or internal system processes.
If the Start menu is unresponsive and Windows is also displaying warnings that certain apps are unverified or untrusted , it's advisable to check several system components before considering formatting.
Update Windows 11 from Task Manager
Often, problems with the Start menu and apps are fixed with cumulative updates distributed by Microsoft . If the menu isn't working, you can still force an update check from Task Manager.
- Balance Ctrl + Shift + Esc to open Task Manager.
- Go to File > Run new task.
- Write ms-settings:windowsupdate and hit Enter.
- From the window of Windows Update, Search for and install all available updates..
Installing the latest patches can fix internal errors that prevent certain applications from properly verifying their components or digital signature , reducing annoying warnings and restoring menu stability.
Restart key services and processes (Iris Service and Explorer)
Some users have identified that the IrisService.exe process is related to the proper functioning of the Start Menu. If it becomes stuck, the menu may crash and affect other parts of the interface.
- Open Task Manager with Ctrl + Shift + Esc.
- In the “Processes” tab, locate IrisService.exe.
- Right click and choose "Finish homework".
Then try opening the Start menu again and see if the error persists. While you're at it, restart Windows Explorer , which controls the taskbar, Start menu, and the entire desktop.
- In Task Manager, look for “Windows Explorer”.
- Right click and press "Restart".
When Explorer crashes, not only does the menu fail, but strange messages may also appear when running programs , including those from applications that have not been checked or are blocked by the system.
Remove programs that modify the start menu
If you have tools like Open-Shell, StartIsBack, or other Start Menu modifiers installed , they are likely interfering with the normal operation of Windows 11 and how the system checks for and launches apps.
- Open Task Manager.
- Go to File > Run new task and writes appwiz.cpl to open the classic uninstaller.
- Search any a program that modifies the start menu or taskbar and uninstall it.
- Restart your PC for the changes to take effect.
With these tools out of the way, you reduce the likelihood of encountering strange behavior and incompatibility warnings when opening applications.
Restart background services and scan for malware
There are background services that are critical to the user experience in Windows 11. If they are stopped, the system may not respond properly when opening apps or may display nonsensical warnings.
- Balance Windows + R, writes services.msc and press Enter.
- Find and restart (if possible) services such as User Experience Virtualization Service, Windows Push Notifications System Service y Windows Event Log.
Additionally, if you have installed suspicious programs or activators, it is essential to run a full scan with Windows Defender to detect malware that may be modifying the behavior of applications.
- From the Task Manager, run ms-settings:windowsdefender.
- Sign in “Protection against viruses and threats”.
- Choose the option “Complete exam” and let it finish.
Removing active threats not only improves security, but also prevents certain apps from being flagged as dangerous or untrustworthy when the problem is actually being caused by resident malware.
Install and run Android apps on Windows 11
Windows 11 allows you to use Android apps through the WSA subsystem and the Amazon Appstore , but many people prefer to install Google Play Store apps more directly . These methods often require extensive modifications , and sometimes Windows considers them untrustworthy, triggering warnings that the app hasn't been verified.
To reduce problems and errors, you need to make sure that the development and virtualization environment is correctly configured before installing anything modified.
Programmer mode and virtual mode
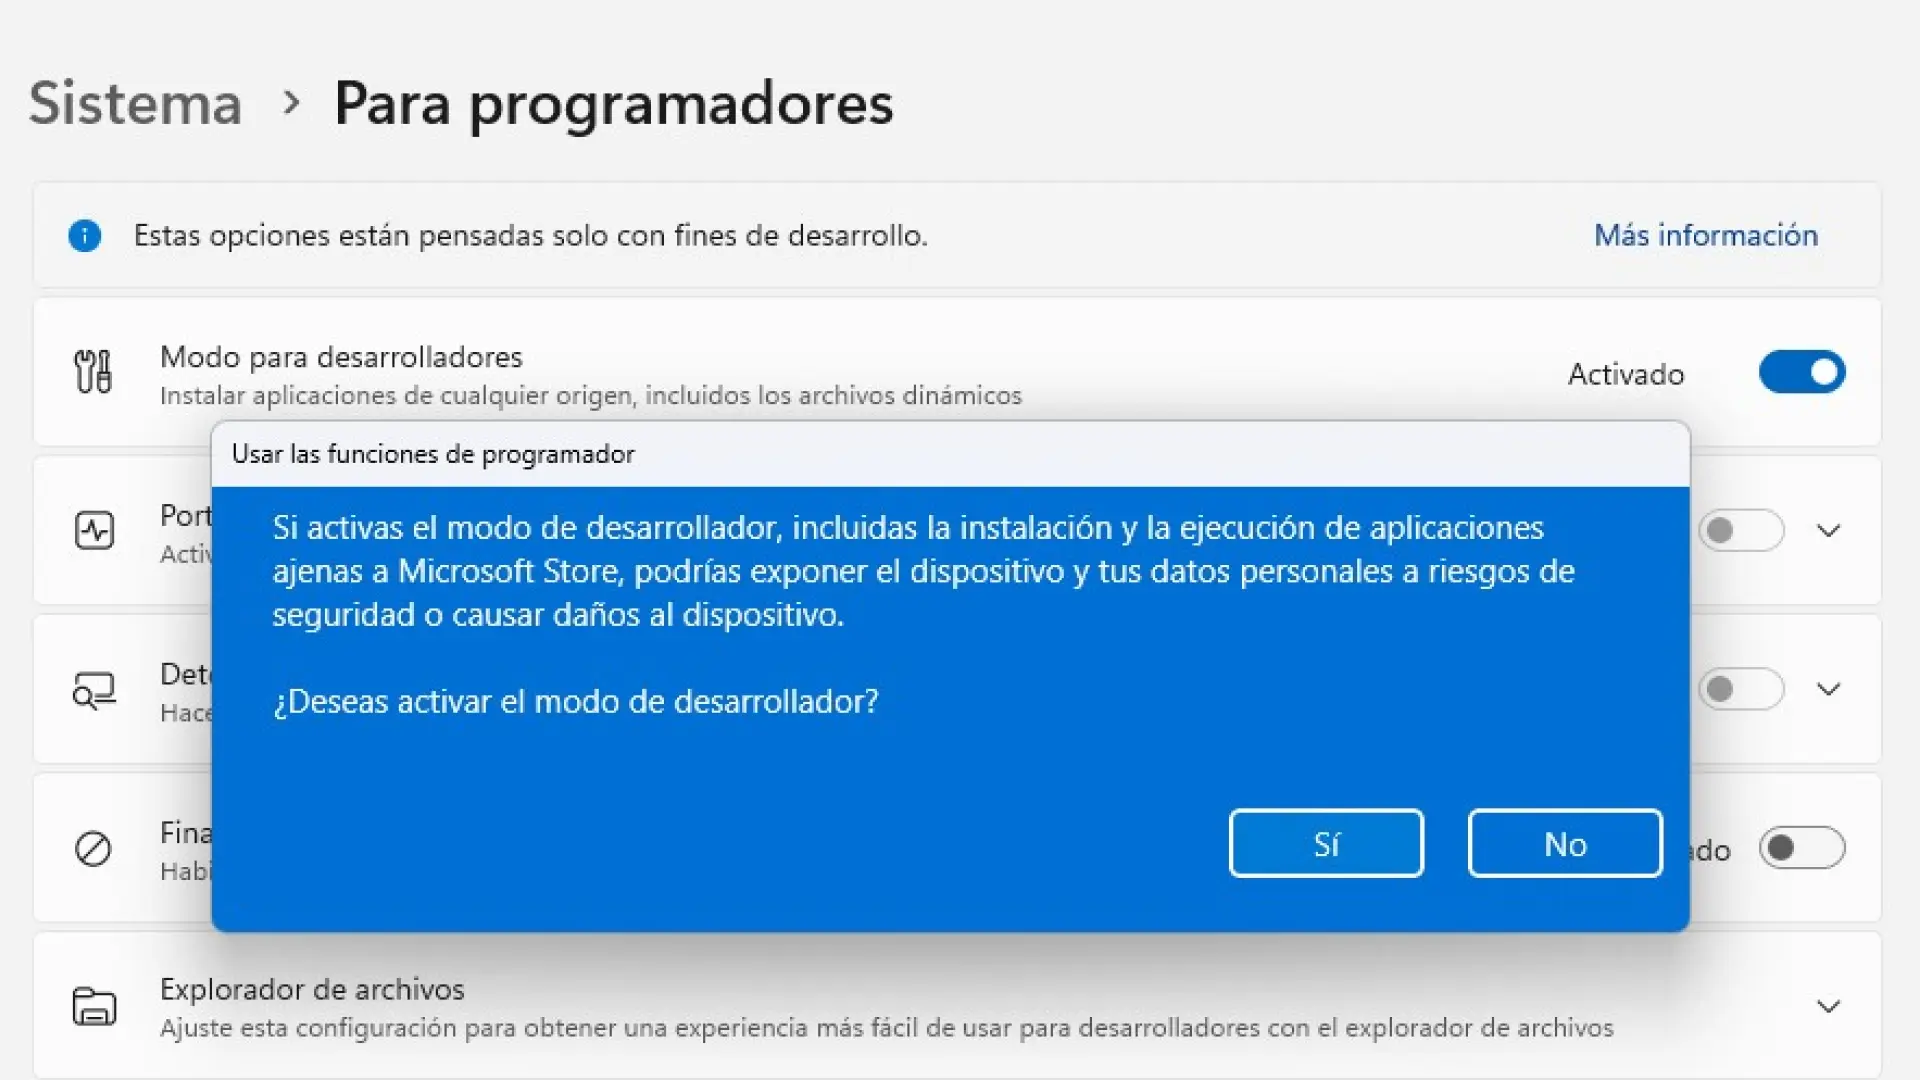
To install a modified WSA with Google Play, you first need to enable some advanced Windows 11 options.
- Balance Windows + I to open Settings.
- Go to Privacy and security > For programmers.
- Active “Developer mode” And heed the warning; you won't do anything dangerous if you follow reliable steps.
Next, you will need to enable the system's virtualization features:
- Open the Control panel (Windows + S, type “Control Panel”).
- In “View by”, select Category and enters Programs.
- Press on "Enable or disable Windows features".
- Brand “Virtual machine platform” y “Windows Hypervisor Platform”Accept and restart when prompted.
Without these options enabled, Android components may fail or be marked as incompatible , generating errors and security warnings when launching apps.
Modified WSA, ADB and Play Store
The most common method for getting Google Play on Windows 11 involves installing a modified WSA and connecting it via ADB. In short, the process consists of:
- Download a modified WSA package and extract its contents, renaming the internal folder to something simple like WSAUNPACKED and placing it on a convenient route (for example Downloads).
- OPEN PowerShell as administrator, move to the path of that folder with the command CD ROUTE (without quotes) and execute Add-AppxPackage -Register .\AppxManifest.xml to register the package.
- Once installed, locate the Android subsystem (WSA) In the Start menu, open it, activate the developer mode and click on “Files” to start it.
Next, you'll need to use ADBToolkit to connect to the IP address shown by WSA in developer mode and run PowerShell commands like `adb.exe connect ADDRESS` , followed by `adb.exe shell` , `su` , and `setenforce 0` . Once everything is set up correctly, the Play Store will appear in your Start menu , and you can sign in with your Google account.
These processes are advanced, and it's normal for Windows to display warnings or mark some parts as unverified. To minimize risks, download files only from trusted sources and ensure your system is clean and up to date before starting.
Update and manage applications installed on Windows 11
Another source of conflicts with security and compatibility warnings is having outdated applications . Many older utilities use libraries that Windows 11 now considers insecure or incompatible, triggering warning messages when they are run.
Microsoft has integrated a very convenient option so you can update all installed apps from the Microsoft Store at once , reducing risks and improving stability.
Update all apps from the Microsoft Store
To quickly check which apps have pending updates and apply them all at once, you can use the store itself:
- In the taskbar, type "Microsoft Store" and open it.
- In the left sidebar menu, enter the section "Library".
- Push the button “Update all” and wait for the new versions to download and install.
Keep in mind that only apps installed through the Microsoft Store will be updated . Third-party programs downloaded from external websites will need to be updated manually from their respective websites or internal updaters.
Keeping everything up to date significantly reduces the occurrence of incompatibility messages, app crashes, and verification errors.
Optimize Windows 11 performance to prevent crashes and errors
Many warnings about untested applications or problems running them are accompanied by slowdowns, crashes, or excessive resource consumption . Windows 11 is more visually appealing than its predecessors, but that also means that on less powerful hardware, it can run slower if not properly optimized.
With a few simple adjustments, you can make the system run much more smoothly , which also reduces random failures when opening programs, Start Menu errors, or crashes that Windows interprets as suspicious behavior.
Disable startup programs and clean temporary files
Every time you install a program, it's quite common for it to be added to the Windows startup , consuming memory and CPU from the very first second.
- Open the Task Manager with Ctrl + Shift + Esc.
- Go to the tab "Start" and disable all apps that you don't need to start automatically.
Additionally, it's important to periodically delete temporary files and accumulated junk that only takes up space and can interfere with some processes:
- In the taskbar, type "Disk Cleanup" and open the tool.
- Select the drive where you have Windows installed (usually C:).
- Mark elements such as temporary files, system files, and the recycle bin and press “Accept”.
With a cleaner disk, application installations and updates work better , and file corruption and error messages when running programs are less likely.
Reduce visual effects and use performance mode
Windows 11 comes loaded with animations and visual details that look great, but they don't add anything to functionality and can penalize less powerful computers.
- Search “View advanced system settings” and open it.
- On the “Advanced Options” tab, click on "Configuration" within “Performance”.
- Check the option “Adjust for best performance” and save the changes.
If you notice that a process is consuming all the resources, you can activate performance mode for it from the Task Manager itself, by right-clicking on the problematic process and choosing the advanced prioritization options offered by your version.
The less saturated the system is, the less likely Windows is to mistakenly consider an app to be behaving suspiciously and block it or mark it as problematic.
Uninstall applications you don't use and check drivers
Another basic but very effective step is to uninstall everything you don't need . The more programs you have installed, the more background services, the more potential conflicts, and the more security or compatibility warnings you may encounter.
- Opens Configuration from the search engine.
- Sign in Apps > Installed Apps.
- Review each app individually and uninstall the ones you no longer use by clicking the three dots to the right of each app.
Additionally, check Windows Update to ensure you have all the latest system and driver updates . An outdated driver can cause errors when launching certain programs or games, and Windows may even mark them as incompatible.

Passionate writer about the world of bytes and technology in general. I love sharing my knowledge through writing, and that's what I'll do on this blog, show you all the most interesting things about gadgets, software, hardware, tech trends, and more. My goal is to help you navigate the digital world in a simple and entertaining way.