- Understanding the relationship between layers, frames, and animation in Krita is key to exporting sprites correctly.
- It is possible to export animations as GIFs or image sequences adapted to 2D engines.
- Layers can be animated using keyframes, which are managed and removed from the timeline.
- An organized workflow makes it easier to create assets optimized for 2D game engines.
If you've just discovered Krita and created your first sprites or animations, it's perfectly normal to wonder how to cleanly export all those layers and frames for use in a 2D game engine. Unlike other programs (see alternatives like GIMP and Photoshop ), in Krita it's not always obvious which option to select to export a complete animation, a GIF, a sprite sheet, or individual assets.
Furthermore, when you first start working with the timeline and frame-by-frame animation, it's easy to accidentally click where you shouldn't and create a keyframe , or even make a layer animated when you only intended something static. All of this might seem confusing, but once you understand the export options and how to manage frames, Krita becomes a very convenient tool for workflows with engines like Godot, Unity, GameMaker Studio, and similar programs.
Basic concepts: layers, frames, and animation in Krita
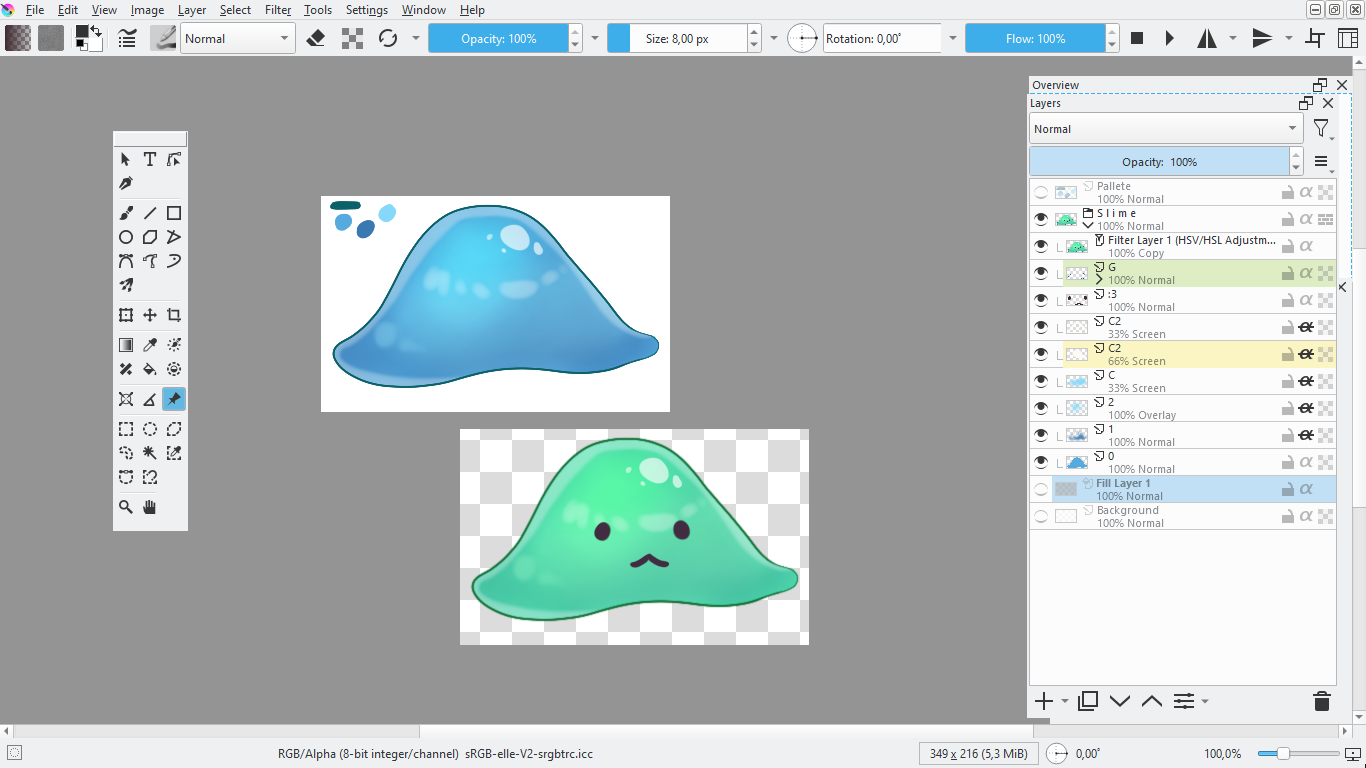
The first thing to understand is how Krita handles animation and layers, because this will determine how you export your frames and assets . Each layer can be static (just a single image) or animated (multiple frames along the timeline). When you say you have "each frame on a layer," what you've actually done is use the layer system as if they were individual frames, which is very common when coming from other programs.
In Krita, the standard approach for animation is to work in reverse: using a single animation layer with multiple frames on the timeline. Each keyframe is then managed from the Animation panel and viewed sequentially. However, if you've already created an animation where each frame is on a separate layer , you can still export those elements, though the workflow will be slightly different from standard animation.
When you delve into the world of 2D game engines, you typically need three things: either a sequence of images (PNG, for example) to import as animation, a reference GIF/video, or a sprite sheet where all the character's positions are arranged on a grid or strip. Krita allows you to achieve all three outputs, provided you know how to prepare the file before exporting.
It's also important to understand what a keyframe is in Krita: in an animated layer, each small square on the timeline represents a frame. If a keyframe icon appears in a specific position, it means there's content drawn there. These are the frames that will later become the images you export for your game, so it's a good idea to keep them well-organized and free of clutter on the timeline.
How to export an animation as a GIF or other format from Krita
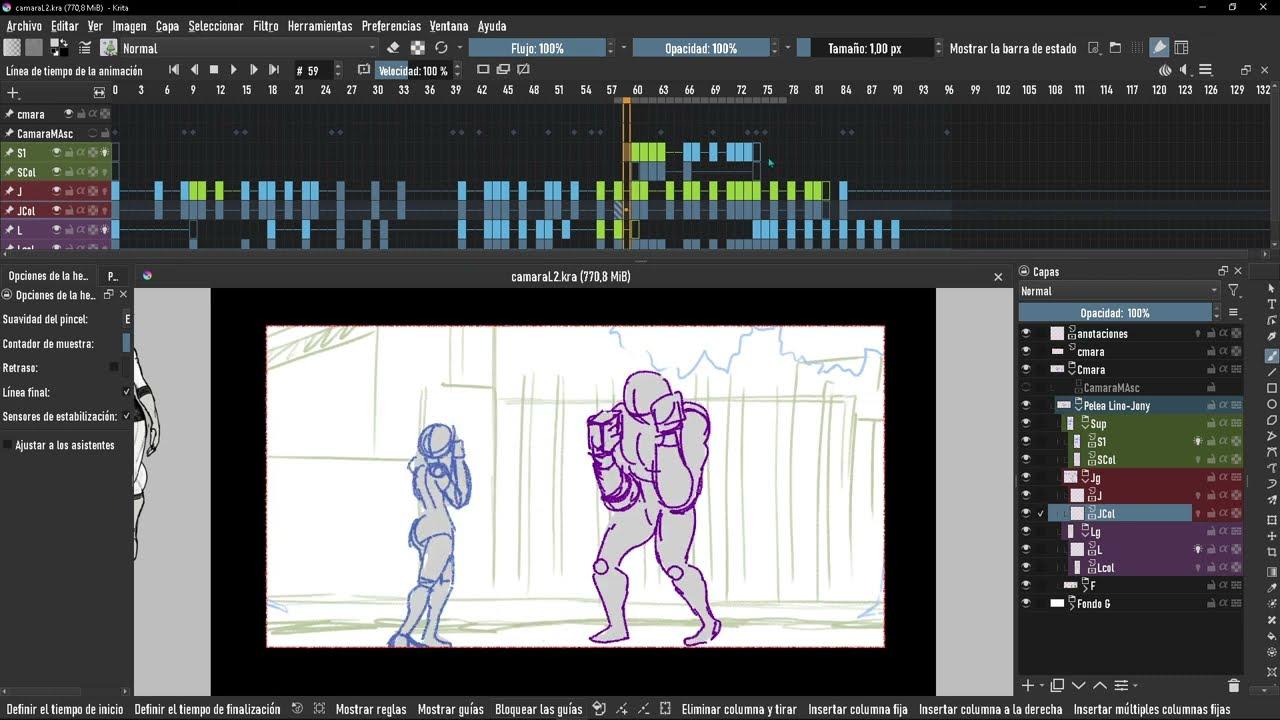
If you already have your animation ready in Krita (whether using a single animated layer or multiple layers), one of the quickest ways to test the result is to export it directly as an animated GIF or a sequence of images. This is very useful for checking the smoothness of the movement or for sharing a preview with other team members before moving to the game engine.
To generate a GIF or other animation format, you'll need to go to the animation export menu. From there, you can select both the codec and the final file type you require. While GIF isn't the ideal format for working within the game engine (PNG or more controllable video formats are generally preferred), it can be useful for quickly verifying that the timing and frame rate are correct.
Within the export settings, Krita allows you to define the range of frames you want to export, the resolution, and, in some cases, compression options. For use within a 2D engine, you'll particularly benefit from the ability to export as a sequence of numbered images , which the engine will then interpret as a frame-by-frame animation. This means you'll end up with files like character_0001.png, character_0002.png, and so on.
If you're used to programs where you simply select "export layers as frames" and you're done, you'll find that Krita's process relies more on timeline animation than on the layers themselves. Therefore, if each frame is on a separate layer, you should consider whether it's worth reorganizing your project to convert those layers into frames within a single animation layer. This will give you much clearer control over exporting as a GIF or as a sequence.
Export all layers as individual frames for animation
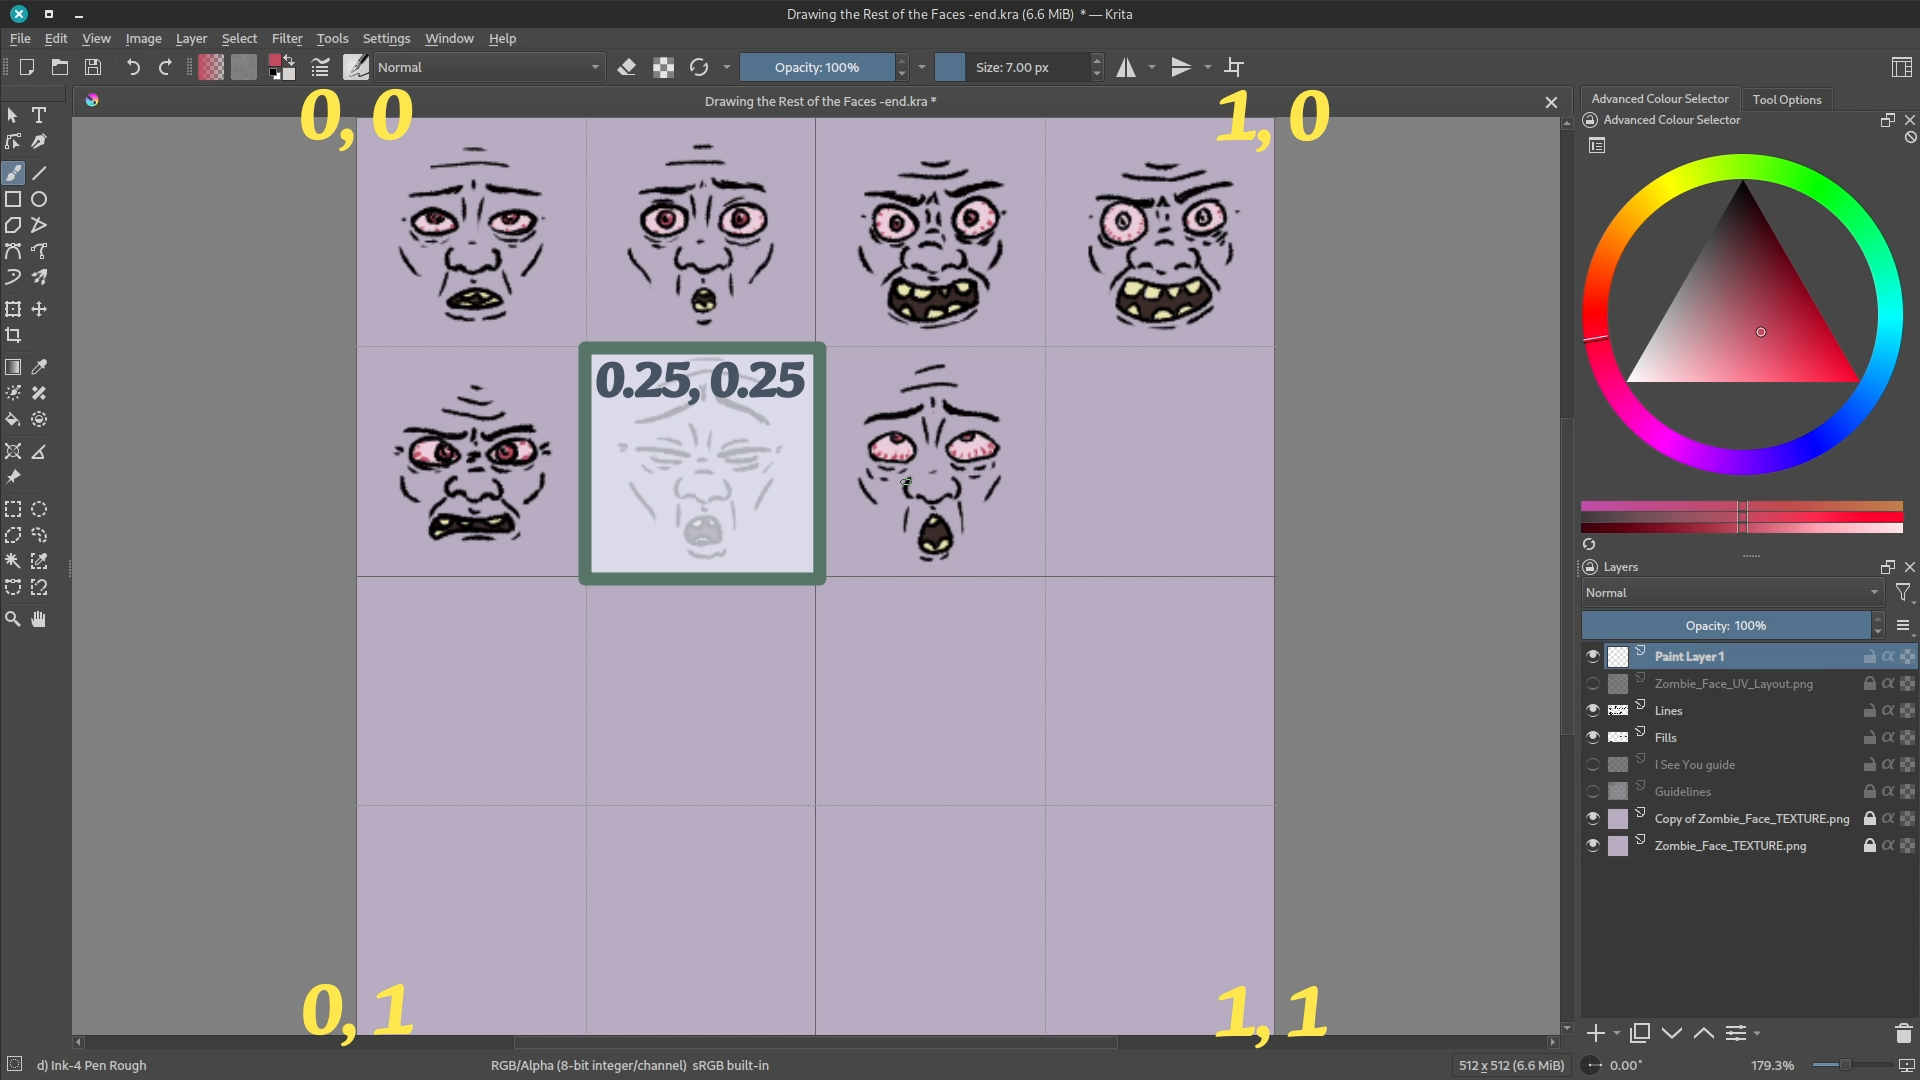
A very common question for beginners is whether there's a magic option to export all the layers as individual images , similar to other illustration or animation programs. You've created your character in different poses, each on its own layer, and now you want to export each one as a PNG file to assemble the animation directly in the game engine.
In Krita, there isn't a single button that literally says "export each layer as a separate frame" like some simpler animation applications do, but you can achieve the same result by combining several functions. One typical solution is to export the layers as individual images using scripts, extensions, or the multilayer file system, or even automate exports with actions, but you can also do it more manually if you don't have too many layers.
If you need a quick and less technical solution, you can activate only one layer at a time and use the export to PNG option, renaming it with a suffix that indicates the frame number or the action name. It's not the most convenient way to do this if you have dozens of frames, but it works for small projects. This way, you'll generate the assets that you'll then import as sprites directly into your 2D game engine.
For more advanced workflows, many artists choose to reorganize the file: they merge or group layers that go together and move each pose to successive frames within the same animation layer. Once everything is positioned on the timeline, the animation can be exported as a sequence of images, resulting in each frame being a separate file ready for use in your game project.
It's also important to note that when exporting layers or frames for a game engine, it's best to start with the correct canvas size, center the character's position ( see how to center layers ), and transparent backgrounds. This prevents you from having to redo adjustments later and ensures the 2D engine recognizes all images with the same "anchor" and size, greatly simplifying collision and pivot point settings.
Managing keyframes and errors when animating in Krita
While working on your animation, it's quite likely that you'll accidentally click on the timeline and add a keyframe you didn't intend . This can happen, for example, on a layer like "C2" (or any other) where you only wanted to keep the image static, but now a box appears in a later frame indicating that the layer has been animated.
The first logical reaction when you realize you've made a mistake is to use the undo function. In Krita, the classic Ctrl+Z shortcut is still your best friend. However, there's a slightly peculiar behavior: in many cases, you'll have to press Ctrl+Z twice to completely undo the creation of that keyframe. This is something many users experience and is worth keeping in mind, so don't panic if the first "Undo" doesn't remove the frame from the timeline.
If you don't notice the problem immediately and continue working, there comes a point where using undo is no longer practical, because you would lose several steps of your work. In that case, the correct way to remove the keyframe is to right-click on the timeline frame where the unwanted keyframe appeared. In the context menu that opens, you'll find options like "Remove Keyframe" or "Remove Frame and Pull ," which are the ones you need.
The "Remove Frame" option simply deletes that keyframe without affecting the rest, while "Remove Frame and Pull" goes a step further, shifting all subsequent frames back one unit to close the gap. This second option is very useful if you want to maintain the total duration of the animation without leaving empty spaces in the timeline, which can prevent problems when exporting the image sequence to the game engine later.
There's an important detail worth noting: once a Krita layer has been animated (meaning it has frames in the timeline), it can't be transformed back into a completely static, normal layer. You can delete keyframes, but the layer itself is still treated as animated by the program. If you need it to become a "clean" static layer again , the practical solution is usually to delete that layer and create a new paint layer in its place.
It might seem a bit drastic, but in 2D game animation projects, it's standard practice to clearly divide the layers: some for static elements (backgrounds, UI, references) and others specifically dedicated to animated frames. Maintaining this order from the start saves you a lot of trouble, avoids confusion when exporting, and reduces the likelihood of a layer ending up with frames where it shouldn't.
Prepare assets for 2D game engines
Beyond the simple export process, it's worth focusing on how to adapt your Krita artwork to the real world of 2D engines. When your ultimate goal is to use these drawings in Godot, Unity, GameMaker, or another engine, you need to think in terms of game-optimized assets , not just pretty illustrations.
Start by planning the size of your sprites: decide from the beginning whether you want to work with typical resolutions like 32x32, 64x64, 128x128, etc., or if your game will be high-resolution. Designing your layers and animations with a mental (or visible) grid helps ensure that the images fit perfectly in the engine. Having all frames with identical dimensions and consistent positioning within the canvas is almost mandatory if you want to avoid visual glitches.
Another key aspect is the alpha channel. For sprites to work properly, you need a transparent background, not white or any other color. Krita works very well with transparency, so make sure your canvas and layers are set to preserve the alpha channel and that you maintain this transparency when exporting to PNG. This will allow the game engine to draw only the character, not an opaque square around it.
Once you have exported your frames as individual PNGs (either from layers or individual frames), you can choose to import them directly as animation within the engine, or build a sprite sheet: a single large image containing all the frames arranged in rows and columns. Many engines have built-in tools for generating these sprite sheets, but you can also prepare them in Krita if you prefer, by organizing the layers and using alignment functions.
Finally, it's a good idea to keep file names organized. A good system is to combine the character or object name, the action it performs, and a frame number: for example, hero_run_0001.png, hero_run_0002.png , etc. This type of naming convention makes importing and assigning files in the engine much faster, especially if you're going to reuse animations or share assets with other members of the development team.
Practical tips for a smooth workflow
Working with Krita to create 2D game assets and animations is entirely feasible, but it's much easier if you adopt a few habits. The first, and perhaps most important, is to save incremental versions of the file as you go, so that if you mess up an animated layer or the timeline, you can always revert to a previous version without wasting too much time.
Another tip is to familiarize yourself with keyboard shortcuts, especially those related to animation and undo. As mentioned earlier, you'll sometimes need to press Ctrl+Z twice to undo the creation of a keyframe, which can be confusing if you're not familiar with it. Setting up your own hotkeys to show/hide the timeline, move between frames, or play the animation also significantly speeds up your workflow.
Regarding file structure, keeping elements with different functions in the game on separate layers simplifies exporting. For example, you can group all the layers that will make up the main character and group the effects, shadows, or accessories in other groups. Then, when it's time to export, you can activate or deactivate entire groups depending on what you need to convert into a sprite or separate asset.
It's also a good idea to spend a few minutes reviewing the timeline before exporting anything to the engine. Check that there are no blank frames you don't need, that the duration of each pose is correct, and that no secondary layers have keyframes created by mistake. A quick check can save you a lot of failed tests within the engine, where it's much more tedious to realize that a frame is missing or extra in the middle of a walk cycle.
With these precautions and a good understanding of Krita's specifics, it's perfectly possible to have a smooth workflow: you draw, animate, adjust frames, export as PNGs or sprite sheets, and finally integrate everything into your 2D engine without unnecessary headaches.
Although Krita may seem a bit peculiar at first if you're coming from other tools where everything is based on layers-like frames, once you get used to its animation system and the options for deleting keyframes, reorganizing the timeline, and exporting sequences, it becomes a very solid ally for creating professional sprites and assets for your 2D games, avoiding repetitive layer-by-layer exports and making the most of the program's capabilities.


Passionate writer about the world of bytes and technology in general. I love sharing my knowledge through writing, and that's what I'll do on this blog, show you all the most interesting things about gadgets, software, hardware, tech trends, and more. My goal is to help you navigate the digital world in a simple and entertaining way.