- Configuring the size, position, and contents of the Dock allows for quick and organized access to apps, folders and key links.
- The menu bar provides direct access to app menus, system settings, and status icons, and can be hidden or shown as you prefer.
- It is possible to rearrange, add, or remove icons in both the Dock and the menu bar, even creating groups and separators using Bus Terminal.
- Common menu bar problems are usually resolved by checking settings, restarting processes, and keeping macOS up to date.
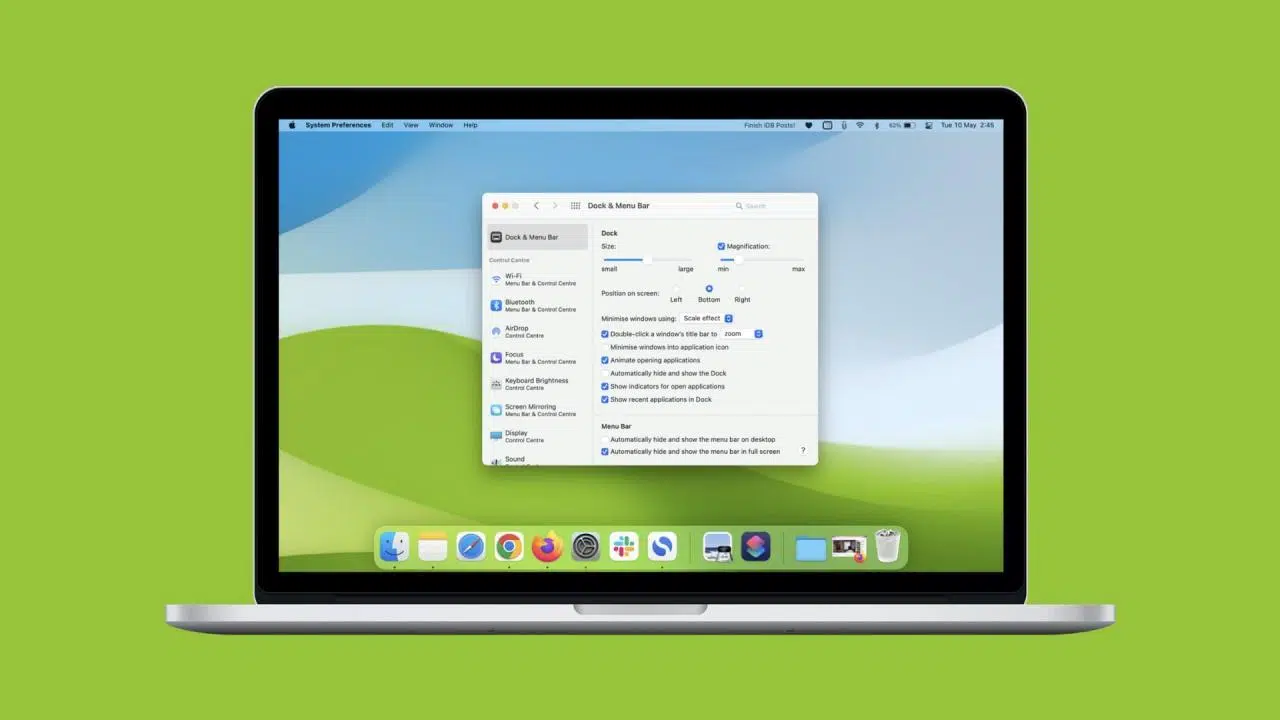
If you spend many hours in front of your Mac , having your Dock and menu bar well-organized to your liking makes a huge difference in comfort. It's not just about aesthetics: a chaotic Dock or a menu bar full of useless icons slows everything down, including you.
Throughout this guide, you'll learn how to master every detail of the Dock and menu bar in macOS : from basic size and position adjustments to advanced Terminal tricks , keyboard shortcuts, group organization, and troubleshooting when something stops working as it should. Everything is explained in clear, everyday language.
What is the Dock in macOS and how is it organized?
On macOS, the Dock is the row of icons that usually appears at the bottom of the screen and gives you quick access to apps, documents, folders, and features you use frequently. For example, Safari, Finder, and the Trash are always within easy reach.
The system divides the Dock into three clearly differentiated zones . On the left (or at the top if you place it on the side) you have the pinned applications. Next are the recently used apps, and finally, on the right (or at the bottom in a side Dock) is the user area: folders such as Downloads , Documents, Network Drives, and the Trash.
macOS can automatically display up to three recently used apps that aren't permanently pinned. This is useful for quickly accessing apps you use occasionally without cluttering your Dock with fixed icons.
Additionally, you'll usually see a specific folder for your internet downloads on the right . From there, with a single click, you can open what you've downloaded without having to navigate through Finder to find the corresponding folder.
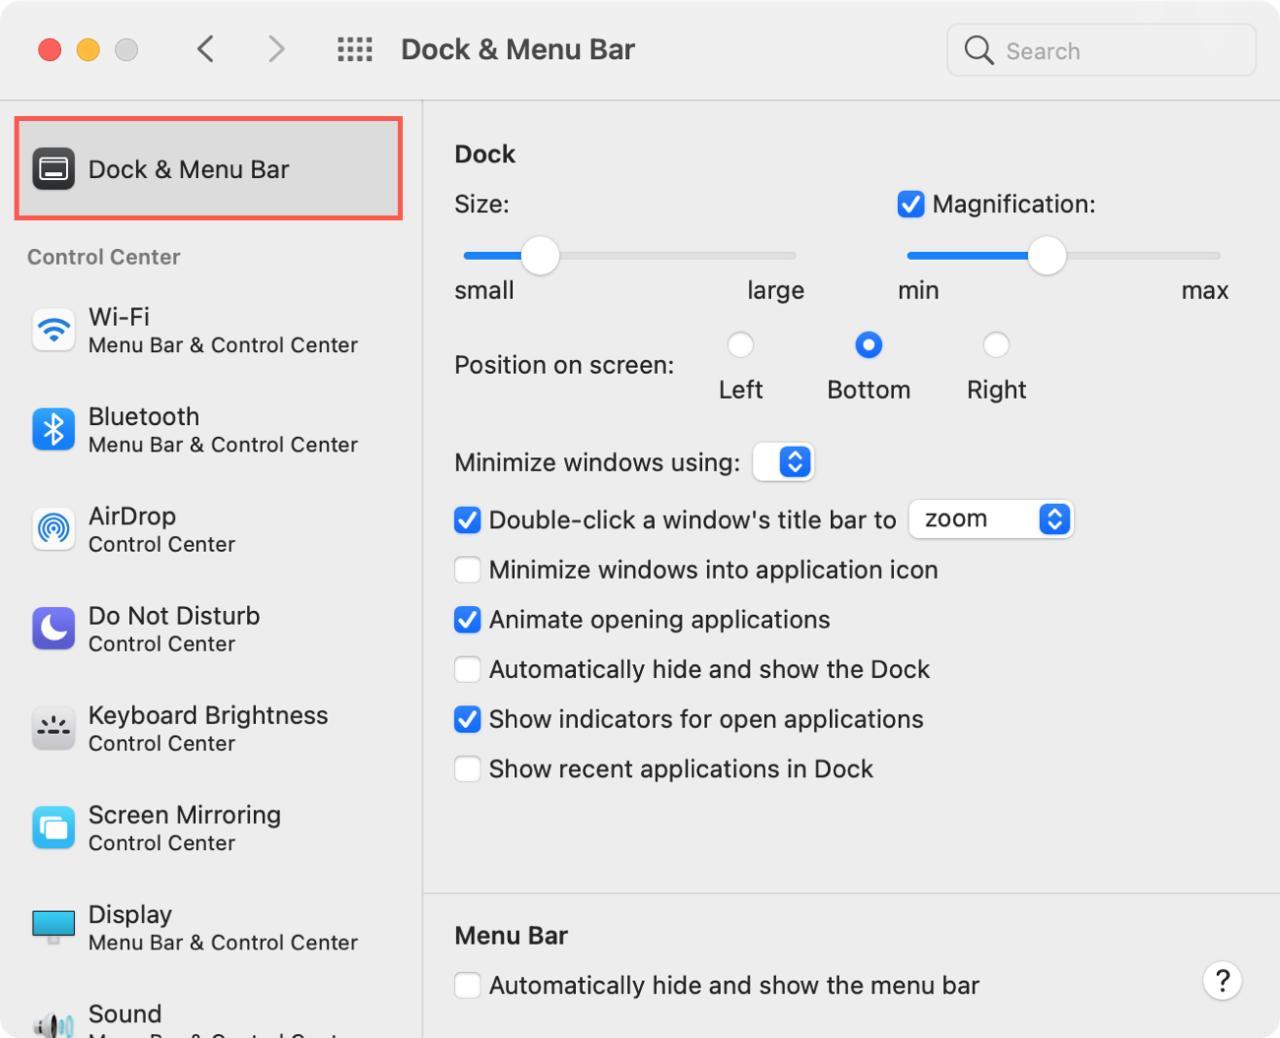
By default, the Dock appears at the bottom of the screen, but you can move it to the left or right if that's more convenient, if you're working with small screens, or if you simply prefer it that way. This position is adjusted in the system settings, as we'll see in a moment.
Open, use, and manage items in the Dock
Interacting with the Dock is as simple as clicking any icon to open the associated app or item . If the icon belongs to an application, it will launch; if it's a folder, a menu with its contents will open; if it's a document, it will open with the default app.
When an app is open, you'll usually see a small indicator (a dot) below the icon . This lets you see at a glance which apps are active, which is very useful when you have many open at once.
In addition to opening items, the Dock offers quick actions from the context menu. Right-clicking (or Ctrl+clicking) an icon displays options such as keep the app in the Dock, remove it, show it in Finder, or access recent files , depending on the type of item.
For folders located on the right side, you can choose how their contents are displayed : as a fan-shaped stack, as a list, as a grid, or by opening the folder directly in Finder. This makes working with the Downloads folder, for example, much faster.
If you see a red balloon icon with a number inside in your Dock , it's not just decoration: it indicates pending notifications or actions to be taken in that app or in System Settings. In Mail, for example, that number represents unread emails.
Add, remove, and reorder icons in the Dock
One of the advantages of the Dock is that you can customize exactly which icons appear and in what order . It's all done very visually, simply by dragging and dropping, without any complications.
To add an app to the Dock, simply drag its icon from the Applications folder or Launchpad to the Dock's app area. When you release the icon, it will remain there permanently, even if you close the app.
If you want to remove an app from the Dock, you don't need to uninstall it. Click on the icon and drag it to the center of the screen . When you see the text "Remove" appear, release the mouse button. If you release it too soon and that label doesn't appear, the system interprets it as an accidental movement and will return the icon to its place.
You can also use the context menu: right-click (or Alt+click) on the icon, Options > Remove from Dock . This is especially convenient if you're working with a trackpad or prefer not to drag icons.
Rearranging icons is just as easy: simply drag an icon left or right within its corresponding area . Apps move to the left; folders, documents, and links move to the right, next to the Trash.
Dock settings from “Desktop & Dock” in System Settings
To change the general behavior of the Dock (size, position, effects, etc.), you need to go to System Settings > Desktop & Dock . This is where many of the controls that affect both the Dock and the desktop, as well as other visual functions, are grouped together.
To access it, click the Apple menu and select System Settings . In the sidebar, scroll down to the "Desktop & Dock" section and click it. In recent macOS updates, Apple has consolidated many previously scattered options into this panel.
In the "Dock" section, you can adjust parameters such as icon size, hover effect, screen position, and auto-hide behavior . This allows you to adapt the Dock to large or small screens, or multi-monitor setups.
In the same panel, you'll also see options related to the desktop, the visual organizer (Stage Manager), widgets, window management, and Mission Control . While they don't directly affect the Dock, they're all part of the macOS workflow and worth exploring.
If you like to keep your screen as clean as possible, you can enable the option to automatically hide and show the Dock . This way, the Dock hides when you're not using it and only appears when you move your cursor to the edge of the screen where it's located.
Tips for adjusting the size and animation of the Dock
The Dock can be very visually appealing, but if you overdo the effects, it's easy to end up clicking where you don't intend . The zoom animations on mouse hover, for example, are eye-catching, but sometimes impractical if they aren't smooth.
To quickly resize the Dock, hover your cursor over the bar that separates the app area from the user area . You'll see the pointer change to a double-headed arrow. Click and drag up or down (or sideways, if the Dock is in portrait mode) to make it bigger or smaller.
If you hold down the Option (Alt) key while resizing, the Dock will cycle through four preset sizes . It's a quick way to find a comfortable size without having to experiment with every detail.
You can also temporarily enable or disable icon magnification. Hold down Control + Shift while hovering your mouse over the Dock to temporarily disable the default magnification.
Within "Desktop and Dock" you can also choose the type of effect when minimizing windows (for example, the classic "Genie" effect or a simpler one) and whether the minimized windows go to the Dock or to their application icon, which also influences how cluttered the Dock becomes.
Add folders, disks, web links, and control panels to the Dock
The right side of the Dock, where the Downloads folder and the Trash are located, is perfect for storing shortcuts to items you use daily : work folders, network drives, control panels, or even websites.
If there's a folder you frequently access (for example, a project or your working documents folder), you can drag it from Finder to the right side of the Dock . From then on, a single click will give you access to its contents.
You can also drag network hard drives, external volumes, or servers . If you connect to a NAS or a company server daily, having it in the Dock saves time and clicks, especially if you work with many shared resources.
A very useful feature is adding direct links to web pages . Open the website in your browser, select the URL in the address bar, and drag it directly to the right side of the Dock. A shortcut will be created that, when clicked, will open that page without any intermediate steps.
You can even add System Preferences panes. These panes are located in /System/Library/PreferencePanes/ . If you drag one of these files to the right side of the Dock, you'll have a shortcut to directly open the pane you use most often (for example, Network, Sound, or Keyboard).
Create groups and blank spaces in the Dock with Terminal
When you start pinning apps nonstop, there comes a point where finding the icon you're looking for takes longer than it should . The icons all look the same, the Dock is overflowing, and locating them quickly becomes a bit of a hassle.
A very useful way to organize this clutter is to create groups of applications separated by spaces . This way you can group, for example, work apps, leisure apps, system tools, etc., and know exactly where to look in each case.
To do this, you'll need to use Terminal, but it's simpler than it seems. Open the Terminal app (in Applications > Utilities) and type the following command to add a blank space to the Dock's app area:
defaults write com.apple.dock persistent-apps -array-add '{tile-data = {}; tile-type = »spacer-tile»;} '
After running that command, you need to restart the Dock for the change to take effect. In the same Terminal window, type:
killall dock
When the Dock reloads, you'll see an empty space appear between your apps. You can drag it anywhere within the app area to use it as a visual separator between groups.
If you want to add more spaces, you can repeat the commands above or use the up arrow in Terminal to retrieve the history and run the same commands again by pressing Enter several times. To remove a space, right-click on it and choose "Remove from Dock."
Keyboard shortcuts to navigate the Dock
If you like working with the keyboard, macOS lets you navigate the Dock without touching the mouse or trackpad , which can significantly speed up your workflow, especially if you're constantly switching between applications.
To begin, press Function (Fn) + Control + F3 . This shortcut moves the keyboard focus to the Dock, so the icons are no longer just visual elements and you can navigate them with the arrow keys.
Once the Dock is in focus, use the left and right arrow keys to scroll through the icons. You'll see them highlighted one by one as you move, just like you would be navigating a menu.
When the focus is on the icon you want to open, simply press the Return (Enter) key . The application or item will open just as if you had clicked it with the mouse, and you can continue using the keyboard to interact with the app.
This usage method is especially useful if you work with accessibility, advanced keyboard shortcuts , or simply prefer not to let go of the keyboard while typing, programming, or editing documents.
Besides the Dock and the desktop, the menu bar is another key element of the macOS interface . It's the horizontal bar that appears at the top of the screen and is always present, regardless of which window is in the foreground.
On the left side of this bar, you'll see the menus for the active application (File, Edit, View, etc.), which change depending on the app you're using. On the right side are the status and quick access icons: Wi-Fi, Bluetooth, battery, clock, Spotlight, Control Center, and third-party applications.
The menu bar is enabled by default on all Macs and provides quick access to system functions and your apps without having to search for buttons within windows. If you're coming from Windows, it might feel a little strange at first, but once you get used to it, it becomes indispensable.
Many menus in this bar also include keyboard shortcuts, quick help, and shortcuts to preferences. Therefore, understanding how it works and how to customize it is just as important as configuring the Dock to your liking.
In the latest versions of macOS, some of the content that was previously scattered across the menu bar is now centralized in the Control Center , from where you can decide which icons appear at the top and how they are displayed.
If you prefer a clean screen, macOS lets you hide the menu bar and show it only when you need it . This feature can be adapted to different scenarios: desktop only, full screen only, always, etc.
To configure this behavior, go to the Apple menu and select System Settings > Control Center . Within this section, you'll find the option related to menu bar visibility.
Look for the setting " Automatically hide and show the menu bar ." From the drop-down menu, you can choose when you want it to be hidden or visible, depending on your workflow.
The usual options are: " Full screen only " (the bar is hidden when you use full screen apps), " Desktop only " (it is shown only on the desktop and not in full screen apps), " Always " (it is always hidden and appears when you hover the cursor over it) and " Never " (it remains visible at all times).
Playing with these options allows you to gain vertical space on small screens or laptops , while still having quick access to menus and status icons when you need them.
Over time , it's normal for the menu bar to fill up with icons from system and third-party apps : Bluetooth, Wi-Fi, battery, Dropbox, antivirus, messaging, etc. If there are too many, some may even be grouped or hidden automatically.
To control which system icons appear in the menu bar, go to System Settings > Control Center . From there you can enable or disable them, and also decide whether you want them to be displayed in the Control Center itself.
For third-party apps, each app typically has its own option in its preferences to show or hide its icon in the menu bar. You'll usually see something like "Show icon in menu bar" that you can check or uncheck.
To rearrange the icons, hold down the Command (⌘) key and drag them to your preferred position within the menu bar. This allows you to group, for example, everything related to connectivity, everything related to sound, and so on.
Some system icons can be removed directly by holding Command (⌘) and dragging them off the taskbar . In other cases, you'll need to disable them from Control Center or the settings of the corresponding app.
System apps and many third-party apps allow you to add shortcuts to key functions directly to the menu bar . This is very useful for tools you frequently use, such as weather, backups, or productivity utilities.
In the case of macOS features (Siri, Time Machine, Bluetooth, etc.), control is done from System Settings > Control Center , where you decide which icons appear at the top and whether they also appear in the Control Center.
To add specific System Settings icons, you can use the " Menu Bar " section within System Settings in macOS versions where it's available. From there, you select which controls and panels you want to be constantly displayed.
For third-party apps, you'll usually need to go into the app's preferences and look for an option like "Show in menu bar." If the app supports this type of icon, it will appear as soon as you check that box.
If any tool leaves icons you don't want to see, check its settings or, if you can't find them, see if there's a context menu within the menu bar icon itself with visibility or exit options.
Organizing your menu bar greatly influences how quickly you can find what you need . If everything is jumbled up, you end up searching by eye; if it's well-organized, you can find everything at a glance.
To change the order, hold down the Command (⌘) key and drag the icons left or right. You can create your own logical order: first system (Wi-Fi, battery, clock), then productivity, then entertainment apps, for example.
As for color, the menu bar automatically adapts to macOS's light or dark mode . In light mode, you'll see a semi-transparent light bar; in dark mode , a dark bar that blends in with the rest of the interface.
Some macOS Sonoma users have noticed that, in certain situations, the menu bar turns completely black even in light mode . This usually happens in full-screen apps because the system sets the desktop to black in that mode.
The solution is as simple as exiting full-screen mode . As soon as the app returns to windowed mode, the menu bar regains its usual transparent appearance and no longer looks like a black block.


Passionate writer about the world of bytes and technology in general. I love sharing my knowledge through writing, and that's what I'll do on this blog, show you all the most interesting things about gadgets, software, hardware, tech trends, and more. My goal is to help you navigate the digital world in a simple and entertaining way.
Table of Contents
- 1 What is the Dock in macOS and how is it organized?
- 2 Open, use, and manage items in the Dock
- 3 Add, remove, and reorder icons in the Dock
- 4 Dock settings from “Desktop & Dock” in System Settings
- 5 Tips for adjusting the size and animation of the Dock
- 6 Add folders, disks, web links, and control panels to the Dock
- 7 Create groups and blank spaces in the Dock with Terminal
- 8 Keyboard shortcuts to navigate the Dock
- 9 The menu bar in macOS: what it is and what it's for
- 10 Automatically hide and show the menu bar
- 11 Manage and delete icons in the menu bar
- 12 Add or remove applications from the menu bar
- 13 Change the order and appearance of the icons in the menu bar