- Macrium Reflect Free allows you to clone to smaller disks by adjusting partitions and copying only used data.
- To boot properly, the target disk must be connected to the motherboard; Windows It doesn't start because USB.
- Wondershare UBackit offers a simple alternative with disk cloning, partitioning, and sector-by-sector mode.
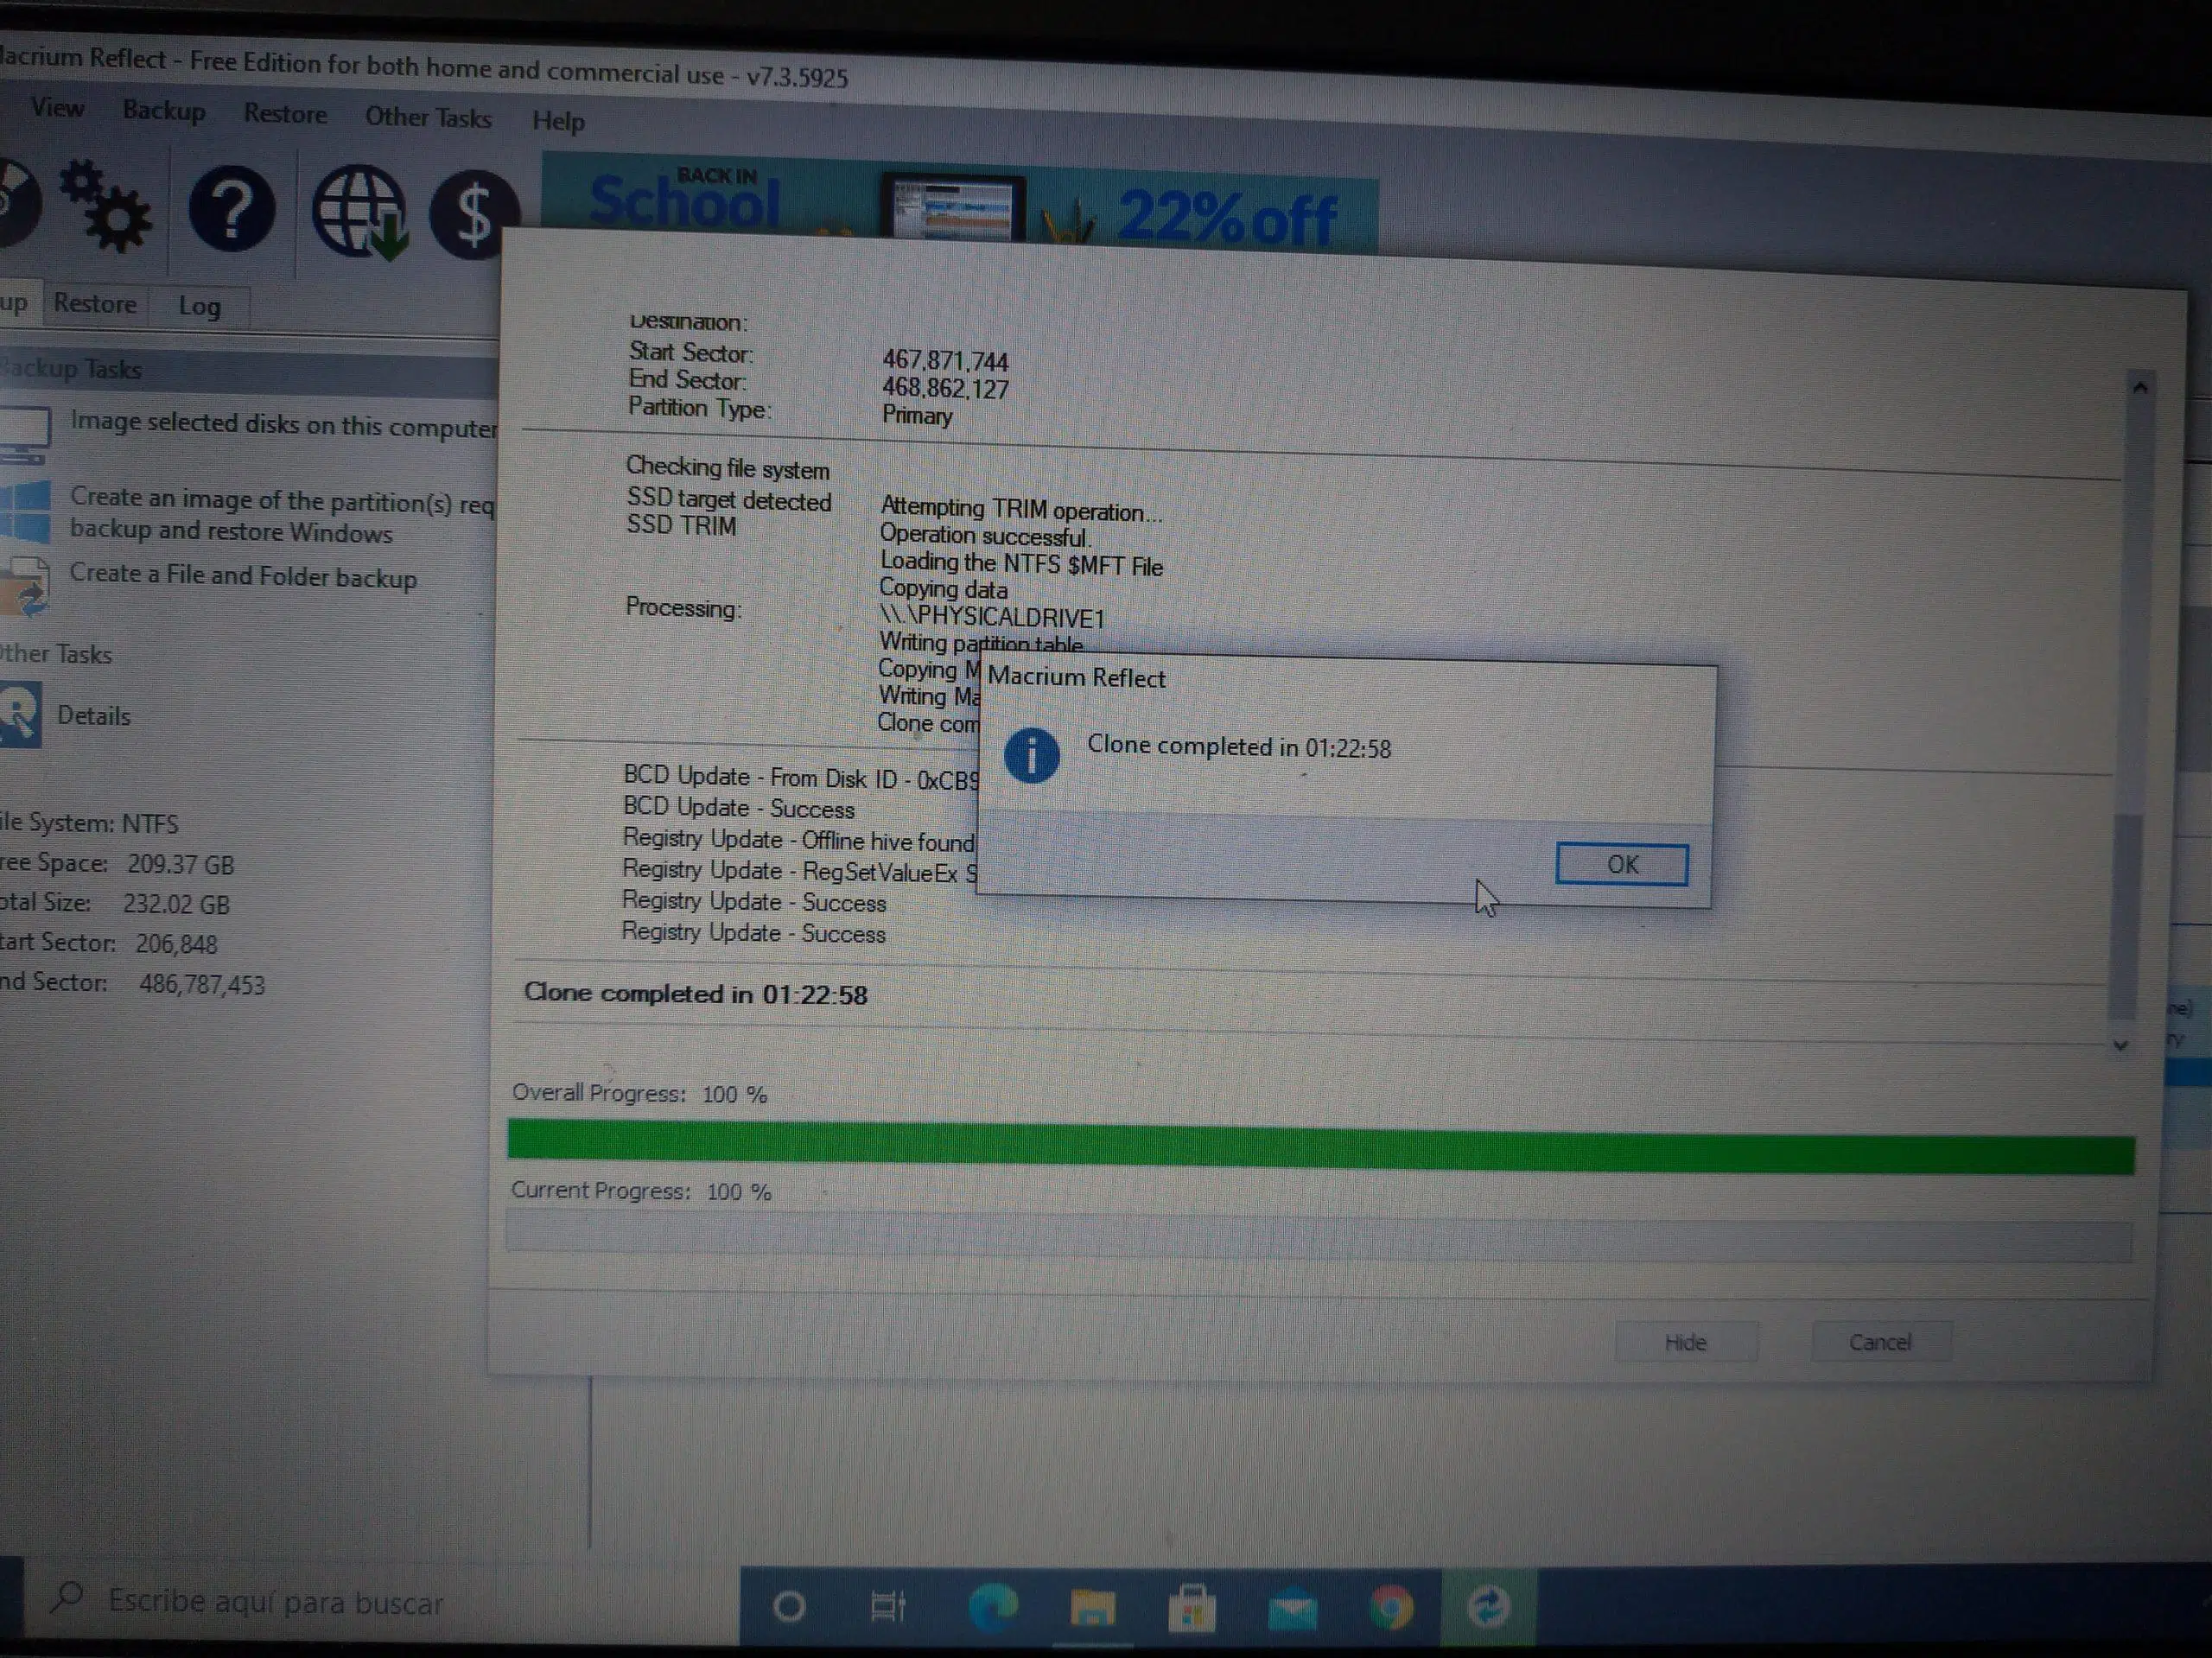
If you're thinking about migrating your entire system to a new drive or creating a reliable backup of your computer, cloning the entire disk with a free tool is one of the safest and most convenient options. Among the most popular utilities, Macrium Reflect Free stands out for its flexible and powerful cloning capabilities, ideal for switching from a traditional HDD to a modern SSD without any hassle.
Before anything else, it's important to understand two key ideas: firstly, Windows doesn't allow booting from a USB-connected drive, so it's essential to connect the new drive directly to the motherboard (SATA or M.2/NVMe); secondly, although many programs require the destination drive to be the same size or larger, with Macrium Reflect you can migrate to even a smaller drive as long as the data fits and you configure the partitions correctly.
What is Macrium Reflect Free and why is it so useful?
Macrium Reflect Free is a Windows tool focused on cloning and backup that many users value for its ability to clone entire disks or select partitions as needed. While its interface may seem more technical than some alternatives, it offers very fine control for those who want to migrate their system and data safely.
One of its most striking advantages is its ability to clone a large disk to a smaller one , resizing partitions and copying only the space actually used. In real-world scenarios, this allows, for example, migrating from a 500 GB or 1 TB HDD to a 256 GB or 512 GB SSD without losing your operating system or applications.
Furthermore, the program allows you to schedule cloning and choose which partitions to copy, providing convenience and flexibility. Several users highlight that you can work normally from within Windows, that the process generally takes more than an hour (depending on the data volume), and that the result is a bootable replica.
There are shared experiences that even mention that, in tight scenarios, certain folders have been excluded from cloning to ensure everything fits together. This level of granularity is unusual in free solutions and explains why Macrium Reflect Free is so highly regarded for migrations to SSDs or M.2 drives.
Prerequisites and preparation
Before cloning, there's a minimum of preparation you shouldn't skip. First, connect the new drive directly to the motherboard : if it's a SATA SSD, use a SATA cable and power supply; if it's an M.2 or NVMe drive, insert it into the corresponding slot. Avoid using USB enclosures for the destination drive if you plan to boot from it.
Also, make sure the destination drive has enough space for everything you intend to clone . The nominal size doesn't need to be larger than the source, but the actual data used must be less than or equal to the source. If not, delete unnecessary files or move large amounts of data to another drive before cloning.
As a best practice, create a separate backup of your critical data in case something goes wrong. While cloning is safe, having an additional backup provides peace of mind. Also, check the SMART status of the old drive for reallocated sectors or impending failures.
Regarding compatibility, remember that Macrium Reflect works on Windows . If you want to clone a Linux or macOS system, this utility isn't the right choice. For Windows 7 , 8/8.1, 10, and 11 (32-bit and 64-bit), it works seamlessly and offers extensive support.
Basic steps to clone a disk with Macrium Reflect Free
While the interface isn't the simplest, the workflow is quite logical. Generally speaking, you'll identify the source disk, choose the destination, and adjust how the partitions are copied to ensure everything fits together, especially if you're moving to a smaller drive.
- Install and open Macrium Reflect Free on your Windows PC. Connect both disks (source and destination) to the motherboard before starting.
- In the main window, locate the source disk (your current system drive) and click the Clone this disk option.
- Click Select a disk to clone to and choose the destination disk (your SSD or new drive where you will migrate).
- Check the partitions you want to copy, especially if you are going to clone disks with multiple partitions. You can use Copy selected partitions and, if you need to, go into Cloned Partition Properties to resize and adjust sizes.
- If you're moving to a smaller drive, shrink the large data partition and leave the system partitions (EFI/MSR/Recovery) intact. Respect the order and the alignment.
- Review the advanced options if you want to schedule cloning. Then, confirm with Finish and Start to start cloning.
- Wait for the process to complete. Depending on the size and speed of your disks, this may take more than an hour. Do not interrupt the operation.
When finished, shut down your computer, disconnect the old drive (or change its port), and try booting from the new one. If everything went well, your system should start as usual , but much faster if you've migrated to an SSD or NVMe drive.
Clone from a large disk to a smaller one: what you need to know
Many free programs require the destination disk to be the same size as or larger than the source disk, making it difficult to migrate to smaller SSDs. With Macrium Reflect Free, you can clone only the used space and adjust partitions to fit the new size, as long as your data still fits.
The key is to resize the data partition before starting the cloning process or during the wizard itself (Cloned Partition Properties). Keep the boot and reserve partitions intact, and shrink the large partition until it all fits on the SSD.
On systems with very limited storage space, some users have reported having to exclude large folders from the cloning process to ensure a smooth migration. If you find yourself in this situation, free up as much space as possible: delete temporary files, uninstall large games, or move libraries to another drive.
Once copied, verify that Windows boots and that the file system is intact. If you encounter space issues after migrating, you can later expand the partition using Disk Management to utilize all the gigabytes of the new media.
Partition cloning, sector by sector and other methods
You don't always need to duplicate the entire disk. If you're only interested in moving a specific data drive or configuration, you can clone a specific partition , which saves time and minimizes unnecessary risks.
There is also sector-by-sector (bit-by-bit) cloning , which copies everything, including empty space. This is useful in forensic recovery or with uncommon file systems, but it is slower and requires the destination to be at least the same size.
For most Windows migrations, simply cloning the system and data partitions is sufficient, avoiding sector-by-sector cloning . This saves you hours of waiting and ensures that the sizes are better suited to your new SSD.
Remember to check the 4K alignment and logical sector format; modern assistants handle this automatically, but it never hurts to confirm that the alignment is correct for optimal performance.
Programming, execution from Windows and timing
A very practical advantage of Macrium Reflect is that it allows you to schedule cloning and run it from Windows, without having to enter rescue environments unless absolutely necessary. This gives you flexibility to run it during off-peak hours.
Even when running on demand, it's best not to overload the system while cloning, especially if you're transferring a lot of data. The fewer processes running in parallel , the more stable and faster the process will be, and the less likely you'll have to repeat it.
The total time will depend on the speed of your drives (HDD vs SSD/NVMe), the bus type (SATA vs PCIe), and the volume of data being copied. As a reference, more than an hour is common on systems with a lot of data or on slow HDDs.
After cloning, you can keep the old disk as a data storage or backup. Alternatively, if you prefer not to keep it, securely erase it to avoid leaving any traces of sensitive information.
Limitations and compatibility to keep in mind
Important: Macrium Reflect operates on Windows and is designed for this environment. Therefore, if you attempt to boot a cloned disk via USB cable, connect the media to the correct internal port for a successful boot.
Regarding partition schemes, some users point out that, under certain circumstances, the Free version might not accept GPT disks as a source and MBR disks would be better supported . If you encounter this situation, consider converting MBR disks to GPT , using a system image, or upgrading to the paid edition depending on your needs.
Furthermore, system support is extensive: Windows 11/10/8.1/8/7 , both 32 and 64 bits, are the scenarios for which this type of tool shows its best side in cloning and backup tasks.
When the hardware is severely degraded (bad sectors, electrical failures), cloning can become complicated. In such extreme cases, consider diagnostic software , image copying with validation, or a data recovery process before attempting a 1:1 duplication.
Easier alternative: Wondershare UBackit
If you find Macrium Reflect's interface too difficult, there's a very user-friendly alternative called Wondershare UBackit . Its standout feature is its ability to simplify the user experience without sacrificing powerful functions.
Among its capabilities, you'll find that it clones entire disks (from HDD to SSD or another HDD) and supports a wide variety of media: HDDs of all brands, SATA and M.2 SSDs, NVMe SSDs, USB drives, NAS devices, and SD cards. Hardware coverage is extensive for both home and professional use.
In addition, it allows you to clone specific partitions if you don't want to replicate the entire disk and offers a sector-by-sector (bit-by-bit) cloning mode when you need a literal copy of the contents, useful in specific recovery or auditing scenarios.
In terms of compatibility, UBackit works with Windows 11/10/8.1/8/7 in both 32-bit and 64-bit versions, maintaining a clean, straightforward, and easy-to-understand interface . If you lack technical experience, this simplicity can make all the difference in completing the task without any hassle.
The process with UBackit is reduced to just a few clicks, and upon completion, you'll see a success message. Users highlight its quick and easy setup , with a gentler learning curve than other tools, making it a solid alternative to Macrium.
Practical tips for a migration or backup without surprises
Before cloning, clean up your system: uninstall anything you don't use, delete temporary files, and empty the Recycle Bin. The less data you move, the faster the cloning will be and the easier it will be to fit on a smaller SSD if that's your goal.
Check the partition table and boot type (UEFI with GPT or BIOS with MBR). Maintaining a consistent scheme between source and destination prevents boot problems , especially on modern systems configured with UEFI and EFI partitioning.
If you plan to keep the old drive for data, change the boot order in the BIOS/UEFI to prioritize the new drive. This ensures that Windows boots from the migrated drive and not from the old one by mistake.
Keep a recovery method handy in case something goes wrong during the process. While it's not usually necessary, having a recovery option allows you to repair the boot process, restore an image, or safely repeat the cloning process.

Passionate writer about the world of bytes and technology in general. I love sharing my knowledge through writing, and that's what I'll do on this blog, show you all the most interesting things about gadgets, software, hardware, tech trends, and more. My goal is to help you navigate the digital world in a simple and entertaining way.