- Audacity offers a complete collection of effects to clean noise, correct clicks, equalize and normalize the volume of your recordings.
- The combination of noise reduction, noise gate, filters and equalization allows the elimination of hum, hiss, breathing and distortion without sacrificing clarity.
- The Normalize effect adjusts the peak audio level to a defined level (e.g., -1 dB), equalizing the volume between tracks and preventing clipping.
- Online tools and other editors complement Audacity for tasks such as voice and music separation or advanced LUFS-based normalization.
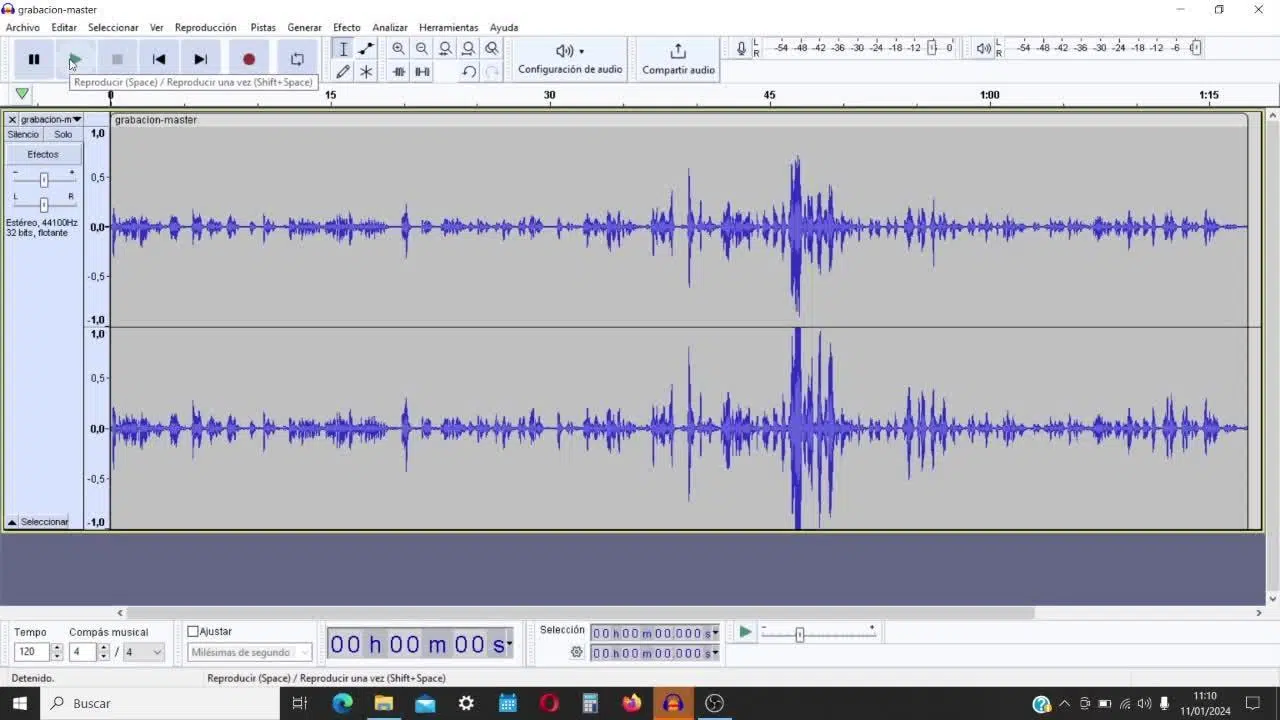
In this article, you'll learn, step by step, how to clean up audio in Audacity and normalize its volume so it sounds balanced, clear, and pleasant. You'll see exactly what each effect does (Noise Reduction, Noise Gate, Normalize, Amplify, Equalize, Clip Repair, etc.), the best order to apply them, and some guideline values you can use to avoid ruining your recording.
What is Audacity and why is it useful for cleaning and normalizing audio?
Audacity is a free and open-source audio editor available for Windows , macOS, and Linux . Despite being free, it includes a huge collection of professional tools for recording, editing, processing, and enhancing sound.
With Audacity you can record directly with your microphone, import files in formats such as MP3 , WAV, FLAC or M4A , edit multiple clips in multitrack and apply effects to correct typical problems of any home recording.
Among these tools, those designed to clean up the audio and make it as "fine" as possible stand out : noise reduction , noise gate, notch filters, click and pop removal, clipping correction, equalization, compression and, of course, volume effects such as Amplify and Normalize.
In addition, Audacity is widely used to convert analog audio (tapes, vinyl records, old recorders) to digital format , edit podcasts, prepare voiceovers for video, or adjust the pitch and tempo of a song without significantly affecting the quality.
Basic concepts: noise, peaks, RMS, LUFS and normalization
Before we get down to business with the effects, it's worth clarifying some key concepts that will help you understand what you're doing when you normalize and clean audio.
On one hand, there's the background noise: buzzing, hissing, fans, traffic, electrical clicks, or very pronounced breathing that seeps into the recording. They're not part of the message, but they're there, "muddying" the track.
On the other hand, there are volume levels. The peak volume level is not the same as the overall perceived volume . Three important measurements come into play here:
- RMS (Root Mean Square): It's a way to measure the average level of an audio signal. It's closer to how we perceive the actual volume than simply the peak level, and it's very useful for determining whether audio sounds constant or has fluctuations.
- LUFS (Loudness Units Full Scale): It is the modern reference unit for measuring perceived loudness. Platforms typically recommend values such as -16 LUFS for spoken voice and -14 LUFS for music to maintain a consistent listening experience.
- Peak level: This indicates the highest point reached by the waveform. If a peak reaches or exceeds 0 dBFS (the digital maximum), you will have clipping and distortion.
Normalization, as implemented by Audacity, focuses on the peak level : it adjusts all audio up or down so that the highest point of the waveform reaches a target value (for example, -1 dB). This gives you a track with sufficient volume without it exceeding the limit and distorting.
Preparation: Import and duplicate your audio in Audacity
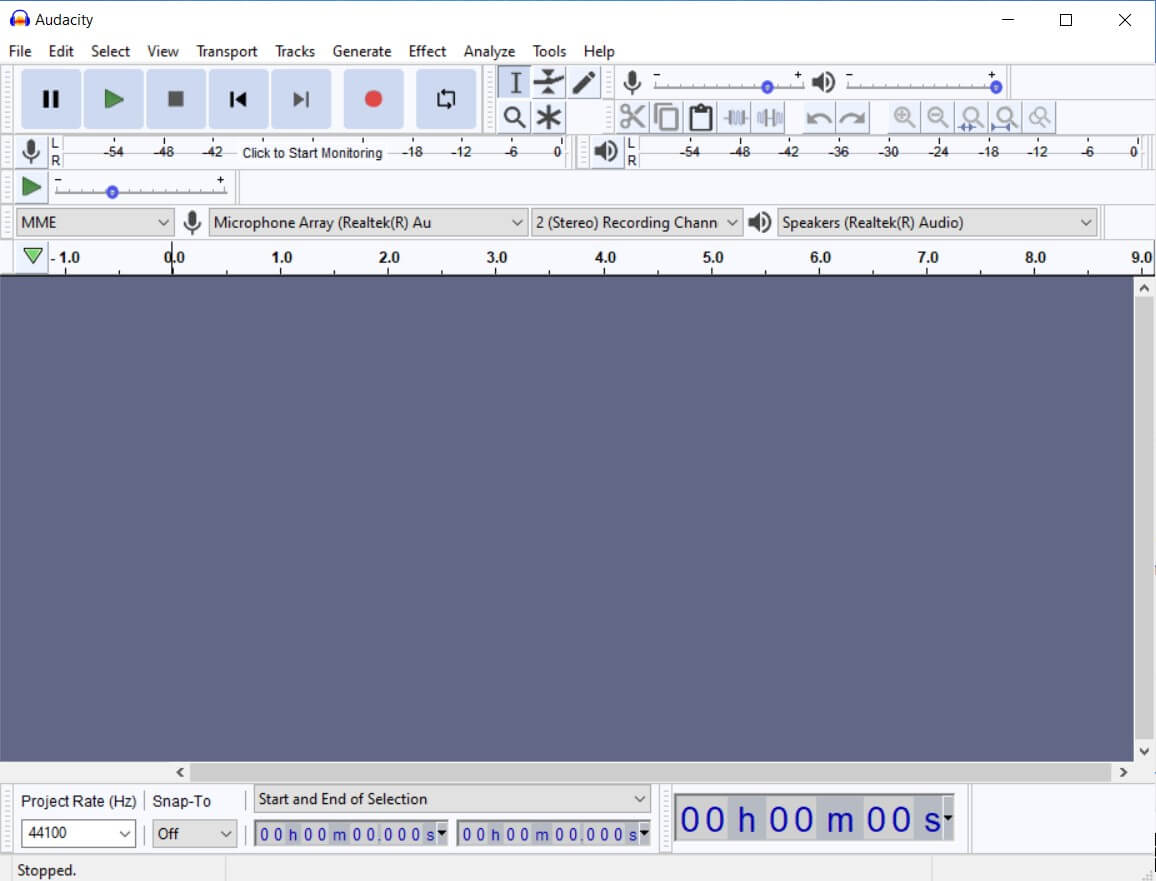
The first thing you should always do is work on a copy of your recording . That way, if you overdo an effect or mess something up, you can go back to the original file without any problems.
Open Audacity and, to import your sound file, go to “File > Import > Audio” . In the window that appears, select the file you want to edit (MP3, WAV, FLAC, etc.) and confirm.
When you import, Audacity may display a warning asking for permission to "Make a copy of the files before editing them ." Select this option if you want the program to create an internal copy of the audio and not work directly on the original from the disc.
Once the clip is loaded, you can duplicate the track within Audacity to have two versions: one clean and one for experimenting. Simply select the track and use "Edit > Duplicate" or the corresponding shortcut to clone the waveform.
Noise reduction: clean up background hums and hisses
Many home recordings have a constant background noise : a laptop fan, an air conditioner, an electrical hum, or a high-pitched hiss. That's where Audacity's "Noise Reduction" effect comes in.
This filter works by identifying a section where only noise is audible and then removing frequencies that match that pattern in the rest of the audio. However, it's not magic: if you overdo it, it can leave a metallic or robotic sound because it also removes some of the "good" audio that shares those frequencies.
To use it effectively, first select an area of your clip that contains no vocals or music, only background noise . With that section selected, go to “Effect > Remove and Repair Noise > Noise Reduction”.
In the effect window, click "Get Noise Profile ." Audacity will then memorize the noise you want to remove. Next, select the entire track (Ctrl+A or Cmd+A) and return to the same effect to apply the noise reduction to the rest of the audio.
Within the window you will see key parameters to control how much you will clean:
- Noise reduction (dB): is the amount of noise attenuation. A typical and fairly safe value to start with is around 6 dBIf the noise is very loud, you can turn it up a little, but avoid excessive values so as not to damage your voice.
- Sensitivity: This determines how much of the audio Audacity will consider as noise. It typically works between 0 and 24, and an intermediate value such as 6 It usually gives good results without eating up too much useful content.
- Frequency bands: Control how many bands the algorithm uses to separate noise and signal. Keep it between 0 and 2 It helps to preserve clarity in many cases.
Once you have the values, use the Preview button to listen for a few seconds and adjust if necessary. If you like the result, click "OK" and Audacity will apply the filter to the selection.
Noise door: cuts out whispers and low-level residual noise
Noise reduction is fine for constant hum, but it often falls short with very subtle sounds that appear intermittently (background noise rising and falling, breathing, distant keyboard clicks, etc.). That's where the Noise Gate comes in handy.
A noise gate acts like a doorman: anything below a certain level is attenuated or silenced , while anything above that level passes through undisturbed. This allows you to significantly reduce noise during pauses in speech or at the end of sentences.
In Audacity, you'll find it under "Effects > Remove and Repair Noise > Noise Gate" . First, select the audio section you want to apply it to (it can be the entire track), and then open the effect.
One of the key settings is the "threshold level" . A reasonable starting value might be -40 dB , which is usually enough to cut out background noise without drowning out the voice, although it will depend a lot on how loud you recorded.
Also, make sure you have the "Gate" function selected within the effect. After adjusting, preview the sound. If you notice that the voice cuts off abruptly or sounds unnatural, lower the threshold slightly or smooth out the attack and release times if the effect offers them.
Notch filter: eliminates specific electrical hums
There are very specific noises, such as the hum of an electrical current at 50 or 60 Hz , that are especially annoying because they remain constant at a fixed frequency. In these cases, the ideal tool is the notch filter.
This type of filter very selectively reduces a single frequency (and a very narrow range around it), leaving the rest of the spectrum almost untouched. It is often used to remove mains hum, electronic equipment buzzes, or static tones that have crept into a recording.
In Audacity, you'll find it under "Effect > Equalizer and Filters > Notch Filter" . Once there, you'll mainly need to adjust two parameters:
- Frequency: This is the center frequency you want to eliminate. A typical value for electrical hum is 60 Hz (or 50 Hz depending on the country). You can try that number and fine-tune it if you find that the noise doesn't disappear completely.
- Q factor: determines how narrow or wide the "notch" is. Values between 0,1 and 1 They usually work well. The higher the Q factor, the more selective the filter will be.
Apply the effect and listen carefully. If you notice that the overall sound loses too much body, try readjusting the frequency or softening the filter (lower Q) to avoid losing some of the useful bass.
Click eliminator: remove annoying clicks and pops
Another very common annoyance is the clicks, pops and small "pops" produced by blows to the microphone, small connection failures, saliva in the mouth or defects in old files (vinyl records, tapes...).
To address this, Audacity includes the "Remove Click" effect , accessible under "Effects > Remove and Repair Noise > Remove Click." Its purpose is to detect these very brief spikes and smooth them out so they go unnoticed.
Within the effect you will see two essential controls :
- Threshold value: determines how sensitive the detections are. A reference value might be 200If you lower it, it will detect smaller clicks; if you raise it, it will be less sensitive.
- Maximum width of the clicks: Indicates the maximum duration of clicks to be corrected. A typical value might be 20, suitable for short clicks.
Ideally, the effect should only be applied to the areas where the clicks are clearly audible , not to the entire track. This prevents the algorithm from affecting parts that don't need it and maintains the natural sound of the audio. If the clicks are coming from older recordings, you might also be interested in how to repair damaged audio files.
Repair clip: fix minor cuts and distortions
When you record too loudly, the audio can reach the digital limit and get squashed at the top or bottom of the waveform . That's clipping, and it results in a harsh, distorted sound.
Audacity has a function to try to correct it called “Repair clip” , located in “Effect > Remove and repair noise > Repair clip” (or “Correct clip”, depending on the translation).
This effect attempts to partially reconstruct the clipped waveform at the peaks, smoothing out the flattening. It won't work miracles if the clipping is severe, but with slight clipping it can significantly improve the listening experience.
In the effects window you will find settings such as:
- Threshold (%): Mark the percentage of amplitude at which you consider a cut-off occurs. A typical value might be 95 %to target only the truly problematic peaks.
- Reduce amplitude to allow restored peaks: Lower the overall level slightly to create space to reconstruct the waveform. A value like -9 dB It can be a good place to start.
Select the affected area, adjust the parameters, and click "OK." If the result is still very harsh, the distortion may be too advanced, and you may need to combine this correction with a slight reduction in the overall volume or repeat the process with slightly different settings.
Graphic equalizer: control wind, noise, and voice clarity
Equalization is one of the most powerful tools for shaping the character of a sound . Audacity's Graphic Equalizer lets you raise or lower specific frequency bands to enhance certain elements or mask others.
If your recording has a lot of wind noise, popping sounds, or low-frequency pops , you can reduce the bass with an equalizer. If the voice sounds muffled or nasal, you can boost some of the mids or highs for clarity.
Access the effect from “Effect > Equalizer and Filters > Graphic Equalizer”. You will see a series of sliders grouped by frequency bands (bass, mid, treble).
Before making too many adjustments, it's a good idea to normalize the track to a reasonable level, for example between 0 and -3 dB , to prevent clipping caused by the cumulative gain. Then, move the sliders gradually, always listening with the preview button.
A useful trick is to slightly reduce the most problematic frequency bands instead of drastically boosting the ones you like . For example, if there's too much rumble in the very low frequencies, lower them a few dB instead of excessively boosting the treble. If you're unsure about your sound card settings, review the basic sound configurations to avoid output problems.
Normalize, amplify, and other volume functions
Once you have the audio reasonably clean of noise and with the equalization to your liking, it's time to adjust the volume correctly so that there are no surprises or distortion and it sounds consistent with other tracks.
Audacity offers three key functions in the “Effect > Volume and Compression” menu: Amplify, Normalize, and Repair (the latter as an umbrella for various volume corrections).
With Amplify, you can raise or lower the overall audio level by a specific number of decibels. If your track is too quiet, you can increase the gain; if it's too loud and approaching 0 dB, you can lower it slightly. A typical setting might be, for example, to amplify until the peak is around -1 dB , although normalization is more convenient for this.
The "Normalize" effect is key when it comes to leveling up. You can find it under "Effect > Volume & Compression > Normalize". Its purpose is to bring the highest peak in the selection down to the level you specify, applying the same gain to all the audio.
In the Normalize window you will see three options :
- Remove DC offset: If your waveform is vertically off-center (it doesn't oscillate around the 0,0 line), this checkbox re-centers the audio. It's a good idea to enable it most of the time. avoid headroom problems and unnecessary distortion.
- Normalize peak amplitude to (dB): Here you specify the value you want the maximum peak to reach. By default, it's usually set to... -1,0 dBwhich is a very reasonable standard because it leaves a small margin below 0 dB to avoid clipping and allow for further processing.
- Normalize stereo channels independently: If you're working with a stereo track, this option normalizes each channel (left and right) separately. This is useful, for example, if You have two microphones recorded on L and R and each person speaks at a different volumeIf this is not the case for you, you can leave it unchecked to maintain the original stereo balance.
To use it, select the entire track (or multiple tracks at once) and open the effect. Check "Remove DC Offset," leave the peak maximum at -1 dB or your preferred value, and decide whether you want to process the channels separately. Preview the effect if available, and then click "OK."
If you select multiple tracks and apply Normalize with the same peak value, each track will be individually normalized to that level . This means they will all have the same maximum peak, although their perceived average volume may vary slightly depending on the content. Even so, it's a very good starting point to avoid abrupt level jumps between files.
How to clean up audio recorded on your mobile phone step by step using Audacity
We're going to group all of the above into a very useful logical workflow if, for example, you've recorded a voice with your mobile phone and it sounds like it has background noise, some buzzing, and an unbalanced volume.
First, import the file into Audacity as described above: “File > Import > Audio” and, if possible, make a copy of the project or duplicate the track. Next, identify a section of the clip where only ambient noise is audible.
Use that part to get the noise profile with the Noise Reduction effect, and then apply the reduction to the entire track with moderate values (e.g., 6 dB reduction, sensitivity 6, bands 0-2) so as not to overdo it.
If there are still very pronounced breaths or residual noise at the end of sentences, use the Noise Gate , setting a threshold around -40 dB and adjusting until the background is attenuated without cutting off words.
If you hear a clear electrical hum, try inserting a notch filter around 50-60 Hz, with a Q factor between 0,1 and 1, making sure that the voice does not lose too much pleasant bass.
Once the noise is under control, move on to the more obvious clicks and pops using the Click Eliminator. Focus the effect on the problem areas and control the threshold value (e.g., 200) and the maximum click width (20) to avoid altering otherwise sound audio.
If you detect clipping in some peaks due to recording at a very high volume, select those areas and run Repair Clip with a threshold around 95% and a small amplitude reduction to allow room for reconstruction.
Next comes adjusting the overall tone with the graphic equalizer . It slightly reduces very low bass frequencies if there are any harsh, plosive sounds, and adds a touch of presence to the vocals in the mid-high frequencies, always with smooth changes of just a few dB.
Finally, adjust the overall volume using Amplify and, especially, Normalize . You can use Amplify to add some headroom and then Normalize to -1 dB peak, with DC offset removal enabled. This will give you a stable, clean track with a good level and no distortion.


Passionate writer about the world of bytes and technology in general. I love sharing my knowledge through writing, and that's what I'll do on this blog, show you all the most interesting things about gadgets, software, hardware, tech trends, and more. My goal is to help you navigate the digital world in a simple and entertaining way.