- Keeping the lens and housing clean with mild products ensures maximum visibility and prevents premature damage to the V16 beacon.
- A good storage Inside the vehicle, away from direct sunlight and well protected, it reduces breakdowns and ensures quick access in emergencies.
- Regular checks of light, power, casing and connectivity with DGT 3.0 are key to ensuring that the beacon fulfills its function and the regulations.
- Using batteries or power supplies according to the manufacturer's instructions and avoiding immersion or strong impacts will maximize the device's lifespan.
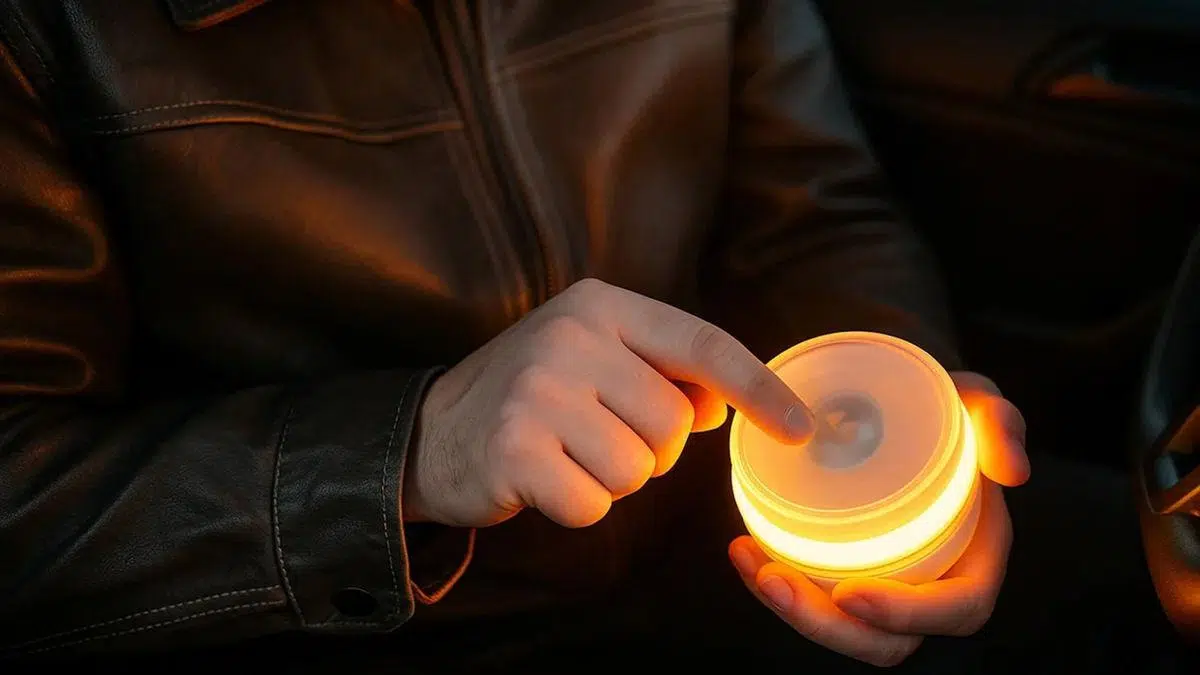
Properly maintaining a V16 warning light is almost as important as having it in your car. It's pointless to have the mandatory device if, on the day of a breakdown or collision on the road, the light is barely visible, the magnet doesn't hold properly, or the electronics are damaged by moisture or dirt. The good news is that maintenance is simple as long as you follow a few clear guidelines.
Throughout this guide you will find how to clean a V16 beacon without damaging it , how to store it so that it does not suffer, what checks should be done periodically, what you can do if it gets wet in the rain and how to treat the batteries so that they last all those years of service promised by the manufacturers and the DGT 3.0 regulation.
Why it's key to keep your V16 beacon in good condition

Beyond the legal requirement, a well-maintained V16 beacon makes the difference between being visible from a kilometer away and going almost unnoticed in the dead of night or in the rain. Just as you wouldn't drive with completely opaque headlights, there's no point in letting the beacon lens accumulate dirt, scratches, or grease.
Furthermore, from January 1, 2026, only V16 beacons approved and connected to DGT 3.0 will be valid . If your device fails at the worst possible moment due to lack of maintenance, you risk driving without effective signaling, with the consequent risk of accidents and the possibility of a fine.
There's also a household budgeting aspect to consider: these smart beacons offer connectivity for over a decade thanks to the integrated eSIM, so it's reasonable to expect them to remain functional until that point. Misuse, cleaning with unsuitable products, or a minor knock could force you to buy a new one well before then.
Finally, there's what really matters: your safety and the safety of others . A V16 that provides good illumination, is securely attached to the roof, and alerts the DGT 3.0 platform in a matter of seconds drastically reduces the risk of being hit by a vehicle and secondary accidents while you wait for a tow truck or emergency services.
Recommended frequency and materials for cleaning a V16 beacon
If you want your device to always be ready for action, it's a good idea to schedule a light cleaning every so often . There's no need to be obsessive, but having a basic routine is helpful.
As a reasonable guideline, cleaning every three months works very well for normal use, combined with an extra check after trips to areas with a lot of dust, mud, heavy rain, or coastal areas with salt spray . It is precisely these environments that dirtie the lens and housing the most.
To avoid scratching the plastic or damaging the electronics, it's important to use soft materials and neutral products . This way you'll be safe and avoid unpleasant surprises.
What to use (and what NOT to use) to clean the V16 beacon
For proper cleaning without risk of damage, a small homemade kit will suffice. It's common to combine one or more of these items , depending on how dirty the beacon is:
- Microfiber cloth or very soft cotton, like the kind you use to clean glasses or screens.
- Distilled waterwhich prevents limescale buildup and marks on the lens.
- Very diluted neutral soap in water (for slightly more stubborn dirt).
- Isopropyl alcohol in small quantities for spot stains on the LED lens.
- Cotton swabs or soft brush for tricky areas and hidden corners.
On the other hand, there are a number of products you should keep away from the V16 beacon if you don't want to end up with whitish plastic, an opaque lens, or even liquid leaks inside:
- Strong solvents or abrasive products (acetone, turpentine, oven cleaner, etc.).
- Aggressive alcohols and flammable liquids that are not specifically isopropyl and used in moderation.
- Bleach, ammonia, or corrosive all-purpose cleaners.
- Rough scouring pads, hard brushes or any fiber that can scratch.
- High-pressure water jets or Karcher-type machines applied directly to the beacon.
Keep in mind that a single cleaning with an unsuitable chemical can permanently cloud the lens, reduce the actual light intensity, and render the beacon practically useless for what matters: being seen.
Steps to clean a V16 beacon without damaging it
Once you know what to use and what to avoid, the idea is to follow a simple procedure that will always be the same , which will only take a few minutes and will greatly extend the life of the device.
1. Turn off the beacon and make sure it does not activate on its own.
Before touching anything, turn the V16 beacon completely off . This will prevent accidental activation while you are handling it, unnecessary battery saving, and potential reading errors in the electronics or the geolocation module.
If your model has a physical lock or cover for the power button, check that it is in the off position before starting the cleaning.
2. General cleaning of the casing
Start with the outside, which is where the dirt accumulates the most. Lightly dampen the microfiber cloth with distilled water or a drop of mild soap . It should be just slightly damp, not soaking wet.
Gently wipe the entire surface with the cloth, paying special attention to areas with mud, hand grease, or stuck-on dust . If you see any grooves or crevices where dirt accumulates, you can use a nearly dry cotton swab to gently push it out.
When you're finished, go over it again with another clean, dry cloth to remove any remaining moisture. This step is important to prevent water from seeping in through joints or buttons over time.
3. Gentle cleaning of the LED lens
The lens or transparent dome is the critical area of the beacon: if it's dirty, scratched, or opaque , the light disperses less effectively, reducing actual visibility at a distance. Treat it like the screen of an expensive mobile phone.
First, remove loose dust with a dry microfiber cloth, using broad, gentle strokes without pressing too hard. If grease stains or stubborn marks remain, dampen a cotton swab with a very small amount of isopropyl alcohol and wipe the surface in a circular motion.
Next, remove any remaining alcohol with another cotton swab or a microfiber cloth lightly dampened with distilled water, and dry thoroughly. It's important to remove all traces and prevent any residue from blurring the light.
4. Magnet area, base and connectors
If your beacon is attached with a magnetic base, you should periodically check the magnet to ensure that it does not accumulate rust or metallic particles that could reduce its holding power.
Wipe the entire base with a dry cloth and inspect it for any bumps, dents, or cracks . Any deformation could prevent it from resting properly on the ceiling and cause it to come loose in a strong gust of wind.
For models with a charging port or visible connections, you can remove dust with compressed air (using cans specifically designed for electronics) or with a very soft brush. Avoid inserting metal or wet objects into the connectors, as this is the quickest way to cause a short circuit.
Can the V16 beacon get wet? Water, rain, and IP certification
The question is very common: what happens if the beacon gets wet? Can I wash it under the tap? Is it okay if it's raining heavily when I put it on the roof? The answer lies in two things: certification and common sense.
Approved V16 beacons typically offer protection against dust and splashes (e.g., IP54 or similar), sufficient to withstand rain, high humidity, or even light snow without ceasing to function. Regulations require them to withstand adverse weather conditions because that is precisely when they are used.
However, this protection does not make the beacon submersible . It is not designed to be placed in a bucket of water, left floating in a deep puddle, or washed like a dish under a strong stream of water. Pressurized water and prolonged immersion can force water in through seals or covers and damage the internal electronics.
In summary: no problem with normal rain or splashes while using it, but do not submerge it or clean it by putting it under the tap or using pressure washers.
What to do if the beacon falls to the ground or gets very wet
If, during an emergency, the beacon slips off the roof and ends up on the wet road , remain calm. First, pick it up carefully, avoiding prolonged contact with the water or mud.
Next, dry the outside with a clean, absorbent cloth , paying attention to the seams, the power button, and the magnetic base. Do not use hair dryers or direct heat sources: these could warp the plastic or create internal condensation.
If you suspect water may have entered the beacon (sloshing sound when shaken, internal fogging, or unusual behavior), leave it in a dry, well-ventilated place at room temperature for several hours. Then, perform a quick power-on test to see if the light flashes normally.
If the beacon malfunctions, has weak lights, or has been submerged , it's best to contact the manufacturer or their technical service. Repairing it yourself is often complicated and could void your certification or warranty without realizing it.
Storage: Where and how to store the V16 beacon in the car
A surprising number of problems with beacons stem from improper storage rather than use . Storing them where they shouldn't be, leaving them loose, or exposing them to direct sunlight continuously can significantly shorten their lifespan.
Ideal spot inside the vehicle
The general recommendation is to keep the beacon ALWAYS accessible from inside the car, without needing to get out or open the trunk, especially if you get stranded on a highway.
The most practical places are usually:
- Glove box, if there is room and it is not saturated with other objects.
- Door pockets or side openings near the driver.
- Central compartments between seats, as long as it is securely fastened.
Ideally, you should be able to access it with your seatbelt on or with minimal movement , place it on the roof from the window and close it again without having to walk along the shoulder.
Recommended temperature and humidity conditions
Inside a parked car, the heat can build up, so it's important not to overheat the device's internal components. Most manufacturers specify fairly wide operating ranges, such as -20°C to 50°C, but the more you protect it, the better.
Try to find a spot that's as protected from direct sunlight as possible . Avoid placing it against the windshield or on the rear parcel shelf, where temperatures are extreme and the plastic can warp over time.
Regarding humidity, it's best to keep the relative humidity inside the car below 80% . This isn't usually a problem under normal conditions, but it's advisable to avoid areas where water droplets can get in (for example, near seals that you know leak rain).
Use of a protective case or cover
If your beacon came with a specific hard or soft case , always use it. It's not just a design choice: it's designed to protect the lens and casing from scratches, impacts with other items in the glove compartment, and minor dust ingress.
For models without a case, you can use a small padded bag , as long as it doesn't shed lint or fibers that could stick to the lens. Avoid wrapping it in dirty cloths or leaving it at the bottom of a compartment full of metal tools or other items that could damage it.
Periodic checkups: what to check regularly
Although many modern beacons include electronic self-diagnostic systems , it's still a good idea to do a list of basic checks at least once a year, or before a long trip where you don't want any surprises.
Battery status: Power always available
On the market you'll find beacons with a fixed rechargeable battery and others that run on alkaline batteries . Each system has its own characteristics, but they share one key principle: without power, the beacon is useless.
If your beacon is rechargeable, fully charge it every 4-6 months , even if you haven't used it. This prevents the battery from degrading due to prolonged discharge and ensures it maintains its autonomy.
For models that use alkaline batteries, remember that these slowly self-discharge over time . A properly stored battery can retain most of its capacity for 5 to 10 years, but temperature, humidity, and impacts accelerate its deterioration.
Always check the expiration date printed on the blister pack or the battery itself. If it has passed or is very close to expiring, it's time to replace them. If you notice corrosion, bulging, or leaks, dispose of those batteries at a designated recycling point and do not use them under any circumstances.
Light intensity and stability
At least once a year, or before an important trip, perform a quick activation test . Activate the beacon briefly in a safe place and observe the light's behavior.
What you should see is a steady, bright flash, visible even in ambient light . If the intensity seems very low, the light flashes irregularly, or the beacon turns off by itself, something is wrong: it could be a battery issue or an electronic fault that should be checked with the manufacturer.
Geolocation and communication with DGT 3.0
When switched on, the connected V16 beacons send their exact position to the DGT 3.0 platform via the internal eSIM and the associated data network (in many models, with service included until 2038).
If the device offers an app or web panel , log in from time to time to check that it is listed as active, that recent connections have been registered, and that no coverage or geolocation error messages appear.
If you notice that it never updates, constantly shows signal failures, or that the data service has expired , contact the provider to see if it needs a firmware update, service reactivation, or, if necessary, a replacement.
Physical condition of the casing and magnetic base
Take advantage of your annual inspection to examine the beacon closely. Look for cracks, dents, deformations, or loose parts in the casing. A serious impact—for example, if it fell from the roof onto the road at high speed—may have compromised the internal seal.
At the base, check that the magnet is still holding firmly . You can test it on different metal surfaces of the car to see if the hold remains strong. If you notice that it slips easily or that the surface is heavily rusted, you might have trouble keeping it in place on a windy day or with the car slightly tilted.
Alkaline batteries and proper storage outside the beacon
Many V16 beacons, especially connected ones, opt for alkaline batteries instead of rechargeable batteries for a simple reason: they ensure that even if the beacon goes months without being used, it still has power available to activate immediately in an emergency.
Alkaline batteries work thanks to an internal chemical reaction that doesn't completely stop , even when at rest . Over time, this causes the well-known self-discharge: they gradually lose capacity even when not powering any device.
To minimize this loss and extend their lifespan, it's important to store them in cool, dry places , ideally between 20°C and 25°C, away from direct sunlight and intense heat sources. Humidity should not exceed around 60%, as above that level the risk of corrosion and leaks increases significantly.
A highly recommended practice for beacons is to remove the batteries if you know you won't be using them for a long time . You can store them in the car, in a small case next to the beacon itself, so they are always visible and ready to be installed in seconds if needed.
Basic criteria to ensure your beacon is certified
Looking ahead to 2026, simply having "something flashing yellow" is no longer enough. Compliance with regulations requires a certified and connected V16 beacon , meaning it must be approved by the DGT (Spanish Directorate General of Traffic) and equipped to transmit its location to the DGT 3.0 platform.
A key detail is that the homologation code (for example, issued by LCOE or IDIADA) must be permanently marked on the casing , either engraved or screen-printed, not on a simple sticker that can be peeled off. If you can't find this code or have doubts about its authenticity, it's probably better to invest in a new model with a full warranty.
In addition to certification, it's important to ensure the beacon offers high 360º visibility, good battery life, shock and water resistance , and, if possible, a connectivity system with data storage throughout its lifespan. This ensures that, besides being legal, it will actually be useful when you need it.
Good general practices for daily use and care
Apart from cleaning and regular checks, there are a number of very simple daily actions that greatly help the beacon to arrive in top condition in 2038 and beyond.
First of all, try not to drop it on the floor . Although they are designed to withstand minor impacts, falls from the ceiling to the asphalt or from a certain height in the garage can cause micro-cracks in the lens, loosen internal connections, or misalign the magnetic module.
When handling it, try not to constantly touch the lens with your hands, especially if they are greasy or very dirty . Fingerprints accumulate and require more frequent cleaning, with the consequent risk of scratches if you use whatever is handy.
In snowy conditions, remember that although many beacons can withstand moderate sub-zero temperatures , snow accumulation on the roof can block the light and reduce its effectiveness. If conditions permit and it is safe to do so, it is advisable to remove excess snow from the area where the beacon is mounted.
Finally, don't use it as a toy, makeshift flashlight, or decorative light . Each on/off cycle adds hours to the lifespan of the LEDs and the battery, so it's best to reserve it for what it is: an emergency device that should always be at 100% when really needed.
With a few simple habits—gentle cleaning with appropriate products, storage in an accessible and protected place, regular checks of light, power and casing, and basic care against shocks and water—it's easy to ensure your approved and connected V16 beacon works perfectly for years, complying with DGT 3.0 regulations and, above all, maximizing your safety and that of other drivers every time you have to stop on the road.

Passionate writer about the world of bytes and technology in general. I love sharing my knowledge through writing, and that's what I'll do on this blog, show you all the most interesting things about gadgets, software, hardware, tech trends, and more. My goal is to help you navigate the digital world in a simple and entertaining way.