- Microsoft Entra ID acts as a central identity directory that consumes Intune, including local accounts synchronized from Active Directory.
- The combination of Entra's RBAC and Intune allows you to control who creates, modifies, or deletes users and who manages local privileges in Windows and macOS.
- Enrollment profiles, LAPS for macOS, and MDM policies make it easy to securely create and manage local administrator and user accounts.
- Security features such as Windows Hello, certificates, and MFA strengthen identity protection within a Zero Trust strategy.
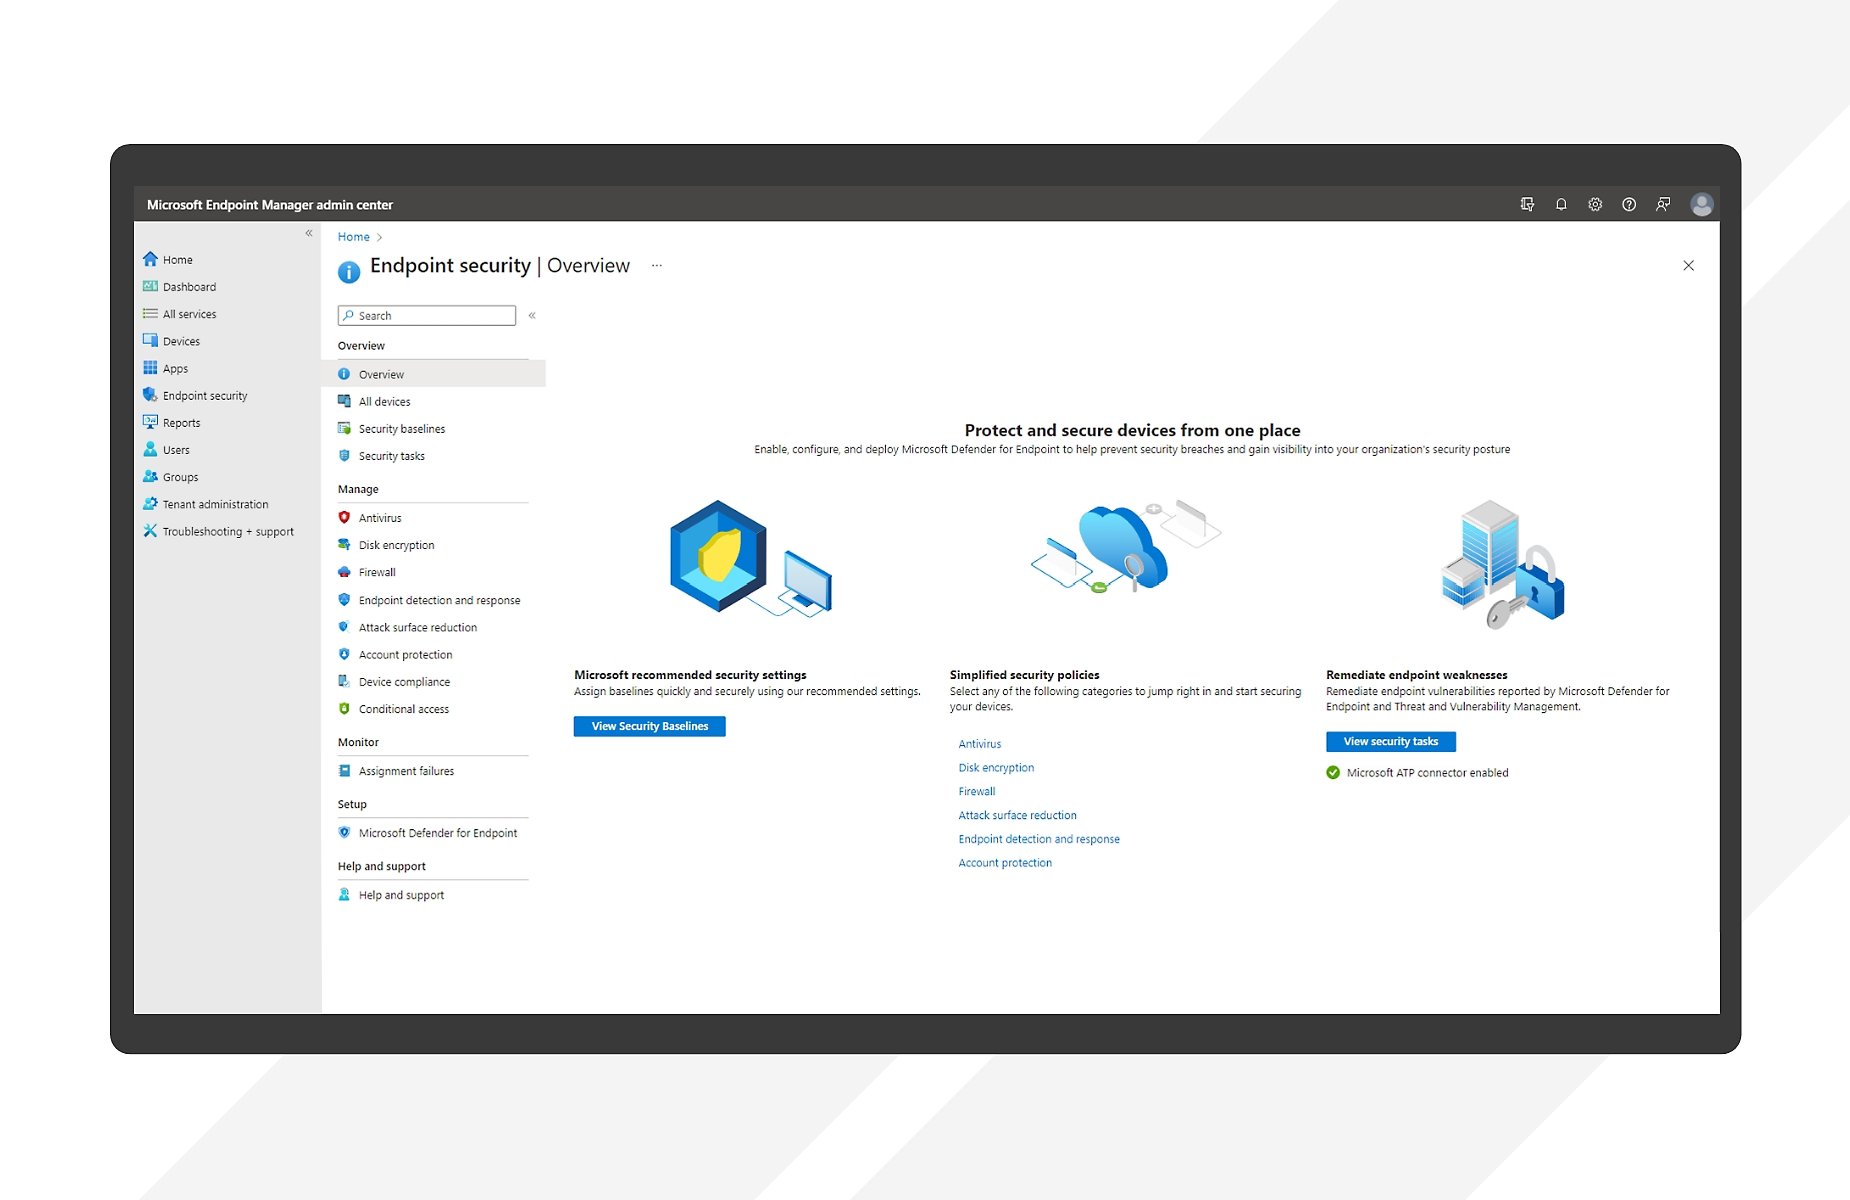
Managing on- premises accounts, Microsoft Entra ID accounts (formerly Azure AD), and enterprise profiles in an organized way with Intune has become a key component of any modern IT department. Simply creating users in Active Directory and hoping for the best is no longer enough: now it's necessary to combine cloud identities, hybrid devices, security policies, and automation, all while keeping the user experience in mind.
Throughout this guide, you'll see, in considerable detail, how to create, sync, and manage user accounts, local profiles, and administrator roles using Microsoft Entra ID, Intune, and, when appropriate, the local directory. We'll also cover how administrator privileges are controlled in Windows and macOS (including LAPS for Mac ), how devices are linked to users, and which security elements (MFA, certificates, Windows Hello, Zero Trust) fit into this picture.
Relationship between Microsoft Entra ID, Intune, and user accounts
Microsoft Entra ID is the identity service that Intune relies on , meaning that the user accounts you see in Intune actually reside within the Entra tenant. Intune doesn't maintain its own separate directory; instead, it simply consumes and extends what already exists in Entra ID.
If you have sufficient role-based access control (RBAC) permissions in Microsoft Entra , you can manage users from three locations: the Intune admin center, the Microsoft 365 admin center , and the Entra admin center itself. The underlying authorization is always the same, and Intune permissions are actually a subset of Entra's RBAC model.
Intune also integrates seamlessly with hybrid environments: you can use accounts synced from on-premises Active Directory to Entra ID and share that same tenant with Intune and other Microsoft 365 cloud services. So, once a user has been created or synced to Entra and assigned an Intune license, they are ready to enroll devices and access corporate resources.
In addition to the purely identity aspect, administrators can assign Intune RBAC roles to user groups to delegate tasks (for example, allowing a support group to view LAPS passwords or rotate them, without making them global administrators).
Minimum RBAC permissions required to manage accounts in Entra and Intune
To manage users from Intune, simply assigning them an internal Intune role is insufficient: the account must have appropriate RBAC permissions in Microsoft Entra ID . Since Intune roles are based on the Entra model, an administrator with only an Intune role, but no Entra role, will not be able to manage identities in the directory.
Microsoft's recommendation is to strictly follow the principle of least privilege : give each person only the permissions essential for their role and reserve the most privileged roles (such as Global Administrator or Intune Administrator) only for specific tasks and highly controlled accounts.
Within Entra ID's integrated roles, the most suitable for managing users without exceeding privileges is the User Administrator role. This role allows users to create, edit, and delete user accounts from the Entra, Microsoft 365, and Intune admin centers, without granting them full ownership of the tenant.
Registering users in Intune through Microsoft Login ID
When we talk about adding users to Intune, we're actually referring to creating them in Microsoft Entra IDs from the Intune Admin Center . The wizard is very similar to Entra's: you can add users one by one or use bulk uploads via CSV.
For individual account setup, the first step is to access Users > All Users > New User > Create New User in Intune . On the basic information tab, you configure the UPN (User Primary Name), email alias, display name, initial password, and whether the account is created enabled or not. You can complete the setup with just this basic information.
The UPN defined here is the credential that will be used to log in to Entra ID, Microsoft 365, and Intune , so it's crucial to align the format (e.g., firstname.lastname@domain) with the organization's standard. All new users are required to change their password upon their first login, reinforcing security.
If you decide to continue with the Properties tab, the information is expanded with fields for identity (name, surname, user type member or guest, data for certificate-based authentication), employment data (position, department, manager), contact details, parental controls for minors (very useful in K-12 educational environments) and the user's usage location , which influences legal and licensing issues.
Later, in the Assignments section, the wizard allows you to link the user to an Entra ID administrative unit, up to 20 groups, and up to 20 Entra roles . This is very practical for ensuring the user has the correct assignments and, if necessary, can perform certain administrative functions from day one.
Entra's administrative units are a powerful way to delegate administration over subsets of users, groups, or devices, but in many Intune deployments, scope tags and scope groups are preferred to segment management over the Intune service itself.
Bulk account creation using CSV files
When importing large volumes of users, the most efficient way is to use bulk creation from the Intune Admin Center using a CSV file. This functionality avoids creating each user manually and reduces human error.
The process is simple: from Intune, go to Users > All Users > Bulk Operations > Bulk Creation , download the CSV template provided by the console, and fill it with the complete list of users to be created. This CSV file can be edited with either a text editor or Excel, as long as the formatting is maintained.
Once the file is complete, it is uploaded back to Intune, sent for processing, and after data validation, the accounts are created in Entra ID . This same CSV template approach is used for other bulk tasks, such as deleting users.
Active Directory synchronization with Entra ID to use Intune
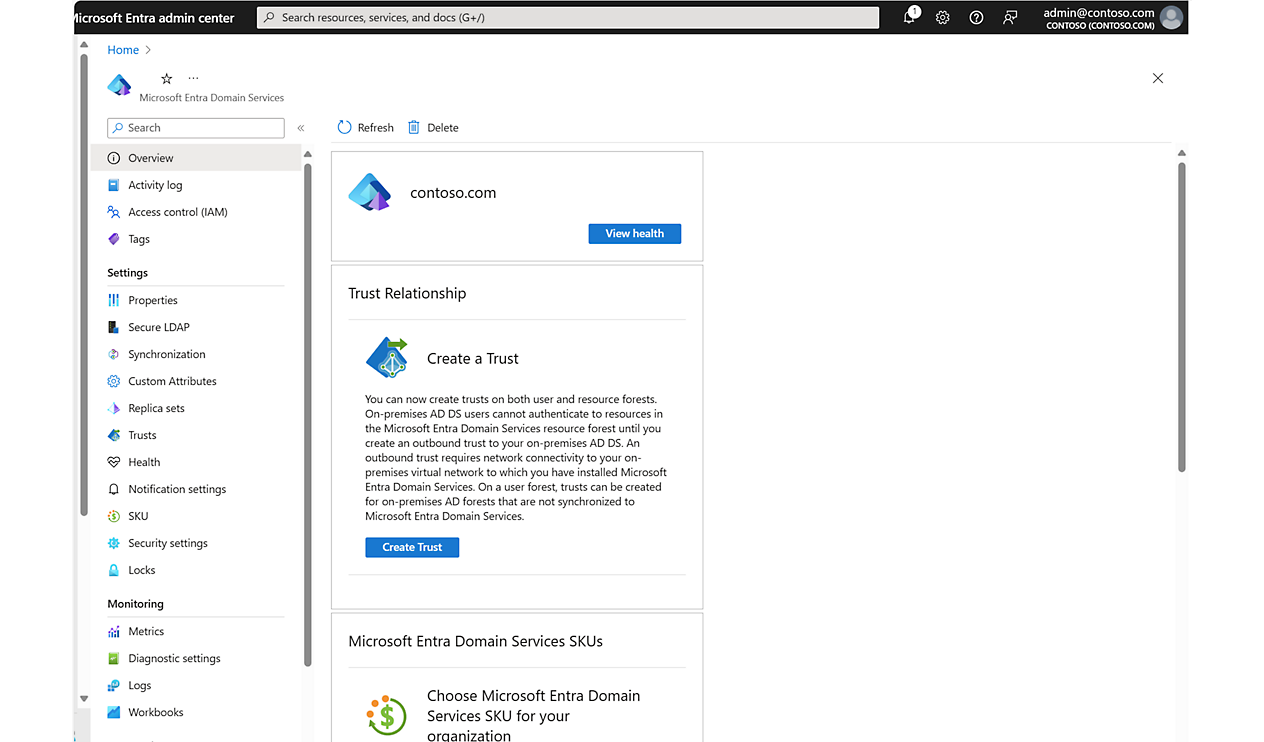
In organizations with on-premises infrastructure, it's common practice to leverage directory synchronization between on-premises Active Directory and Microsoft Entra ID . This way, accounts are managed in AD and replicated to Entra, where they are then used in Intune and other cloud services.
There are several ways to achieve this, but the method supported by Microsoft is to configure a hybrid identity , so that user identities exist in both Active Directory and Entra ID. This way, modifications are still made locally but are reflected in the cloud without duplicating processes.
The key component is the Microsoft Entra Connect wizard , which guides you step-by-step through the connection between the Active Directory forest and the Entra tenant. During setup, you choose the topology (single or multiple forests, one or multiple directories) and the authentication method: password hash synchronization, pass-through authentication (PTA), or federation with AD FS.
In the background, Entra Connect installs and configures the synchronization services, the necessary Active Directory Federation Services (AD FS) components when applicable, and the appropriate PowerShell /Graph module , leaving the infrastructure ready for AD users to appear as users in the cloud.
For this model to work well, it is important that Active Directory administrators have access to the Entra tenant and are trained in both classic AD tasks and the specifics of the cloud directory.
User deletion and bulk operations
When an employee leaves the company, simply collecting their laptop isn't enough: their user account must be disabled or deleted to cut off their access to corporate resources. From the Intune Admin Center, you can initiate account deletion in Entra ID, which also removes them from Intune.
To do this individually, log in to Intune, go to Users > All Users , select the relevant account, and click Delete. This action requires that the administrator account has at least the permissions equivalent to the User Administrator role in Microsoft Login.
If a bulk cleanup is needed (for example, a wave of account terminations or cleaning up old accounts), bulk operations using a CSV file are again used . In this case, the Bulk User Deletion option is used, where the template is downloaded, filled in with the accounts to be deleted, and uploaded for the system to process the request.
It's important to keep in mind the scope: accounts outside of Intune's current scope group cannot be modified from the console itself, because scope tags and RBAC limit which objects each administrator can touch.
Creating and managing local administrator accounts with Intune
In many environments , local administrator accounts on devices are still necessary , whether for field support, offline scenarios, or as a last resort in case of connectivity issues with Entra ID. Intune offers several ways to create and manage these accounts centrally.
In Windows, configuration policies or scripts can be used to create and control a local account with administrator privileges . To add an Entra ID user or group to the local administrators group, local account configuration options or OMA-URI/Account protection mechanisms are used, as described in various specialized guides.
This approach prevents each technician from creating different local accounts on each computer, which makes it difficult to control and audit who has real access with high privileges on the organization's devices.
macOS ADE and LAPS: Secure local accounts managed with Intune
In the Apple world, Intune integrates with Apple Business Manager/School Manager to automatically enroll macOS devices using ADE (Automated Device Enrollment). Microsoft has incorporated a similar functionality to LAPS, but designed for Mac, which allows for the secure deployment and management of local accounts.
The macOS Local Account Setup with LAPS feature is enabled within macOS ADE enrollment profiles and applies only to new enrollments. It allows you to provision a local administrator account on the device with a strong, randomly generated, encrypted password, securely stored in Intune.
Additionally, the profile can include a standard local user account that coexists with the administrator account. Once the device is enrolled, Intune automatically rotates the password for the local administrator account managed by LAPS approximately every six months, reducing the risk associated with static passwords.
When a Mac was already enrolled before LAPS was activated in the ADE profile, it is necessary to re-enroll it using an ADE profile with LAPS enabled so that the managed account is created correctly and becomes hooked into the password rotation cycle.
By default, the passwords generated for these administrator accounts are 15 characters long and combine uppercase letters, lowercase letters, numbers, and special characters , providing a reasonably high level of complexity without being impossible to manage when they need to be entered occasionally.
RBAC requirements and permissions for macOS LAPS
For macOS LAPS to function correctly, there are a number of minimum device and enrollment requirements that cannot be ignored. The system must be running macOS 12 or later, the computer must be synced to Intune from Apple Business Manager or School Manager, and enrollment must be done through a macOS ADE profile.
In addition to the technical requirements, password management requires specific RBAC permissions in Intune. Within the Enrollment Programs category of Intune's RBAC model, the "View macOS Admin Password" and "Rotate macOS Admin Password" permissions must be enabled for the administrative roles or groups that need to be able to view or rotate the password.
This granularity allows, for example, the second-level support team to view or regenerate the local administrator password of a Mac without needing to become Intune administrators globally, reducing the attack surface.
Account and password configuration options in macOS ADE profiles
When you edit or create a macOS ADE enrollment profile in Intune, an Account Settings tab appears where you enable local administrator and standard user accounts. By default, both are disabled, so you must explicitly select which ones you want to create.
If you select either creating a local administrator account or a standard user account, the macOS LAPS configuration set is activated, and unique 15-character passwords are generated following the previously discussed complexity rules. On the backend, the "await final" parameter is forced to Yes, so that account creation occurs during the device's initial setup wizard.
For the local administrator account, the username and full administrator name can be defined either with a fixed value or using dynamic variables such as {{serialNumber}}, {{partialupn}}, {{managedDeviceName}} or {{onPremisesSamAccountName}}, which are replaced with data from the device itself or the user.
There's also an option to hide the account on the login screen and in Users and Groups , preventing the end user from seeing it at a glance. And you can specify an additional rotation period, in days, so the password rotates at a specific interval between 1 and 180 days, in addition to LAPS's base automatic rotation cycle.
In the case of the standard local user account, elements such as the account type are defined (by default Standard, although if there is no local administrator account configured the system will elevate it to admin due to a platform limitation), whether to pre-fill the account information , the main account name and the full name, also supporting variables.
Additionally, you can decide whether or not the end user can edit the account name and full name during the setup wizard by configuring the edit restriction option accordingly.
Viewing and manually rotating LAPS passwords on macOS
To check the local administrator password of a Mac managed with LAPS, you need to have the RBAC permission to view macOS administrator passwords assigned within the Enrollment Programs category in Intune. Without this permission, the console will not display the sensitive information.
To view the password, go to the Intune Admin Center, navigate to Devices > Devices > macOS , select the computer in question, and then, from the Overview panel, open the Passwords & Keys section. There you will see the current password for the local administrator account and the date of the last password rotation.
If the password is retrieved successfully in that view, it indicates that the local administrator account is being managed by Intune . Otherwise, the device may not be configured with the correct ADE profile, or LAPS may not have been applied during enrollment.
In addition to automatic password rotation, there's a remote action called Rotate Local Administrator Password that allows you to force an immediate change. To use it, the administrator must have the macOS Password Rotation RBAC permission enabled in their role.
When you perform this action on a device, Intune generates a new password, sends it to the computer, waits for it to be applied, and updates the console with the new credential and the exact time the change occurred, information that is visible again in the Passwords and Keys section.
All these operations, both viewing and manual rotation, are reflected in Intune's audit logs . Entries such as "Get AdminAccountDto" (password query) and "rotateLocalAdminPassword ManagedDevice" (rotation performed) can be found in the Tenant Management Audit Logs section, facilitating traceability and regulatory compliance.
Local administrator management on Windows devices joined to Enter
In Windows, managing a computer requires membership in the device's local administrators group . When a device joins Microsoft Entra ID, this process automatically updates its membership in the local administrators group.
During the Entra ID joining process, certain default security principals are added to the Local Administrators group, including the Local Administrator of Microsoft Entra-joined devices role . This allows you to control who has elevated privileges on computers without having to configure each one individually.
The major advantage is that adding users or groups to that role in Entra updates the administrators of all devices joined to Entra without requiring modifications to the local configuration of each machine. This naturally supports the principle of least privilege, as it clearly separates the device administrator role from the global administrator role.
Role management is done from the device settings in the Entra portal: by logging in with at least an account with the Role Administrator role with privileges, navigating to Entra ID > Devices > All devices > Device settings and using the option to manage additional local administrators on all devices joined to Entra.
It's important to know that this role applies to all devices joined to Entra and cannot be limited to a subset. Furthermore, changes are not immediate: it can take up to four hours for a new Master Refresh Token (PRT) to be issued with the new or revoked privileges, and the user must log out and log back in for the changes to take effect.
Local privilege control using Entry groups and MDM policies
If a more granular approach than the global Local Administrator role for Entra-joined devices is needed, the Local Users and Groups MDM policy can be used . This policy allows Entra users and groups to be assigned to specific local groups (Administrators, Users, Guests, Power Users, Remote Desktop Users, etc.) on computers running Windows 10 or later.
With this configuration, organizations can use Intune to define custom OMA-URI policies or use Account Protection policies to give certain Entra groups local administrator privileges only on certain devices or collections of devices.
To add Entra groups, you need to know their SID (security identifier) , which is obtained through the Microsoft Graph API by analyzing the securityIdentifier property of the group object. This SID is then referenced in the policy configuration.
There are some limitations to keep in mind: this method of managing local administrators using Entra groups does not apply to hybrid domain-joined devices or devices registered only with Entra . Furthermore, groups added this way do not control Remote Desktop connections; in those cases, you must still add the user's SID directly to the appropriate group on the device.
Standard user management and manual elevation in Windows
By default, when a user joins a device to a Microsoft Entra ID, that user becomes a local administrator of the device . In many companies, this is undesirable because it increases the attack surface and complicates change control on devices.
To prevent the user performing the join from becoming an administrator, there are two very common strategies: using Windows Autopilot with a profile that prevents the main user from becoming an admin , or resorting to mass enrollment, where the join to Entra is done in the context of a self-created technical user and the end users who log in later remain as standard users.
When you need to manually elevate the permissions of a specific user on a particular device, you can do so from the Windows interface itself. Starting with Windows 10 version 1709, in Settings > Accounts > Other users, you can add a work or school user by entering their UPN and selecting "Administrator" as the account type.
There are also command -line options for adding users to the local administrators group: `net localgroup administrators /add "Contoso\username"` if the user is synchronized from Active Directory, or `net localgroup administrators /add "AzureAD\UPN"` if the identity was created directly in Entra ID. In both cases, you must already be a local administrator on the computer to run these commands.
As additional considerations, role-based groups can only be assigned to the Local Administrator of Entra-joined devices role ; B2B guests do not acquire local administrator rights through this role, and when removing users from the role, the loss of privileges occurs deferred, upon renewal of the PRT and re-logging in.
Using existing users and groups with Intune
Many deployments already have accounts and groups, both on-premises and in the cloud, so it makes sense to reuse that identity structure with Intune instead of creating everything from scratch. The Intune Admin Center provides a centralized view for working with these users and groups.
If your organization already uses Microsoft 365, the accounts and groups managed from the Microsoft 365 admin center will automatically appear in Intune as well , provided you're using the same tenant. Entra ID and Intune share the same tenant, so you simply need to sign in to Intune with the correct administrator account.
When starting from a 100% on-premises environment with Active Directory, the recommended strategy is to synchronize AD accounts with Entra ID using Entra Connect Sync . Once the identities are available in the cloud directory, they are visible in Intune and can receive device policies.
It's also possible to import users and groups directly into Intune from CSV files or create them manually from scratch, organizing them by department, location, device type, and so on. By default, Intune creates the All Users and All Devices groups, which serve as global targets for applying broad configurations.
Roles and permissions in Intune to control access
Authorization in Intune relies heavily on RBAC. Each administrator is assigned one or more roles that determine which resources they can view and what actions they can perform within the Intune Admin Center. There are built-in roles geared toward specific tasks, such as Application Manager or Policy and Profile Manager.
Because Intune is based on Entra ID, you can also use Entra's built-in roles , such as the Intune Service Manager, which grants a set of permissions aligned with service management. Additionally, you can define custom roles for more granular scenarios, adjusting read, create, update, or delete permissions.
In practice, role assignment is usually combined with the use of scope tags to delimit which objects (devices, profiles, applications) each role can see based on region, business unit, or any other segmentation that makes sense to the company.
User affinity in device registration
When a device is enrolled in Intune and a user logs in for the first time, the system creates what's known as a user affinity : that device is associated with that primary user. From then on, the policies and apps assigned to the user also apply to the affinity device.
This behavior is ideal for personal work teams, corporate laptops , or devices that are clearly and permanently assigned to a person. It allows the user to have their email accounts, files, applications, and settings linked to their identity across all devices with active affinity.
If you don't want to link the device to a user, you register it as a device without a user . This approach is typical for kiosks, meeting room displays, shared devices, or terminals dedicated to specific tasks, where the device's status is more important than the identity of the person connecting.
Intune offers specific policies for both scenarios on Android , iOS/iPadOS, macOS, and Windows, so planning carefully what type of device to enroll avoids later problems with app allocation or restrictions.
Policy assignment to users and groups versus the local LSDOU model
In a purely on-premises environment with Active Directory, group policies are applied following the LSDOU (Local, Site, Domain, Organizational Unit) hierarchy , where GPOs in the OU closest to the object typically take precedence. In Intune, the philosophy is different because this classic hierarchy does not exist.
Intune creates profiles and policies in the cloud and then assigns them directly to users or groups . There are no inherited levels by default, although a hierarchy can be approximated by experimenting with groups, filters, and combinations of inclusive and exclusive assignments.
Intune's configuration catalog brings together thousands of settings for Windows, iOS/iPadOS, and macOS devices, and is a very useful bridge for those coming from managing GPOs, because it allows you to move a large part of those settings to a cloud-based model without having to learn each parameter from scratch.
Identity protection: Windows Hello, certificates, MFA, and Zero Trust
Since user accounts are the gateway to company resources, simply creating them and assigning device policies isn't enough: authentication needs to be strengthened and password dependencies reduced . This is where several components that integrate with Intune come into play.
Windows Hello for business replaces the traditional username and password login with a PIN or biometric factor (face, fingerprint) linked to the device. Credentials are stored and validated locally, without traveling over the network or relying on a reusable secret, thus reducing the risk of password theft.
With Intune, you can create specific Windows Hello policies during the enrollment phase, use security baselines (such as those from Microsoft Defender for Endpoint or Windows 10 and later), or go to the configuration catalog to adjust parameters such as the minimum PIN length, the number of failed attempts, the requirement for biometrics, etc.
Certificate-based authentication is another important part of a passwordless strategy. Intune can distribute certificates to devices and users to authenticate them on corporate Wi-Fi networks, VPNs, or email systems without requiring them to enter credentials each time, making the experience more seamless and secure.
Multi-factor authentication (MFA), available through Microsoft Entra ID, adds a second layer of verification. MFA can be required for both signing in and enrolling devices in Intune , thus strengthening one of the most sensitive points in the identity lifecycle.
Finally, all of this falls under a Zero Trust approach , in which nothing and no one is considered trustworthy by default. Every request is evaluated considering the device's status, identity, location, risk, and other factors, with the goal of keeping the organization's data within a well-defended logical perimeter.
Combining account management in Entra ID, device management with Intune, fine-grained local privilege control (including LAPS for macOS and local administrator assignment in Windows), and identity security measures such as MFA, certificates, and Windows Hello allows you to build a scenario where daily IT operations are more agile and the risk of security incidents is significantly reduced , without sacrificing a reasonable user experience.


Passionate writer about the world of bytes and technology in general. I love sharing my knowledge through writing, and that's what I'll do on this blog, show you all the most interesting things about gadgets, software, hardware, tech trends, and more. My goal is to help you navigate the digital world in a simple and entertaining way.
Table of Contents
- 1 Relationship between Microsoft Entra ID, Intune, and user accounts
- 2 Minimum RBAC permissions required to manage accounts in Entra and Intune
- 3 Registering users in Intune through Microsoft Login ID
- 4 Bulk account creation using CSV files
- 5 Active Directory synchronization with Entra ID to use Intune
- 6 User deletion and bulk operations
- 7 Creating and managing local administrator accounts with Intune
- 8 macOS ADE and LAPS: Secure local accounts managed with Intune
- 9 RBAC requirements and permissions for macOS LAPS
- 10 Account and password configuration options in macOS ADE profiles
- 11 Viewing and manually rotating LAPS passwords on macOS
- 12 Local administrator management on Windows devices joined to Enter
- 13 Local privilege control using Entry groups and MDM policies
- 14 Standard user management and manual elevation in Windows
- 15 Using existing users and groups with Intune
- 16 Roles and permissions in Intune to control access
- 17 User affinity in device registration
- 18 Policy assignment to users and groups versus the local LSDOU model
- 19 Identity protection: Windows Hello, certificates, MFA, and Zero Trust