- Import distros from tar with wsl --import and standardize environments.
- Automate with wsl.conf and, where appropriate, with cloud-init.
- Export/Import for quick backups and restores.
- Integrates Docker and WSL 2 for reproducible and efficient workflows.
If you work in Windows but want Linux tools , WSL and the `wsl --import` command allow you to import any Linux distribution in tar format and get it ready to use without going through the Microsoft Store . This approach opens the door to truly rapid deployments, reproducible environments, and backups that can be restored in a flash.
Furthermore, with WSL 2 you can automate system settings using wsl.conf and, on certain distributions, with cloud-init ; you can also export and share images, integrate Docker, and even run native Linux GUI applications. In the following lines, you'll see how to build the tar archive, import it, fine-tune the distribution (default user, DNS, mounts), create and restore backups, resolve the common issue of the "import" option not appearing in the WSL help, and set up a production-ready hybrid WSL 2 + Docker workflow.
What does wsl –import solve and when to use it
The `wsl --import` command allows you to install any distribution from a tar archive , even if the package isn't listed in the Store. This is ideal for: teams seeking centralized control, enterprise deployments, custom images that already include packages and dotfiles, or rapid system recovery scenarios.
The basic syntax is straightforward and flexible, pointing to an installation directory and a tar file containing the distro's rootfs:
wsl.exe --import <NombreDistro> <RutaInstalacion> <ArchivoTar> If you organize yourself well, you can save your distros under E:\wslDistroStorage\ to keep things organized and separate data from the system disk, minimizing surprises during reinstalls or breakdowns.
How to obtain the tar file of a distribution
To import anything, you first need the tar file. You have two easy ways : download an official rootfs (for example, Alpine's Mini Root Filesystem) or generate the tar file by exporting a Docker container from the distro you're interested in.
The Docker approach is very practical because it guarantees a clean, reproducible, and easy-to-version system with minimal dependencies. Below is an example using CentOS running within a WSL distribution with Docker.
Example: Creating a CentOS tar archive with Docker
Boot a Linux distro installed from the Microsoft Store (for example, Ubuntu in WSL) and make sure you have Docker running (Docker Desktop or the Docker service within the distro itself).
# Inicia Docker si lo tienes en la distro WSL
sudo service docker start

# Lanza un contenedor CentOS con un nombre identificable
docker run -t --name wsl_export centos ls /

# Exporta el contenedor a un tar en C:\temp
docker export wsl_export > /mnt/c/temp/centos.tar

# Limpieza
docker rm wsl_export
Once finished, you'll have centos.tar ready to import into WSL . This method works for virtually any distro available as a container image.
Importing the tar file into WSL: step-by-step example with CentOS
With the tar file prepared, it's time to load it into WSL. From PowerShell , first create a folder where the rootfs will reside.
# En PowerShell
cd C:\temp
mkdir E:\wslDistroStorage\CentOS
Now, the tar file matters: the first argument is the logical name of the distro , the second is the path where the rootfs will be saved, and the third is the tar file you generated.
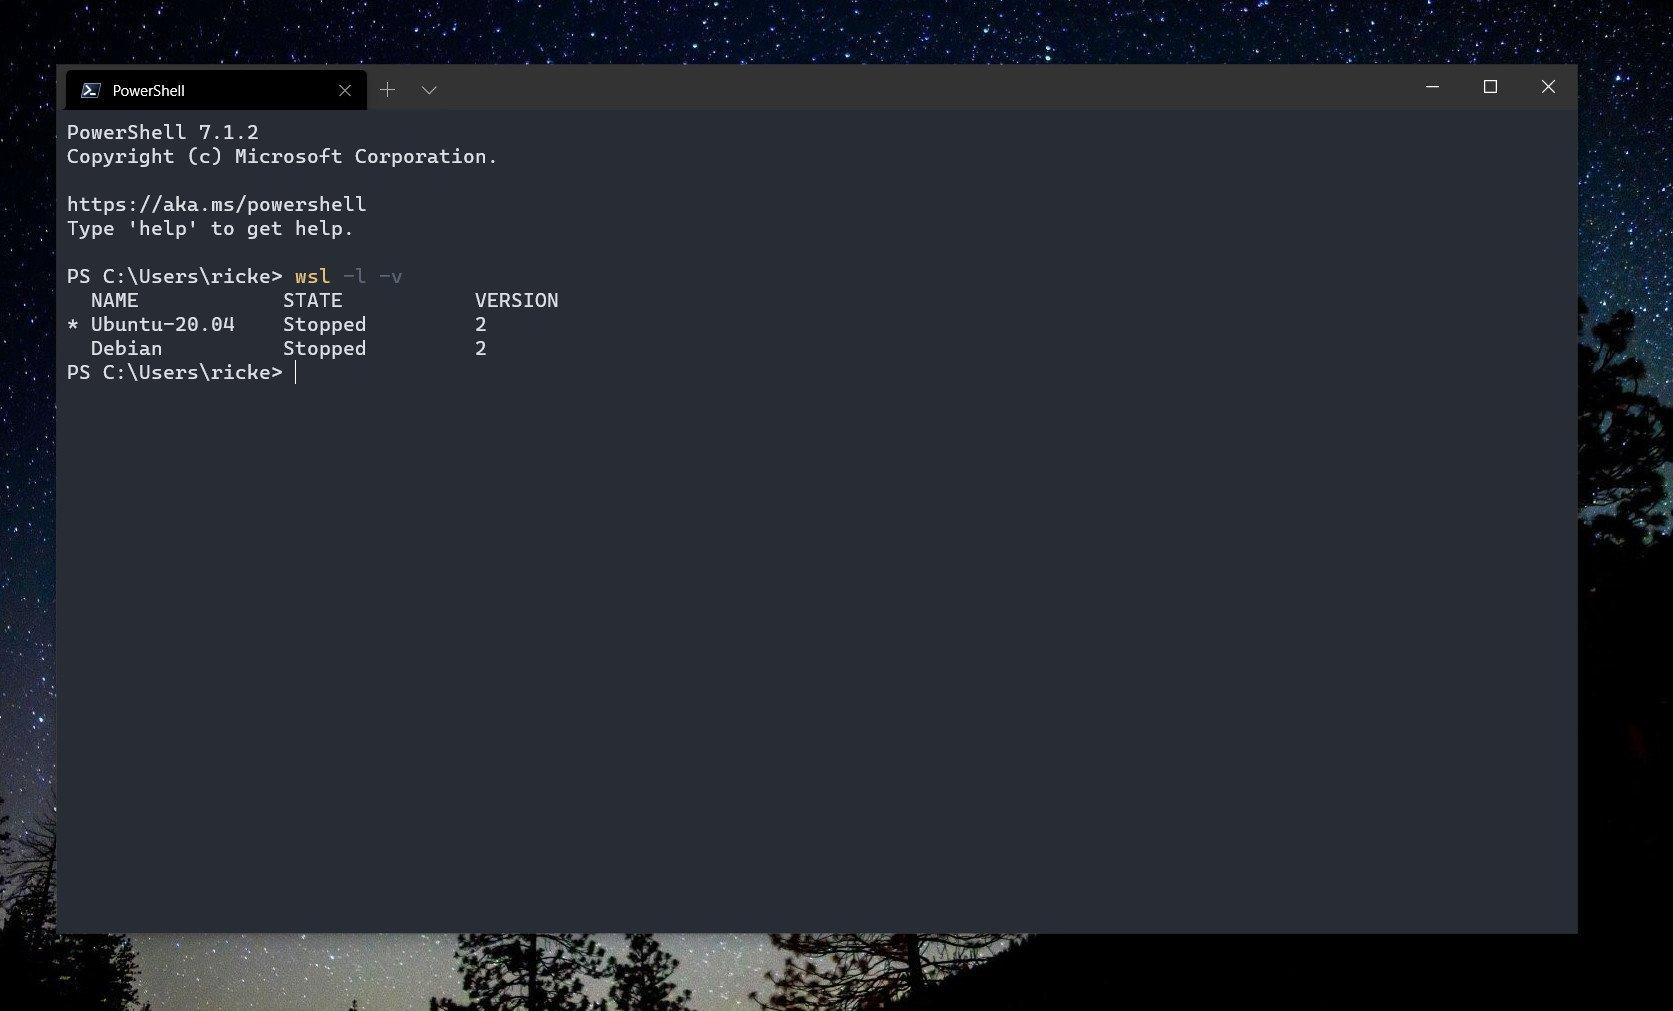
wsl --import CentOS E:\wslDistroStorage\CentOS .\centos.tarCheck that it appears as installed and, if you want, start it directly to verify that everything is OK.
wsl -l -v
wsl -d CentOS
After importing, WSL starts as root. If you prefer to log in with your normal user , the next section shows you how to set it as the default.
Configure the default user and adjust WSL with wsl.conf
After importing any distro, you log in as root by default . In CentOS, you can create a user, add it to the wheel, and configure it as the default user using wsl.conf.
# Dentro de la distro CentOS
yum update -y && yum install -y passwd sudo

myUsername=caloewen
adduser -G wheel $myUsername

echo -e "\ndefault=$myUsername" >> /etc/wsl.conf

passwd $myUsername
To apply the change, shut down the instance and restart it from PowerShell:
wsl --terminate CentOS
wsl -d CentOS
Beyond the user, /etc/wsl.conf allows the regulation of mounts , networks and other options , very useful when several people share the same distro or when you want to standardize behaviors.
Basic example of wsl.conf
This example mounts Windows drives with metadata, prevents WSL from regenerating resolv.conf (useful if you manage DNS manually), and sets the default user.
enabled = true
options = "metadata,umask=22,fmask=11"


generateResolvConf = false


default = tu_usuario
Apply changes with wsl –shutdown and restart the distro for the new settings to take effect.
Additional automation with cloud-init (when the distro supports it)
Some WSL 2 distributions, such as Ubuntu, can run cloud-init to provision packages, users, and files during the initial boot. It's a tool designed for cloud environments, but it's very convenient for standardizing installations on development machines.
A minimal example that installs packages and creates a user might look like this:
#cloud-config
packages:
  - git
  - curl
  - build-essential
users:
  - name: dev
    groups:
    sudo: ALL=(ALL) NOPASSWD:ALL
    shell: /bin/bash
runcmd:
  - echo "alias ll='ls -la'" >> /home/dev/.bashrc
Combined with wsl.conf and post-provisioning scripts, you'll get distros that boot up ready to work with your tools, dotfiles, and preferences.
Typical automated deployment flow
If you want everything measured, a reasonable flow would be: create the base distro with wsl –import , inject wsl.conf and (if the distro allows it) cloud-init, run the provisioning and, finally, export it for sharing.
- Create a base distro with
wsl --import. - Setup
/etc/wsl.confand, if the distro allows it, add files fromcloud-init. - Execute the provisioning and validate that everything matches.
- Export to tar and share the image with the team for express onboardings.
This approach drastically reduces setup time , avoids "works on my machine" differences , and facilitates compliance with IT policies in companies.
Backup and restore of WSL distros
Spending weeks fine-tuning an environment only to lose it due to a single error is incredibly frustrating. Using `wsl --export`, you can create a complete snapshot of the file system, packages, configurations, and users in a single TAR file.
Before exporting, make sure the distro is stopped so that the archive remains intact:
wsl --list --verbose
wsl --terminate Ubuntu   # si está Running
# Repite hasta verla como Stopped
Exporting is straightforward and supports versioned names. Save the tar files to another drive or the cloud for added security.
# Ejemplo simple
wsl --export Ubuntu E:\WSL_Backups\UbuntuBackup_2025-09-02.tar

# Con fecha automática en PowerShell
wsl --export Ubuntu E:\WSL_Backups\UbuntuBackup$(Get-Date -Format yyyy-MM-dd).tar
To restore, import the tar file with a new name and folder. You will obtain a distro identical to the original.
wsl --import Ubuntu_Backup C:\WSL\Ubuntu_Backup E:\WSL_Backups\UbuntuBackup_2025-09-02.tar
wsl -d Ubuntu_Backup
After importing, you will log in as root. Set your default user by editing /etc/wsl.conf within the distribution and restarting WSL:
# Dentro de la distro restaurada
sudo nano /etc/wsl.conf

# Añade:

default = tu_usuario

# Aplica cambios
wsl --terminate Ubuntu_Backup
wsl -d Ubuntu_Backup
Best practices: schedule regular backups with the Task Scheduler, clean up temporary files and containers to reduce size, and use short, clear names in your distributions to make management easier.
What to do if “wsl –import” does not appear in the help
It may happen that when executing wsl --help Don't see "import" listed among the options And that the import attempt returns the generic usage text. This usually indicates that your WSL binary is not updated to a version that includes the functionality.
On Windows 10 Pro 21H2 (build 19044.1706) and later, you should have modern capabilities if you update WSL . Try the following with privileged PowerShell:
# Actualiza WSL a la versión más reciente
wsl --update

# Reinicia WSL para aplicar
wsl --shutdown

# Si persiste, reinicia el servicio del subsistema
Restart-Service LxssManager
After this, run wsl --help again and check that "--import" appears . If you still have the same problem, make sure you are using a compatible build and that you are not using an outdated executable in the path.
GUI applications in WSL: requirements and quick examples
WSL now allows you to run Linux GUI (X11/Wayland) apps on Windows in an integrated way: pin them to the taskbar, Alt-Tab between apps, copy and paste between environments… To do this, you need Windows 10 build 19044+ or Windows 11 and a suitable vGPU driver.
If you're starting from scratch, a clean install with wsl –install gets everything up and running and will ask for your Ubuntu username and password after restarting:
# PowerShell (Administrador)
wsl --install
With WSL already installed, update to the latest version with GUI support and restart the subsystem:
wsl --update
wsl --shutdown
Examples in Ubuntu for installing common desktop apps and testing that they work :
# Refresca índices
sudo apt update

# Gnome Text Editor
sudo apt install -y gnome-text-editor
# Ejecuta: gnome-text-editor ~/.bashrc

# GIMP
sudo apt install -y gimp
# Ejecuta: gimp

# Nautilus (Archivos GNOME)
sudo apt install -y nautilus
# Ejecuta: nautilus

# Apps X11 básicas
sudo apt install -y x11-apps
# Ejecuta: xcalc, xclock, xeyes
Even browsers: Chrome is installed by downloading the .deb file and resolving dependencies , and Edge has command -line installation from its Insider site.
WSL 2 + Docker: Advantages and workflow for a real working environment (NILMTK)
Docker is a perfect fit for WSL 2: portability, consistency, and speed for hassle-free development and deployment. It lets you isolate projects, version images, and scale when needed.
Key advantages of Docker in this context: identical environments throughout the pipeline, efficient use of resources compared to VMs, automation with CI/CD , and seamless collaboration by sharing pre-configured images.
Summary of steps for a hybrid environment with NILMTK
In a real-world scenario, you can start with a physical Ubuntu machine, build a Docker image with NILMTK and dependencies , export it to tar, activate WSL 2 on Windows, and load the image there to work.
# En tu Ubuntu físico
sudo apt update && sudo apt upgrade -y
sudo apt install -y docker.io tar
sudo systemctl enable docker

# Dockerfile mínimo para NILMTK
cat <<EOF > Dockerfile
FROM ubuntu:22.04
RUN apt update && apt install -y python3.8 python3-pip \
    && pip install nilmtk==0.4.3 nilm_metadata==0.2.4
EOF

# Construye y exporta la imagen
sudo docker build -t nilmtk-env .
sudo docker save nilmtk-env > nilmtk-env.tar
On Windows 11, enable WSL 2, and on Ubuntu 22.04, enable it from PowerShell (Administrator):
dism.exe /online /enable-feature /featurename:Microsoft-Windows-Subsystem-Linux /all /norestart
dism.exe /online /enable-feature /featurename:VirtualMachinePlatform /all /norestart
wsl --set-default-version 2
wsl --install -d Ubuntu-22.04
Transfer the tar file and load it into Docker within WSL :
# Desde Ubuntu físico
scp nilmtk-env.tar usuario@windows:/mnt/c/Users/tu_usuario/

# Dentro de Ubuntu en WSL
docker load < /mnt/c/Users/tu_usuario/nilmtk-env.tar
Install Docker Desktop with WSL 2 backend, enable integration with your distro in Settings > Resources > WSL Integration, and launch the container:
docker run -it --rm \
  -v $(pwd):/nilmtk \
  --gpus all \
  nilmtk-env \
  bash

# Verifica NILMTK dentro del contenedor
python3 -c "import nilmtk; print(nilmtk.__version__)"  # 0.4.3
If something goes wrong, here are several quick fixes: “WSL integration not available” is solved with wsl –update and restarting LxssManagerIf the GPU doesn't appear, update. drivers NVIDIA and CUDA support for WSL; when space is limited, the VHDX is compacted after performing a wsl --shutdown.
Enterprise Ubuntu installation and distribution on WSL
Canonical promotes a tar-based format and, more recently, .wsl files for direct distribution and installation . This allows IT to self-host images, control which versions are available, and customize them before deployment, with native cloud-init support for advanced configuration.
To install Ubuntu using the latest approach, use the updated version of WSL (2.4.8 or higher) and run:
wsl --install ubuntu
# O bien, si tienes el archivo
wsl --install --from-file ubuntu.tar.wsl
# Incluso puedes hacer doble clic sobre el .wsl
This model greatly simplifies life in companies, by allowing installations without going through the Store , with centralized control and compliance with security policies.
Custom Linux distributions for WSL
If you need to go a step further, you can create your own distro as a UWP app so that it behaves like the official distributions in the Store. This is a powerful way for organizations that need to package internal tools, security policies, and specific onboarding workflows.
For everyday use, the `tar + wsl –import + wsl.conf` combo already covers the vast majority of scenarios . But if your organization requires distribution via corporate channels, the UWP option is available.
Operating tips and expert support
When planning WSL deployments and backups, organize the paths, label versions, and document the restore procedure . Avoid copying tar files to the same system disk, schedule regular exports, and clean up artifacts to save space.
If you're looking to fine-tune your pipelines, security, or public cloud solutions, specialized companies like Q2BSTUDIO can help you orchestrate backups, automate tasks, design reproducible pipelines, and protect your data against incidents and ransomware. They can also advise you on cloud services (AWS, Azure) for storing and versioning images with lifecycle policies and encryption.
With all of the above, the strategy is clear: `wsl –import` gives you the key to bringing any Linux system to Windows , `wsl.conf` and `cloud-init` round out the automation, the WSL 2 + Docker duo offers consistent and fast environments, and the export/import functions protect you against unforeseen problems; if you also update to the latest version of WSL, you can add integrated GUI applications and new distribution methods such as .wsl files, achieving an agile, replicable, and easy-to-maintain professional environment.

Passionate writer about the world of bytes and technology in general. I love sharing my knowledge through writing, and that's what I'll do on this blog, show you all the most interesting things about gadgets, software, hardware, tech trends, and more. My goal is to help you navigate the digital world in a simple and entertaining way.