- Kiosk mode of Windows 11 Allows you to restrict device use to one or more defined applications, ideal for businesses, public spaces, and educational environments.
- There are different modes: single-app (with Assigned Access or Shell Launcher) and multi-app, each with its own advantages and requirements, adapting to different security and customization needs.
- Kiosk mode configuration can be done with either native tools or Windows as well as through device management (MDM) solutions, allowing everything from basic lockdowns to deep customizations and remote maintenance.
- For an optimal experience, it's essential to cover advanced aspects such as power management, security settings, update control, and disabling unwanted features that may affect kiosk mode use.

Many users and IT professionals are looking for the best way to restrict the use of a Windows 11 device so that it can only be used with one or a few specific applications. This has become a common need in businesses, self-service kiosks, schools, public spaces, and any environment where control, security, and a simplified user experience are desired.
Setting up kiosk mode in Windows 11 is the ideal solution for achieving a secure system experience, offering a simple yet powerful way to limit access, prevent unauthorized manipulation, and ensure stability and consistency across devices. This guide will show you in detail how to do it, including the necessary steps, requirements, best practices, and helpful tips to get the most out of this feature.
What is Windows 11 kiosk mode and what is it used for?
Kiosk mode is a Windows feature that allows you to restrict PC use to a single application or a specific set of applications . When kiosk mode is enabled, the rest of the system becomes inaccessible to the user: you cannot exit the designated application, access the Start menu, settings, or any other function that could compromise security or the intended user experience.
This is especially useful in self-service environments (such as checkout terminals, information points or POS systems in restaurants), for publicly accessible devices, in schools, libraries, laboratories or even in companies that want to limit the use of their equipment to certain business applications.
Advantages of implementing kiosk mode in Windows 11
- Greater security: The user of the device may only use what has been previously defined, preventing accidental or malicious changes to the system.
- Facilitates IT management: Administrators can easily control and update allowed applications, maintaining consistency throughout the organization.
- Improve user experience: The possibility of distraction or error is eliminated, since the user has access only to what is necessary for the kiosk's function.
- Cost reduction: The need for technical support is minimized and system reinstallations or restores are avoided.
- Personalization and flexibility: Kiosk mode is adaptable to different types of businesses and scenarios, allowing you to configure everything from simple browsers to advanced multi-user applications.
Kiosk modes and types in Windows 11
Windows 11 offers several ways to configure kiosk mode , adapted to different uses and needs:
- Single application with assigned access: The device is locked to run only a Universal Windows Platform (UWP) app or Microsoft EdgeIdeal for digital signage, information points, or specific applications where a desktop is not required.
- Single App with Shell Launcher: Allows you to replace the Windows shell (
Explorer.exe) by any desktop application, which can be useful if you need to launch a classic Win32 program on a kiosk. - Multi-application kiosk: Allows you to define a set of UWP apps that are allowed for the user, blocking the rest. The Start menu is customized to display only these apps. apps authorized.
Prerequisites before setting up kiosk mode
Before you jump into setting up kiosk mode, it's key to know and meet certain requirements:
- Supported Windows Edition: Kiosk mode is supported on Windows 10/11 Pro (since version 1709), Enterprise, Education and IoT. Not available on Windows Home.
- Standard user account: The user using the kiosk cannot be an administrator; it must be an account standard local, domain or Azure/Entra ID.
- Compatible applications: Only UWP apps (those installed from the Microsoft Store) or Microsoft Edge can be used for assigned access. If you want to use a Win32 app, you'll need to use Shell Launcher.
- User Account Control (UAC) active: It is essential that you be enabled for the assigned access to work correctly.
- Remote desktop is not supported: In kiosk mode, only log in to the computer's physical console.
How to set up kiosk mode in Windows 11 step by step?
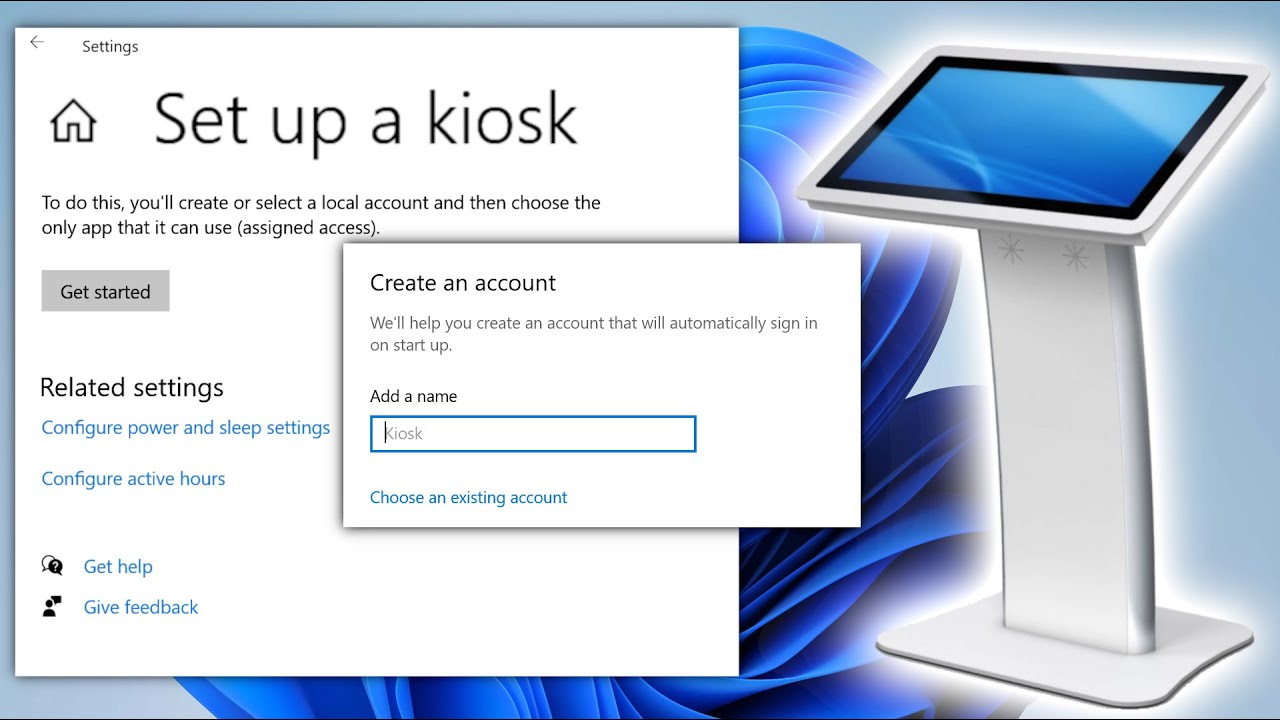
1. Prepare the user account for kiosk mode
The first step is to create a standard account (neither an administrator nor a limited account) that will be used for the kiosk. You can do this from Settings > Accounts > Family & other users . Add a new account and give it a recognizable name, such as "Kiosk," to easily identify it.
2. Access the kiosk setup wizard
Open the Start menu and search for "Kiosk" or "Set up a media kiosk (assigned access) ." Select the option that appears and click "Get started." The wizard will open and guide you through the process.
3. Select user and application
Next, the system will ask you to associate the created user with kiosk mode. Choose the standard account and press next.
Next, select the app you want to run in kiosk mode : Microsoft Edge (ideal for displaying websites, signage, or interactive catalogs) or any other UWP app installed from the Microsoft Store.
Setting up Microsoft Edge as a kiosk
- You can define if you want the browser in mode “digital signature” (no navigation bar, only shows a specific website) or as “interactive screen” (allows limited interaction with the configured website or app).
- Specifies the URL to load when starting kiosk mode (can be a web page, a local path like “C:/Kiosk/MyApp/index.html”, etc.).
- setup There of inactivity after which the browser, if not used, will reset to the kiosk home page (example: 24 hours).
Kiosk with other UWP apps
- Choose the installed app from the list that should run in kiosk mode. Remember: only UWP or Microsoft Edge apps can be used in standard assigned access.
4. Finish setup, test, and activate the kiosk
Once the wizard is complete, switch users in Windows and log in with the account configured for the kiosk. The system will lock, displaying only the selected application.
5. Exit kiosk mode
To exit kiosk mode, press "Ctrl + Alt + Delete" simultaneously on your keyboard. This will take you to the user selection screen, where you can log in with an administrator account if you need to make changes or switch back to the kiosk user.
Advanced settings and customization of kiosk mode
Block functions and prevent interference
To provide a professional experience free from distractions and the risk of manipulation, it is advisable to apply advanced security and personalization settings :
- Disable Quick Settings flyout: Access group policies (Edit Group Policy) and navigate to User Configuration > Administrative Templates > Start Menu and Taskbar. Find the “Remove Quick Settings” option, toggle it to “Enabled,” and save the changes.
- Remove widgets: From group policies, in Computer Configuration > Administrative Templates > Windows Components > Widgets, disable “Allow widgets” and enable “Disable Widgets On Lock Screen”.
- Configure the power plan: This will prevent the screen from turning off if the kiosk is always on. Find “Edit Power Plan” in the menu and set it to You are never enter sleep mode nor turn off.
- Avoiding mistakes when starting the kiosk: Update Windows, disable the Boot automatic removal of unwanted apps and limits the apps allowed for the kiosk user.
Managing updates and autoplay in Edge
To prevent an Edge update from breaking the kiosk experience, you can disable its update services :
- Search for “Services” in the menu, locate “Microsoft Edge Elevation Service”, “Microsoft Edge Update Service (edgeupdate)” and “Microsoft Edge Update Service (edgeupdatem)”, disable them and stop its execution.
- In the task scheduler, disables “MicrosoftEdgeUpdateTaskMachineCore” and “MicrosoftEdgeUpdateTaskMachineUA”.
- Rename “MicrosoftEdgeUpdate.exe” to “MicrosoftEdgeUpdate-Disabled.exe” in all folders where it is present.
To enable autoplay of videos and audio in Edge:
- Press Windows + R, type “regedit” and accept.
- Go to
Computer\HKEY_LOCAL_MACHINE\SOFTWARE\Policies\Microsoft\EdgeIf the “Edge” key does not exist, create it. - Create a new DWORD value “AutoplayAllowed” and assign it the value “1” (hexadecimal).
- To disable automatic translation, create the DWORD “TranslateEnabled” and assign it the value “0”.
- Restart the computer to apply the changes.
Additional recommended customizations
- If it is a touch screen, disable pinch zoom in Edge (this can be done by modifying the settings of the web application itself or from the Windows registry if necessary).
- Make sure that only essential apps remain active in kiosk mode (usually only Edge, drivers necessary and, if you use it, Windows Defender or some remote access tool).
- Always keep Windows and production UWP apps up to date, but Test the changes on a test device first to avoid surprises in the real environment.
Configuring Kiosk Mode Using MDM Tools and Other Alternatives
If you manage a large fleet of devices or need advanced functionality, it is recommended to use MDM software such as Mobile Device Manager Plus (from ManageEngine) or similar solutions (such as Windows 11 LTSC ), which allow you to manage kiosk mode configuration centrally.
Advantages of using an MDM
- Remote mass provisioning: You can enable kiosk mode on many devices without manual intervention.
- Multi-application support: Allows you to configure multiple applications in kiosk mode, not just one.
- Silent installation of apps: Applications can be installed and updated remotely.
- Centralized management: All devices are managed from a unified web console, saving time and reducing errors.
- Extended Compatibility: It is possible to manage Windows devices, Android, Apple and Chrome OS from the same tool.
Steps to configure with MDM
- From the MDM dashboard, create a new Windows kiosk profile.
- Enter the profile name and description, selecting whether it will be single-application or multi-application.
- Specifies the names of the applications or their package IDs (AUMID) that will be allowed.
- Associate the profile with the target teams and publish it.
- It is recommended to first test the profile on a test computer before deploying it to production.
Once the profile is applied, kiosk mode is automatically activated upon restarting the device and remains tamper-proof until you choose to disassociate the profile or delete it from the MDM console.
How to disable kiosk mode in Windows 11
To remove kiosk mode at any time, go to Settings > Accounts > Family & other users , find the kiosk settings section, and select the delete option. If you're using MDM, simply unlink the profile from the console.
If the kiosk mode persists after restarting the device, check in Sign-in Options that the option "Use my sign-in information to automatically complete my device setup after an update or restart" is not selected.


Passionate writer about the world of bytes and technology in general. I love sharing my knowledge through writing, and that's what I'll do on this blog, show you all the most interesting things about gadgets, software, hardware, tech trends, and more. My goal is to help you navigate the digital world in a simple and entertaining way.
Table of Contents
- 1 What is Windows 11 kiosk mode and what is it used for?
- 2 Advantages of implementing kiosk mode in Windows 11
- 3 Kiosk modes and types in Windows 11
- 4 Prerequisites before setting up kiosk mode
- 5 How to set up kiosk mode in Windows 11 step by step?
- 6 Advanced settings and customization of kiosk mode
- 7 Configuring Kiosk Mode Using MDM Tools and Other Alternatives
- 8 How to disable kiosk mode in Windows 11