
In this article we will tell you how export from Microsoft Project to ExcelIf you have ever used P6, you might be surprised that exporting from Microsoft Project to Microsoft Excel does not give you ready-to-use data, considering that both products are from the Royal House of Microsoft.
In P6, the Exports to Excel They come formatted as an Excel table for any data analysis you want to do, but with Microsoft Project, you still need forma tear Excel properly before any Excel table data analysis. Read on to learn more.
Maybe you may be interested: Microsoft Project: What It Is, Features, Advantages And More
How to export from Microsoft Project to Excel
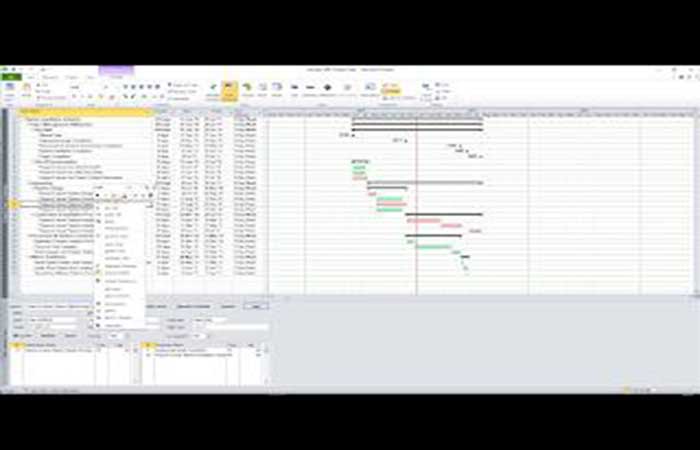
For export in Primavera P6 Right click anywhere on the Table of activities, press Export to Excel and save the Excel file.

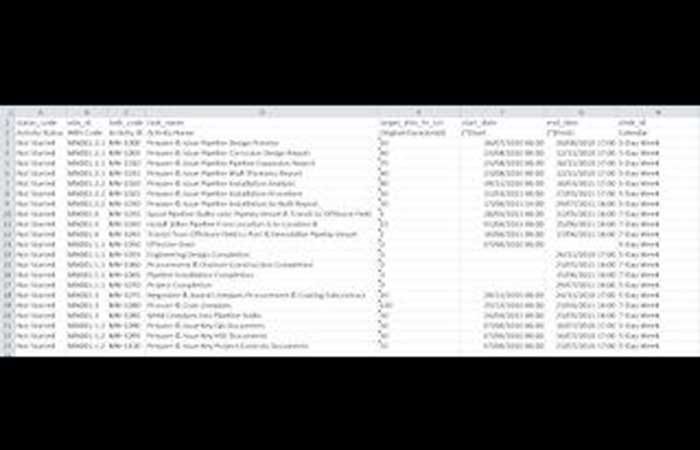
The newly created Excel file looks like a proper Excel table, as shown below.
Unfortunately, Microsoft Project does not have the option to right-click and export to Excel.
To export from Microsoft Project to Excel Do the following:
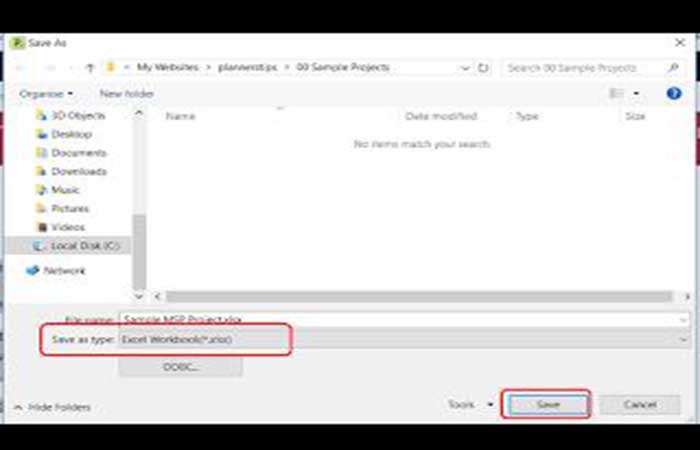
Step 1: go to Archive >> Save as.
Step 2: from the drop-down box Save as type, Select excel workbook (*. Xlsx) and then click the button Save.
Step 3: in the dialog Export Wizard, Click on Next.

Step 4: at the Export Assistant - Data dialog box, check the option Selected data and then click Next.

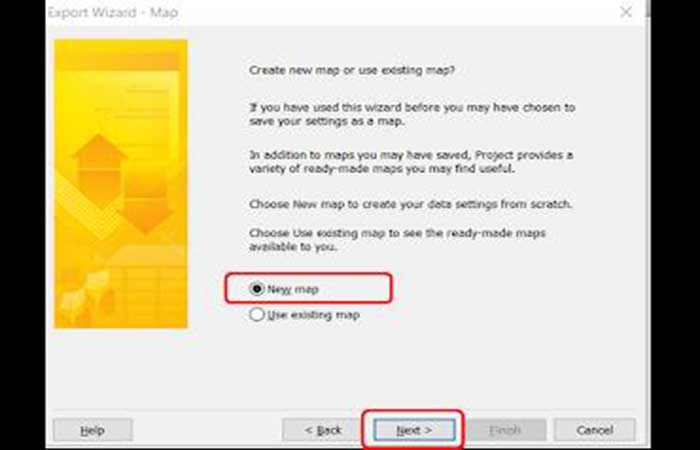
Step 5: in the dialog Export Assistant - Map, Select New Map and then click Next.
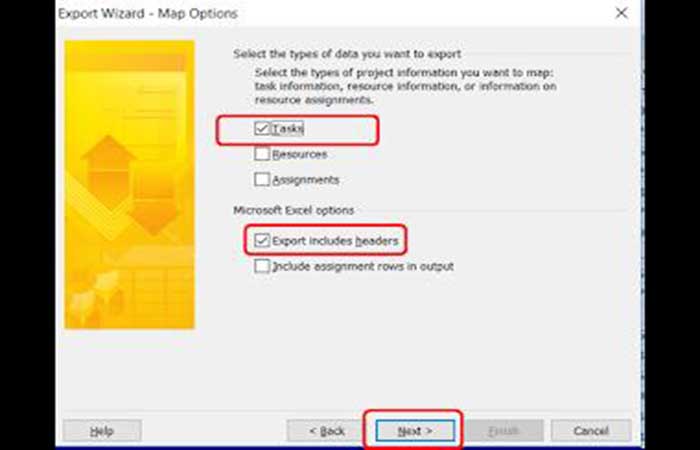
Step 6: like Spring P6, Microsoft Project also allows you to export Tasks, Resources, and Resource Assignments, but in this tutorial we are only going to export Tasks. In the dialog box Export Assistant - Map options, Mark Tasks y Export. Include headers and then click Next.
Step 7: in the dialog Export Assistant: task assignment, you will see a message (Click here to assign a field).
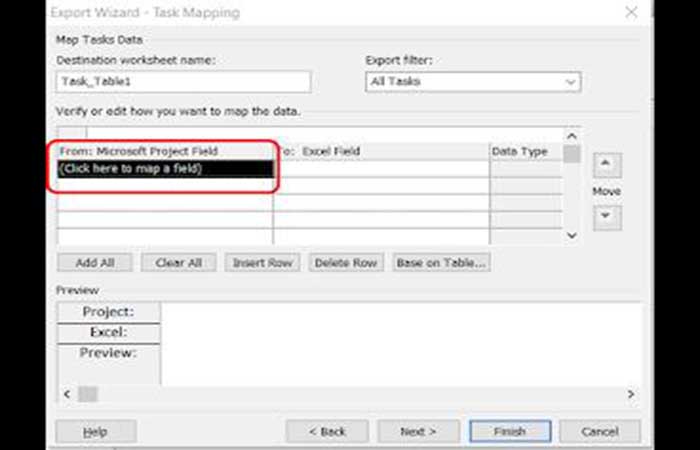
Step 8: Now, click and add the fields you would like to export to Excel. You will notice that as you add fields to the left column (From: Microsoft Project Field), the same fields are automatically added to the right column (A: Excel Field).
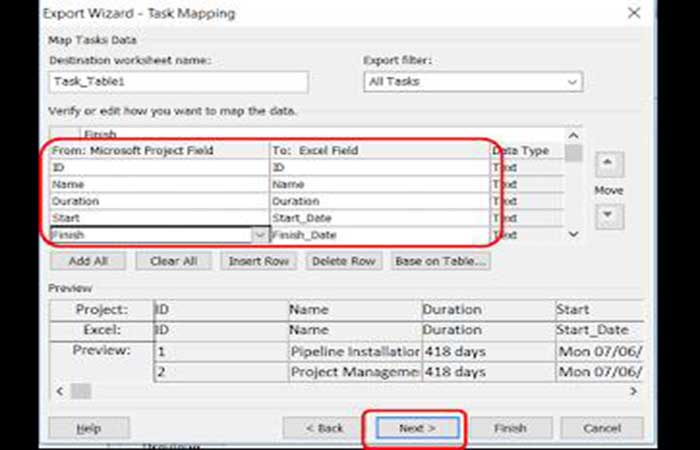
In this example, we added the fields ID, Name, Duration, Start, End, Task Calendar, and Summary (the reason for adding the Summary field will become clear later). When you are done adding fields, click Next.
You may want to know: How to Open Mpp Files Online. Tutorial
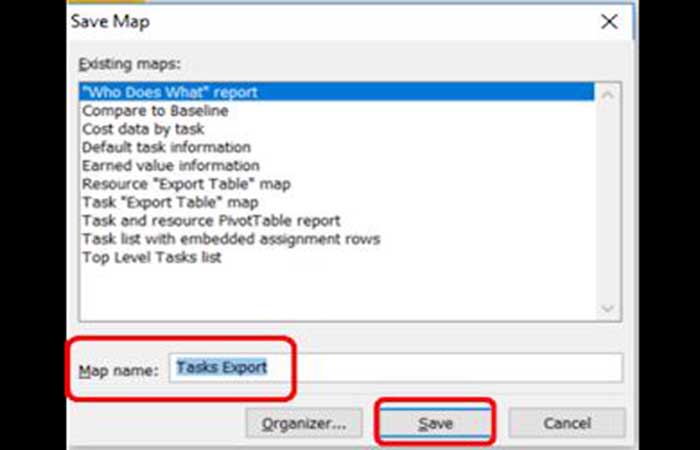
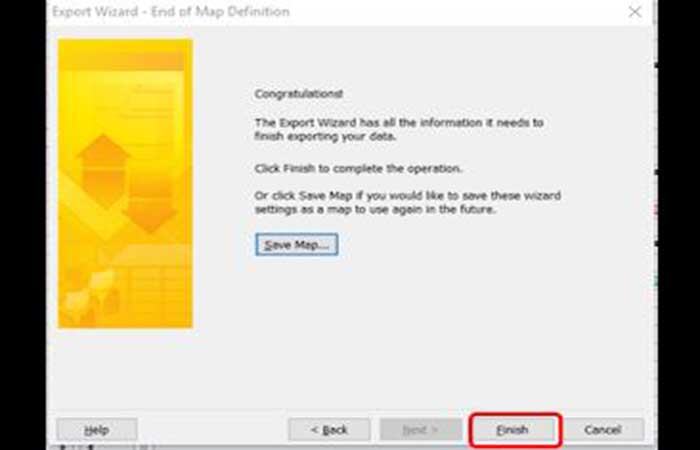
Step 9: at the export assistant – dialog box End of map definition, Click on Save map so that we can reuse the map for future task exports.

Step 10: in the dialog Save map, enter a map name and click Save.
Step 11: dand back in the dialog box Export Assistant: end of map definition, Click on Finalize.
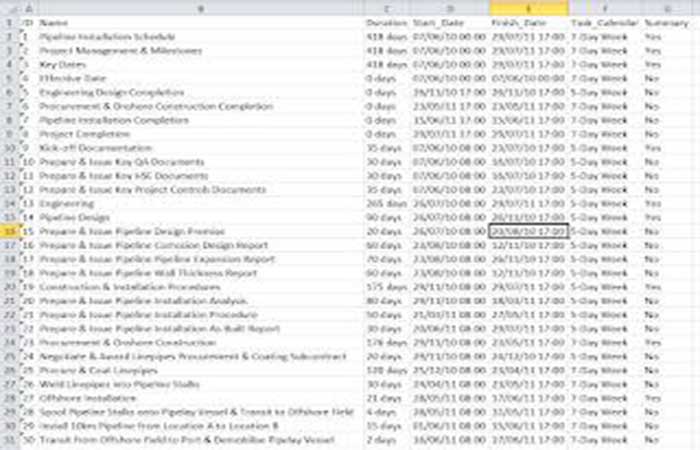
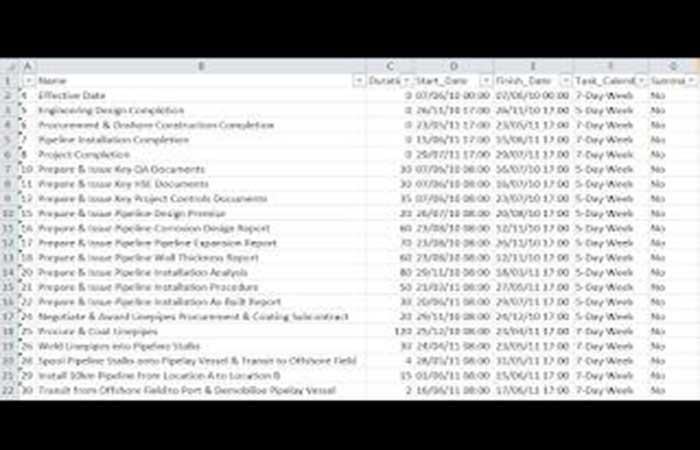
Step 12: Now open the newly created Excel file and you will immediately notice that the Activity Headers (called Summary Activities in Microsoft Project), which are used to group activities, are also aggregated as activities (see rows with Yes in the column Summary) on export, unlike Primavera P6 where these activity headers (WBS codes) are added as activity attributes when exported to Excel.
Step 13: enable filter on Excel and filter the Summary column for Yes.
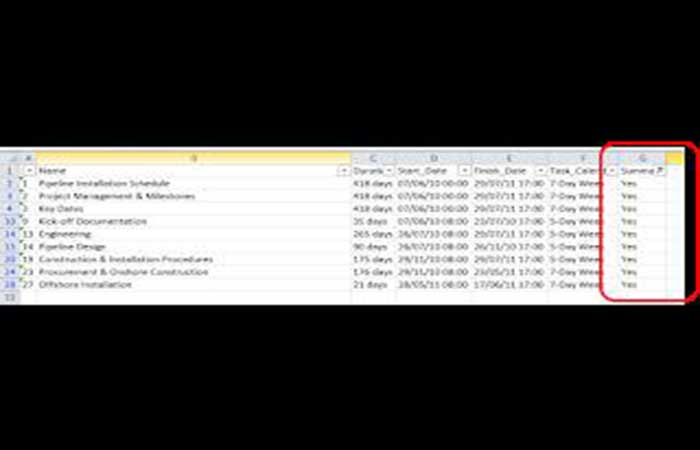
Step 14: now delete all visible rows (where Summary is Yes) so that when you remove the filter, you are left with only activities and no activity headers.
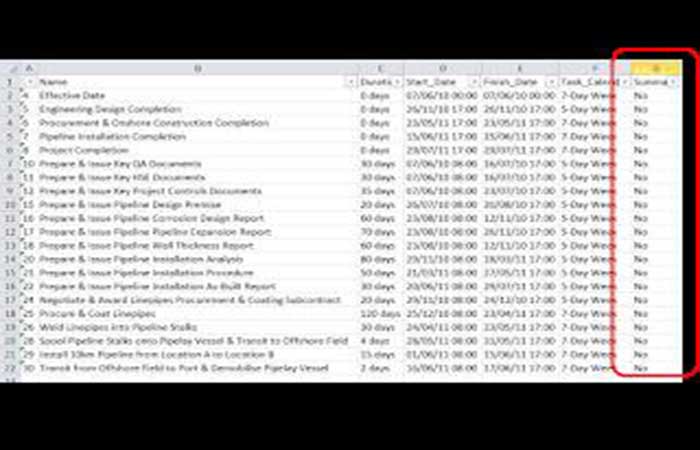
Step 15: You will notice that the data in the column Duration They also include the duration unit, days, which still prevents us from using this export for analysis, so we need to remove days from Duration column. Select the column Duration and use the function Search and Replace Excel table to remove days from this column. By doing this, you are left with an Excel table ready to use for data analysis.
Take a look at: 7 Best Project Management Software for Mac
Final thoughts
Done, now you know how to export from Microsoft Project to Excel and also from Primavera P6 which is much simpler. Microsoft Project allows the user to export project data to formats compatible with Microsoft Excel, such as (Spreadsheet XML or XLSX format). We hope that the tutorial has been useful to you and we will see your name in the comments section. We will always be here with many more related tutorials.
My name is Javier Chirinos and I am passionate about technology. Ever since I can remember, I have been interested in computers and video games, and that passion has turned into a job.
I have been publishing about technology and gadgets on the Internet for over 15 years, especially in mundobytes.com
I am also an expert in online marketing and communication and have knowledge in WordPress development.
Comments are closed.