- ASUS GPU Tweak III allows overclocking, power control, and fan control on graphics cards NVIDIA and desktop AMD.
- It offers automatic modes, custom profiles, OC Scanner and VF Tuner to adjust performance and stability.
- The OSD function, advanced monitoring, and utilities like ROG FurMark and GPU-Z help measure and ensure changes.
- Combined with Armoury Crate, adjustments of BIOS, Windows and the game allows for a significant improvement in FPS.
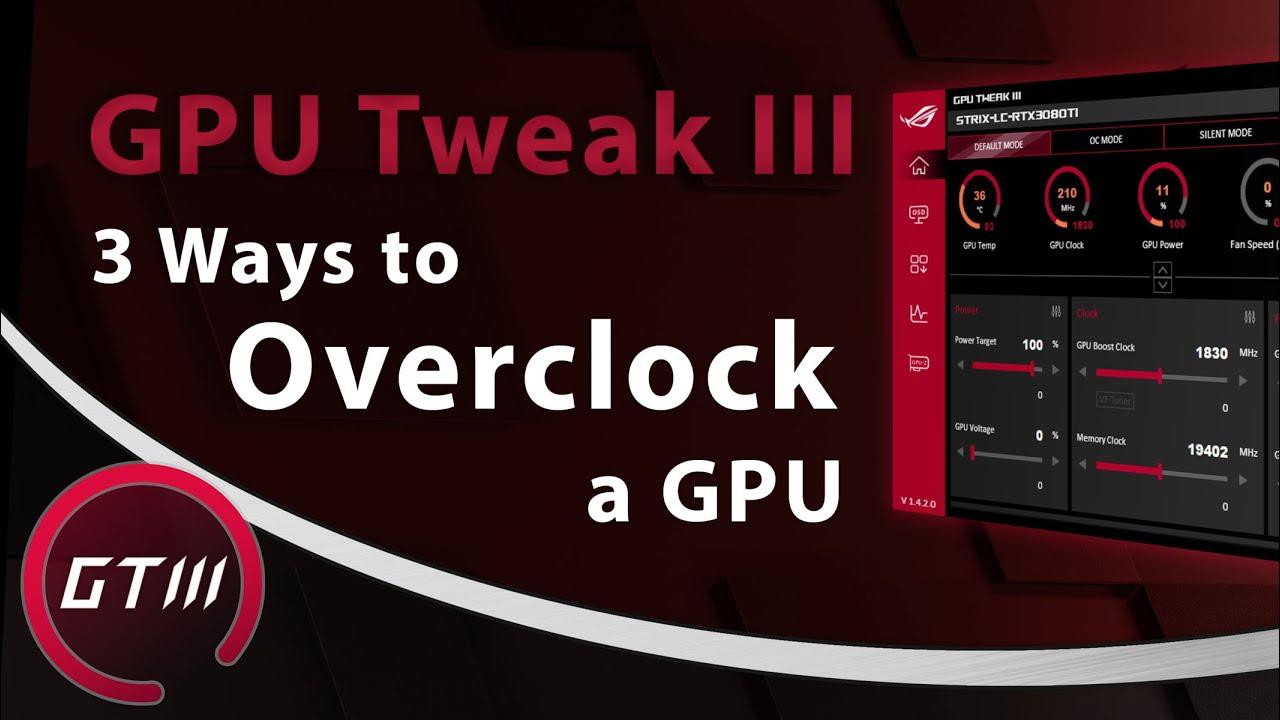
If you want to get the most out of your graphics card without changing your hardware , overclocking with ASUS GPU Tweak III is one of the most effective and controlled ways to do it. This ASUS tool is designed for desktop PC users with NVIDIA or AMD graphics cards and combines very simple automatic modes with advanced options for those who want to fine-tune down to the last MHz.
Throughout this guide, you'll see how ASUS GPU Tweak III works, what modes it includes, how it integrates with Armoury Crate , and what additional adjustments you can make in Windows, BIOS, and your games to gain FPS. Everything is explained in Spanish (Spain), with a practical approach and without omitting any of the important features offered by the official ASUS software.
What is ASUS GPU Tweak III and what is it used for?
ASUS GPU Tweak III is a program for Windows 10 and 11 designed to control and adjust the behavior of NVIDIA and AMD desktop graphics cards . From a single interface, you can adjust frequency, voltage, power limits, fan speeds, and enable features such as automatic overclocking scans and OSD overlays with real-time data within games.
The idea is that, without leaving Windows, you have a kind of "central panel" where you can monitor GPU temperature, power consumption and clock speed , apply pre-configured profiles (silent, overclock, custom), create your own fan curves and, if you like, delve into more advanced tools like VF Tuner to tailor voltage and frequency settings to your needs.
It's important to note that GPU Tweak III is designed for desktop graphics cards . ASUS and ROG gaming laptops have their own tuning environment called Armoury Crate, which is recommended for tweaking performance on these types of machines due to their thermal and power limitations.
ASUS GPU Tweak III Download and Requirements
To get the latest version of the program, ASUS offers two main options: the official ASUS Download Center and the dedicated GPU Tweak III campaign page. From either of these, you'll have access to the updated installer, manuals, drivers , and firmware related to your products.
The most direct way to access this software is to visit the official ASUS GPU Tweak III website using the URL provided in their documentation. Once you're on that page, scroll down to the downloads section , locate the "Stable Versions" section, and click the "Download" button to begin downloading the executable file.
Please note that GPU Tweak III is only compatible with Windows 10 and Windows 11. If you are using an earlier version of the operating system, the program is not officially supported, so you may encounter errors or it may not install at all.
GPU Tweak III step-by-step installation
Once you've downloaded the installation file, it will usually arrive compressed in a package. First, extract the ZIP file to a folder of your choice, and then double-click the executable file with a name similar to GPU-Tweak-III.exe to launch the wizard.
The installer will guide you through several simple steps where you'll need to accept the terms, choose an installation path, and confirm with the Install button . There are usually no complicated options, so just follow the "Next" prompts until the progress bar finishes.
When finished, the program will ask you to restart your computer to complete the installation . It is recommended to do so, as this ensures that all GPU Tweak III services and components load correctly when Windows restarts.
Main interface and sections of GPU Tweak III
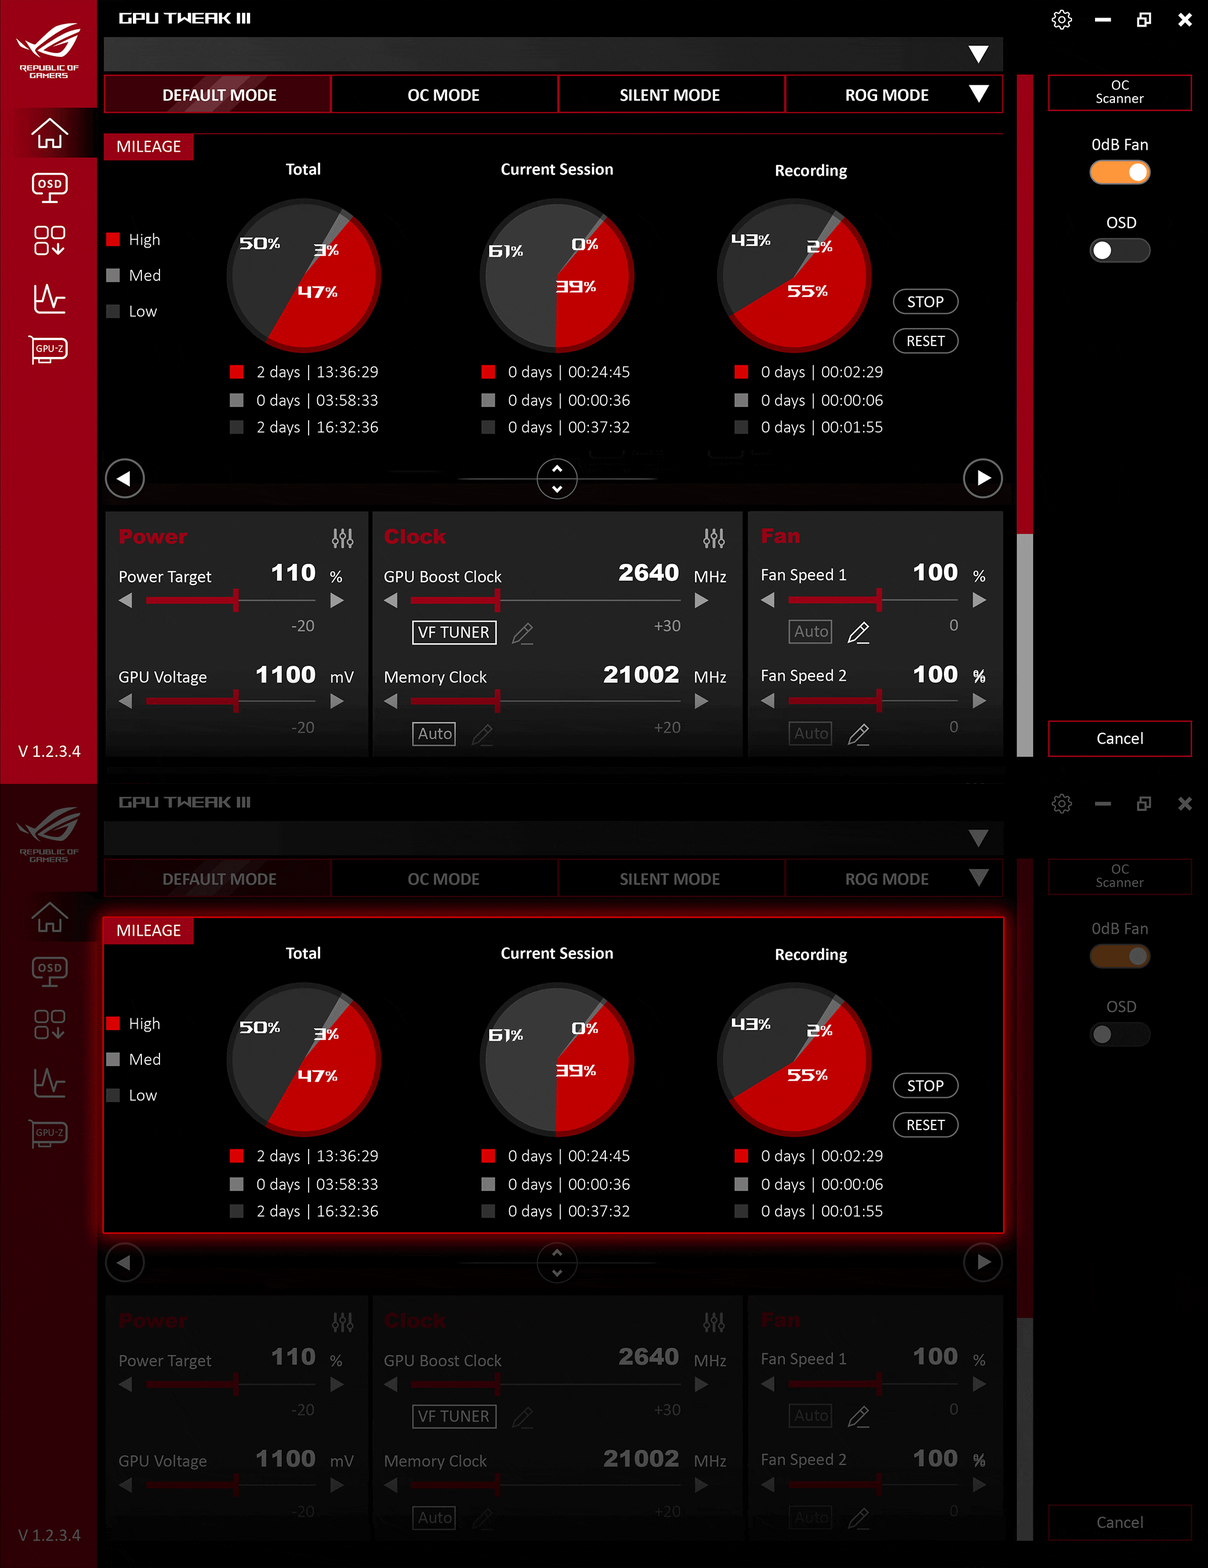
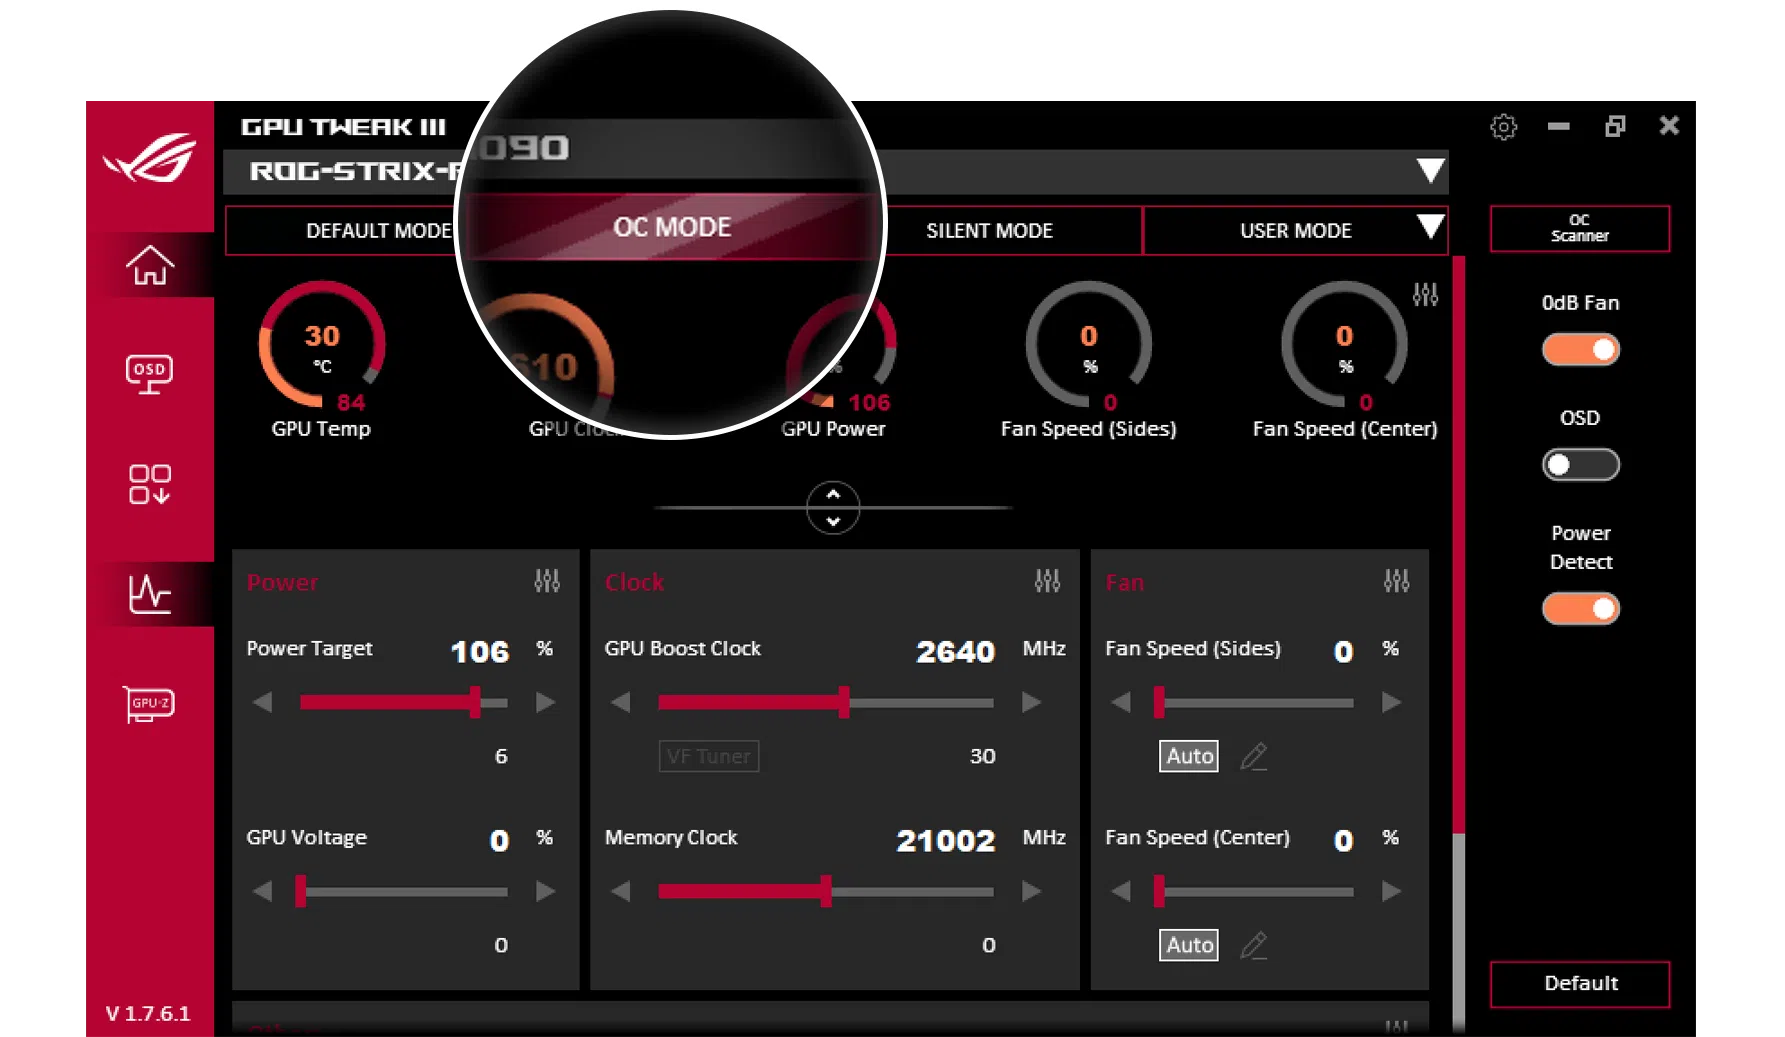
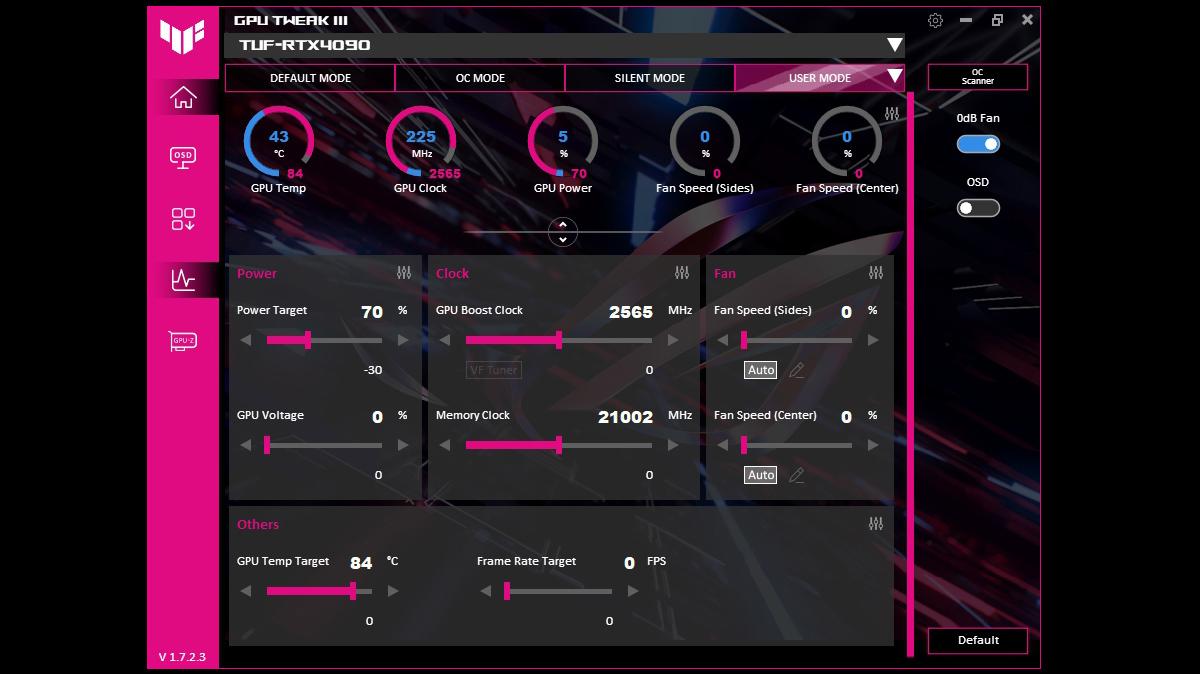
When you open GPU Tweak III from the desktop icon, you'll see a main window divided into two areas : on the left, the monitoring area with real-time graphs and readings, and on the right, the settings panel where you adjust the GPU parameters. Between the two, there's usually an icon that lets you link or detach these windows to organize them as you prefer.
On the left side of the settings window is a menu with several basic sections: main settings page, OSD settings, utility downloads, monitoring window, and access to GPU-Z . These shortcuts allow you to quickly navigate between the most frequently used tools without wasting time.
The main view on the right groups the essential overclocking and fan controls, along with preset modes and the OC Scanner. From here, you can switch modes with a click, modify frequency or power consumption , and activate the OSD to monitor your graphics card's performance while gaming.
Operating modes: standard, OC, silent, and custom
The most prominent part of the interface features quick mode buttons, which allow you to choose between various configurations without having to adjust sliders individually. These profiles globally change how the graphics card behaves and are ideal for fine-tuning the balance between performance, temperature, and noise.
The default mode uses the GPU's factory settings, exactly as they come from the factory. It's a safe starting point, without any additional overclocking, and with the behavior that the manufacturer has validated for all typical usage scenarios.
Overclocking mode applies more aggressive parameters designed to improve FPS. It typically involves higher frequencies and a higher power target, resulting in increased performance at the cost of higher temperatures and fan noise compared to standard mode.
Silent mode prioritizes noise reduction above all else. When activated, the graphics card operates with slightly lower power consumption and performance, allowing the fans to spin more slowly. This results in higher temperatures than in normal mode, but also less noise.
Finally, the custom mode is designed for users who want to define their own blend of power, temperature, and noise. In this mode, you can save your own parameters from the advanced settings, and then simply click on the profile to apply them instantly when needed.
Custom profile management: create, import, export, and link
Within the custom profiles section, GPU Tweak III allows for fairly comprehensive configuration management. With the option to add a new profile, you can give it a descriptive name (for example, "Competitive Shooter" or "Summer Mode") and save it with your current settings.
The import profiles function allows you to load previously saved or shared configurations from another computer. In this case, you choose the profile type, the file path, the associated graphics card, and the profile name. Before applying, you can review the parameters to ensure they meet your needs.
The export profiles option does the opposite: it allows you to generate a file with your settings to save to a folder or external drive, or to share with other users. You select the profile type, choose the one you want to export, specify the destination path, and the configuration file is generated.
A very practical feature is the ability to link profiles to specific games or applications . This allows you to specify that a particular executable should use a high-performance profile, a quiet profile, or a balanced profile. The process involves selecting the game with the browse button, choosing the mode or profile you want to associate, and, if applicable, also selecting the OSD profile that will be activated with that title.
In addition, profiles can be edited to rename or delete them if you no longer need them, keeping your settings library clean and organized so you don't get lost among dozens of options.
Graphics card parameters panel
The heart of overclocking in GPU Tweak III is the GPU control panel. This is where the sliders and options that determine how much power the card consumes, what frequency it operates at, and how its components are cooled are located . Although they vary slightly depending on the model, the general structure remains the same.
The power consumption block lets you adjust the power limit and, in some cases, the maximum voltage the GPU can reach. Increasing this limit allows the card to maintain higher frequencies under load, but it also increases power consumption and heat, so use caution.
The frequencies section contains the GPU and video memory clock settings. From here, you can apply positive or negative offsets to increase or decrease the MHz, as well as open the "VF Tuner" tool, which offers very fine control over the voltage-frequency relationship at different points on the curve.
The fan block controls the speed of both the integrated fans on the card and, in some models, auxiliary system fans. You can let them regulate automatically or activate "Edit Mode" to create your own fan curve based on temperature.
The OC Scanner module automates the process of finding a stable overclock by internally measuring your GPU's headroom. Finally, the OSD (On-Screen Display) switch enables the data overlay feature within games, perfect for seeing at a glance if your changes are producing the expected results.
VF Tuner: voltage/frequency curve to your liking
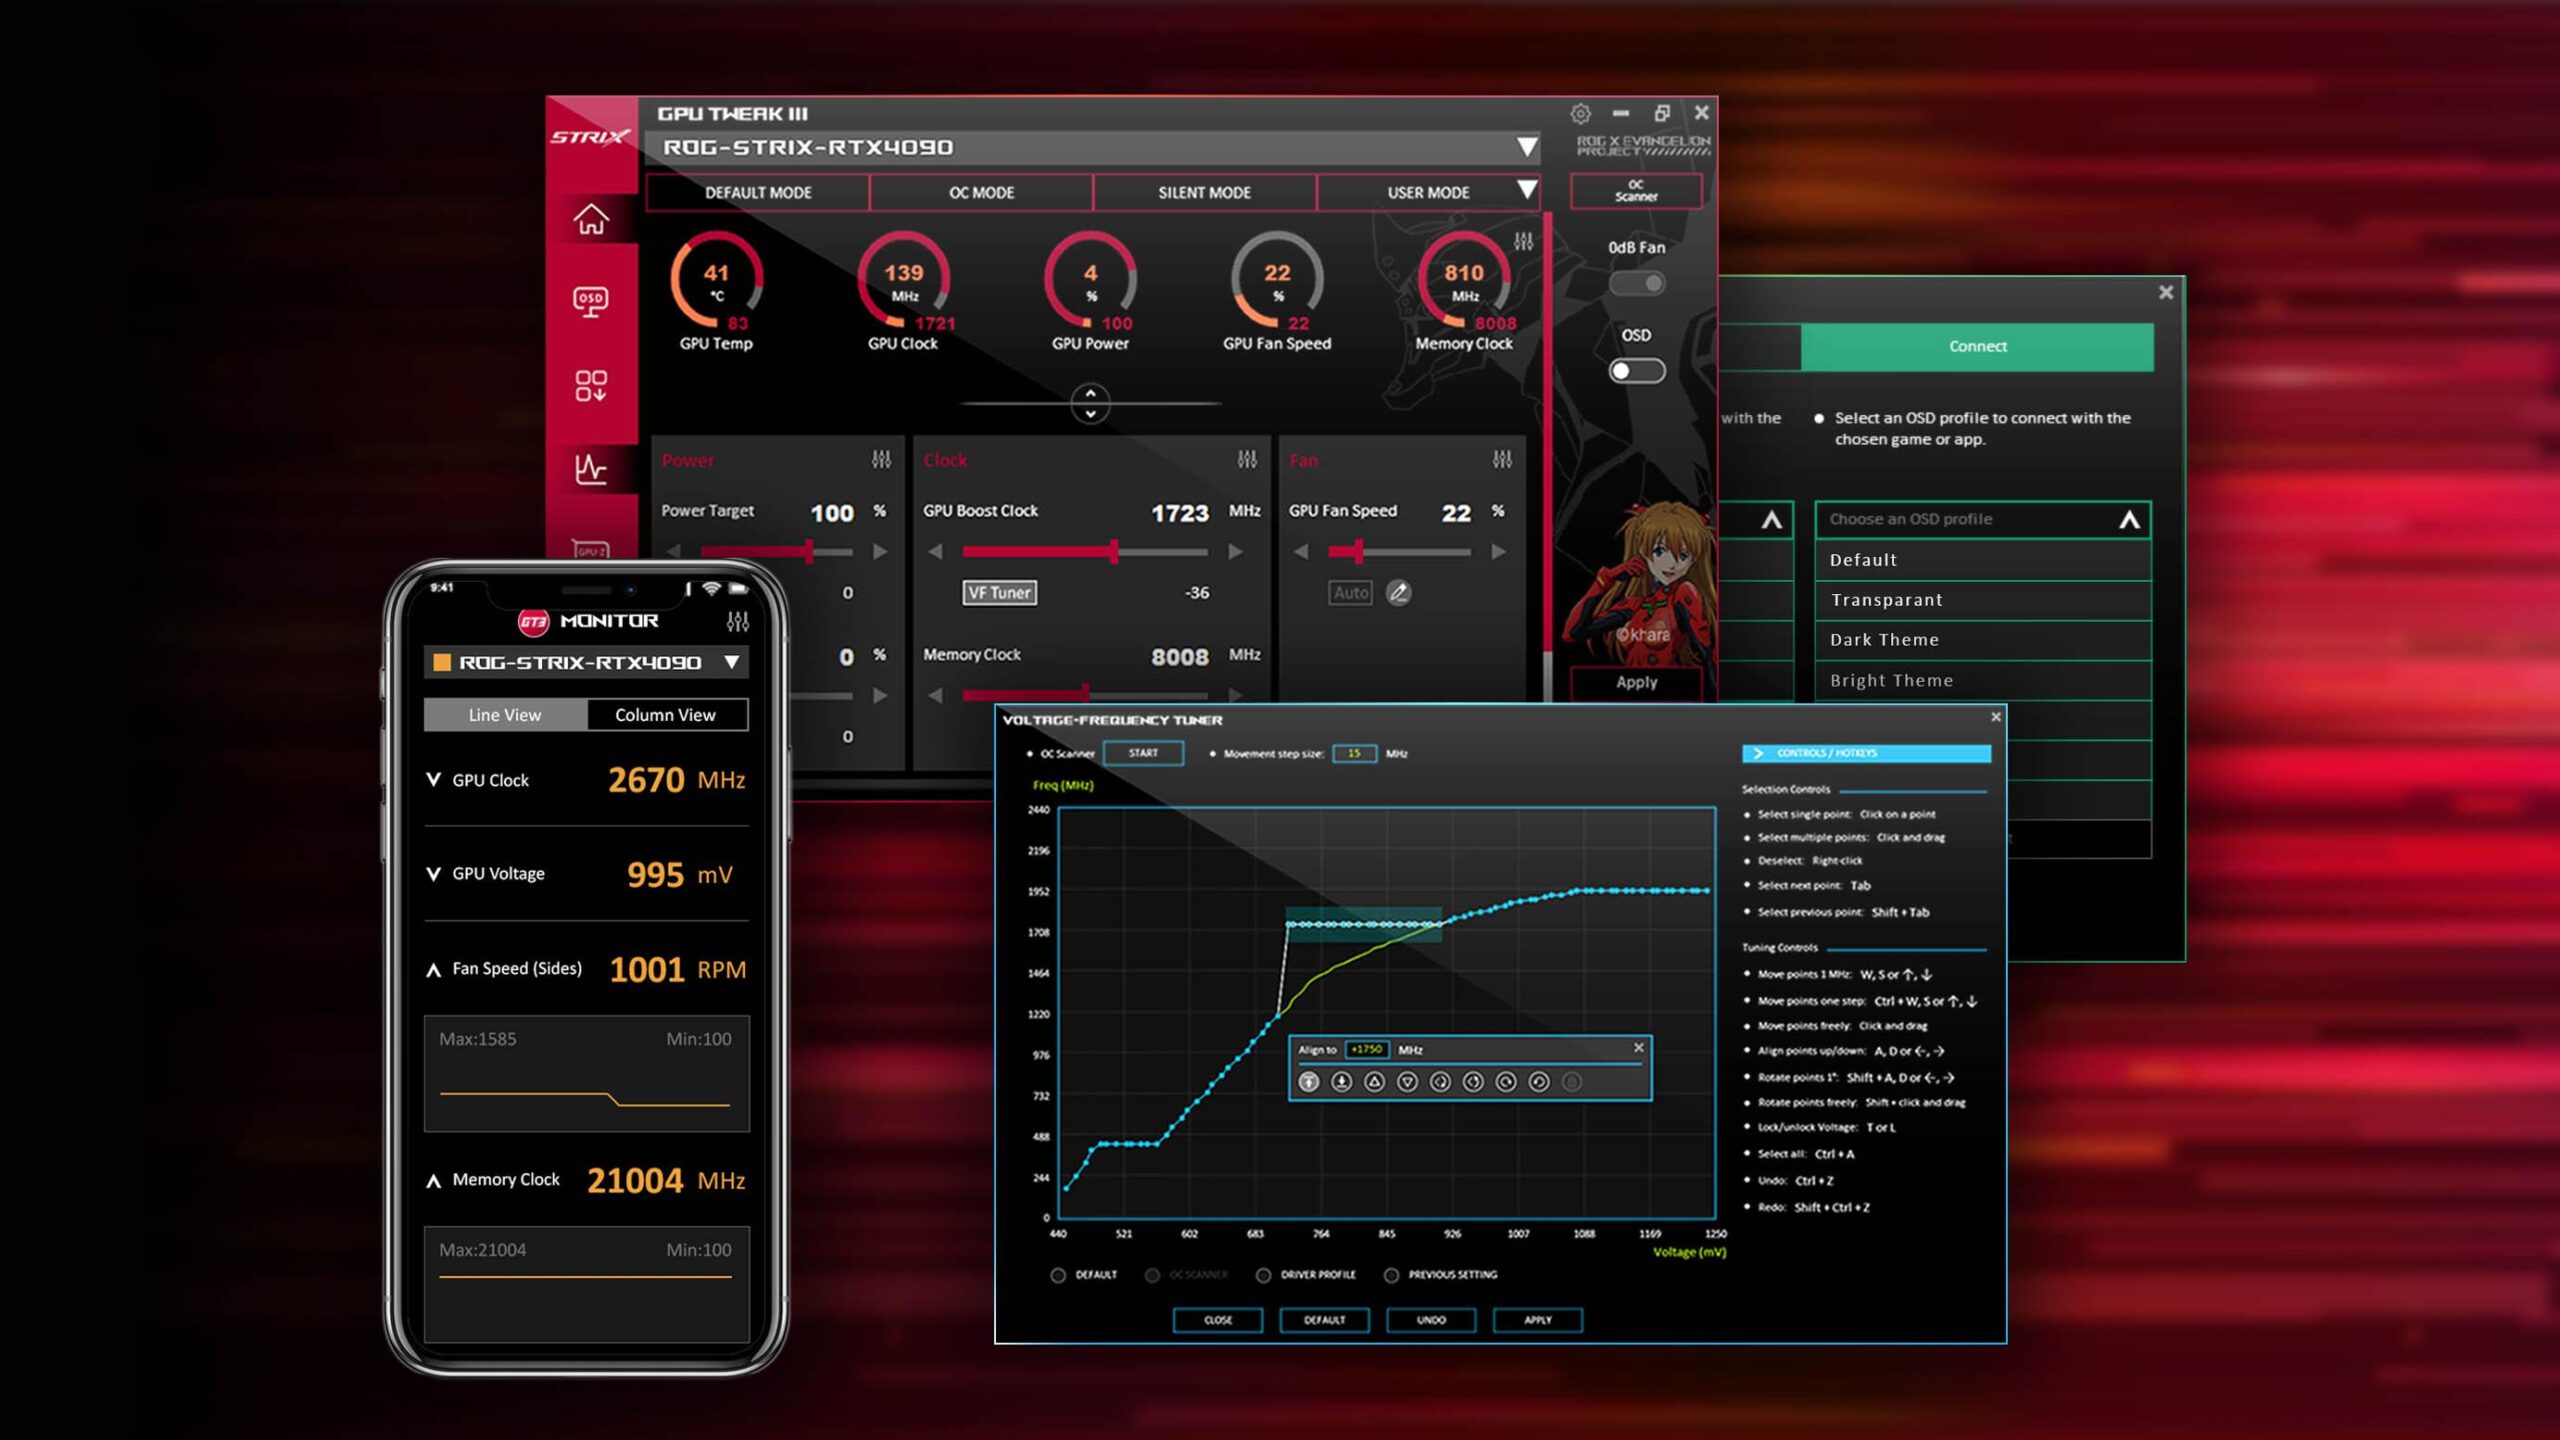
The VF Tuner is one of the most powerful tools in GPU Tweak III for advanced users. It displays a curve that relates specific voltage points to clock frequencies , allowing you to manually adjust each segment to optimize performance or efficiency.
This section also includes the OC Scanner function applied to the VF curve , which analyzes your card and proposes an automatic adjustment calibrated for that specific unit. The frequency step size when moving the grid points can be customized for finer or coarser precision.
In addition, the VF Tuner includes various modes or presets: you can revert to a previous configuration, use scanner results, load controller parameters , or retrieve settings you've previously saved. This makes it easy to experiment and revert to a previous setting if you're not happy with it.
Advanced fan curves and options
In the fans section, "Edit Mode" unlocks a set of specific settings for detailed control over cooling behavior. One of these is the fan speed update period , which defines how often the speed can change in milliseconds; the higher the value, the less abrupt and frequent the changes will be.
Another key option is temperature hysteresis , which introduces a small delay or buffer to prevent the fan from constantly cycling up and down if the GPU temperature fluctuates around a specific point. Increasing hysteresis often reduces annoying noises caused by constant temperature changes.
The tool also allows you to create a custom fan speed curve based on temperature . For example, you can set the fan speed to 30% up to 50°C, 70% at 70°C, and then to maximum from that point on. This lets you adjust the balance between noise and temperature to your liking.
OC Scanner: Automatic and safe overclocking
The OC Scanner is the ideal option for those seeking automatic overclocking and performance gains without the hassle of manual testing. Activated from the GPU Tweak III panel, the program analyzes the graphics card's stability at different frequencies and voltages, calculating an "optimal" profile specific to your unit.
In its advanced version, you can pre-adjust the target power, temperature, memory frequency, and even a target voltage . Once these limits are set, you press the start button and the automatic analysis process begins, which can last up to 30 minutes depending on the model and available bandwidth.
When the scan is complete, you're given the option to save and apply the new settings . It's a very convenient way to achieve a reasonably safe overclock without spending hours manually testing games and benchmarks.
Organization and visibility of parameters
GPU Tweak III lets you customize which controls appear on the main panel. From the sorting settings, you can enable or disable the visibility of each option by checking a box to indicate whether you want that entry to be visible or hidden to avoid cluttering the interface.
Additionally, you can rearrange the elements by dragging them with the three-line icon , moving each parameter up or down according to its priority. This way, you can bring the sliders you use most often to the forefront and relegate those you rarely use further down.
OSD (On-Screen Display): Statistics in your games
GPU Tweak III's OSD feature is designed for those who want to see in real time how the GPU responds while gaming . Tapping the corresponding icon opens the OSD settings screen, where you can define both its appearance and the information it will display.
First, you can load pre-configured OSD profiles or create a new one. You can also choose between GPU Tweak III's own visual style or a "classic style," depending on your preference and how intrusive you want the overlay to be.
The size and display adjustment section allows you to define the width and height of the box, as well as specify a custom resolution or even a background image to integrate the OSD more aesthetically into your games.
In the monitoring information section, you choose which data you want to see: GPU temperature, frequency, usage, fan speed, power consumption, FPS , and much more. This allows you to focus only on what's relevant to your performance tuning.
Customization extends to the text as well: there are options to change colors, fonts, and apply text effects , as well as adjust the style and effects of the panel's background. The position is configured by dragging the OSD on the screen or by manually entering X and Y coordinates.
Finally, there is an application blacklist where you can add programs or games in which you don't want the OSD to appear, avoiding annoyances in specific cases (video players, streaming software , etc.).
Additional utilities: Armoury Crate, ROG FurMark, and GPU-Z
From the utilities section, GPU Tweak III makes it easy to download and install third-party tools recommended by ASUS. One of these is Armoury Crate, the ASUS device control ecosystem that handles, among other things, AURA Sync lighting on compatible graphics cards and global tuning of ROG systems.
Another notable utility is ROG FurMark , a stress test program designed to push your graphics card to its limits and check its stability after overclocking. It's very useful for ensuring your configuration doesn't cause unexpected crashes, graphical artifacts, or excessively high temperatures.
Accessing GPU-Z from the main interface opens this familiar diagnostic tool, which displays all the card's information: chip, memory, buses, BIOS version, and other technical details; you can also export logs from GPU-Z . Recent versions even highlight the ASUS BIOS version and the card's general BIOS version.
Monitoring and logging window
The monitoring window is where you can view GPU usage in Windows and track the graphics card's behavior in real time while gaming, rendering, or performing other demanding tasks. It displays graphs and numerical values for temperature, frequency, voltage, fan speed, and other key parameters.
GPU Tweak III offers various display modes, such as line view or column view , so you can choose the representation that's most convenient for you. This flexibility helps you quickly identify bottlenecks or anomalous behavior.
In addition, the window allows you to export and import monitoring logs , which can be useful for analyzing long sessions, sharing data with other users, or comparing the impact of different overclocking profiles over time.
Armory Crate vs GPU Tweak III: How they differ
When discussing ASUS devices, it's common to wonder if Armoury Crate alone is sufficient or if GPU Tweak III should also be installed. The reality is that each program is geared towards a different type of device and use case , so they tend to complement each other rather than overlap.
On ROG gaming laptops, Armoury Crate is the main control center . From there, you manage the system's operating modes (Silent, Performance, Turbo, Manual), which affect not only the fans but also the power allocated to the CPU and GPU. On some models, Manual mode even allows you to apply small clock offsets to the GPU and memory to squeeze out a little extra performance.
These laptops also allow you to configure GPU mode (e.g., Ultimate) , which forces the use of the dedicated graphics card and bypasses the CPU's integrated graphics, thus reducing overhead and potential bottlenecks in games.
However, for desktop graphics cards, deep overclocking is done with GPU Tweak III . Armoury Crate, on recent motherboards, does offer FanXpert to control system fans and other PC functions, but fine-tuning the GPU (frequency, voltage, OC scanner, VF Tuner) is concentrated in GPU Tweak III.
Therefore, on a desktop PC, it's common to use Armoury Crate for RGB lighting, chassis fans, and peripherals , and reserve GPU Tweak III for graphics performance. On a laptop, however, ASUS recommends sticking with Armoury Crate and not using GPU Tweak III, as the latter is not officially supported on laptops.
Improve FPS with GPU Tweak III and other tweaks
If your goal is to increase frame rates in games, there are several ways to tackle the problem. The first, obviously, involves overclocking your GPU with GPU Tweak III . Enabling Overclocking mode or running the OC Scanner usually provides a noticeable performance boost, especially in demanding titles, and you can measure this with GPU benchmarks.
It's equally important to keep your graphics card drivers up to date . Both NVIDIA and AMD release regular updates that optimize specific games, fix bugs, and improve compatibility. You can find the latest version for your specific model in the ASUS Download Center.
Another key aspect is the game's own settings . Reducing options like shadows, texture quality, post-processing effects, or ray tracing can significantly reduce the load on the GPU without ruining the visual experience. Furthermore, the chosen resolution also makes a big difference: switching from 4K to 1440p or from 1440p to 1080p can result in a dramatic improvement in FPS.
If your game supports it, you can also take advantage of technologies like NVIDIA DLSS or AMD FSR . These intelligent scaling solutions allow you to render at a lower internal resolution and upscale to a higher one, achieving higher FPS with minimal visual impact. There are usually modes like Performance, Balanced, and Quality; Balanced mode typically offers a good middle ground for most users.
BIOS and Windows settings to complement overclocking
Besides tweaking the GPU, you can squeeze out performance gains from other sources. On compatible ASUS motherboards, the AI Overclocking feature in the BIOS analyzes your processor and cooling system to automatically suggest a safe CPU overclocking configuration. Enabling it involves entering the BIOS, selecting AI Optimized mode, and saving the changes.
Windows 10 and 11 also offer several interesting options. Enabling the operating system's game mode helps prioritize resources for gaming applications, preventing interruptions and background processes that might consume CPU or disk space at crucial times.
Another good practice is to review the automatic startup of background applications . From the Applications section and the Startup tab in Windows settings, you can disable programs that launch automatically and that you don't always need running. This frees up memory and CPU for your games.


Table of Contents
- 1 What is ASUS GPU Tweak III and what is it used for?
- 2 ASUS GPU Tweak III Download and Requirements
- 3 GPU Tweak III step-by-step installation
- 4 Main interface and sections of GPU Tweak III
- 5 Operating modes: standard, OC, silent, and custom
- 6 Custom profile management: create, import, export, and link
- 7 Graphics card parameters panel
- 8 VF Tuner: voltage/frequency curve to your liking
- 9 Advanced fan curves and options
- 10 OC Scanner: Automatic and safe overclocking
- 11 Organization and visibility of parameters
- 12 OSD (On-Screen Display): Statistics in your games
- 13 Additional utilities: Armoury Crate, ROG FurMark, and GPU-Z
- 14 Monitoring and logging window
- 15 Armory Crate vs GPU Tweak III: How they differ
- 16 Improve FPS with GPU Tweak III and other tweaks
- 17 BIOS and Windows settings to complement overclocking