- ,
- APA standards require specific margins, fonts, and numbering for the entire document.
- Word y Google Docs allow you to easily apply APA style with templates or manual adjustments
- References must follow the hanging indentation format and alphabetical order.
- Titles and subtitles vary according to their hierarchy, with up to five different levels.

The APA format, established by the American Psychological Association , is one of the most widely used standards for presenting academic work, especially in the social sciences. Applying it correctly in Microsoft Word may seem complicated at first, but with a clear, step-by-step guide, it is entirely achievable for any student or researcher.
This article covers everything you need to format your Microsoft Word document (and Google Docs) using the 7th edition of the APA style guide, from font selection to inserting citations, bibliography, tables, figures, and appendices. Everything is explained in detail and in clear, accessible language to ensure you have no questions.
Initial document setup in Word
Before writing a single word, it is essential to prepare the document correctly . APA establishes very specific guidelines regarding paper size, margins, and font.
Paper size: The standard for academic papers in APA style is letter size (21.59 cm x 27.94 cm) . This can be selected from the "Design" or "Layout" tab in Word, by accessing "Size" and selecting "Letter".
Margins: All sides of the document must have a 2.54 cm (1 inch) margin . To set them, go to "Design > Margins > Custom Margins" and enter this value for top, bottom, left, and right.
Font and size: APA accepts various fonts such as Times New Roman 12, Arial 11, Calibri 11, Georgia 11, or Lucida Sans 10. However, the most common and reliable is Times New Roman, size 12 , because it is clear and widely accepted. To apply it, select the entire document (Ctrl + A) and change the font and size from the "Home" tab.
Page numbering and headings
All papers in APA format must be paginated from the first page, including the cover page . The page number should be right-aligned in the header.
To add page numbering in Word, go to “Insert > Page Number > Top of Page > Unformatted Number 3.”
Regarding the header , only the page number is included in school assignments. Professional work also includes a left-aligned, abbreviated title . To edit it, go to "Insert > Header > Edit Header" and add the appropriate text.
Indentation, paragraph alignment, and line spacing
The indent in APA style is 0.5 inches or 1.27 cm for the first line of all paragraphs . This is set by right-clicking on the text, then selecting "Paragraph > Special Indent > First Line" and choosing 1.27 cm.
The alignment should always be left-aligned , leaving an irregular right margin. Do not justify the text unless your teacher specifically requires it.
The entire document must be double-spaced (2.0) , including titles, quotations, and references. In Word, this is enabled from the "Home > Line Spacing > 2.0" tab.
Titles and subtitles according to APA standards
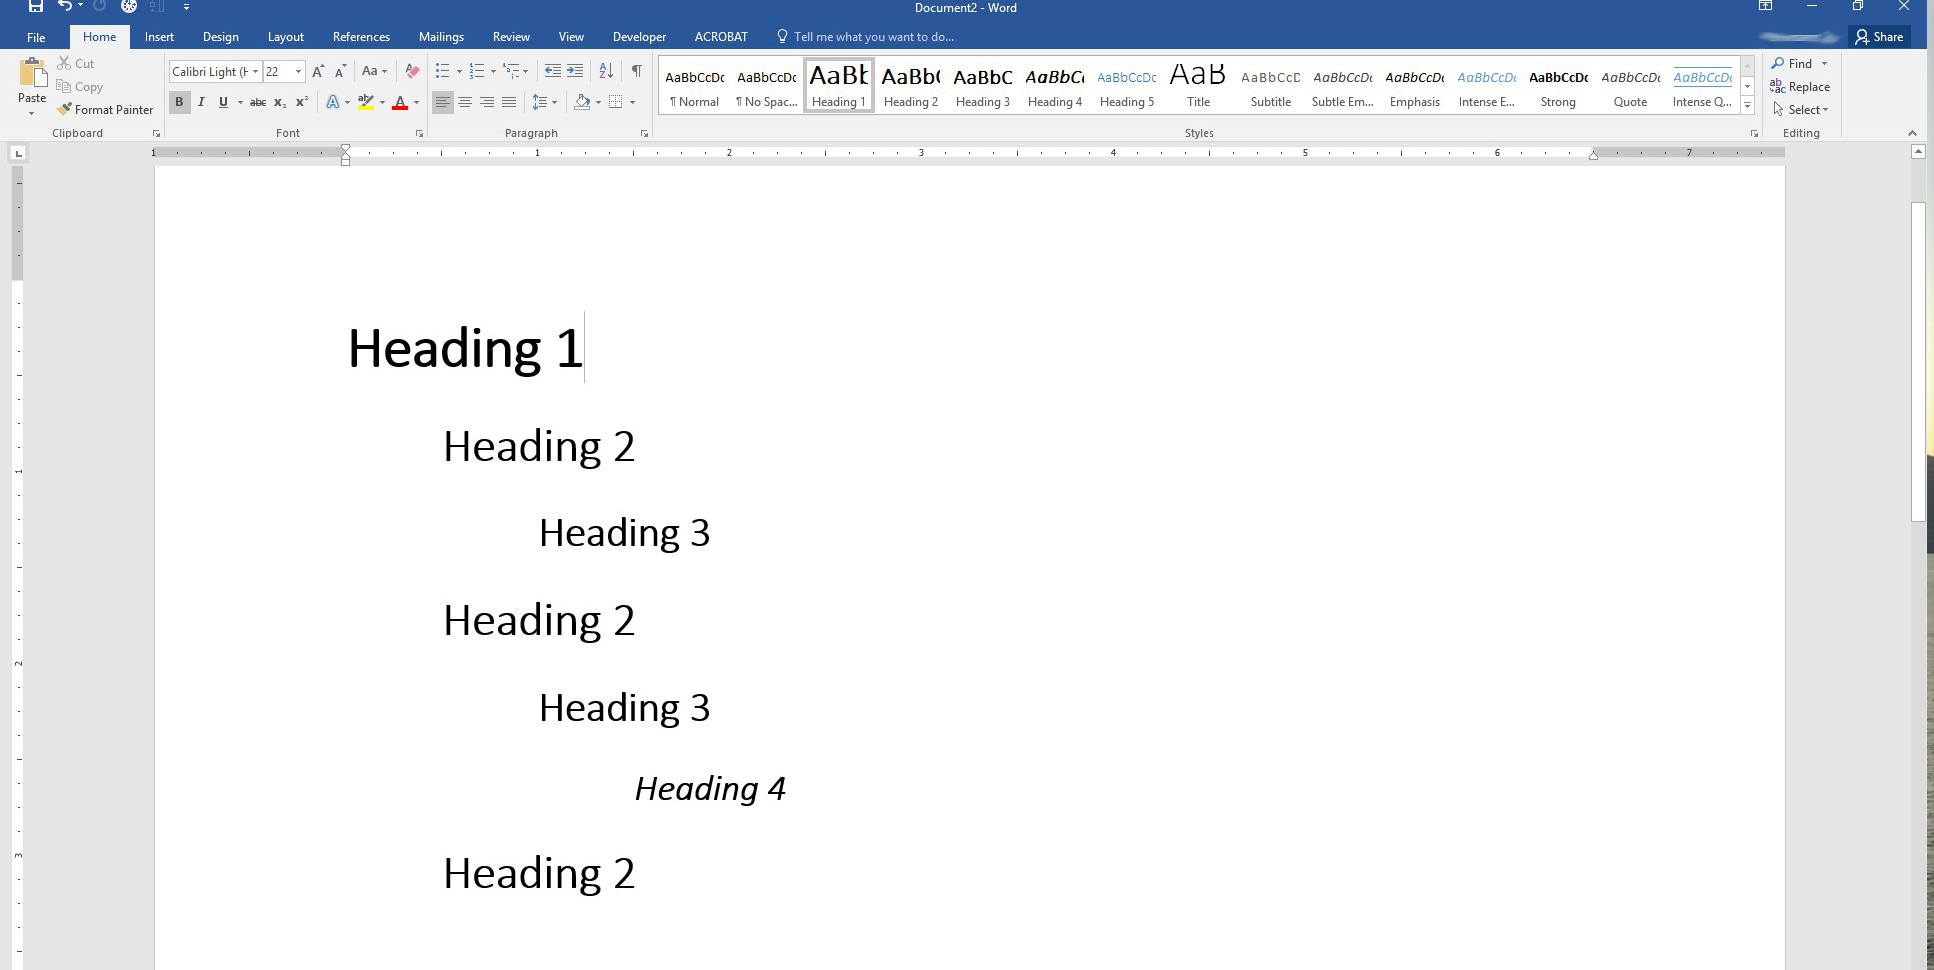
The APA format includes up to five levels of headings, which differ in format and placement . The levels are applied according to the hierarchy of the content:
- 1 level: Centered, bold, and capitalized for each relevant word.
- 2 level: Left aligned, bold and capitalized on main words.
- 3 level: Left aligned, bold, italicized, and with initial capitals.
- 4 level: Indented, bold, ending with a period and the text continues on the same line.
- 5 level: Indented, bold, italic, ending with a period and the text continues below.
To facilitate automatic indexing, it is recommended to use Word styles from the Styles section on the Home tab.
Setting up citations and references
In-text citations should include the author's last name and the year of publication , for example: (Toledo, 2018). If the citation is a direct quote, add the page number : (Toledo, 2018, p. 45).
To insert a citation in Word, go to References > Insert Citation > Add New Source, choose the source type (book, web page, etc.), enter your details, and save.
The reference list should begin on a new page, with the title "References" centered and in bold . Entries should be ordered alphabetically by the author's last name , and each with a hanging indent (first line aligned with the left margin, subsequent lines indented 1.27 cm).
To apply a hanging indent, select the references, right-click, select “Paragraph,” and under “Special Indent,” choose “Hanging.”

Other important elements: tables, figures, appendices and notes
Tables should have their number and title in bold above the table . For example: "Table 1. Students who used APA format." Notes below can be general, specific, or probability-based.
Figures follow the same structure as tables : number, title, and note. Clear images with explanatory text are recommended if necessary . Avoid unnecessary color and decorative elements.
Appendices are placed on one or more new pages at the end of the document . If there is more than one, they are titled Appendix A, Appendix B, etc. The content may include surveys, interviews, additional data, explanatory charts, etc.
Footnotes are inserted using "References > Insert Footnote" . They are placed at the bottom of the page, in a smaller size (10 pt.) and with single line spacing.
Endnotes are also implemented from the same tab , but appear grouped at the end of the document, before the appendices.
Applying APA format in Google Docs
If you prefer to work in Google Docs, you can also easily apply APA style:
- Margins: File > Page Setup > Custom Margins (2.54 cm).
- paper size: Select “Letter”.
- Font and size: Times New Roman 12, from the top bar.
- Indent first line: Format > Align and Indent > Options > Special Indent: First Line (1.27 cm).
- Quotes: Tools > Citations > APA 7th Edition > Add Source.
Common mistakes you should avoid
Avoiding common mistakes will save you time and potential academic penalties . Some of the most common mistakes are:
- Failure to apply hanging indentation correctly in the bibliography.
- Forget double-spacing in tables, titles, or quotes.
- Use full text justification when it should be aligned to the left.
- Do not number pages from the cover page.
- Disordering bibliographic references or not formatting them correctly.
A final review before submitting your work can make all the difference and ensure compliance with APA standards.
Mastering Word document formatting following APA standards is an essential skill for any student, researcher, or academic professional. With a little patience and following the step-by-step instructions, you can create a visually impeccable work that meets all the requirements of this standard. Modern tools like Word or Google Docs make the task much easier, and applying the correct formatting not only improves the presentation of the work but also demonstrates attention to detail and professionalism.


Table of Contents
- 1 Initial document setup in Word
- 2 Page numbering and headings
- 3 Indentation, paragraph alignment, and line spacing
- 4 Titles and subtitles according to APA standards
- 5 Setting up citations and references
- 6 Other important elements: tables, figures, appendices and notes
- 7 Applying APA format in Google Docs
- 8 Common mistakes you should avoid