- Consistent configuration of teams, channels, and groups in Microsoft 365 to avoid duplication.
- Combined use of Teams, Stream, Outlook, and SharePoint to organize collaboration.
- Types of channels in Teams (standard, private, and shared) and their relationship with SharePoint sites.
- Best practices for sharing videos and managing permissions with Microsoft Stream.

Microsoft 365 offers a powerful ecosystem for teamwork.Teams for daily collaboration, Stream for video, SharePoint for documents, Outlook for email, Planner for tasks… The problem is that, if the structure of teams, channels and groups is not designed well, it is very easy to end up with duplicate resources and completely lost users.
The aim of this article is to help you set up a clear structure of channels and groups. in Microsoft Teams and Microsoft Stream connected to Office 365, explaining what is created in the background (Microsoft 365 groups, SharePoint sites, permissions) and how to take advantage of each type of channel and video groups in Stream without messing things up in your tenant.
Microsoft 365 Groups, Teams, and Stream: How it all fits together
Before you start creating channels like there's no tomorrowIt's helpful to understand what a Microsoft 365 group is and how it relates to Teams, SharePoint, and Stream. A Microsoft 365 group is essentially a container of shared resources: a group mailbox and calendar in Outlook, a SharePoint site, a OneNote notebook, a plan in Planner, and, if enabled, a team in Microsoft Teams.
The important thing is that it doesn't matter where you create the group from.Whether you do this from Outlook, by creating a SharePoint site, from Planner, or from Teams, the underlying result is a Microsoft 365 group with all those resources connected. The typical problem is that one user creates a SharePoint site for documents, another creates a separate plan in Planner, and a third sets up a Teams team, all for the same department, generating three different groups without anyone noticing.
To avoid this chaos, it is key to educate users Choose the creation method that best suits your organization's way of working: those who live in Outlook can create groups from there, if you come from a SharePoint-centric environment you can start from team sites, and if collaboration revolves around chat and meetings, the most natural thing to do is to create a team directly in Teams.
If the most consistent entry point is always used for each work teamDuplication is minimized, and it is made easier for everyone to understand that behind their Teams team there is a SharePoint site, a mailing group, a Planner plan, and a space where Stream can organize the associated video.
How to organize communication: internal loop, external loop, and video
Microsoft proposes a very practical two-loop communication modelThe internal loop, focused on day-to-day work with your close team, and the external loop, geared towards connecting with the rest of the organization. Each tool has its role, and knowing which one to use makes all the difference.
For the internal loop, the central piece is Microsoft TeamsThis is where teams are organized, channels are created, meetings are planned, documents are shared, and project progress is tracked. It's the space where your team needs maximum coordination and quick access to everything.
For the outer loop, Viva Engage comes into play. (formerly Yammer). It is designed for communities and more open communication between people who do not work together daily: sharing best practices, launching large-scale queries, or disseminating corporate information and cross-functional content.
Furthermore, Outlook and SharePoint continue to have a very clear role.With Outlook you manage email groups for targeted communications, while with SharePoint sites you share and collaborate on structured content with specific teams or the entire organization.
Stream fits in as the nerve center of the videoThere you can store, organize, and share recordings of Teams meetings, courses, internal presentations, and live events with the appropriate groups and channels, aligned with that same collaboration structure.
Microsoft Stream in Office 365: what it is and what it's used for
Stream is the enterprise video platform integrated into Microsoft 365 It allows you to securely upload, view, and distribute videos within your organization. It's not a public YouTube, but a private environment where access is fully controlled by permissions.
It is especially useful for sharing meetings, training sessions, and internal communications.You can upload Teams recordings, presentation videos, tutorials, or even broadcast live events of up to four hours. All content remains within the company's domain, and you can adjust who can view each video: specific individuals, groups, departments, or the entire organization.
A major advantage of Stream is its integration with other applications. From Microsoft 365, recorded Teams meetings are automatically sent to Stream, where they can be viewed, commented on, and the transcript searched by keywords. It also integrates with SharePoint, OneNote, and Viva Engage, allowing you to embed or link videos where they make the most sense.
The owners of a video have very detailed control Regarding the content: users can update the title and description, trim the beginning or end, adjust permissions, view viewing statistics, upload subtitle files, or enable automatic subtitle generation. These subtitles can be exported in .vtt format and converted to text if needed.
In addition to uploading files, Stream allows you to directly record the screen directly from the upload option. This is incredibly convenient for creating quick training sessions, demonstrations, or short knowledge capsules without relying on external editing tools.
Groups and channels in Microsoft Stream
Within Stream you can organize content on two levelsGroups and channels. Groups are usually aligned with departments or project teams (e.g., Finance, Marketing, IT), while channels group videos by theme or purpose within those groups.
A typical example would be having a group from the Human Resources Department Within it, there are channels for internal training, corporate communication, onboarding new employees, and regular meetings. Each channel contains associated videos and inherits or adjusts permissions as needed.
Permissions in Stream are very flexible and are based on Microsoft 365 groups.Group owners can decide who sees each video or channel: only members of that group, other groups within the organization, or the entire company. This way, someone can log into Stream and, depending on their permissions, browse videos, channels, and groups, and search for words or phrases that appear in titles, descriptions, or transcripts.
Any user with the appropriate permissions can create their own groups, channels, and videosThis fosters a culture of knowledge sharing. However, it's advisable to establish basic guidelines to avoid creating redundant groups and to ensure that the naming conventions and structure are consistent with those of Teams and SharePoint.
Create Microsoft Teams teams by reusing groups and settings
When you create a new workspace in TeamsIt doesn't always make sense to start from scratch; administrators can automate the creation process with powershell scriptsMicrosoft allows you to create a new team by copying the structure of an existing one or by leveraging a Microsoft 365 group you've already created, which saves a lot of time and maintains consistency.
From the Teams desktop or web client, the process starts in the Chat areaIn the left panel, select Chat, and at the top of the list of chats and channels, choose New items. From that menu, you can start creating a new team.
Once you select New Team, additional options are displayed To choose how you want it to be generated: from scratch, from an existing team, or based on a Microsoft 365 group. These options appear under the "More ways to create a team" section.
If you choose to create the team from an existing oneYou'll see a list of all the teams you're a member of. Just select the one you want to copy and decide which parts you want to inherit.
If you prefer to create it from an existing Microsoft 365 groupYou select the "From a group" option and then choose one of the groups you own that doesn't yet have an associated team. The system filters the groups that meet these conditions and have fewer than 10,000 members.
Key details when setting up a new computer
When you decide to create the team, it's time to define its details.You must assign a clear and recognizable name, add a description that explains its purpose, choose the privacy setting (public or private) and, if your organization has it enabled, set an appropriate sensitivity label.
Additionally, you can select which items you want to copy from the source computer. If you're reusing one: channels, tabs, settings, installed apps, and even members. This allows you to replicate complex structures very quickly, maintaining a consistent user experience.
Once all these parameters are adjusted, you just have to press Create. This will allow Teams to create the new team with all the selected members. From there, you can continue adjusting permissions and channels according to the actual needs of the workgroup.
If you choose to create a completely new team from the Join a team or create one optionThe flow is very similar: you select Create team, give it a name and description, choose whether it will be private (you add the members) or public (anyone in the organization can join) and finally, add contacts, groups or even entire distribution lists.
You can also invite external people as guests using their email address. In that case, they are assigned a display name and integrated as guests, with more limited permissions than internal members, but sufficient to collaborate in many scenarios.
Creating channels in Microsoft Teams and their relationship with SharePoint
Every team in Teams starts with a General channelThis is typically used for announcements, important communications, and topics that affect the entire team. From there, you can create additional channels to better organize content by projects, departments, products, or any other criteria that makes sense.
To add a channel from the device itselfGo to the channel list, select More options next to the team name, and choose Add channel. Then simply enter the name, a brief description, and, if you wish, automatically mark it as a favorite so it's visible to everyone.
Each channel you create is reflected in the SharePoint site associated with the team.When you create a new team (or a specific private channel), Microsoft automatically creates a team site in connected SharePoint. This site inherits the description, classification, and other properties of the Teams team.
If you need to change the site description or ratingYou must do this from the settings of the corresponding channel or team in Teams. From there, you adjust the parameters that are reflected on the SharePoint site, maintaining consistency between both environments.
Please note that each standard channel shares the main site's document library.Whereas private and shared channels, as we will see, generate collections of independent sites with their own library and permission scheme.
Types of channels in Teams: standard, private, and shared
Not all channels in Teams are the same.There are three main types, each designed for a different level of visibility and collaboration: standard channels, private channels, and shared channels.
Standard channels are the most openAll team members can see, participate in, and search messages within them. They are ideal for general topics or projects that require the entire team's involvement. Over the lifetime of a team, you can create up to 1000 standard channels, including those that are created and then deleted.
Private channels are intended for more restricted conversations. within the same team. Only the owners and specific members of that private channel can access it, although they must first belong to the team to which that channel is linked. Each team can have up to 30 private channels during its lifespan.
Shared channels take collaboration a step furtherThis allows you to work with people inside and outside your team, and even from other organizations, without them needing to switch tenants in Teams. Only team owners can create them, and only owners of that shared channel can add members or share it with other teams.
An important detail is that the channel type cannot be changed afterward.A standard channel cannot be converted to private or shared, nor can a shared channel be converted to standard or private. If you choose the wrong type, you will need to create a new channel.
Create channels from Chat or from the team list
Teams allows you to start creating channels from different points in the interface, both from the chat view and from the full view of teams and channels, to adapt to the way each user works.
If you are in the Chat section on the left sideYou can open the New Items menu at the top of the chats and channels list. From there, you can select the New Channel option, which will guide you through a wizard to choose which team the channel will belong to.
When choosing New Channel, the next step is to select the host deviceThat is, the device that will host that channel. Once chosen, you will be asked to provide a name, an optional description, and the channel type: standard, private, or shared.
If you prefer to create the channel starting from the team nameYou can go to the All Teams view or View all teams and channels. Locate the desired team, tap More options to the right of its name, and select the option to add a channel.
In the Teams mobile app, the process is similar but with some differences.From your computer, click More options on the right and then Add. Enter a name and description, and a standard channel will be created automatically. To create a private channel, when you reach the Privacy step, choose the Private option and continue with the setup process. Creating shared channels, however, is limited to the desktop or web version.
Shared channels: advanced collaboration between organizations
Microsoft Teams' shared channels (Teams Connect) are one of the most powerful new features This allows collaboration with people from other organizations without requiring them to switch tenants within the application. With this feature, an external user sees the channel integrated into their own team list, as if it were just another team within their organization.
This type of channel is ideal when several partners or clients are involved in the same project.The organization where the channel is created acts as the host and is responsible for storing the content (messages, files, tabs). External users participate as direct members of the shared channel, but they do not become part of the host team.
The key characteristics of these channels are very specific.Only team owners can create shared channels; only channel owners can add members or share it with other teams; access is restricted to channel owners and members, even if you belong to the team, if you are not in the channel you don't see anything; and they cannot be transformed into other types of channels.
To create a shared channel, you follow the same procedure as when creating any channel.For example, you can do this from the team options using "Add channel." In the Privacy section, choose the "Shared" option instead of "Standard" or "Private." You can decide whether to automatically share it with all members of the host team by checking the corresponding box.
Once created, the channel appears on the device with an icon indicating that it is shared.From that moment on, the host organization controls the content and the SharePoint architecture that is generated behind the scenes to store the files associated with that channel.
Configure B2B collaboration for shared channels
For shared channels to work with users from other organizationsIt is not enough to create them in Teams: it is essential that there is a B2B Direct Connect relationship configured between the tenants involved in Azure AD.
If you try to add an external user and receive the message that no match is foundIt's most likely that this direct B2B connection hasn't been set up yet. There are two basic requirements: that the guests have a Teams business or education account in Azure AD, and that both organizations have enabled direct B2B collaboration with each other.
This connection can be configured against a specific organization or more generally.This opens it up to all organizations so you don't have to repeat the process every time you want to collaborate with a new partner. In any case, since it's a direct B2B relationship, both parties must configure their policies; if only one of the two tenants does so, the shared channels will still not work.
The process can be summarized in three steps.Add the remote organization, configure the inbound options to allow your users to be invited to shared channels hosted in your tenant, and configure the outbound options so that your users can participate in shared channels hosted in the other tenant.
After applying the configuration in Azure, it may take several hours for it to propagate. in the Microsoft 365 environment (up to about six hours). Until these changes have been fully replicated, you will continue to encounter errors when trying to add external users to shared channels.
Share shared channels with people and teams
Once you have created the shared channel and correctly configured the B2B connectionYou can start inviting both individual users and entire teams, whether from your organization or an external tenant.
From the channel options you will see the Share channel functionwhich offers three alternatives: sharing it with specific people, with any team, or with a team that you own.
If you choose to share with peopleYou can enter internal names or email addresses of users from the other organization. When the B2B configuration is in order, the system will recognize them as External, even displaying their image and presence, instead of treating them as standard guests.
One of the clear differences compared to private channels The external user doesn't need to be a member of the host team. They simply join the shared channel and appear in the channel's member list, but they aren't officially a team member and don't have access to the other channels and resources.
When sharing with a team from another organization, the flow is somewhat more elaborate.You provide the address of the external team owner and send an invitation so that owner can choose which team they want to associate the channel with. They receive a notification in Teams, accept, choose one of their teams, and the request is then pending approval from the owner of the shared channel in the host organization.
External user experience in a shared channel
From the external user's point of view, the experience is quite transparent.When you are invited to a shared channel, upon entering Teams you will see a notification informing you that another organization wants to collaborate with you through a channel.
Upon opening the notification, you will be presented with a permissions notice. to authorize the inviting organization to share that channel. Once permissions are granted, the channel appears directly in your list of teams and channels, integrated into your Teams environment, without needing to make the typical organization change in the interface.
When the external user is going to post a message in the shared channelTeams displays a notification reminding you that the channel includes participants from another organization. The same occurs when the host tenant user replies: they also see a message indicating that they are interacting with external members.
In addition to chat, users can collaborate on files just like in any other channelThe documents are stored in SharePoint on the site associated with the shared channel, and real-time co-authoring between users from different organizations is allowed, provided that security policies permit it.
It is important to emphasize that, although the channel may appear as just another component within the external user's teamThe content continues to reside in the host organization, and the confidentiality labels, permissions, and access limits configured in that tenant are respected.
SharePoint architecture for private and shared channels
Behind every private or shared channel lies a specific architecture in SharePointUnlike standard channels, which use the shared documents library of the team's main site, private and shared channels create new, dedicated site collections.
When you open the files tab of a shared channel and jump to SharePointYou'll see that you're in a separate site, with its own library and a folder representing the documents for that channel. At the top, there's usually a label indicating that it's a site associated with a shared channel.
In the permissions for that site you can verify that the external user is listed as a memberwith the appropriate role to collaborate on the documents. If the user attempts to navigate to the main computer's SharePoint site using the link to the host computer, they will see an access denied message, as they are not part of that other resource.
This design allows for very granular control It controls who has access to what content and prevents external users from seeing inappropriate documentation, limiting their access only to what the shared channel exposes them to.
Limits and restrictions of shared channels in Teams
Shared channels have a number of technical limitations that are worth knowing about. to avoid running into them in large deployments or complex inter-company collaboration scenarios.
In terms of capacity, a team can have up to 25,000 membersThis includes internal users and direct members in shared channels. A single team can have up to 200 shared channels, including both active channels and deleted channels that are still in the recovery period.
Each shared channel can be shared with up to 50 devices at a time. (excluding the primary team) and can have up to 5000 direct members, considering that each team with which it is shared counts as a single member for that limit.
There are also some important functional considerations.Only enterprise or education Azure AD accounts are supported as external participants; tabs can be used in shared channels, but with exceptions such as Stream, Planner, or Forms; and bots, connectors, LOB apps, and message extensions are not supported.
When you create a new team by copying an existing oneShared channels from the source team are not copied to the new structure. Additionally, activity notifications in shared channels are not included in the missing activity emails that Teams sends to users.
Finally, shared channels are not available for specific equipment types., such as classroom teams in educational settings, where the collaboration and permissions model is more specific.
Member management, permissions, and channel maintenance
The administration of who can create channels and how members are managed This is key to maintaining order in a large Teams environment. As a team owner, you can control many of these options from within the application itself.
To view a team member listGo to the team name and select More options > Manage team. The Members tab shows who owns the channel, who is a member, and, depending on the channel type, who can see what content.
In the case of standard channels, all team members have accessTherefore, you don't need to add them one by one. However, in private and shared channels, you do need to explicitly manage which people or teams participate.
As the owner of a private channel, you can add or remove members and adjust their role.The quickest way is to go to the channel name, select More options, and then Add members. A window will open where you can search for team members and grant them access. You can also use Manage channel to manage roles from the Members tab and, from Settings, restrict what members can do in that channel.
A private channel allows multiple owners and up to 250 membersprovided they are all members of the parent team. This limitation helps keep management under control and prevents private channels from becoming overly large "parallel teams".
In shared channels, when creating the channel you have the option to share it with all members of the host team.Later, you can add internal or external users and change their role from Member to Owner, provided they have the appropriate account. External users, however, typically have a fixed member role in many scenarios and can only be removed if they no longer need to participate.
Control over the creation, editing, and deletion of channels
To maintain governance, team owners can decide who can create channelsFrom More options > Manage team > Settings > Member permissions, you can allow or block users from creating, updating, or deleting channels.
In day-to-day operations, editing, deleting, hiding, or abandoning a channel is very simple.Simply go to the channel name, click on More options and choose the corresponding action from the menu: edit to change the name or description, delete to remove it, hide to remove it from your view, or leave if you no longer wish to participate.
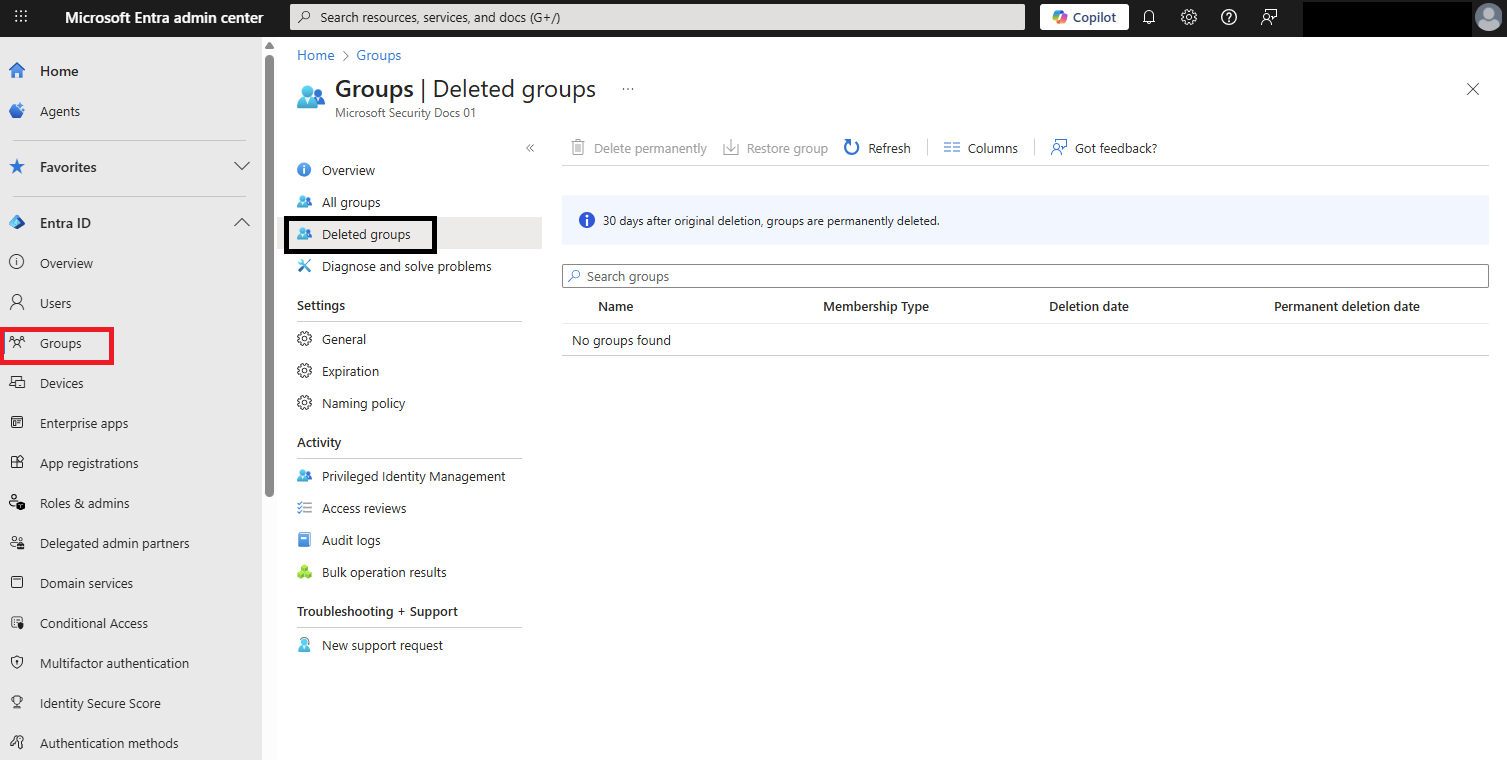
You must be very careful when deleting channelsDoing so will erase the entire conversation history, although there is a 30-day grace period during which it can be restored. While the channel is in this sort of "trash can," another channel with the same name cannot be created.
The OneNote sections linked to the deleted channel remain visible on the team's SharePoint site, so some of the associated content doesn't disappear completely. Even so, it's always a good idea to review whether it's really necessary to delete a channel or simply archive or hide it.
After all of the above, it is clear that the key to getting the most out of Microsoft Teams and Stream It's about designing the structure of teams, channels, and groups well, understanding how they connect with Microsoft 365 and SharePoint groups, and leveraging the different types of channels (standard, private, and shared) to balance openness and security, while Stream centralizes video with permissions aligned with that same collaboration logic.
Passionate writer about the world of bytes and technology in general. I love sharing my knowledge through writing, and that's what I'll do on this blog, show you all the most interesting things about gadgets, software, hardware, tech trends, and more. My goal is to help you navigate the digital world in a simple and entertaining way.