- Telnet is an older protocol that allows remote console access, but transmits everything in plain text without encryption.
- In Windows 10 and 11 the Telnet client exists, but it comes disabled and must be enabled manually.
- Telnet can be enabled from "Turn Windows features on or off" or with DISM via the command line.
- For security reasons, it is recommended to use Telnet only on controlled networks and to prefer alternatives such as SSH or RDP.
If you've ever tried to use the command telnet If you're running Windows and it says it's not recognized, don't worry: it's not that anything unusual is missing, it's just that the The Telnet client is disabled by default. In both Windows 10 and Windows 11, activating it is simple, but it's helpful to understand what you're turning on and why it's not used as much as it used to be.
Although much safer and more modern alternatives exist today, Telnet remains useful for diagnose network problems, test ports or connect to older devicesHowever, it does have some very important security details, so let's review in detail what it is, how it works, what its risks are, and how to enable it correctly in Windows step by step.
What is Telnet and what is it used for today?
Telnet is a TCP/IP-based network protocol It allows you to connect remotely to another computer using only a command-line interface, without a graphical interface. It originated in the late 60s and was, for a long time, one of the standard ways to access servers and computers remotely.
Its classic operation is based on the model client-serverOn a computer, the Telnet server is running, which normally listens on the TCP port 23And from another computer a Telnet client connects, which is the one you run from the terminal or command prompt.
When you try to connect, the client sends a request to the remote server, which responds by asking you Username and passwordIf the credentials are correct, a remote session opens in text mode, as if you were sitting in front of that computer, but using only commands.
Everything transmitted over Telnet travels in plain text without any encryptionThis includes usernames, passwords, and any information you enter or receive during the session. This detail, which wasn't considered so serious at the time, is now its main weakness.
Historically it has been used for manage servers, access databases, query BBS or MUD systems, and manage network equipmentToday, its use has been reduced mainly to controlled environments and specific tests, as much more secure alternatives such as SSH have become the norm.
How Telnet works technically
Telnet relies on the protocol TCPTypically on port 23, a reliable session is established between the client and the server. When the connection is initiated, the server waits for a client to connect, and once established, an initial exchange of options (Telnet negotiation) takes place before the authentication prompt appears.
From the user's point of view, you only see a console where you can enter commands, but behind the scenes, messages are being sent characters in both directions in real timeThere is no graphical interface: everything is text, like in the old terminals connected to large mainframes.
Once inside, you can navigate through directories, run programs, view logs, or change settings, depending on the account permissions that is using Telnet. On many older network devices or embedded systems, Telnet access was (and in some cases still is) the primary method of administration.
Telnet can also be used to check if a remote port is responding. For example, you can connect to a mail server on port 25 to see if it accepts connections, or test if a web service is responding on port 80 or 443, although there are more specific tools available for this purpose today.
In local networks or very limited environments, where traffic does not go out to the Internet and access is controlled, it can still make sense to use it occasionally for rapid diagnostics and connectivity testingalways assuming the risk that all traffic is unencrypted.
Practical uses of Telnet in administration and support
One of the most common scenarios where Telnet still appears is in tasks of technical support and network administrationMany guides and manuals for older equipment or certain specialized devices still indicate "connect via Telnet" to review or modify the configuration.
For example, some monitoring devices or older cameras allow access via Telnet to view logs, traces, or internal valuesThis is something the technician may need to diagnose problems. In these cases, if your PC has the client disabled, you won't be able to follow the instructions until you enable it.
Telnet can also be used for check email servicesTest whether the SMTP port (25, 587, or 465, as applicable) is responding from a specific computer. If an email client cannot send messages, a simple Telnet test on the appropriate port helps rule out port blocking or firewall issues.
Another interesting use is the web connectivity verificationYou can try connecting via Telnet to port 80 (HTTP) or 443 (HTTPS) of a server to check for a transport-level response, even if you then manage the content with a browser.
In networks where services have been defined on custom ports (for example, internal applications that use unusual ports), Telnet allows Quickly check which ports are accessible from a point on the network, something very useful when adjusting a firewall or suspecting an intermediate block.
Telnet Security Risks and Issues
Telnet's biggest Achilles' heel is that It doesn't encrypt anything you send or receive.All traffic, including login credentials, travels in plain text. Anyone with access to the network traffic (for example, on a shared Wi-Fi network or a compromised network segment) can intercept and read everything. tools like Wireshark.
This opens the door to attacks of the type “Man-in-the-Middle” (MITM)In these attacks, an attacker positions themselves between the client and the server, captures credentials and commands, and could even inject malicious instructions. On public or uncontrolled networks, using Telnet is practically giving away your information.
In addition, Telnet does not have strong authentication mechanismsValidation is limited to plain text username and password, without certificates, robust public keys, or encryption layers to protect the initial exchange, something that newer protocols like SSH do offer.
For reasons like these, the use of Telnet on the open internet is considered obsolete and dangerous. Organizations like the IETF have been pushing for the use of other methods for years. encrypted and modern protocolsAnd in practice, any moderately serious environment should have already migrated to SSH or other secure solutions.
In corporate networks, even when Telnet is still used on legacy equipment, it is normal to encapsulate it within other security mechanisms, limit its access to internal network segments, and apply strict controls to minimize exposure to attacks.
Telnet in Windows 10 and Windows 11: what you can and can't do
In modern Windows, the Telnet client still exists, but It is disabled by defaultThis occurs in Windows 10, Windows 11, and many earlier desktop versions such as Windows 8 or Windows Vista.
What has changed is that, in the current desktop versions, Telnet server not includedIn other words, you can use your Windows computer as a client to connect to other computers or devices that have an active Telnet server, but you cannot turn your Windows 10 or 11 computer into a Telnet server for others to access.
In earlier versions such as Windows 7 or Windows Vista (and, of course, in the editions of Windows Server), it was possible to install and enable the Telnet server service, although today it is strongly discouraged in production environments open to the Internet.
Microsoft's decision to disable the client and remove the server by default in desktop systems is a direct response to the serious security limitations of the protocolIn this way, it will only be used by those who consciously activate it and, in theory, know what they are getting into.
If your goal is simply to perform connectivity tests, diagnose ports, or connect an older device within an internal network, this will suffice. activate the Telnet client on your Windows 10 or Windows 11 using one of the methods we will see below.
How to enable Telnet in Windows from the graphical interface
The most visual and easiest to remember method for many users is to activate it from within the device itself. Windows control panelThe process is very similar in Windows 10 and Windows 11, basically changing the way you access the option.
In Windows 10, you can open the Start menu and type "Control Panel" in the search bar. In Windows 11, you can also search directly for “Windows features” for a faster experience, but the classic Control Panel is still available and can be used.
Once inside the Control Panel, it is recommended to change the view to “large icons” or “small icons” To better find the options, then click on "Programs and Features," which is where the optional system components are managed.
In the left-hand column you will see the link "Enable or disable Windows features"Clicking it will open a window with a fairly extensive list of components that can be added or removed, including the Telnet client.
Wait a few seconds for the full list to load, and when it appears, look for the entry called “Telnet Client”Simply check the box, click "OK," and let Windows install the necessary files. In just a few moments, the Telnet client will be enabled on your computer.
How to enable Telnet in Windows using commands
If you prefer to get straight to the point and are comfortable using the terminal, you can activate the Telnet client from the Symbol of the system using a single instruction, which is practical if you have to do it on several computers or if you work with scripts.
First, open a Command Prompt window with administrator privileges. To do this, type `cmd` in the Start menu search bar. "Cmd"Right-click on “Command Prompt” and choose “Run as administrator”. Accept the User Account Control prompt if it appears.
With the console already open as administrator, enter the following command to enable the system feature that corresponds to the Windows Telnet client:
dism /online /enable-feature /featurename:TelnetClient
After pressing Enter, the DISM (Deployment Image Servicing and Management) tool will begin to add the optional component to the system. You will see a progress bar on the console, and when it finishes it will indicate that the operation has been completed successfully.
From that moment on, the command telnet It will be available in the system and you can use it from the same CMD window or from other consoles that you open from now on, such as Windows Terminal or PowerShell (by calling the corresponding executable).
Enabling and using Telnet in Windows 11
In Windows 11, the client works the same way, and the activation process hardly changes. In fact, it still relies on the same system. optional feature “Telnet Client” which already existed in previous versions of the operating system.
The quickest way to access the graphical option is to open the Start menu or the search box and type "characteristics"Among the results, select “Turn Windows features on or off,” which will take you directly to the window where the list of components is located.
Once there, you just have to locate the “Telnet Client”Select it and click "OK". Windows 11 will take a few seconds to search for and configure the necessary files, and when finished, the client will be available for use on any terminal.
Next, open the application Windows Terminal Or you can use the classic "Command Prompt" and launch telnet commands without installing anything additional. It's important to remember that you must enable the client on both the computer you're connecting from and, if applicable, on the other computer or device that will also act as a client for cross-testing.
If at any point you no longer need it or want to reduce the system's attack surface, you can return to the Windows features window and uncheck the box from “Telnet Client” so that it is disabled again.
Basic use of Telnet from the console
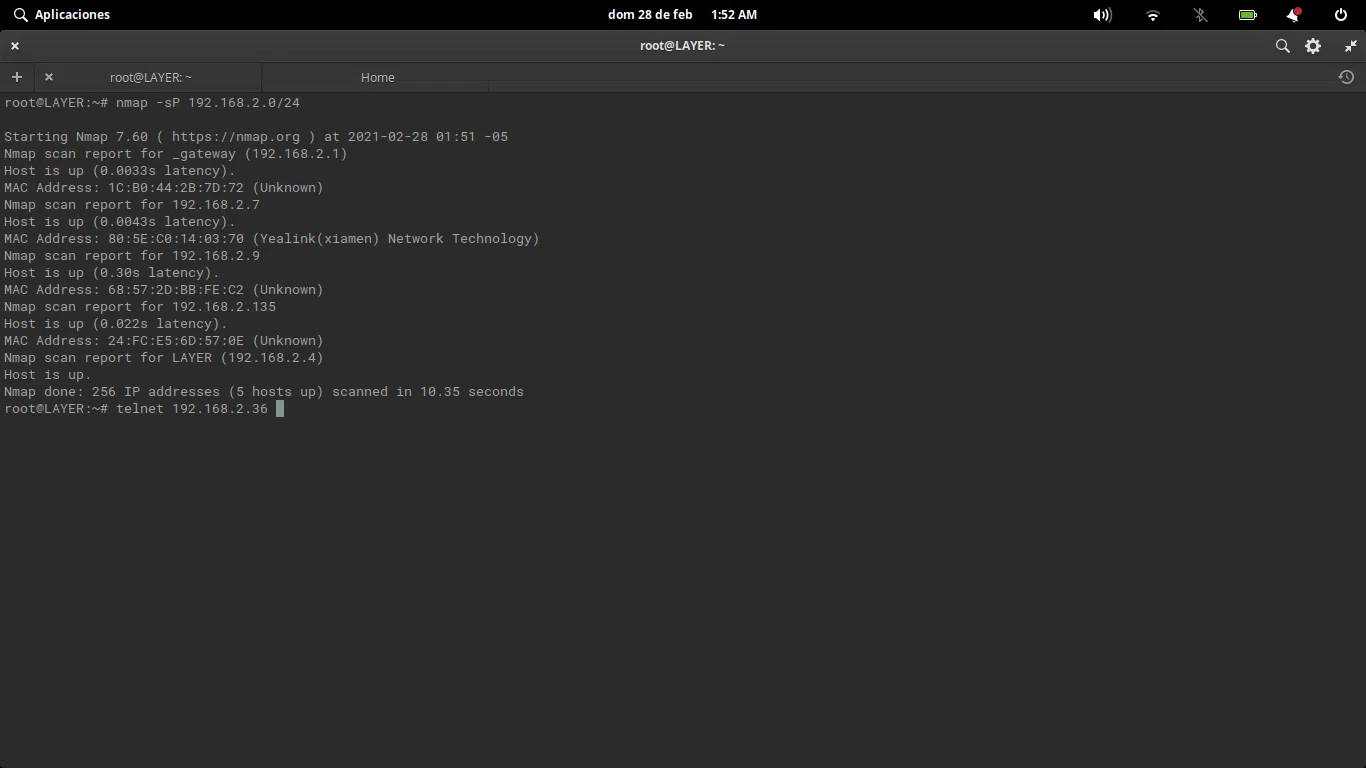
Once the client is activated, basic usage is very simple: the command is invoked telnet followed by the address of the computer you want to connect to, and optionally the port. This is always done from a terminal window or command prompt.
For example, to try to access a server by its domain name, you could type something like telnet domain-name.comIf the Telnet service is listening on the default port (23) and there are no blocks in place, the connection will be initiated.
If you want to test a specific port—such as that of a website or an internal service—you can also specify the port number, for example: telnet 192.168.1.50 80 to check if port 80 of that IP address is open from your computer.
When the port is closed or there is a block in the path, the connection usually fails, displaying an error. error message or it may hang until it times out. If it responds immediately, you'll know the port is accessible, although the service may then require other, more advanced tests.
In addition to the main command, Telnet has certain internal commands (such as display, set or mode) that allow you to view and adjust connection parameters, change the transfer mode and other advanced details, although most users will only need the basic connection and port testing functions.
Enable Telnet for testing between computers on the same network
In environments such as small office networks, POS or point-of-sale systems, Telnet is sometimes used to check if the communication between the server and the terminals It works correctly. A typical example is that of desktop applications that need to ensure that all computers can see the server.
The first step is the same: enable the Telnet client on the computers that will perform the tests, following any of the methods already explained (Control Panel or DISM command) on Windows machines.
Next, on the computer that acts as the application server, it is convenient to obtain your team name and IP address within the local network. To do this, open the command prompt (Start → Run → “cmd”) and in the window that opens type ipconfig /all; if you need more commands to manage networks and WiFi with commands, check out that guide.
With that information recorded, from another client computer on the same network you can launch commands such as telnet server-name port or telnet server-ip-port to check if the service you want to access is responding correctly within the LAN.
This type of testing helps to distinguish whether a problem is of network connectivity, blocked ports, or application settingsespecially in installations where several PCs depend on a single central server.
Modern and secure alternatives to Telnet
Since Telnet's biggest problem is its complete lack of encryption, over the years alternatives offering security, robust authentication and more features, while maintaining the ability to manage equipment remotely.
The most popular alternative is undoubtedly SSH (Secure Shell); to manage SSH connections from Windows you can use the Plink commandThis protocol works similarly in that it allows remote sessions to be opened in command mode, but all communication is end-to-end encrypted. It also supports authentication using public keys, encrypted tunnels, and secure file transfer (SFTP, SCP).
Another interesting option is Mosh (Mobile Shell)Mosh is specifically designed for unstable or mobile connections. Unlike Telnet or pure SSH, Mosh is able to maintain the session even when... whether you switch networks, lose your connection momentarily, or close your laptop.which makes it useful for administrators who are constantly on the move.
In the Windows ecosystem, a very common alternative to Telnet for remote access is RDP (Remote Desktop Protocol)Microsoft's Remote Desktop protocol is managed not through commands, but with a graphical interface, making it perfect for those who prefer to see the other computer's desktop as is, with better security than Telnet.
There is also Virtual Network Computing (VNC)It allows you to view and control another computer's desktop remotely. While not as robust in security as SSH on its own, it can be combined with SSH tunnels to add encryption, making it a useful complement for those who need graphical access to remote systems.
In environments where security is a priority, the general recommendation is to avoid Telnet except in strictly necessary cases and opt for SSH, RDP, or other encrypted protocolswhich allow for much more secure and flexible remote administration, adapted to current requirements.
Today, enabling Telnet in Windows makes sense mainly for spot tests, laboratory environments, or compatibility with older devicesAlways on controlled networks. For all other uses, it's best to rely on modern alternatives and keep Telnet safely tucked away in the toolbox only when absolutely necessary.

Passionate writer about the world of bytes and technology in general. I love sharing my knowledge through writing, and that's what I'll do on this blog, show you all the most interesting things about gadgets, software, hardware, tech trends, and more. My goal is to help you navigate the digital world in a simple and entertaining way.