- Control what's displayed and who viewed it with reviewer views and filters for noise-free review.
- Accept or reject changes individually or in bulk without losing track.
- Use comments, review panels, and document comparisons for clear collaboration.

Mastering track changes and comments in Word is one of those skills that saves you time, misunderstandings, and rework. If you collaborate with others or frequently review documents , this feature becomes your best ally for viewing, accepting, or rejecting changes and communicating directly within the document.
It may seem simple at first glance, but it's actually quite complex: display modes, filters by watermark type, reviewer selection, balloons, a revision panel, bulk or selective approval, and options to print or export without watermarks. In this guide, I'll explain step by step everything you need to activate and configure it to get the most out of it without getting lost along the way.
What is change control and how does it work?
Change tracking records every edit made to the file: insertions, deletions, formatting adjustments, and comments. Each modification is marked and associated with its author , making it easy to review proposals before finalizing them.
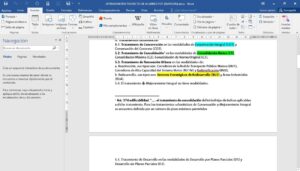
By default, Word highlights added text in color and underlines it, and marks deletions with strikethrough. Bubbles with contextual information about what has changed appear in the right margin ; hovering the pointer over the modification will show you expanded details of the specific change.
When multiple people collaborate, Word assigns different colors to each author to quickly distinguish who did what. You can also adjust whether the markup is displayed inline or in balloons , and decide which types of markup are shown: insertions and deletions, formatting, or even digital pen input.
If you prefer a consolidated view to see what's pending at a glance, open the Review Panel. This panel displays a compact list of open reviews and a counter with the total number, perfect for making sure you don't miss anything.
Activate, deactivate and basic options
To begin, go to the "Review" tab and turn on "Track Changes" within the "Tracking" group. From that moment on, Word will record any changes you make to the document.
Depending on the version, you can choose whether tracking is applied "To all users" or "Only to me." This distinction is useful when you want to limit the visibility of your own markup compared to the rest of the team.
Do you see the button grayed out and can't activate it? This is usually because the document is protected with editing restrictions. Check in "Review" > "Restrict Editing" if there are any active protections and disable them with the corresponding password to enable tracking.
To turn it off, return to the same "Track Changes" button and press it again. Note that turning off Track Changes stops new changes from being recorded , but existing marks remain visible until you accept or reject them.
Show or hide the markup as needed
Visualization is key to working comfortably. In "Show for Review," you'll find four modes: "Simple Revisions," "All Revisions," "No Revisions," and "Original." With "Simple Revisions," you'll see the final text with a marker in the margin to indicate changes; "All Revisions" activates the full view with all the details.
If you select "No revisions," Word hides markup and displays the document as it would appear if you accepted everything. The "Original" option restores the file to its state before any changes , ideal for comparing the text to how it looked before you started revising.
Within "Show Markup," you can further refine what you want to see: insert/delete, formatting, annotations made with a digital pen, and how they are displayed. Balloons allow you to move change information to the margin , while inline tracking integrates it into the body of the text; it's also possible to display only the formatting in balloons and keep the rest inline.
This fine-tuned markup control is perfect for reducing visual noise when there are many micro-edits. Activate only what's relevant at each review stage and work in a cleaner environment.
Filter brands by reviewer
In documents with multiple editors, seeing everything at once can be overwhelming. Word lets you filter by author from "Show Markup" > "Reviewers ," so you only see the changes from those you're interested in.
In the "Other authors" list, select or deselect the names as needed, or choose "All reviewers." This allows you to work with one reviewer first and then the next , maintaining control over the review workflow.
Accept and reject changes accurately
The "Changes" group within "Review" contains the tools for accepting or rejecting changes. Use "Previous" and "Next" to navigate through the changes one by one without missing any.
When you're faced with a specific change, you have several options: accept or reject that modification and move on to the next one, or do it without changing your mind if you prefer to stay where you are. The arrows next to the "Accept" and "Reject" options open up additional commands to help you work faster.
Among these actions are: "Accept and move on to the next," "Reject and move on to the next," and the contextual options "Accept insertion," "Accept deletion," or "Accept change" (or their rejection equivalent). These last ones are useful when you want to confirm a specific type of mark without moving forward in the list.
If you've applied filters to the view (for example, you're only showing it to one reviewer), "Accept all shown" is a lifesaver: it confirms what's visible at once and preserves what's hidden. Similarly, there's "Reject all shown" to discard what's visible without affecting the rest.
To close a review globally, use "Accept All" or "Reject All." You can even choose "Accept All and Stop Tracking" (or its rejection equivalent) to leave the document clean and with change tracking disabled in one fell swoop.
Don't forget that you can also make a one-off change by right-clicking or using the small floating toolbar that appears when you select the text. This method is convenient for quick decisions without having to navigate through the entire ribbon.
If you want to move between checkboxes without accepting or rejecting, use "Previous" or "Next." This allows you to review what's pending before making decisions , which is especially useful in dense documents.
Working with comments: adding, replying, and deleting
Comments are used to discuss questions, justify proposals, or ask for clarification without altering the content. Select the text and use "New Comment" in the "Review" tab to insert it; you can then reply in a thread to keep the conversation organized.
To navigate between comments, also use "Previous" and "Next." This will help you avoid leaving questions unanswered and allow you to close conversations as you resolve issues.
Time to clean up? Open the comment, tap the ellipsis (...) in the comment bubble, and choose "Delete thread" to delete it completely. This method deletes the comment and all its replies at once, leaving the page clear.
If you're going to share or print, it's a good idea to hide annotations and markup. Select "No review" under "Show for review" to hide them while exporting or printing, preventing internal comments or editing marks from being sent.
Compare documents and merge revisions
When working with two versions of the same file, the "Compare" tool is the most reliable way to identify and merge differences. Go to "Review" > "Compare" and select the original and revised documents from the dialog box (browse buttons).
After accepting, Word generates a third document with the comparison results. Differences are usually highlighted with underlining and color , and on the right you can simultaneously view the original and the revised version to get the full context.
If you don't see both source files on screen, open the "Compare" command menu and select "Show Source Document" > "Show Both." This allows you to work with all three views simultaneously and make informed decisions about what to keep.
Display settings: tick types and balloons
In addition to choosing the general display mode, you can go to the "Show Markup" menu to fine-tune what is displayed on the screen. Enable or disable "Inserts and Deletions," "Formatting," or "Pen Input" depending on what you need to review at any given time.
For formatting, choose between displaying changes in margin bubbles or inline. The "Show formatting only in bubbles" option reduces text clutter and keeps style changes grouped in the sidebar, making the content easier to read.
This set of filters is especially useful when the review is style-intensive (bold, italics, sizes). Separating formatting from content helps to decide on the essentials first and then refine the presentation.
Print and share without marks
The revision information can be printed, but it's not always necessary. Before printing, go to "File" > "Print" and, under "Settings," uncheck "Print document with revisions" if it's enabled.
Another option is to change the display mode to "No revision" before printing or exporting to PDF . This setting will give you the final version without mark-ups or comments , or you can choose "Original" to print the version before the editing process.
As a general rule, before sharing a final file, it's advisable to accept or reject all pending items and remove metadata and resolved comments . This will prevent you from inadvertently sending sensitive content or internal conversations .
Usage tips and good practices
Define clear roles: who proposes changes, who reviews them, and who gives final approval. The clearer the workflow, the less friction there will be and the faster you'll finalize the edit.
Don't select absolutely everything unless necessary. Overusing formatting changes or micro-adjustments can obscure the reading experience ; if the situation allows, leave out the minutiae and focus on what's important.
Start by reviewing the changes, rejecting anything that doesn't apply, and leave bulk acceptances for last. When you're finished, "Accept all shown" is very useful if you were filtering by reviewer or brand type.
Get used to the Review Pane to check that nothing is left open. That pending item counter is your safety net to ensure you don't forget details before finalizing the document.
When you close the review, turn off change tracking to avoid accidentally creating new markup. And if the button appears locked, check the "Restrict Editing" section for any password-protected settings you may need to disable.
Practical shortcuts to speed up your review
Right-click on a checkmark to accept or reject on the fly, without scrolling through the list. The floating mini toolbar also gives you essential actions with a single click.
If you're filtering by reviewer, combine "Accept all shown" with a final visual review. This quickly consolidates what you've already validated and avoids surprises with changes that weren't visible.
Switch between "Simple Reviews" for reading the text flow and "All Reviews" for the final decision-making phase. This view change reduces eye strain and improves overall document comprehension.
In long projects, use balloons for formatting and inline marks for content. This separation helps you prioritize editorial aspects and leave aesthetics for a second pass.
When version conflicts arise, the "Compare" tool with the source document view on the right is indispensable. Working with all three panels simultaneously speeds up resolution and reduces the risk of losing valid content.
Most common detailed steps (quick reference)
Turn change tracking on or off from "Review" > "Change Tracking". Choose whether to apply it to all users or only to yourself when the option is available.
To adjust what you see, go to "Display for Review" and toggle between the four modes. Configure "Display Marks" to select mark types and how they appear (in balloons or in a line).
Accept or reject changes from the "Changes" group: individually, by moving to the next group, or by staying in the same group. Use the drop-down lists to accept or reject everything shown , or the entire document if you are closing the review.
Filter by author from "Show Marks" > "Reviewers" to focus on a specific person. Select "All Reviewers" if you want to return to the full view with all participants.
For comments, insert with "New comment," reply in a thread, and delete from the ellipsis with "Delete thread." Hide comments and marks with "No review" when exporting or printing to prevent them from being shared with third parties.
If your "Track Changes" button is disabled, check "Restrict Editing." Remove the password protection if necessary to regain full control.
By working with a clear methodology, Word transforms from a simple editor into a powerful collaboration platform. Controlling the display, filtering by reviewer, and bulk approval options will give you speed and accuracy, while comments and version comparison complete the process for seamless, professional reviews.

Passionate writer about the world of bytes and technology in general. I love sharing my knowledge through writing, and that's what I'll do on this blog, show you all the most interesting things about gadgets, software, hardware, tech trends, and more. My goal is to help you navigate the digital world in a simple and entertaining way.