- Windows Hello improves security with biometrics and a PIN local to the device.
- Requires hardware compatible: IR camera for face and fingerprint sensor.
- The PIN is mandatory and acts as a backup when biometrics are unavailable.
- MFA and policies with Windows Hello for Business are required in businesses.
Windows Hello lets you log in to your PC quickly and securely using your face, fingerprint, or PIN , so you're not relying on passwords that are easily forgotten or leaked. It's a more personalized login experience because it validates something you have (your device) and something you are (biometrics), reducing the risk of intrusions.
In this step-by-step guide , you'll discover what Windows Hello is, its requirements, and how to set it up on Windows 11 and Windows 10 for facial recognition, fingerprint reader, and PIN. We also include compatibility tips, the initial setup flow (OOBE), extra features like Dynamic Lock, and the experience in enterprise environments with Windows Hello for Business —all explained in clear and easy-to-understand language.
What is Windows Hello and why it's worth using it?
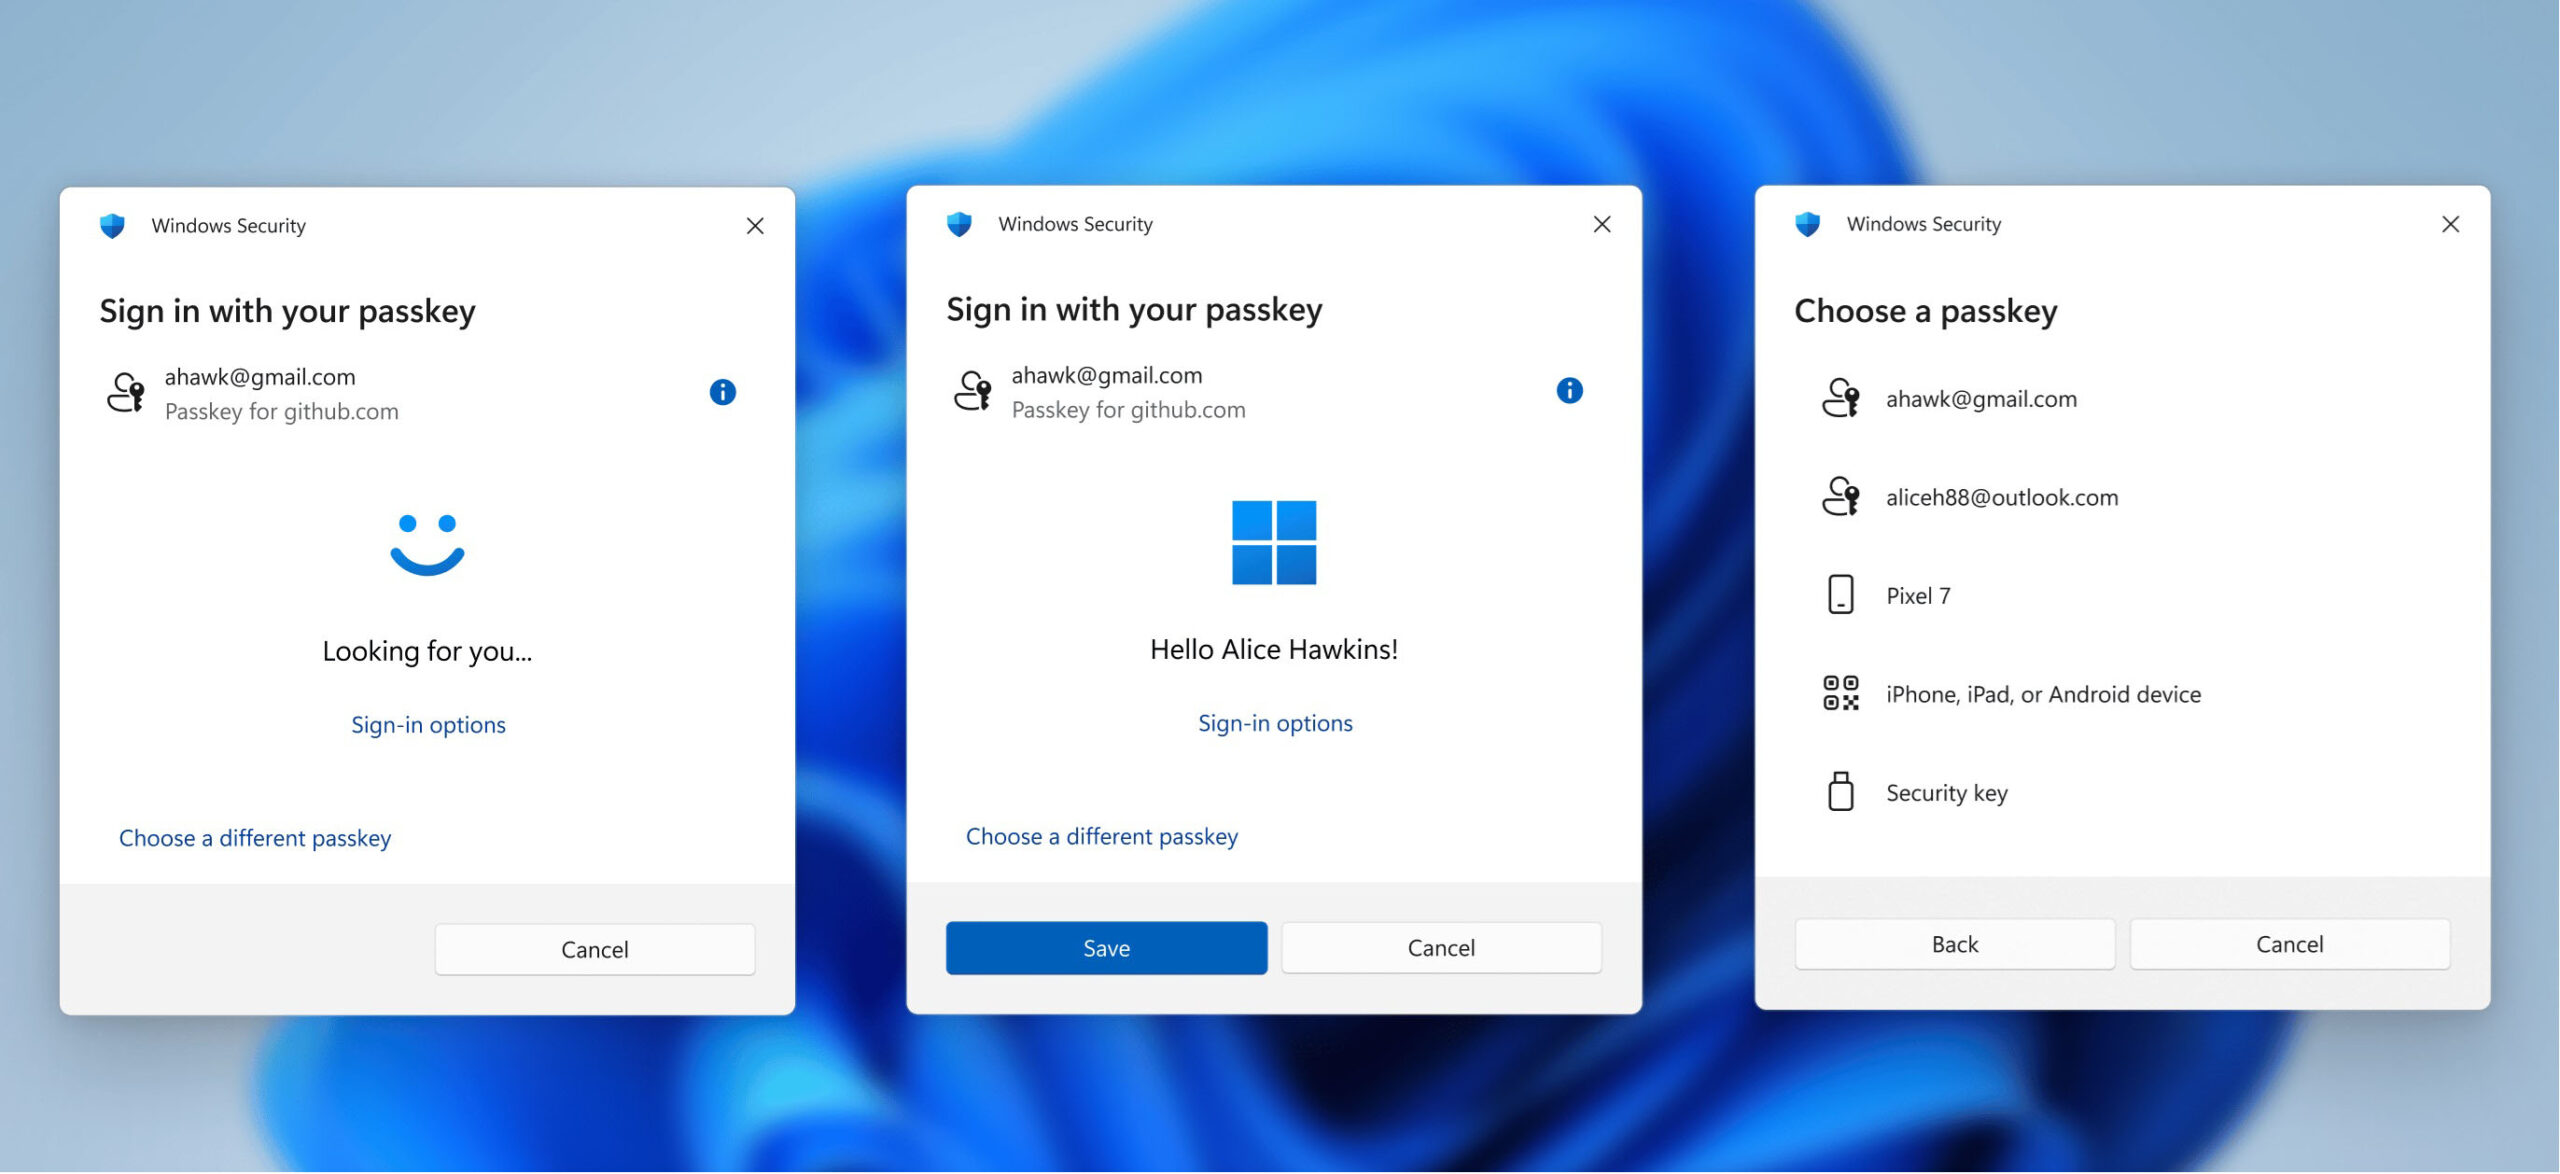
Windows Hello is Windows' biometric authentication platform that replaces passwords with more convenient and robust methods: facial recognition, fingerprint, or a PIN. These options simplify access and increase security , as the PIN is linked to the device and biometric verification is performed locally.
The Windows Hello PIN is an easy-to-remember code tied to a single device ; if someone sees it, they can only use it on that specific device and won't unlock your account on other computers. The device's security hardware ( TPM ) backs up this PIN, adding an extra layer of protection against theft or unauthorized changes.
Windows Hello facial recognition uses an infrared (IR) camera to accurately map your face , securely storing the template on the device itself. Thanks to IR, it can recognize you even in low light , making it easy to log in to all kinds of environments.
Biometric data is kept on the device and is not transferred off , both in home use and in Windows Hello for Business scenarios. This protects your privacy and reduces the attack surface , as validation occurs locally.
In addition to Windows login, the system can be integrated with compatible apps and services to authorize actions or purchases using your face or fingerprint. Password managers and cloud services offer support , so you don't have to constantly type passwords.
Requirements, compatibility and what you should check before
The options you see in Settings depend on your computer's hardware . If you don't see facial recognition, your PC most likely doesn't have an IR camera . Similarly, if you don't see the fingerprint option, your computer lacks a fingerprint sensor.
To check if you have an infrared camera , you can consult the technical specifications for your model on the manufacturer's website or open Device Manager and check the Cameras section . If you see an IR camera listed, your device is ready for facial recognition.
On laptops , the fingerprint reader is usually located near the touchpad or integrated into the power button . If you can't find it, check the manufacturer's documentation, as only some models include the scanner.
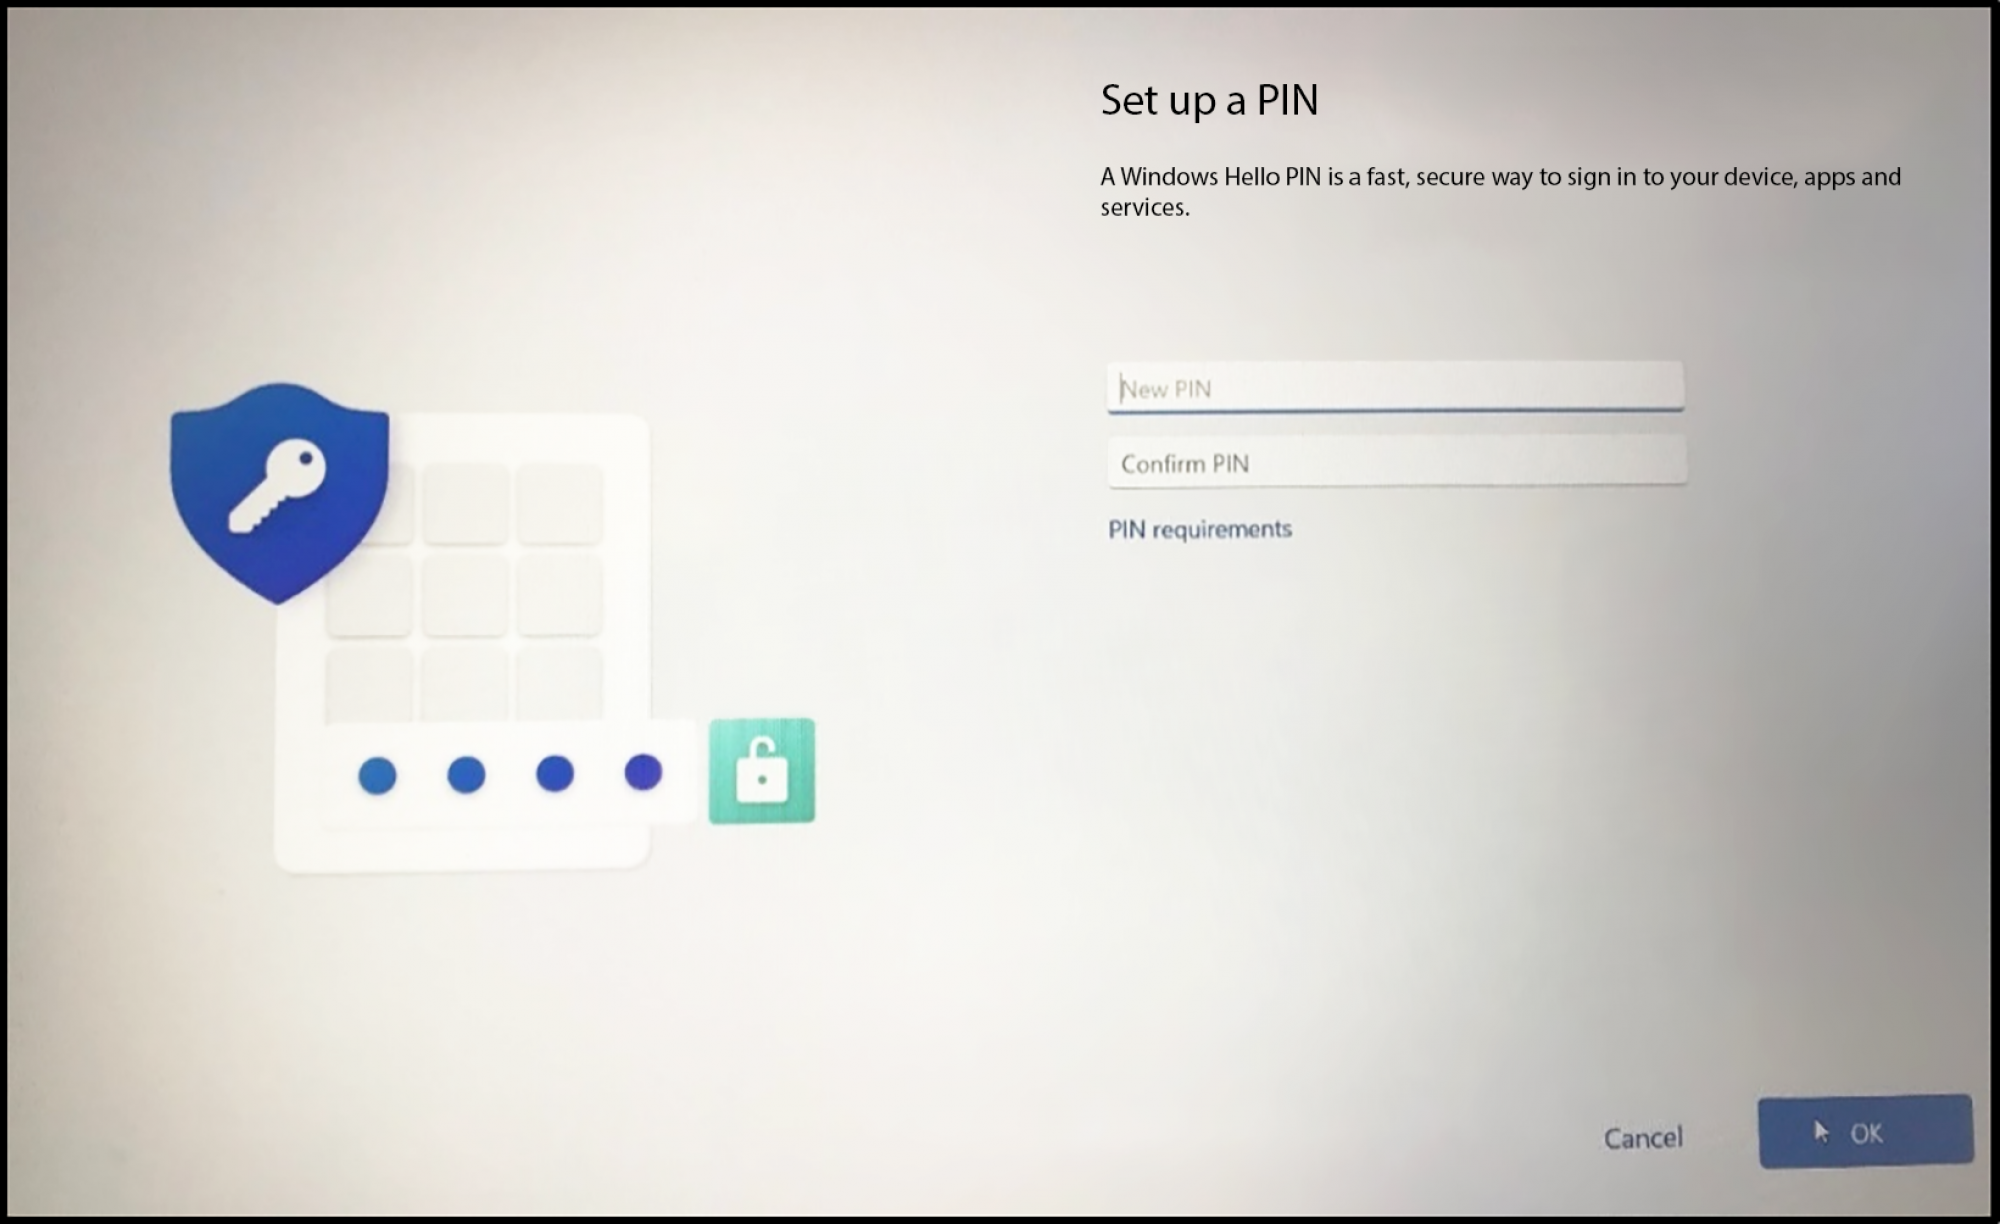
Setting up a PIN is a prerequisite for activating face or fingerprint authentication . If you don't already have one, Windows will prompt you to create it during the process. This PIN serves as a backup method when biometrics are unavailable or if you prefer not to use them temporarily.
In new Windows installations (OOBE), the system may ask you to set up a PIN before using the desktop . Although the PIN works offline, initial account setup after installation requires an internet connection . If you use computers from brands like Dell, you'll see this setting is present in product lines such as XPS, Inspiron, Vostro, OptiPlex, Alienware, and Latitude , among other product families and workstations.
How to set up Windows Hello: PIN, face, and fingerprint in Windows 11 and Windows 10
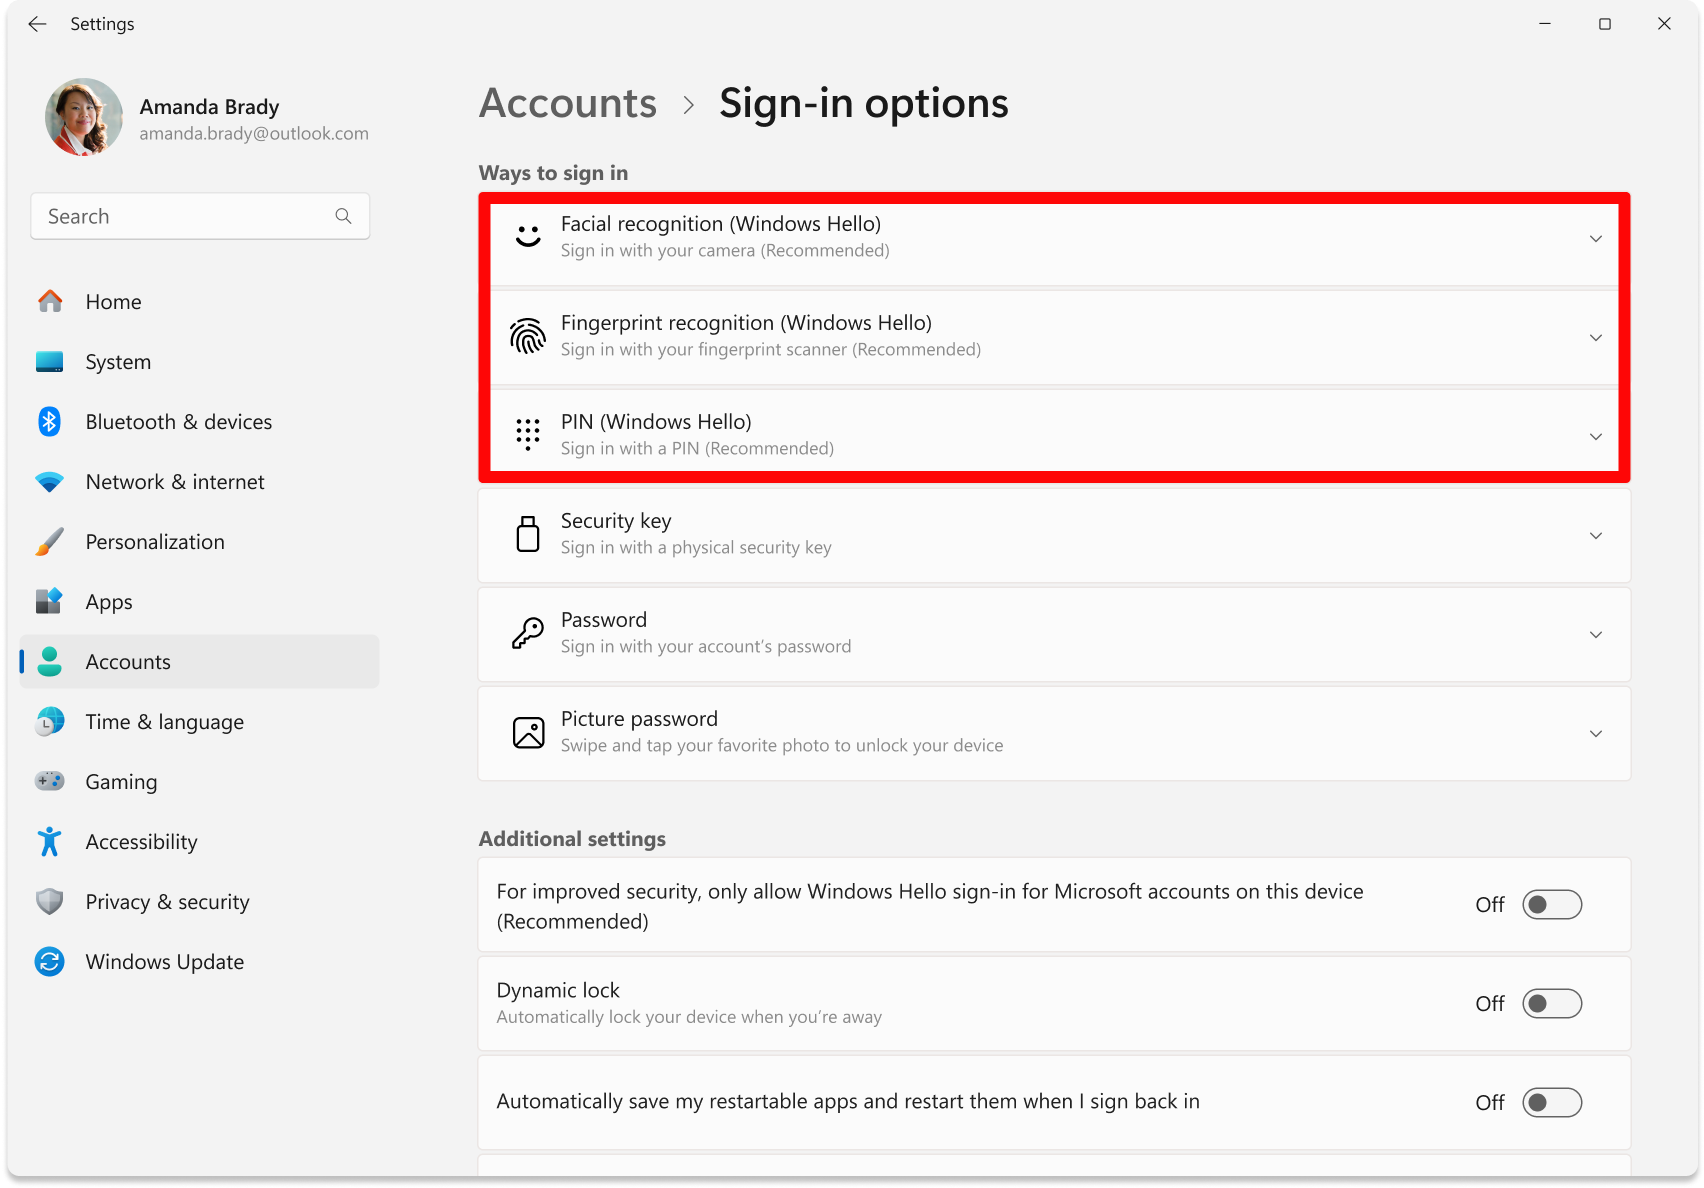
The main path is in Settings > Accounts > Sign-in options . You can also type "Sign-in options" in the Windows search bar to go directly there. From there, you'll see the sections for PIN, Face recognition (Windows Hello), and Fingerprint recognition (Windows Hello).
Create or add a Windows Hello PIN
- Open Settings and enters Accounts > Sign-in options.
- In the PIN (Windows Hello) section, click Add or ConfigureIf you already have a PIN, you can change it later.
- Confirm your identity with your account password when prompted to continue safely.
- Enter a new PIN and confirm itSome organizations allow PINs with letters and Symbols; at home, 4 or more digits are usually used.
- Save the changes and, if you wish, log out or restart to start using it..
The PIN is verified within the device's TPM chip and remains linked to that device , so it won't unlock your account on other computers . This mitigates the risk if someone were to physically see your PIN.
Set up facial recognition (Windows Hello)
- Go to Settings > Accounts > Sign-in options and choose Facial recognition (Windows Hello).
- Click Set Up and then Get Started to start the wizard.
- Enter your PIN to verify your identity and authorize biometric configuration.
- Look directly into the camera and frame your face within the frame. Try to have good lighting conditions so that the system captures precise features.
- Complete the process and press CloseFrom now on, you can log in by showing your face.
If you wear glasses, take advantage of the Improve recognition option to record another screenshot with and without glasses. This helps Windows recognize you more reliably in different situations.
If the face unlock option doesn't appear, your device doesn't have an IR camera and this method can't be activated. You can choose PIN or fingerprint if your model includes it.
Set up fingerprint recognition (Windows Hello)
- Open Settings > Accounts > Sign-in options and press Fingerprint recognition (Windows Hello).
- Select Configure and then Introduction to get started.
- Enter your PIN to verify yourself and enable biometric registration.
- Clean and dry the finger you are going to register y repeatedly place it over the sensor following the on-screen instructions.
- Use different angles to capture the edges of the footprint and achieve a more complete reading.
- Ends with Close and, if you wish, Add another finger with the Add a Finger option to have alternatives.
If fingerprint login is unavailable at any time (for example, wet finger or partially covered sensor), Windows will ask for your PIN as a backup method.
Remove, update, or improve your biometric data
From the same login options, you can remove your face or fingerprint if you no longer want to use them or if you wish to register them again. Look for the Remove option next to each method and confirm the change.
The Improve Face Recognition feature lets you record a second sample , for example, while wearing glasses if you initially set it up without them. This increases the system's accuracy under different conditions.
Dynamic Lock: Let your PC lock itself when you walk away
- Go to Settings > Accounts > Sign-in options and scroll to Dynamic lock.
- Check the box Allow Windows to automatically lock the device when I'm away to activate it
- If you get a warning that a paired phone or device is missinggo to Bluetooth and devices y pair your mobile phone via Bluetooth.
- When the paired phone goes out of Bluetooth range, your team It will automatically lock after a few moments.
This feature adds a practical layer of security when you get up from your desk and forget to lock your computer. It works especially well if you always have your phone with you.
Minor differences between Windows 11 and Windows 10
The setup process is virtually identical in Windows 11 and Windows 10 , with very similar menus and the same PIN requirement. In both systems, the wizard guides you through registering your face or fingerprint and allows you to improve recognition or add additional fingers.
Windows 10 displays the facial recognition process and then suggests setting a PIN if you haven't already , while Windows 11 typically asks for the PIN first and then enables biometrics . In both cases, the final login experience is equally seamless.
Login experience and daily use
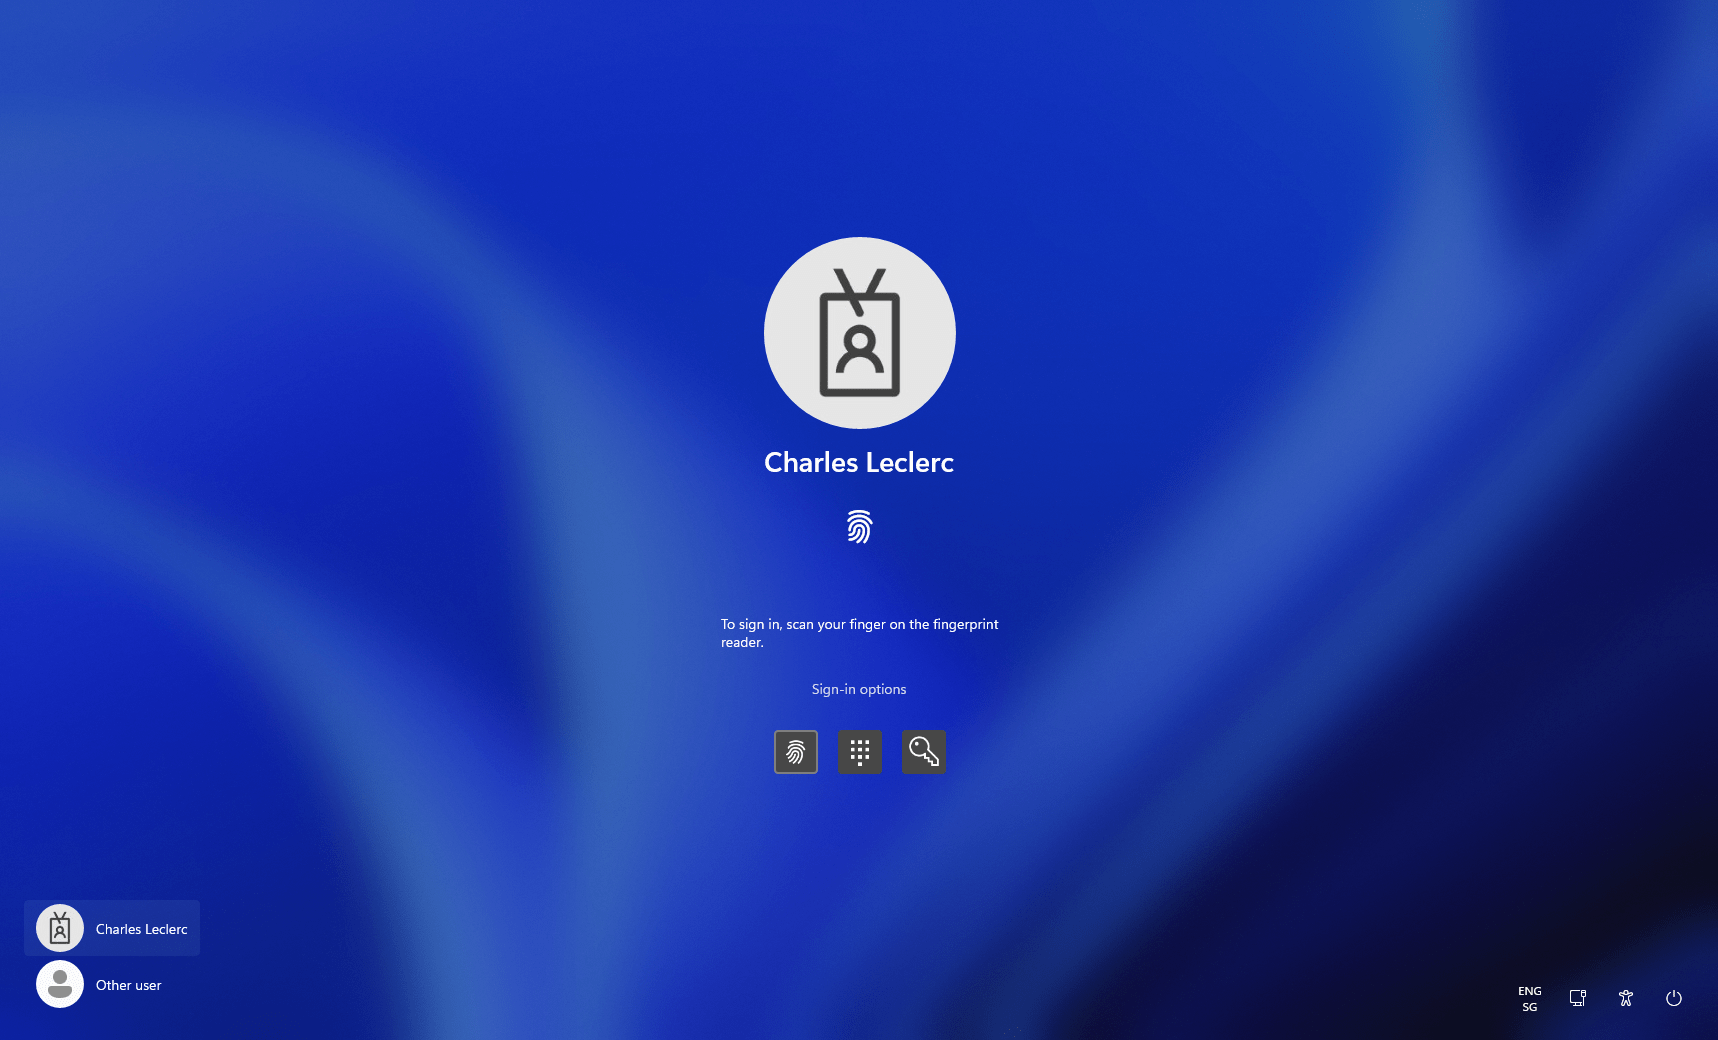
Once Windows Hello is set up, you can use your face, fingerprint, or PIN instead of your password when you turn on or unlock your PC. Facial recognition automatically activates the IR camera , and if it matches you, you'll log in to the desktop without needing to type anything.
If biometric reading fails temporarily or is unavailable (no compatible camera, wet finger, etc.), you can always use the PIN associated with the device for quick and secure access.
Remember that biometric data does not leave your device , and that the PIN remains the backup method for any sensitive operation related to your identity.
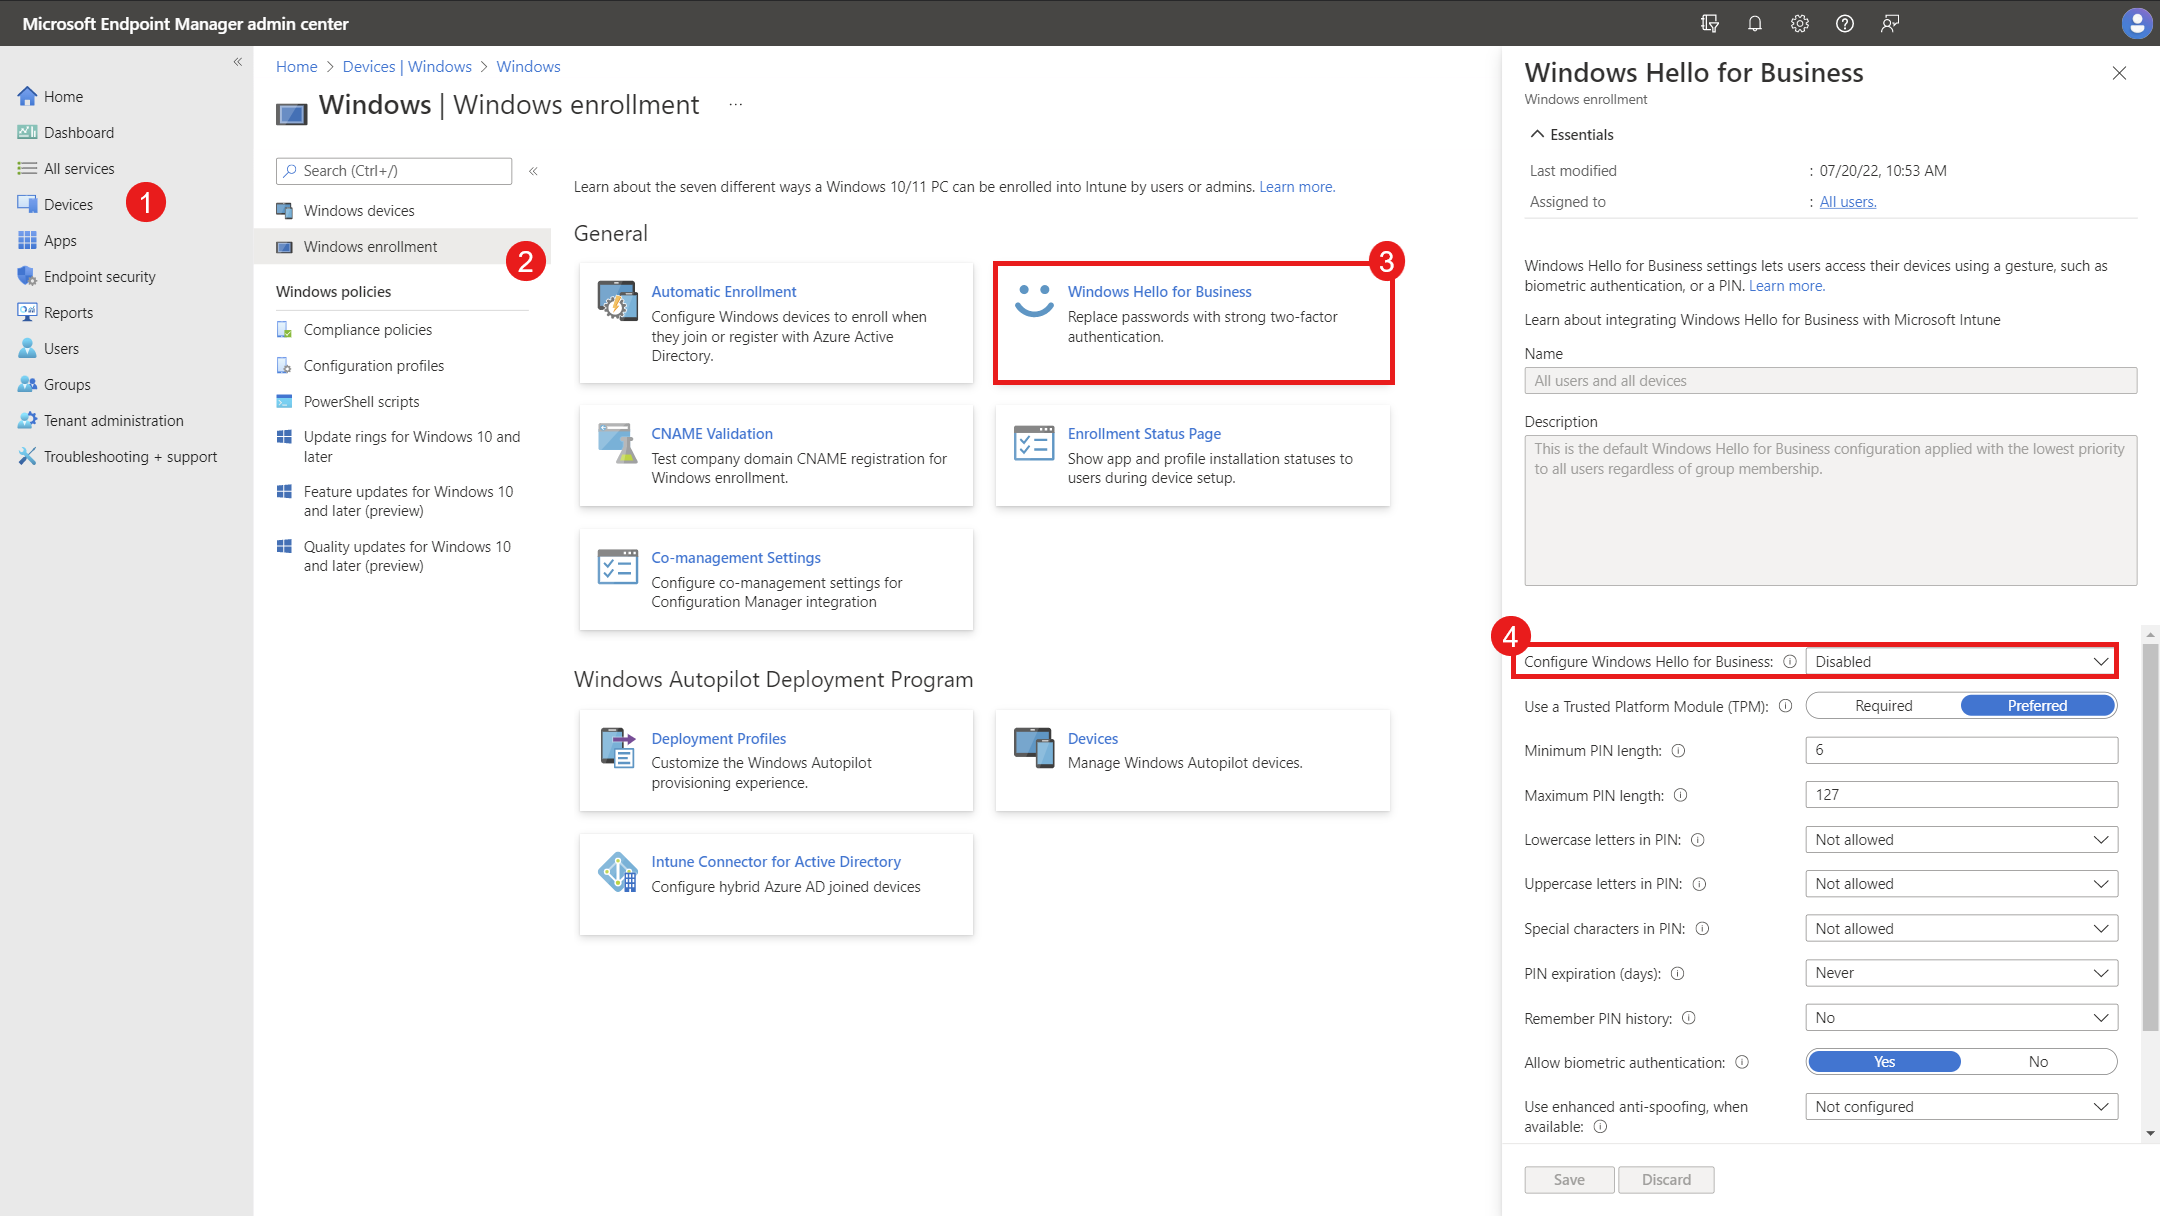
Windows Hello for Business: Enrollment, MFA, and Policies
In corporate environments, Windows Hello for Business requires multi-factor authentication (MFA) during provisioning . This means that in addition to the initial login , the user must validate a second factor to complete enrollment.
The typical enrollment flow after logging in with a password may include: prompting the user to register a biometric gesture (face or fingerprint), asking them to accept using Windows Hello with their organization account , and continuing with system contact using the configured MFA method . If there is an error or timeout, the user will be prompted to retry.
When MFA is successfully completed , the process prompts the user to create and validate a PIN , adhering to the complexity policies defined by the organization. After enrollment, the user uses their signature (PIN, face, or fingerprint) to unlock the device and access corporate resources that require it.
In the OOBE (first boot ) experience of a corporate device, the flow varies slightly : the computer joins Microsoft Entra ID (Azure AD) , the configuration is applied from Microsoft Intune , and, before granting access to the desktop , it is forced to enroll in Windows Hello with the established steps and policies.
This approach enhances security from day one , ensuring that each user has a unique, local unlock gesture . In daily use, login is virtually instantaneous , and policy compliance is maintained transparently.


Passionate writer about the world of bytes and technology in general. I love sharing my knowledge through writing, and that's what I'll do on this blog, show you all the most interesting things about gadgets, software, hardware, tech trends, and more. My goal is to help you navigate the digital world in a simple and entertaining way.