Some Call of Duty : Cold War players are encountering UI errors (27711, 6655, 100002, 70754, 0014, 27711, etc.) whenever they are inside the Cold War Zombie menu adjusting their equipment or preparing to start a new run.
This issue is reported to occur on both consoles (old and next generation) and PC. The truth is, the Call of Duty: Cold War UI bug is real, and here's how to fix it.
After researching this particular issue, it turns out that there are several different underlying causes that can trigger this error code with Call of Duty: Cold War. Here is a list of possible causes that could be causing this problem:
- Outdated version of COD Cold War: According to some affected users, this particular issue is often caused by a new game update being pushed while you were spending time within the menus. In this case, you should be able to fix the problem by closing the game before reopening it to force its update.
- Game file corruption: It turns out that this type of issue can also be caused by some kind of game file corruption that prevents the game from loading certain UI elements in Zombie mode. In this case, you should be able to fix the problem by repairing the game (on Battle.Net) or reinstalling it (on consoles).
- Outdated GPU drivers: In case you see this error code when launching the game on a PC that is more than equipped to render the game, you should start considering a driver issue. An outdated or partially incompatible driver can prevent your PC from running the game. In this case, you should update the GPU drivers using the proprietary update technology (Nvidia Experience or Adrenalin).
How to fix COD Cold War UI error
Now that you are more familiar with all the possible culprits that could be responsible for this problem, here is a list of verified methods that other affected users have successfully used to get the ultimate solution to this problem:
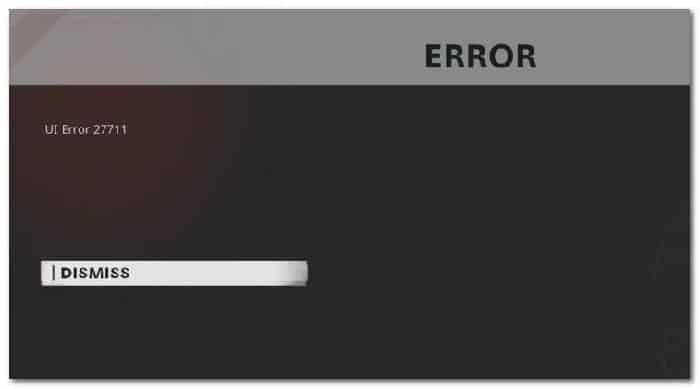
1.- Update to the latest version of COD Cold War
It turns out that you can expect to see this error code in those cases where the game developers have just released a new update for Zombie mode. In this case, the UI error occurs because there is a version mismatch that needs to be fixed.
If you find yourself in this scenario, the only way to resolve this issue is to force update the game. In most cases, it is enough to close the game and open it again (once you reopen it, you will be prompted to update to the latest available version).
Note: If Battle.net indicates that there is a pending update waiting to be installed, do not launch the game until the update operation is complete.
Also, if the game launcher prompts you to restart, do so first to see if the issue is resolved.
Note: On consoles, simply closing the game once will prompt you to install the update the next time you try to open it.
If you've already made sure you're running the latest version of the game, move on to the next potential solution below.
2.- Repair / reinstall COD Cold War
According to several affected users, the UI error can also be traced back to some sort of system file corruption that prevents the game from loading certain Zombie Mode UI elements. In this case, you should be able to resolve the 'UI error' entirely by repairing the game (on PC) or reinstalling it (on consoles).
Depending on the platform you are experiencing this particular issue on, please follow the appropriate sub-guide below to address a corruption issue by repairing or reinstalling Call of Duty: Cold War:
2.1 COD Cold War PC Repair (Battle.Net)
- Make sure Call of Duty Cold War is completely closed and that no background processes are running that may affect the repair operation.
- Then open the app Net and click on the tab Games from the menu at the top.
- With the tab Games selected, click on Call of Duty Cold War to select it.
- After doing this, go to the right section of the screen and click on Options > Scan and Repair.
- In the confirmation message, click Start scanning and wait for the operation to complete.
- Now you need to wait until the operation is completed, then restart your computer and launch Call of Duty Cold War once again to see if the same error code still appears when you try to access Zombie mode.
2.2 Reinstalling COD Cold War on PS4
- From the main menu on your PS4 console, go ahead and access the Library menu.
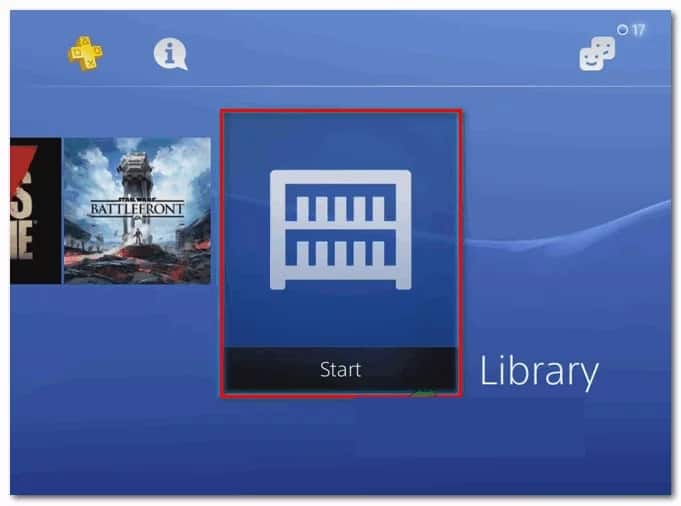
- Inside the menu Library from your console PS4, Select Games (in the left section of the screen), then move to the right section of the screen and locate the entry associated with Overwatch and press the button Options on your computer. .
- Next, from the context menu that just appeared, use the option Delete and confirm the operation when prompted.
- Once the uninstallation procedure is finally complete, restart your console, then reinstall Overwatch once again once the next startup is complete.
- After the game is reinstalled and all relevant updates are applied, run the game to see if the error ofla user interface It is already resolved.
2.3 Reinstalling COD Cold War on PS5
- Go to your main dashboard PS5, then select Call of Duty Cold War and press Options(on your DualSense controller) to bring up the context menu.
- In the context menu that just appeared, select Delete and confirm in the final confirmation message.
- Next, select all Call of Duty Cold War subcomponents before clicking OK and starting the uninstallation.
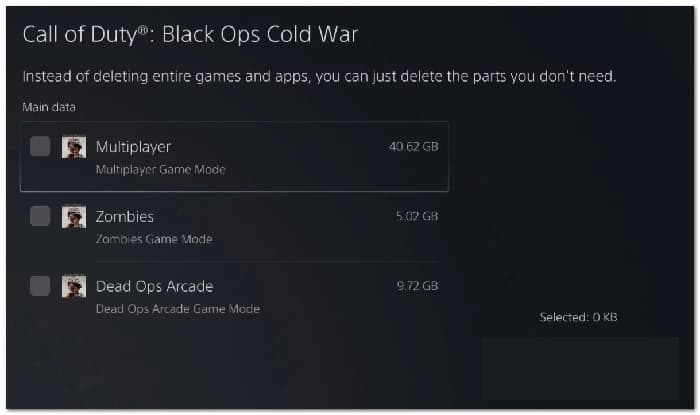
- Once the operation is complete, use the main dashboard once again to navigate to the far right of your item list and access the menu. game library.
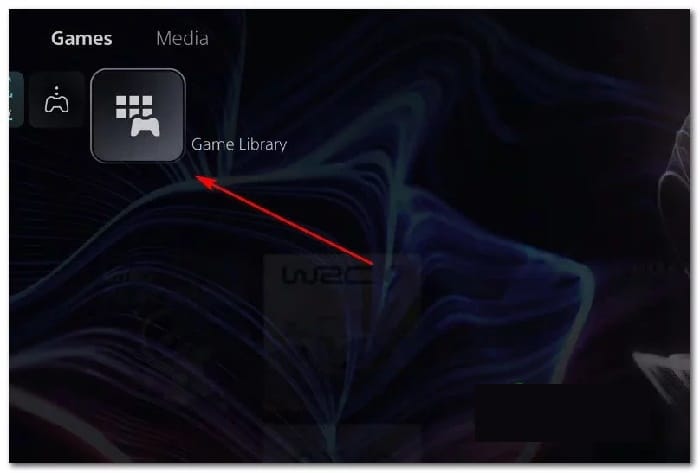
- After the library game list is fully loaded again, navigate to the game you just reinstalled, select it by pressing X, then press the button Download and wait for the operation to complete.
- When you see COD: Cold War downloading and installing again, please reboot your system before opening it for the first time and confirm if the UI error is now fixed.
2.4 Reinstalling COD Cold War on Xbox One / Xbox Series X
- From the main panel of your console Xbox One. Start by clicking on the Xbox button on your controller, then use the guide menu that just appeared to access the menu My games and applications.
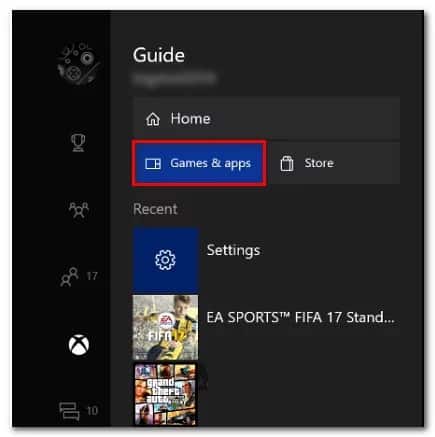
- Once you are inside the menu Games and applications, scroll down the list of installed applications and locate Call of Duty: Cold War.
- After discovering the list associated with Overwatch, press the button Home and choose manage game in the newly appeared context menu.
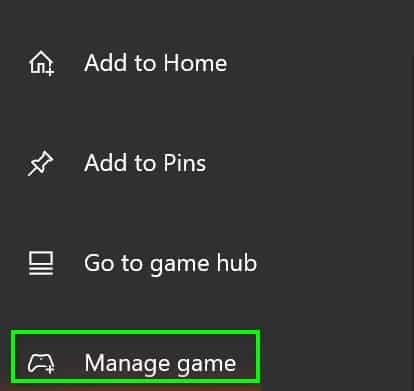
- Once you get to the next menu, select Uninstall all, Then follow the on-screen instructions to ensure you are uninstalling both the base COD: Cold War game + any add-ons you might have installed on top of the base installation.
- Note: Please do not worry about this operation affecting your character data, loadouts, etc. This data is safely stored in the cloud and will not be affected by the reinstallation procedure.
- Once the uninstallation is complete, restart your console and reinstall Call of Duty Cold War from scratch using your store listing.
- Please start the game again and see if the problem is now fixed.
3.- Update GPU drivers (PC only)
If you're encountering this UI error every time you try to launch the game (not even accessing the Zombie submenu), you're likely dealing with a driver issue.
In most cases, this is due to an outdated graphics card driver version or due to a partially incompatible GPU driver. In this case, you should be able to fix the problem by reinstalling all GPU drivers that you are actively using.
Note : The steps to update your GPU drivers will vary depending on the manufacturer. We've created two separate guides to help you uninstall and reinstall your GPU, whether you're using AMD or Nvidia graphics cards.
3.1 Reinstalling GPU drivers on AMD
- In your default browser, visit the AMD Cleanup Utility Download Page and download the latest version.
- Once the AMD Cleanup utility is downloaded, double-click its executable, then click Yes in the confirmation message to run the utility in safe mode and uninstall all AMD drivers.
Note: This utility is designed to completely remove all installed AMD drivers, registry entries, and driver store signatures, saving you the trouble of manually searching for and uninstalling all driver files. To ensure no leftover files are left behind, be sure to run the utility in Safe Mode.
- To start the utility, click on Accept in the second message to start the AMD cleaning process. After doing so, the utility will run in the background.
Note: During this operation, the screen may flicker or go black for a few seconds. This is perfectly normal as the screen components are being removed.
- Once you see the success message, click on Finalize, Then restart your computer manually if you are not prompted to do so automatically.
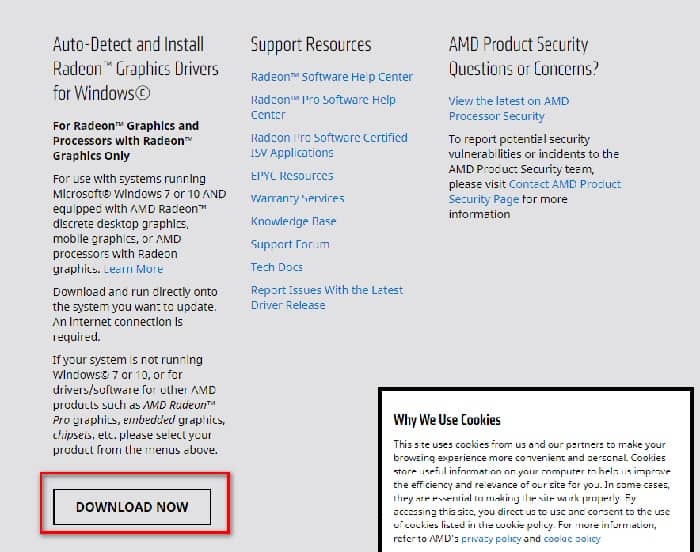
- When you see that the following sequence of Boot, please visit the GPU Auto Detection Page Download Page, then scroll down to Detect and install Radeon graphics drivers all with Windows and click download now.
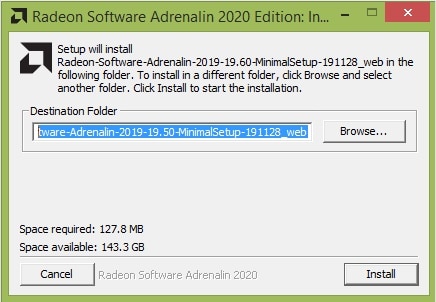
- After the executable has downloaded, open it by double-clicking and follow the on-screen instructions to install Radeon Adrenalin.
Note: You can change the default destination folder back if you wish, but it is not recommended.
- After the download is complete, the utility should automatically launch in an attempt to detect the AMD graphics product and the installed operating system.
- After the tool successfully detects your system configuration and the drivers you need, install the drivers packages. Recommended and optional drivers selecting both and clicking on
- Then accept the EULA After reviewing the terms and conditions, then click on Install To start the installation.
- After installing all necessary drivers, restart your computer and try launching the game once the next startup is complete to see if the issue is resolved.
3.2 Reinstalling GPU drivers on Nvidia
- Press the Windows key + R to open a dialog box Run. Then type the command Cpl inside the text box and press enter to open the menu Programs and files.
- Inside the menu Programs and Features, proceed by clicking on the tab Editor to sort the list of programs installed by your publisher.
- Search for posts published by NVIDIA Corporation and systematically right click on them and then press click uninstall all items using the context menu.
- Next, follow the on-screen instructions to complete the uninstallation process. Do this systematically for each driver that appears published by Nvidia Corporation.
- After uninstalling all Nvidia drivers, restart your computer and wait for the next startup to complete.
- Once the next startup is complete, visit the Nvidia GeForce download page and install GeForce Experience by clicking the button download now and following the instructions on the screen.
Note: This utility works by automatically finding and recommending the drivers you need to install according to your GPU model.
- Open Nvidia Experience, sign in with an account, and then install the recommended drivers from the page. Controladores.
- After installing all the recommended drivers, restart your computer once again and see if the issue is resolved at the next computer startup.
- Launch the game that was previously triggering the UI error and see if the issue is now resolved.
By implementing any of these methods you will be able to successfully fix the UI error. Try them out and let us know your experience in the comments section below. See you in our next post.

My name is Javier Chirinos and I am passionate about technology. Ever since I can remember, I have been interested in computers and video games, and that passion has turned into a job.
I have been publishing about technology and gadgets on the Internet for over 15 years, especially in mundobytes.com
I am also an expert in online marketing and communication and have knowledge in WordPress development.