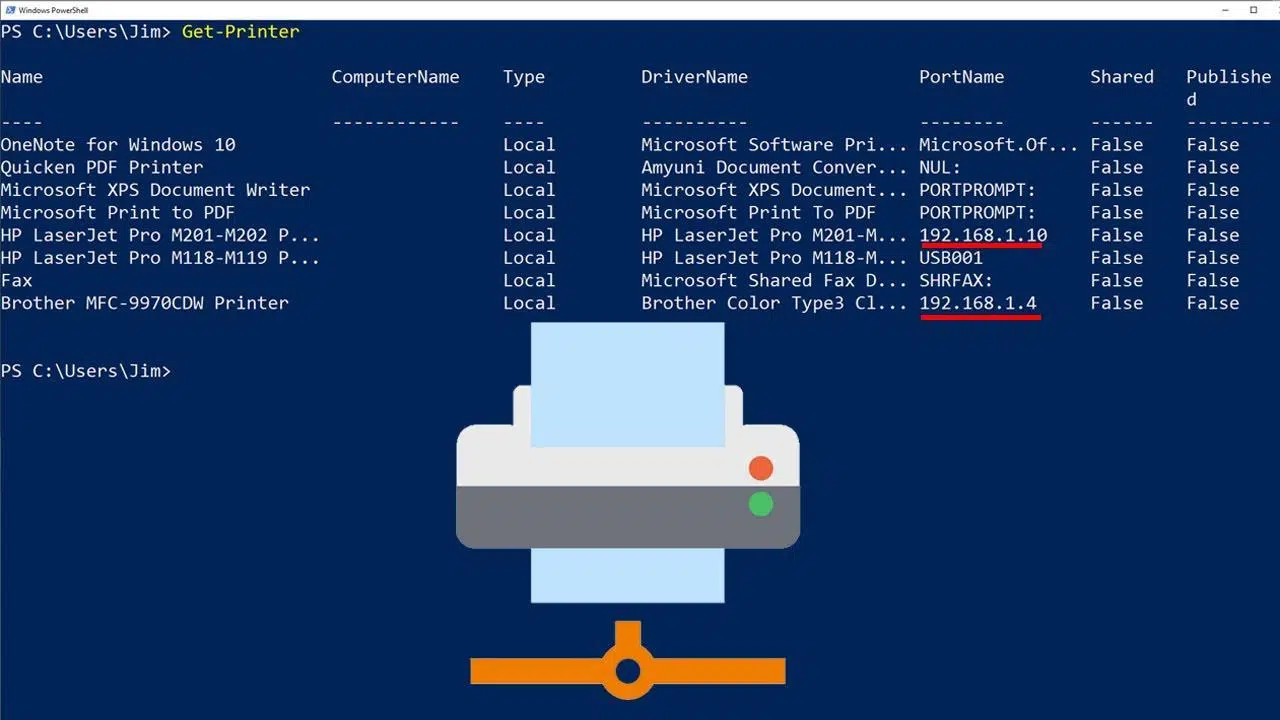
If you work in Windows and are comfortable using the command line, sooner or later you'll want to send documents to the printer without opening any graphical applications. Printing from CMD or PowerShell is fast, scriptable, and perfect for automating everyday tasks, from sending a TXT file to printing the output of a command directly to paper.
In this guide, I'll explain, with a practical approach, the two main methods: the PowerShell cmdlet Out-Printer and the Command Prompt 's PRINT command . You'll also see how to prepare files, filter content, avoid common errors, and chain commands to precisely control what you print. All of this is covered with syntax, examples, and important nuances you should know.
Options for printing in Windows from the console
In Windows, you have two complementary approaches. On the one hand, PowerShell offers the Out-Printer cmdlet to send the output of a command or object to the printer (either the default or a specific one). It's straightforward, works via a pipeline, and inherits the printer's default settings , without exposing formatting controls within the cmdlet itself.
On the other hand, the Command Prompt (CMD) retains the classic PRINT command for text, with the option to choose the device. It's a veteran utility focused on text files , useful when you don't need the full power of PowerShell or when working with batch scripts.
One key point: Out-Printer only exists in Windows (not in macOS or Linux ). If you use PowerShell on other platforms, this cmdlet is not available , so you'll have to look for alternatives specific to that environment, such as printing from the terminal in Linux.
In both cases, if you don't specify a printer, the system default will be used. When you need to point to a network printer, you can specify its UNC name with Out-Printer and, in CMD, the corresponding device name with PRINT.
Out-Printer in detail: syntax, parameters and behavior
This is the cmdlet skeleton for your reference. Note the optional parameters Name and InputObject , and that it supports the standard PowerShell CommonParameters.
Out-Printer <String>] Brief description of behavior: Out-Printer sends output to the default printer or to another printer if you specify one. It does not offer formatting options or print job controls ; the default settings of the selected printer are used.
- Consumer Relations Platform:Windows.
- Format: Cmdlets with the Out verb do not format; they render and output to a presentation destination.
- Channeled output: emits no objects. If you pipe its output to Get-Member, you'll see there's nothing to examine.
Main parameters: they are few and simple, which speeds up their use in scripts and in the interactive console.
- -Name (alias: PrinterName). Type: String, Position: 0, Optional. Indicates the destination printer.
- -InputObject. Type: PSObject. Accepts piped values, optional. This is the object sent to the printer.
- CommonParameters: -Debug, -ErrorAction, -ErrorVariable, -InformationAction, -InformationVariable, -OutBuffer, -OutVariable, -PipelineVariable, -ProgressAction, -Verbose, -WarningAction, -WarningVariable.
Inputs and outputs: You can pipe any PSObject as input , and the cmdlet returns nothing (OutputType: None). This makes it ideal as the endpoint of a pipeline.
Operational notes: When Out-Printer receives a "raw" object, PowerShell will automatically insert a formatting cmdlet before rendering it. This ensures that what reaches the printer has a text representation , even if you don't manually specify the format.
Practical examples with Out-Printer
Printing a file to the default printer even if Out-Printer doesn't have -Path is very straightforward: just read the file and pipe it.
Get-Content -Path ./readme.txt | Out-PrinterIn this pattern, Get-Content extracts the content and Out-Printer sends it to the default printer. Use it for TXT files, logs , or output that is already plain text.
Printing a string to a remote printer (UNC) lets you quickly test connectivity and the print queue. It's ideal for verifying that the printer's shared name is correct.
"Hello, World" | Out-Printer -Name "\\Server01\Prt-6B Color"If you want to print the complete help for a cmdlet, you can dump the contents of Get-Help and send it as an object. The key is to use -InputObject with the previously retrieved value.
$H = Get-Help -Full Get-CimInstance
Out-Printer -InputObject $H
Remember that Out-Printer does not control printing options (pages, tray, duplex, etc.). The printer's default settings will always be applied , so any fine-tuning will have to be done on the device itself or with specific tools other than the cmdlet.
Print from the Command Prompt with PRINT
The PRINT command is native to Windows 10/11 and modern editions of Windows Server. Its purpose is simple: to print text files from CMD.
PRINT archivo ]The /D option specifies the printing device. If you don't specify one, it will use the default printer . It's a perfect utility if your workflow is still batch-based and you work with pure TXT files.
A basic example of sending a .txt file to the default device would be as simple as: opening CMD where the file is located and typing PRINT filename.txt . If you are using a mapped printer or a specific device name, add it with /D.
Prepare and select what to print with file cmdlets
Before printing, it's a good idea to decide which files to queue, move them to a temporary folder, or filter by criteria. PowerShell shines here with its file system cmdlets.
Listing contents with Get-ChildItem (aliases: gci, dir, ls) and showing hidden or system files is immediate with -Force. Add -Recurse if you want to delve deeper into subfolders.
Get-ChildItem -Path C:\ -Force
Get-ChildItem -Path C:\ -Force -Recurse
If you're looking for more sophisticated filtering, combine gci with Where-Object to base your filtering on properties like date and size. This pattern is ideal for generating printable inventory listings.
Get-ChildItem -Path $env:ProgramFiles -Recurse -Include *.exe |
  Where-Object { ($_.LastWriteTime -gt '2005-10-01') -and ($_.Length -ge 1mb) -and ($_.Length -le 10mb) }
Copying or versioning working files is a breeze with Copy-Item, and you can check for previous existence with Test-Path. Use -Force to overwrite read-only destinations.
if (Test-Path -Path $PROFILE) {
  Copy-Item -Path $PROFILE -Destination $($PROFILE -replace 'ps1$', 'bak') -Force
}
To prepare print folder structures, create empty directories and files with New-Item. Differentiate between -ItemType Directory and -ItemType File depending on your needs.
New-Item -Path 'C:\temp\Nueva Carpeta' -ItemType Directory
New-Item -Path 'C:\temp\Nueva Carpeta\listado.txt' -ItemType File
If you need to clean intermediate folders, Remove-Item deletes files or directories. When there is content and you want to avoid confirmations, add -Recurse.
Remove-Item -Path C:\temp\ColaTemporal -RecurseYou can even map a folder as a temporary logical drive with New-PSDrive to shorten paths during the process. With -Persist, only remote paths are supported and integrated into Explorer.
New-PSDrive -Name P -Root $env:ProgramFiles -PSProvider FileSystemRead, write, and combine texts before printing
Get-Content reads text files as an array (each line is an element). This makes it very convenient to preview, filter, or transform before printing.
$lineas = Get-Content -Path .\listado.txt
$lineas.Length
To generate content on the fly, Write-Output (aka: write, echo) and redirection are your allies. Redirect with > to create/overwrite and with >> to append.
Write-Output "Encabezado del informe" > informe.txt
Write-Output "Nueva línea" >> informe.txt
If you want to clone content, you can use Get-Content with redirection instead of Copy-Item. It works well with patterns and wildcards when consolidating text.
Get-Content benjamin.txt > benjamin2.txt
Get-Content *.log > combinado.log
Beware of a classic mistake: redirecting Get-Content *.txt to a file that also ends in .txt in the same directory can create an endless loop because the destination file becomes the source. You can abort with Control-C, but it's better to be safe than sorry.
Get-Content *.txt > gran.txt # Riesgo: gran.txt coincide con *.txtThe clean solution is to exclude the destination file using the -Exclude parameter. This prevents your own output from being included in the input set.
Get-Content *.txt -Exclude gran.txt > gran.txtUse wildcards to your advantage to select exactly what you need (for example, ben*.txt). A well-tuned selection reduces surprises and speeds up your workflow.
Quick search and count before sending to the printer
To locate specific fragments across multiple files, `Select-String` (alias: `sls`) is like having `grep` integrated into PowerShell. Perfect for validating that the text to be printed contains what you expect.
Select-String "existencia única" *.txtAnd if you need quick metrics, pipe to Measure-Object (measure) to count lines, words, and characters. Add -IgnoreWhiteSpace if you want to subtract whitespace.
Get-Content benjamin.txt | Measure-Object -Line -Word -Character
Get-Content *.txt | Measure-Object -Line -Word -Character -IgnoreWhiteSpace
This pre-check saves paper and time, especially for large print runs. Measure, check, and then print with Out-Printer or PRINT, knowing that what comes out of the printer is exactly what you need.
Typical workflows for printing from the console
Scenario 1: Print a TXT file generated by a process. It reads, checks a couple of lines, and sends to the default printer.
Get-Content .\resultado.txt -TotalCount 10
Get-Content .\resultado.txt | Out-Printer
Scenario 2: Send a label or header to a shared printer. Ideal for checks or network printers.
"Etiqueta: Pedido 12345" | Out-Printer -Name "\\SrvPrint\HP-Laser"Scenario 3: Consolidate multiple logs for the day and then print. Avoid the output loop with -Exclude and filter by date pattern if necessary.
Get-Content .\logs\*.2025-09-*.log -Exclude resumen.log > resumen.log
Get-Content resumen.log | Out-Printer
Scenario 4 (CMD): Quickly print a TXT file from a batch script . Useful when PowerShell is not part of the workflow (see Opening PRN files ).
PRINT /D:PRN01 C:\reportes\hoy.txtRelated navigation and productivity tips
To move between folders: Set-Location (sl, cd) and tab completion save you typing and errors. You can combine relative paths like ..\.. to jump branches.
If you frequently switch between two locations, Push-Location (pushd) and Pop-Location (popd) are very convenient: you save the current location on the stack and return with a single command.
Do you prefer to see something in Explorer? Launch `explorer .` from the current folder. This way you can visually verify what you're going to print from the console.
Renaming or moving files with Move-Item (mv) and copying them with Copy-Item (cp) is very fast. Be careful when using rm (Remove-Item): it permanently deletes files , not just to the Recycle Bin.
If you're working with lists (for example, computers or IPs) in a TXT file, Get-Content returns an array; you can use this as the basis for generating a report and sending it to Out-Printer. Pipelining turns these flows into concise and repeatable steps.
Built-in help and useful parameters
Get-Help shows you the syntax and parameters of any cmdlet. If you add -Online, it will open detailed help in your browser . This is the fastest way to clarify specific questions.
Get-Help Out-Printer
Get-Help Get-Content -Online
In the case of Get-Content, -TotalCount lets you read only the first X lines and -Tail the last X. They are perfect for checking a section before printing and avoiding surprises on paper.
Get-Content .\informe.txt -TotalCount 10
Get-Content .\informe.txt -Tail 10
You've already seen that `-Exclude` is key to preventing the destination file from becoming the source during consolidation. Keep this in mind when working with wildcards and redirects.
Limitations, warnings and good practices
Out-Printer has no formatting, margin, or tray controls; it accepts the printer's default settings . If you need more control, look for manufacturer-specific tools or generate a PDF in the desired format and then print it (for example, print as PDF in Windows 11 ).
Out-Printer does not output to the pipeline, by design. Do not attempt to chain its output to Get-Member : there will be no object to examine. Use it as the final step in the pipeline.
If you're going to print large volumes of text, check the size and number of lines beforehand with Measure-Object. A 5-second check can save a lot of pages and ink.
When using PRINT in CMD, remember its focus on text files. For non-textual content, PowerShell and Out-Printer offer more flexible rendering thanks to pipelines and pre-conversion of objects to text.
And if something keeps "thinking" for too long (for example, a loop due to a poorly designed redirect), interrupt with Control-C and review the commands. Avoid using the same input pattern as the output filename in the same directory.
This tutorial prepares you to print confidently from the command line: you'll learn Out-Printer and PRINT, how to prepare and filter files, measure content, search for strings, and avoid pitfalls like redirect loops. With these tools, you can build robust, repeatable, and fast workflows that send exactly what you want, to the printer you want, without relying on the graphical interface.

Passionate writer about the world of bytes and technology in general. I love sharing my knowledge through writing, and that's what I'll do on this blog, show you all the most interesting things about gadgets, software, hardware, tech trends, and more. My goal is to help you navigate the digital world in a simple and entertaining way.