- Jump Lists bring together recent and frequently used files and tasks by app on the taskbar and Start menu.
- You can turn recents on/off, pin key items, and clear history from Settings or manually.
- The item limit can be expanded via registration with the JumpListItems_Maximum key in the user profile.
- WPF developers have access to the JumpList class to define JumpTask/JumpPath, categories, and events.
Windows has offered quick access to your most frequently used items for years, and Jump Lists are the most direct way to reach documents, folders, websites, or actions without opening the application first. This feature debuted in Windows 7 and remains available in Windows 10 and Windows 11 , refined and integrated into both the taskbar and the Start menu.
In this article you will learn exactly what Jump Lists are, how they are displayed, how to activate or deactivate them, pin items to fix them, increase the maximum number of items and clear them when needed, plus a practical troubleshooting section and a bonus for developers who want to build their own Jump Lists in WPF applications.
What are Jump Lists and where do they appear?
Jump Lists are context menus linked to each program pinned to the taskbar or present in the Start menu, showing recently or frequently opened items and, in many cases, specific tasks of the program itself.
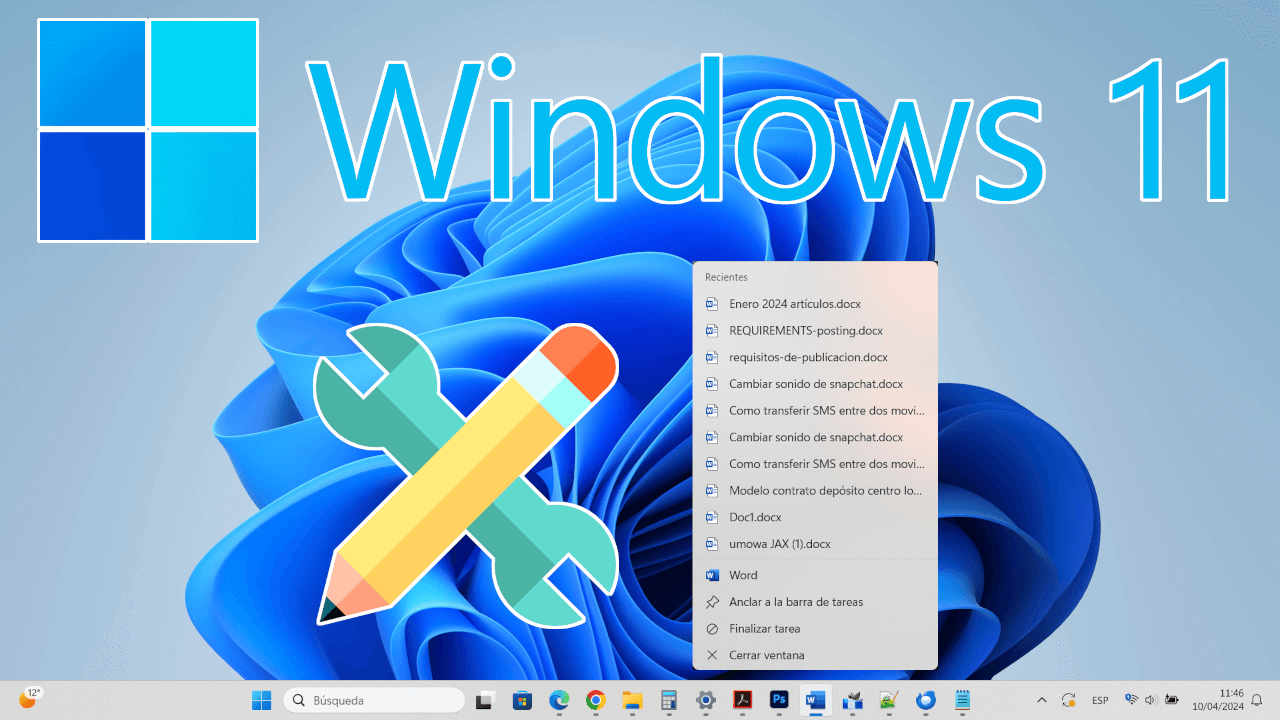
They open very easily: right-click on an app's icon in the taskbar or its entry in the Start menu, and you'll see a cascading list of documents, sites, or action shortcuts. For example, in browsers, you'll often see "New Window" or "New Incognito Window" next to frequently visited pages.
In addition to files and links, Jump Lists can include application-specific actions ("tasks"), such as opening a specific profile, launching a feature, or accessing settings. Microsoft introduced this feature in Windows 7, and it remains fully supported in Windows 10 and Windows 11.
How to open and use Jump Lists correctly
In the taskbar, simply right-click on the pinned application icon to open its Jump List, where you'll see categories like "Recent," "Frequent," "Pinned," and sometimes "Tasks." Hovering your mouse over each item will reveal a pin icon to pin or unpin it.
In the Windows 11 and 10 Start menu, Jump Lists appear when you right-click on a program in the "All apps" list, displaying options and frequently used items. In some cases, the Jump List is presented in a "cascading" fashion, with submenus that group actions (for example, the Alarms and Clock app offers shortcuts to specific functions).
To delve deeper into managing these lists, you can also learn how to customize shortcuts and the taskbar in Windows 11 to further optimize your browsing experience and quick access to the features you use most.
Turn recent items on or off in Jump Lists
In Windows 11, this feature is usually enabled by default, but you can control it from Settings: Press Windows + I, go to "Personalization," and then to "Startup. " Turn "Show recently opened items in Start, File Explorer, and Shortcut Lists" on or off.
In Windows 10, go to Settings > Personalization > Start and uncheck “Show recently opened items in Jump Lists on Start or taskbar” to disable it (and check it again to enable it), which also serves as a quick way to clear the history of the lists.
If these options are disabled, the current lists are deleted, and when they are re-enabled, they will be regenerated based on your recent usage as you open files and sites from related applications.

Pin and unpin items in the Jump List on the taskbar
To ensure a file, folder, or website remains accessible in the Jump List, pin it so it doesn't "disappear" over time , even if it's no longer among the most recent items. To do this:
- Right-click the app icon in the taskbar to open its Jump List, Place the cursor over the desired element and press the pin on the right to pin it.
- To unpin it, repeat the process and press the pin again, This way the item will return to the dynamic list of recent or frequent items depending on your usage.
This feature is very useful when working with certain documents or ongoing projects, as it prevents them from disappearing due to other files opened during the day.
Manage pinned items from the Start menu
The Start menu also allows you to manage items in Jump Lists, although they are only visible in the full list of applications (“All applications”).
- Open Start, go to “All apps”, locate the program, Right-click and, in its Jump List, use the pin to pin or unpin the item you want.
The process is consistent with that of the taskbar, allowing you to maintain the organization of quick access points uniformly.
How many items does a Jump List display? Increase the limit with Registration.
Windows sets a maximum limit on the number of visible items in each Jump List, which can vary depending on the system version and even build. For example, in Windows 10 it might be set to 10 items, while in other versions or configurations it could be 12 or more.
If you need to display more items, you can increase this limit by editing a key in the Windows Registry, following these steps:
- Press Windows + R, type "regedit" and accept to open the Registry Editor, with administrator permissions if necessary.
- Navigate to: Computer\HKEY_CURRENT_USER\Software\Microsoft\Windows\CurrentVersion\Explorer\Advanced
- Right-click in an empty space, select New > DWORD (32-bit) Value, and name it “JumpListItems_Maximum”.
- Double-click on the new value and in “Value information” enter the desired amount in decimal, for example, 20, and accepts.
- Close the editor and restart your system or just Explorer for the changes to take effect.
To delve deeper into the setup, you can also learn how to leverage the digital whiteboard feature in Windows 11 to improve productivity in your daily tasks.
Delete items and completely clean a Jump List
To remove a specific item, open the Jump List, right-click on it and select "Remove from this list", which will make it disappear immediately (if it was pinned, you will first have to unpin it).
To delete all Jump Lists from the system, disable and then re-enable the option to show recent items from Settings > Personalization > Home, so that the system clears the history and recreates the lists based on your subsequent use.
If you prefer a more manual method, you can empty the folders that store the automatic Jump List paths: close the applications, open Explorer and paste %AppData%\Microsoft\Windows\Recent\AutomaticDestinations and %AppData%\Microsoft\Windows\Recent\CustomDestinations into the address bar; delete their contents and restart Windows Explorer.
Troubleshooting common problems (including Windows 7)
Occasionally, the "Pin to Taskbar" option may disappear or Jump Lists may not display, especially in Windows 7 or after configuration changes. Some useful checks include:
- Check your recent settings: In Windows 7, right-click the taskbar > Properties > Start Menu tab and enable "Store and show recently opened items in the Start menu and taskbar." In Windows 10/11, in Settings > Personalization > Start, enable the Recent option.
- Check group policies (if applicable): Run gpedit.msc and navigate to User > Administrative Templates > Start Menu and Taskbar. Make sure policies like “Do not keep a history of recently opened documents” are not enabled.
- Clear automatic destinations: Delete the contents of %AppData%\Microsoft\Windows\Recent\AutomaticDestinations and %AppData%\Microsoft\Windows\Recent\CustomDestinations, and log back in.
- Reset file associations: If Jump Lists fail in a specific program, repair or reinstall that app and make sure the extensions are correctly associated.
- Verify system integrity: opens Symbol of the system as administrator and run sfc /scannow to repair corrupt files that may affect the shell.
In scenarios like those experienced by some users on Windows 7, enabling the recent items option and cleaning up the corresponding folders often restores normal behavior.


Passionate writer about the world of bytes and technology in general. I love sharing my knowledge through writing, and that's what I'll do on this blog, show you all the most interesting things about gadgets, software, hardware, tech trends, and more. My goal is to help you navigate the digital world in a simple and entertaining way.