-
APFS combines strong encryption, snapshots, and space sharing, which improves security but complicates data recovery. Recovery on encrypted APFS volumes is only possible with the correct password or recovery key. Tools such as Disk Drill, R-Studio, UFS Explorer, and PhotoRec can address deletions, formatting, and lost APFS partitions. APFS snapshots and Time Machine are key to restoring recent data and reduce the need for low-level scans.
If you use a Mac daily, sooner or later you'll have to deal with the dreaded shock of losing data on an APFS volume : an external drive accidentally erased, a FileVault that won't accept the password, a corrupted SSD, or an APFS container that inexplicably stops mounting. Apple's file system is very robust, but when something goes wrong, recovery can be considerably more troublesome than with USB drives or traditional HDDs.
The good news is that if you understand how APFS, encryption, and snapshots work, and use the right tools, you have a good chance of recovering files even in complicated scenarios: encrypted volumes, deleted containers, or partitions that suddenly disappear. However, the approach varies greatly depending on the type of data loss and the hardware you're dealing with.
What is APFS and why does it complicate (and at the same time facilitate) recovery?
APFS, the Apple File System introduced with macOS High Sierra , replaced the older HFS+ and has become the standard for Mac, iPhone, iPad, and the rest of the Apple ecosystem. It is primarily designed for solid-state drives (SSDs and flash drives), although it also works on mechanical hard drives.
Among its most important features are native encryption, snapshots, space sharing between volumes within the same container, and improved data integrity. Each APFS container can hold multiple volumes that share free space, providing significant flexibility when managing partitions on modern Macs.
The downside is that this architecture makes data recovery considerably more complex . TRIM support on SSDs allows the system to permanently erase blocks marked as free, encryption means that without the correct credentials, data is just noise, and internal metadata management is far more sophisticated than in FAT or NTFS.
When it comes to recovery, you must assume two things: the longer you use the drive after the incident, the worse the options will be , and if the volume is encrypted, without the password or recovery key there is nothing you can do, no matter how good the software you use is.
APFS encryption: hardware, software, and the real limits of recovery
Apple has significantly raised the bar for security with APFS, integrating strong encryption based on 128-bit or 256-bit AES as standard . The system can operate in two ways: relying on specific hardware (T2 chip or Apple Silicon) for internal drives, or using only software on older Macs and all external devices.
In models with T2 or Apple Silicon, the internal drive's encryption is managed on the chip itself. The keys are stored in the Secure Enclave , an isolated area inaccessible even to the operating system. There are no publicly available methods to extract these keys or move the drive to another computer to decrypt it there: they are tied to that motherboard.
This has a clear consequence: if a hardware-encrypted internal SSD in a modern Mac is seriously damaged or the computer's logic fails, even data recovery labs cannot bypass the encryption . Without the functional T2 or Apple Silicon chip containing the keys, the disk's contents are unrecoverable.
In all other cases, APFS encryption is purely software-based and relies on user credentials or recovery keys . Here, it is possible to work with recovery software provided one condition is met: the volume must be decrypted before any reconstruction is attempted.
Types of credentials in APFS and what happens if you lose them
When you enable FileVault or create an encrypted APFS volume, macOS can use several access methods. The most common are:
- User password: the classic login password or the one you define when encrypting an external APFS volume.
- Personal recovery key: 24-character alphanumeric string generated by macOS as a backup plan in case you forget your password.
- iCloud account linkedIn some cases, macOS can securely store the recovery key associated with your Apple ID, so logging in with that account will unlock the volume.
- Key to institutional recovery: used in corporate environments so that the administrator can unlock computers without having the user's password.
All the information needed to verify these credentials is stored encrypted within the metadata of the APFS volume itself . If these structures are damaged by logical corruption or bad sectors, a perfectly valid password may stop working because the system can no longer validate the keys.
If you lose both your password and recovery keys , and you don't have an associated iCloud account that can unlock the drive, the situation is hopeless: there is currently no viable way to decrypt an APFS volume. At that point, no application, neither from Apple nor a third party, can recover the data.
Recover data from encrypted APFS volumes using specialized software
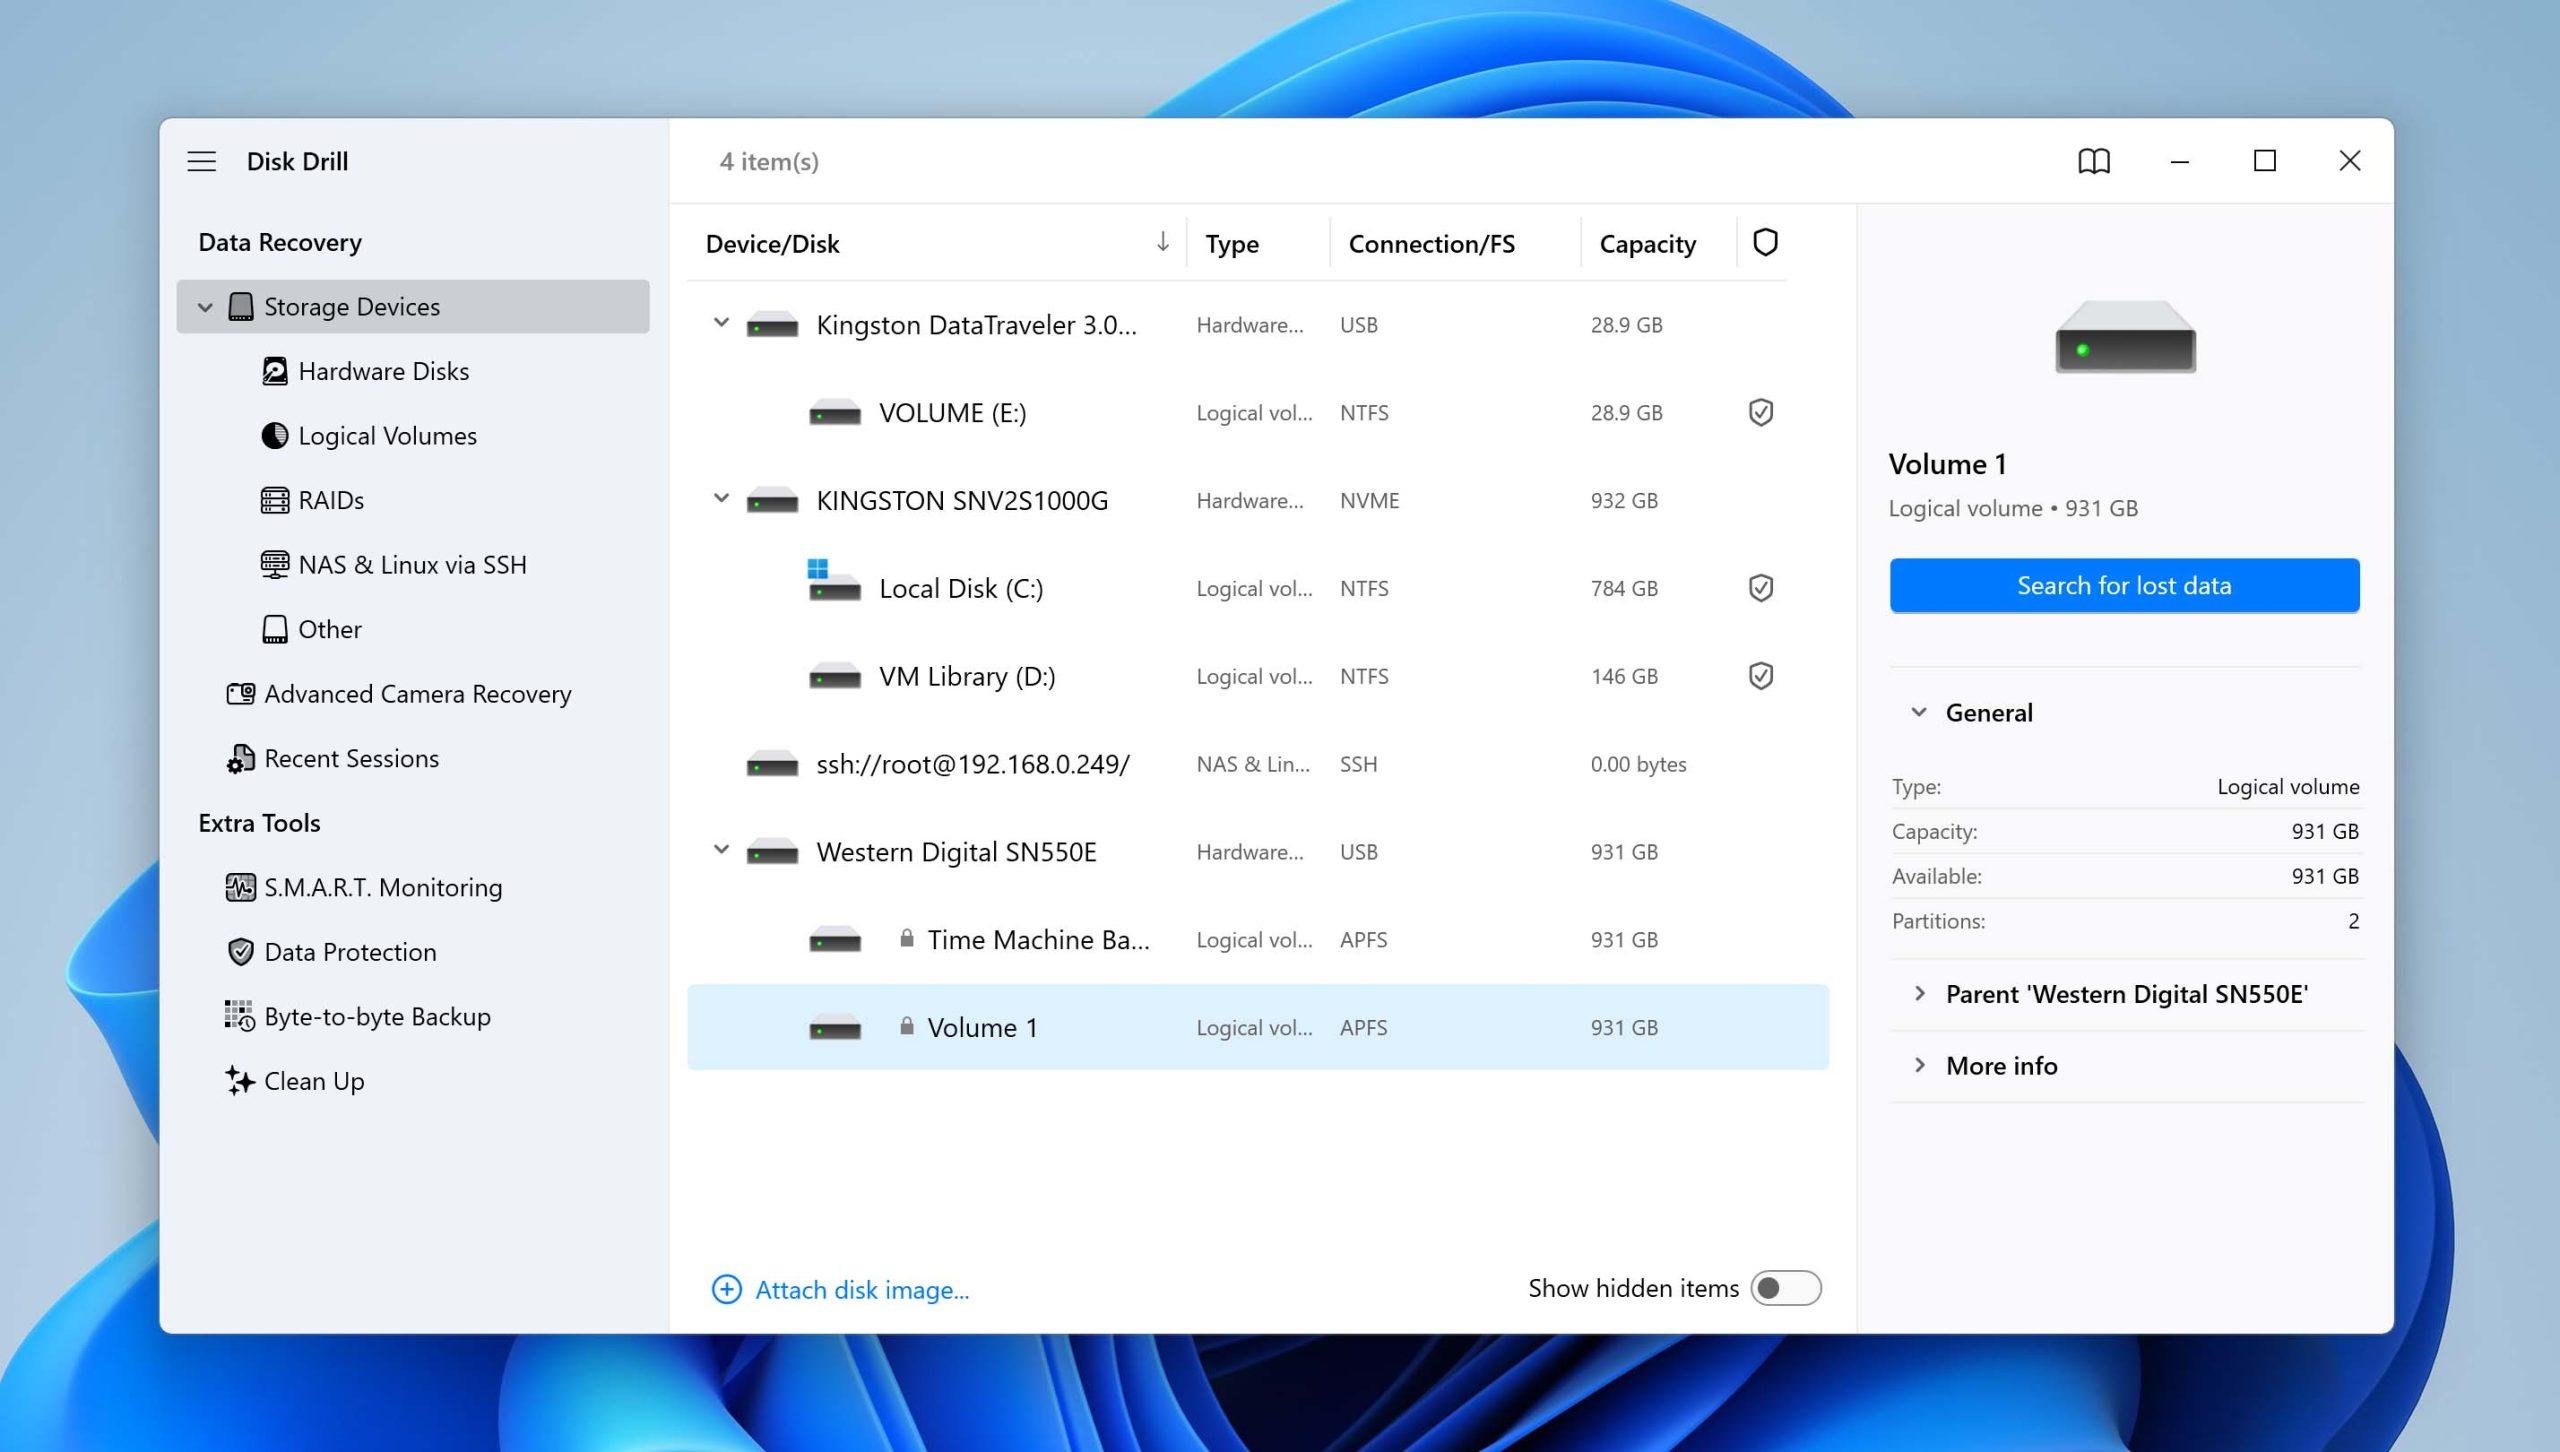
When credentials are available and the problem is a deletion, formatting, or logical corruption, recovery utilities such as UFS Explorer, Disk Drill, R-Studio, PhotoRec, or similar tools come into play . Each has its advantages; the key is understanding what each one does and in which scenario it's best suited.
UFS Explorer, for example, supports decrypting both internal and external software-encrypted APFS volumes. The general workflow is always the same: connect the drive, decrypt, scan, preview, and save . The main difference between editions (Standard, RAID, Network RAID, or Professional) lies in the additional features for working with RAID arrays, networks, and professional workflows.
In UFS Explorer, after connecting the disk, the encrypted APFS volume is identified (usually with a padlock icon), the decryption option is selected, and the password or recovery key is entered. Only then can the software mount the logical file system and perform a deep scan for deleted files or corrupted volumes.
The saving process is also critical: recovered data should always be exported to a different drive to avoid overwriting blocks that still contain useful information. This applies to UFS Explorer and any recovery tool.
FileVault and system-level access blocking
On many Macs, especially modern laptops, system drive encryption is handled by FileVault on an encrypted APFS volume . While FileVault is active, all the volume's contents—including file system metadata—are shuffled and unreadable by any recovery software that cannot decrypt them first.
From a recovery utility's perspective, a volume with FileVault enabled is little more than a block of data with no apparent structure . Until the correct password is entered or encryption is disabled from macOS, it's impossible to reconstruct the folder hierarchy or locate files by name.
One option while you can still boot the system is to disable FileVault from System Preferences, Security & Privacy tab, FileVault section. After entering the administrator password, macOS initiates a full decryption process that can take hours depending on the drive's size. Once complete, the volume is in plain text, and recovery software can work without the encryption barrier.
The alternative, if the system does not boot but the credentials are valid, usually involves using macOS recovery mode or a special boot environment (such as an emergency UFS Explorer CD/USB) to mount the encrypted volume, enter the key, and only then begin the analysis.
Recovering deleted files on APFS with Disk Drill
For home and advanced users who want something powerful yet easy to use, Disk Drill is one of the best-known options. It integrates well with APFS and is capable of reconstructing the original folder structure and names in many cases, not just recovering individual files by signature.
Its operation is based on analyzing both APFS metadata and raw data blocks, attempting to preserve hierarchies, names, and attributes as long as the information remains . When the file table is severely damaged, it resorts to signature-based searching, but if the metadata is reasonably well preserved, the results are quite faithful to what existed before the disaster.
The typical procedure with Disk Drill involves installing it on a different disk than the affected one (to avoid overwriting), selecting the problematic APFS volume, running a full scan, and, upon completion, previewing the results to check which files are in good condition . Finally, the items to recover are selected and saved to another drive.
On Mac, Disk Drill also has a Windows version with APFS read support. This allows an APFS drive connected to a PC to be properly analyzed , interpreting Apple's file system and restoring folders—something generic Windows tools can't do because they treat the disk as "unformatted."
Using PhotoRec: signature-based recovery without relying on APFS
PhotoRec is a classic data recovery tool, free and open source. Its philosophy is different: instead of relying on file system metadata, it looks for signatures of known file types on the disk surface . This means it doesn't care if the file system is APFS, FAT, NTFS, or if it's completely corrupted.
The downside is that, because it only works with signatures, it can't reconstruct original names, folder paths, or permissions . Recovered files appear with generic names in directories like recup_dir.1, recup_dir.2, etc. This is acceptable for photos, videos, and individual documents; however, for complex projects with thousands of related files, reorganizing everything can be a major headache.
PhotoRec is operated from the Terminal, using keyboard navigation, but it displays all detected drives, allows you to choose partitions, and select a destination directory for the recovered material. Precisely because it doesn't rely on APFS metadata, it can recover information in scenarios where the metadata is corrupted, at the cost of losing the logical structure.
Advanced recovery in APFS with R-Studio
R-Studio is a professional-grade tool that also understands APFS and is available for macOS, Windows, and Linux. It can work with APFS disks even if your operating system doesn't support that file system , because the application itself implements the necessary logic to interpret it.
A typical use case is when an external APFS SSD has been erased and reformatted as APFS. At first glance, the volume appears empty, but unless too much data has been overwritten, much of the information from the previous file system version may still be present in unallocated areas.
R-Studio allows you to scan the entire device, inspect "recognized" partitions, and locate both the new volume and remnants of the old one. From there, it reconstructs directory trees, displays files that still retain names and paths , and complements the process with signature-based recovery for those that have lost their metadata.
One of its advantages is the power of its search filters and its disk image handling. For disks with physical symptoms or concerning SMART statuses, it's possible to create a sector-by-sector image beforehand and work on it , minimizing reads to the damaged medium and increasing the chances of data recovery.
APFS and lost partitions: containers that “disappear”
Another fairly common situation is that an APFS container or volume disappears after modifying partitions with Disk Utility, such as resizing, creating a new partition, or deleting something you shouldn't have. macOS doesn't offer magic buttons to "undo" a partition deletion; if the container is gone, the only operating system-level solution is to create a new one and restore from a backup.
When no backup exists, the only solution is to use recovery software capable of analyzing the old partition map and raw APFS structures to locate traces of deleted volumes. Many utilities include "volume not found" or "search for lost volumes" modes that trigger this type of analysis.
If the volume was encrypted, once the tool finds its structure, you will need to enter the corresponding password so it can decrypt and reconstruct the contents. Otherwise, even if the partition is located, its contents will remain unusable.
With solutions like Stellar Data Recovery, Disk Drill or R-Studio it is relatively common to be able to restore all or part of the lost partition, as long as another volume has not been created on top of it or the disk has not been filled with new data.
APFS snapshots and Time Machine: your best “invisible” insurance
A very interesting feature of APFS is read-only local snapshots , which freeze the state of the volume at a given moment. macOS and Time Machine use them to allow you to revert to a previous state even if the backup disk is not constantly connected.
When Time Machine can't find your external drive, macOS creates local snapshots on your system volume roughly every hour and keeps them for about 24 hours as long as there's enough space. This means that even without a backup drive plugged in, you can recover files deleted just a few hours earlier by accessing one of those snapshots.
In some cases of massive data loss—for example, entire folders of audio projects disappearing from the SSD—users have managed to restore everything by booting into recovery mode and reverting the system to an APFS snapshot from before the incident . It's essentially a "time travel" on a volume level.
From macOS itself, if the drive boots, you can open Time Machine, navigate the timeline, and select specific files or folders from a snapshot to restore them to their original location. It's less drastic than reverting the entire volume, but just as effective for recovering recent content without resorting to low-level scans.
Repair APFS volumes with Disk Utility and First Aid
Before attempting a deep recovery, it's always a good idea to try something simple: Disk Utility's First Aid . This built-in tool checks for and repairs logical inconsistencies in the file system, which is very useful if the problem is that the volume won't mount, it hangs when accessing certain folders, or macOS starts showing read/write errors.
First Aid checks APFS structures and, if possible, repairs corrupted indexes and metadata to restore the volume to a consistent state. However, its scope is limited: it does not fix physical damage or deep corruption, and in severely affected containers, it may return error messages without successfully mounting them.
If the volume mounts and the data appears after running First Aid, there's little more to say. Even so, it's highly recommended to perform a full backup immediately , because a volume that has already shown signs of corruption is at risk of becoming corrupted again.
If First Aid fails or keeps requesting restarts without success, it's time to turn off the affected unit and move on to more advanced recovery tools, without continuing to force mounts that could worsen the damage.
Working with APFS on Windows: Access and Limitations
When you connect an APFS drive to a Windows PC, the system either ignores it or prompts you to format it: it doesn't have native support for reading or writing APFS files . To access the data, you need specific software that understands Apple's file system.
There are drivers like Paragon's APFS for Windows and other similar solutions that allow you to mount APFS volumes in read or read/write mode, but they are not recovery tools per se. Their purpose is to allow you to view and copy files from an APFS disk from within Windows , not to recover data that has already been deleted.
In the area of recovery, options like Disk Drill for Windows do include support for reading APFS metadata , allowing them to reconstruct the volume structure and present files with their original folders, provided the data is still there. Other, more generic utilities that don't support APFS will treat the disk as "unformatted" and will be limited to signature-based recovery, resulting in a jumble of anonymous filenames.
PhotoRec, as mentioned, is another alternative when the file system doesn't matter, because it directly analyzes the data blocks. It's useful as a last resort for scraping raw files from a disk that Windows doesn't even recognize, but it won't restore your Mac's directory structure.
How to access data on a MacBook that won't turn on
A very delicate situation arises when the MacBook is dead and the main problem is that the internal SSD contains important data that you can't afford to lose . The strategy here depends entirely on the specific MacBook model.
On older MacBooks with removable internal drives, you can disassemble the computer with some skill, remove the drive, and connect it to another computer using a suitable adapter (USB-to-SATA, for example). From there, it's just a matter of using Disk Drill, R-Studio, PhotoRec, or another tool on that drive as if it were an external hard drive.
In recent models, however, the SSD is either soldered to the motherboard or integrated into the main chip, and encryption is usually handled by hardware. In these cases, attempting to desolder or manipulate the flash memory at home is the fastest way to destroy the only copy of your files. The sensible thing to do is to go to professional services specializing in Mac and APFS storage , who work directly on the motherboard and the T2/Apple Silicon chip to try to extract the data.
In both scenarios, and especially with modern equipment, it's a good idea to contact a recovery lab as soon as possible, describe the problem (symptoms, if the volume was encrypted, if there are strange sounds, etc.) and follow their instructions without improvising home experiments.
Ultimately, recovering data from APFS systems hinges on a thorough understanding of how encryption works, the role of snapshots, what can be repaired with built-in tools like First Aid, and when to bring out the big guns with Disk Drill, R-Studio, UFS Explorer, or PhotoRec. And let's not forget that prevention with Time Machine and external backups remains your best defense . If you act quickly, stop using the affected drive, and choose the right tools for the situation, the chances of rescuing your files, even in complex scenarios, are far better than they initially seem in that moment of panic.

Passionate writer about the world of bytes and technology in general. I love sharing my knowledge through writing, and that's what I'll do on this blog, show you all the most interesting things about gadgets, software, hardware, tech trends, and more. My goal is to help you navigate the digital world in a simple and entertaining way.
Table of Contents
- 1 What is APFS and why does it complicate (and at the same time facilitate) recovery?
- 2 APFS encryption: hardware, software, and the real limits of recovery
- 3 Types of credentials in APFS and what happens if you lose them
- 4 Recover data from encrypted APFS volumes using specialized software
- 5 FileVault and system-level access blocking
- 6 Recovering deleted files on APFS with Disk Drill
- 7 Using PhotoRec: signature-based recovery without relying on APFS
- 8 Advanced recovery in APFS with R-Studio
- 9 APFS and lost partitions: containers that “disappear”
- 10 APFS snapshots and Time Machine: your best “invisible” insurance
- 11 Repair APFS volumes with Disk Utility and First Aid
- 12 Working with APFS on Windows: Access and Limitations
- 13 How to access data on a MacBook that won't turn on