- Define scopes, priority, and publishing tags to align security and usability.
- Apply encryption, branding, and permission control in M365 and Power BI.
- Integrates with Copilot, MIP SDKs and third-party DLP to cover more vectors.
Collaboration is no longer confined behind a firewall: files fly between devices, apps , and services , both inside and outside the organization. Throughout this journey, information must remain secure, comply with internal policies, and, at the same time, not hinder users.
This is where Microsoft Purview Information Protection confidentiality labels come in, allowing you to consistently classify and protect data across Microsoft 365 , Power BI, and more, without sacrificing productivity or collaboration. I'll explain how they work and how to apply them effectively.
What are privacy labels?
A confidentiality label acts like a seal embedded in the metadata of a file or email: it's customizable, persistent, and readable by applications and services. This means we can create levels such as Personal, Public, General, Confidential, or Highly Confidential, tailored to the company's specific needs.
These tags are stored in plain text within the metadata so that apps and services (including third-party ones) can recognize them and take further action. However, the protection applied by the tag (e.g., encryption) travels with the content and remains wherever it goes.
For users within the same organization, the label appears visibly in applications (for example, in the title bar of Word/Excel/PowerPoint/Outlook) and they can even see the description configured by the administrator . However, guests and external users do not see these labels in their interface.
Each compatible item can only have one confidentiality label applied per organization. Documents and emails can also have a retention label, as both classifications are compatible.
In scenarios such as Excel or Outlook, users can easily change the label from the Confidentiality bar or the Confidentiality button on the Home tab, provided the policy allows it and, where applicable, providing justification for lowering the classification.
What they are for and what they can do
Confidentiality labels can apply encryption and permission control to documents, emails, and meeting invitations. You can decide who views, edits, prints, or forwards, and for how long, and even allow users to assign permissions themselves when applying the label.
It's also possible to add content markers (watermarks, headers, and footers) to documents, emails, meeting invitations, and Loop pages or components, using variables such as the tag or document name. Note the limits: watermarks are limited to 255 characters; headers and footers to 1024 characters, except in Excel, which has a total limit of 255 characters (including formatting codes).
Tags help extend SharePoint protection when downloading files from libraries with a default tag ; when downloading those documents, the current SharePoint permissions travel with the tagged file, strengthening off-site security.
You can protect content in Teams, Microsoft 365 Groups, SharePoint sites, and Loop workspaces with labels that configure privacy, external sharing, guest access, controls for unmanaged devices, and shared channel options. These labels protect the container; they don't automatically label the items within it.
In addition, there's support for Teams meetings and chat, allowing you to tag invitations and replies, with encryption options and the ability to apply specific meeting/chat settings. And let's not forget eDiscovery detection : the condition builder lets you search by tags and include or exclude content based on its classification.
With Microsoft Defender for Cloud Apps, you can detect, classify, and protect content across third-party services (Salesforce, Box, Dropbox, etc.), even if those apps don't natively read tags. And with the Microsoft Information Protection SDK, third-party apps can read tags and apply protection seamlessly.
Tags can also be purely for classification (without encryption) to provide visual context and gather usage and activity analytics, helping you decide whether to add protection later. They can also be extended to Power BI and data resources within the Microsoft Purview Data Map (for example, SQL, Azure SQL, Azure Synapse, Azure Cosmos DB, and AWS RDS).
Scopes of label, priority and structure
When you create a tag, you define its scope , which determines what protection options you can configure and which services/applications it will be available across. Scopes include: Files and other data resources (Office, Loop, Power BI, Fabric, and more), Emails, Meetings, and Groups and sites.
Typically, Files and Emails are selected together to maintain consistency between the document and the email attachment. To protect Teams meetings (calendar, options, and chat), you should also select Files and Emails. For Groups and Sites, first enable the use of sensitivity labels for containers.
The order in the label list determines its priority : it's best to place the most restrictive (Highly Confidential) at the end and the least restrictive (Public/Personal) at the beginning. This affects self-tagging behavior, justification for downgrading, and inheritance in email attachments.
To organize schemes with two levels (for example, Confidential → All Employees/Trusted Persons), tag groups are used to replace the old primary tags. These groups have names, colors, descriptions, and priority, but no protection options of their own; the tags are published within the group, not the group itself.
If you delete a tag in the portal, it is not removed from the content that is already tagged: the protection remains . If you edit a tag, the content retains the version that was applied at the time. There are differences between deleting the tag and removing it from a published policy that you should review before making changes.
Publishing and label policies
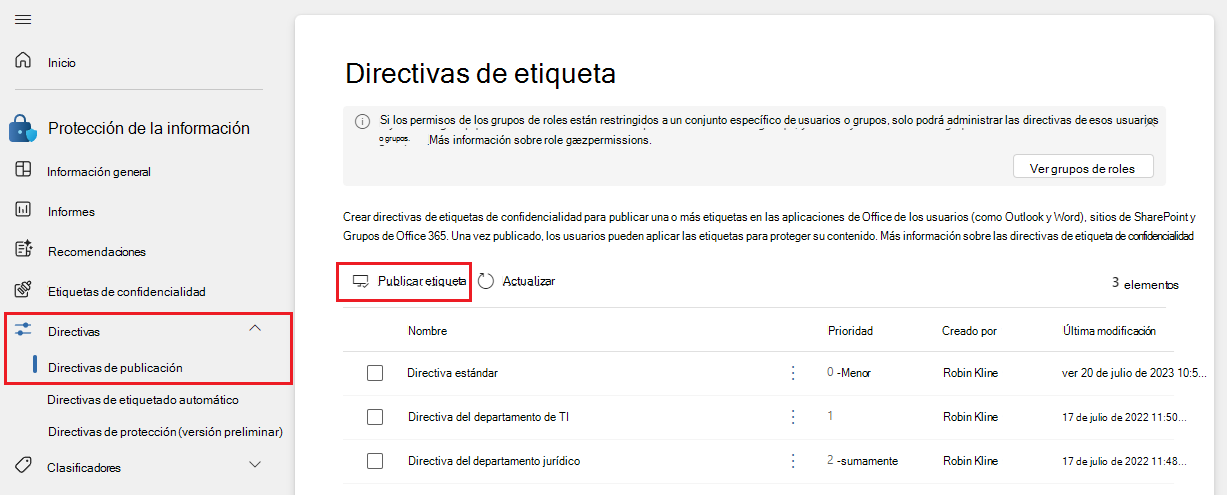
After creating them, you need to publish them to users and groups (not locations) using policies. This way, they'll see them in their apps and can apply them. You can have multiple policies for different groups (for example, everyone sees Public/General/Confidential, but Legal also sees Highly Confidential).
Policies allow you to set default labels for documents (including Loop components and pages), emails and invitations, new containers (Teams, Groups, SharePoint), and Power BI content. Be careful not to set an encryption label as the default, as this could unintentionally block external collaboration.
You can require justification when removing a label or lowering its level (this applies to files, emails, and meetings) and enable mandatory labeling for documents/emails, containers, and Power BI. You can also include a link to a custom help page to answer user questions.
The order of policies also has priority: if a user falls under multiple policies, the highest-ranking one takes precedence . Changes can take up to 24 hours to replicate. There is no limit to the number of tags unless they encrypt with specific permissions: in that case, there is a maximum of 500 per tenant . As a best practice, keep the tag catalog as simple as possible.
In the publishing wizard, you can restrict scope using administrative units (preview), choose which tags to publish, define policy settings (justification, mandatory, support), and set default values for documents. If you run out of RMS licenses, you can activate an EMS trial to complete the creation and deployment.
App in Microsoft 365: Windows, Mac, web, and mobile
In Office for Windows and Mac , labels are applied from the Privacy bar (next to the file name) or from the Privacy button on the Home tab. If labeling is required, you'll see a prompt to select a label before saving or sending.
In new files, saving for the first time may prompt you for a label or apply the default label configured by the administrator. When a label is applied automatically (based on rules) or recommended, a notification appears below the ribbon with the details.
To remove a tag, simply select "No tag" from the menu, unless the policy requires mandatory tagging . The current tag is displayed in the title bar, and you can view your permissions using the corresponding icon in the status bar (in the "My Permissions" dialog).
On Android and iOS, you can add tags from the Home tab → Privacy or from the More options menu , depending on your device. If the tag has user-defined permissions, you'll see an information bar when you open the file to check those permissions.
Microsoft 365 for the web doesn't currently display detailed tag permissions; to view them, use the desktop apps. And if tagging is required, you can choose to open in read-only mode when you don't want to tag a particular file.
Power BI: Classification and protection when exporting
In Power BI, tags are used to classify and protect datasets, reports, dashboards, and flows. Within the service, they don't affect access to the content (that depends on Power BI, RLS, and OLS permissions), but when you export to Excel, PowerPoint, or PDF , or download a .pbix file, the tag and its protection are transferred with the file.
Prerequisites: Azure Information Protection P1 or P2 licenses and Power BI Pro/PPU, and published tags for the appropriate users/groups. First, enable tagging in the tenant administration portal (Information Protection → Allow tags to be applied in Power BI).
In Power BI Desktop, when you save a .pbix file, the label and its encryption are embedded within the file. In the service, reports and dashboards inherit the label from the main dataset or report, and you can change it from the item's settings.
Every label change in datasets, reports, dashboards, or flows is recorded in the audit log , so you can track who applied or modified the label, when, and. This is very useful for governance and compliance.
Copilot and AI: recognition and respect of rights
Microsoft 365 Copilot and Copilot Chat recognize and integrate sensitivity labels into their responses. If a conversation references multiple items, the highest-priority label is displayed (or inherited) to reinforce contextual security.
If the label uses Microsoft Purview encryption, Copilot validates usage rights . It only returns data if the user has, for example, the EXTRACT (copy) right. Without permissions, there are no leaks: the wizard respects end-to-end access control.
Advanced Integration and Development: MIP SDK and Labeling Client
Because tags reside in metadata, applications and services can read and write them to automate processes . With the Microsoft Information Protection SDK, developers can implement tagging and encryption across multiple platforms and integrate workflows with third-party solutions.
The classic AIP tagging client has been replaced by the Microsoft Purview Information Protection client for Windows, which extends tagging to File Explorer, PowerShell , local scanning, and a viewer for encrypted files. Subscription Office apps are fully supported.
A typical development example involves creating a console application (.NET 6) that removes a label for processing a document and reapplies it at the end. To do this, register an application with Entra ID, grant the "Content.SuperUser", "Content.Writer", and "UnifiedPolicy.Tenant.Read" permissions, configure authentication (client secret), and use the Microsoft.InformationProtection.File and Microsoft.Identity.Client packages, along with any necessary document processing library.
The usual testing flow is to create a document in Word , apply a label to it (e.g., Confidential → All employees), save it to OneDrive, download and verify that the restrictions are respected , run your app to transform the content, and check that the output file maintains the protection.
Data Leak Prevention with FortiSASE and MPIP Tags
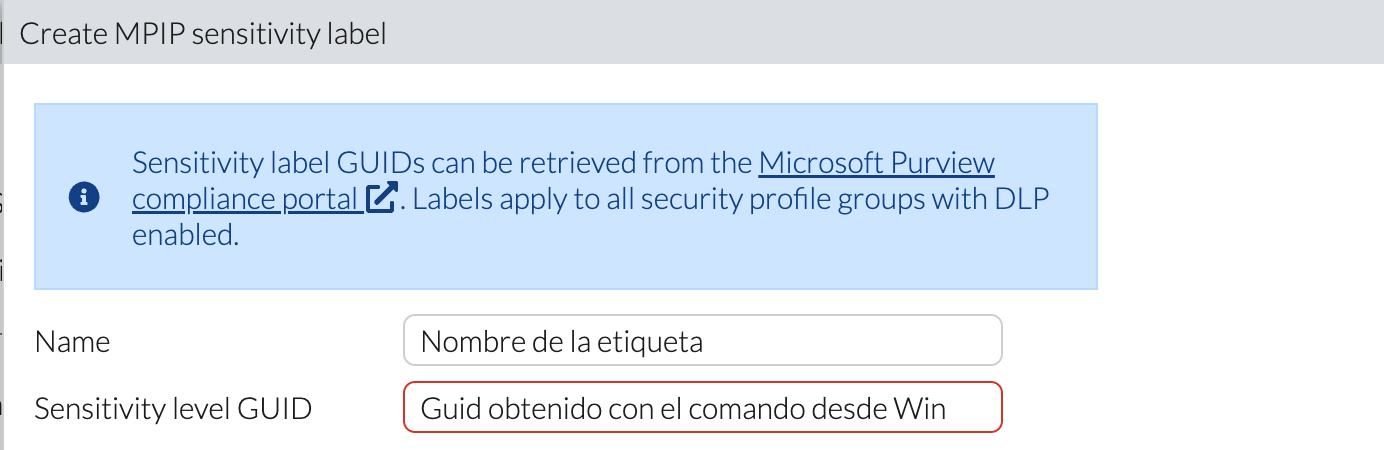
FortiSASE can use MPIP (Microsoft Purview Information Protection) tags to block HTTPS uploads of tagged files. It does this by comparing the GUID of the tag applied to the file with a dictionary/configuration on the platform.
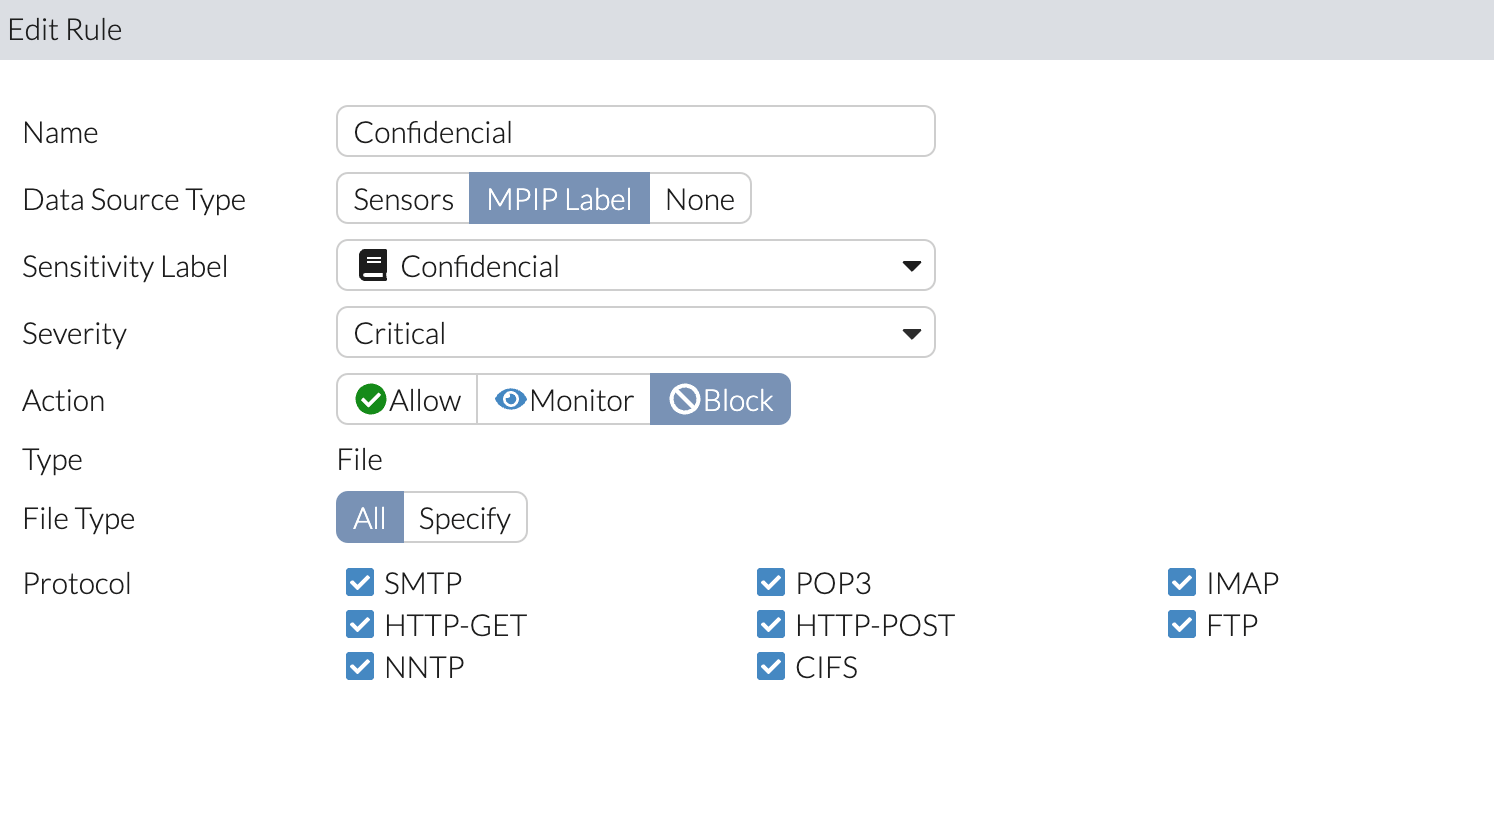
The practical procedure: create a DLP profile in FortiSASE, disable security features not needed for the test, enable deep inspection , add a DLP rule with the MPIP Label condition and a dictionary that maps the label name to its GUID, and associate that profile with a policy for the target user group.
To validate, register the endpoint with FortiSASE, open your browser in incognito mode, and upload a Word document with an MPIP tag to https://dlptest.com/https-post/. The upload should fail both before and after submission. In Analytics → Security → DLP, you will see the block logs, including details such as the file name.
This approach allows Microsoft Purview 's protection to be extended to the network layer, ensuring that classified data does not leave the organization through unauthorized channels.
Good practices, licenses and operation
Before deploying, plan licenses and permissions, define your adoption strategy , review supported scenarios, and prepare end-user communication. Purview's implementation documentation covers these points and will save you a lot of trouble.
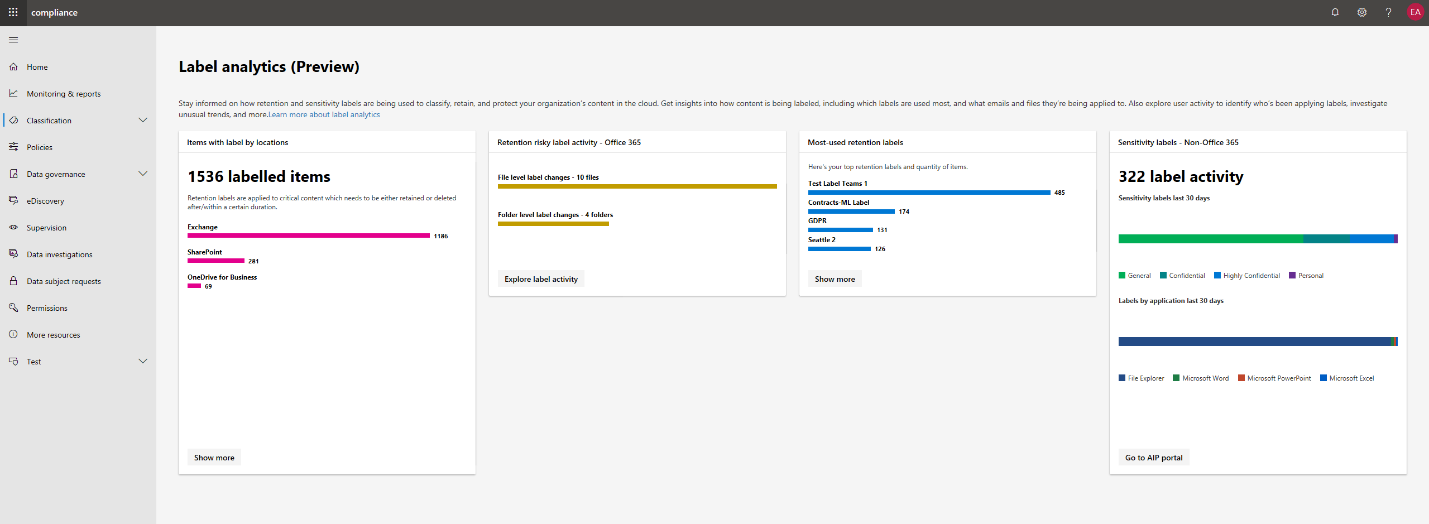
Keep your labels simple : less is more. Reduce the number of labels to the bare minimum to avoid confusion and administrative costs. Leverage Purview's portal analytics to see usage and activity, and adjust your taxonomy based on the data.
Avoid using a default encryption label on documents: many organizations collaborate with external parties who may not be able to open protected content. Also, configure the default sharing link type in SharePoint/OneDrive to minimize over-sharing.
Remember that tags also work with third-party applications through Defender for Cloud Apps and the SDK, and that you can pull them to data resources (SQL, Synapse, Cosmos DB, AWS RDS) using Purview's Data Map.
In desktop automations (for example, Office activities in RPA), ensure the connection has permissions to read/write the tagged files; otherwise, an exception will occur. And as always, test templates and flows with your actual content tags before making them available to the entire organization.
Confidentiality labels offer a consistent framework for classifying, protecting, and governing data across Microsoft 365, Power BI, and third-party services: encryption with permission controls, dynamic content flags, container and meeting protection, auto-labeling and auditing, and integration with Copilot and solutions like FortiSASE. With proper planning, prioritization, judicious publishing, and ongoing training, you'll have data security that travels with your data without disrupting your daily workflow.

Passionate writer about the world of bytes and technology in general. I love sharing my knowledge through writing, and that's what I'll do on this blog, show you all the most interesting things about gadgets, software, hardware, tech trends, and more. My goal is to help you navigate the digital world in a simple and entertaining way.