- It is possible to print A3 documents on A4 printers using automatic reduction or manual scaling without modifying the original file.
- Physical documents in A3 size can be copied or scanned and reduced to A4 using the enlargement/reduction functions of the multifunction printer.
- Poster or mosaic mode allows you to divide an A3 sheet into several A4 sheets without losing content, ideal for models or large posters.
- It is advisable to choose between reducing, dividing, or using professional printing depending on the legibility and level of finish required by each project.

If you've ever struggled with your printer because your document is A3 but you only have A4 paper , don't worry, you're not alone. Changing print sizes and adjusting scales can seem confusing, especially the first time, but once you know the available options, it's much simpler than it looks.
Today we're going to see, step by step and in great detail, how to print an A3 file on a printer that only supports A4 , whether you want to reduce the document to a single A4 sheet or prefer to divide it into several pages to then assemble it like a poster. We'll also look at specific tips and tricks for different programs and multifunction printers.
Basic concepts: A3 and A4 sizes and what scaling means
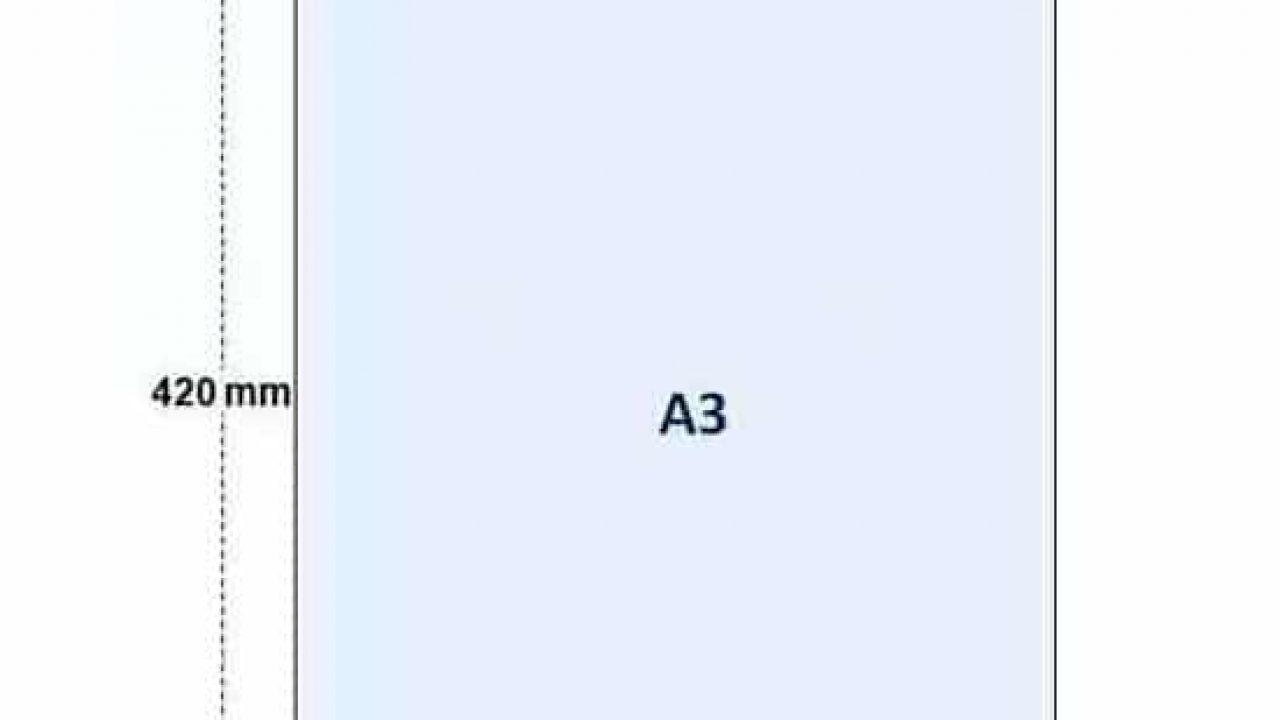
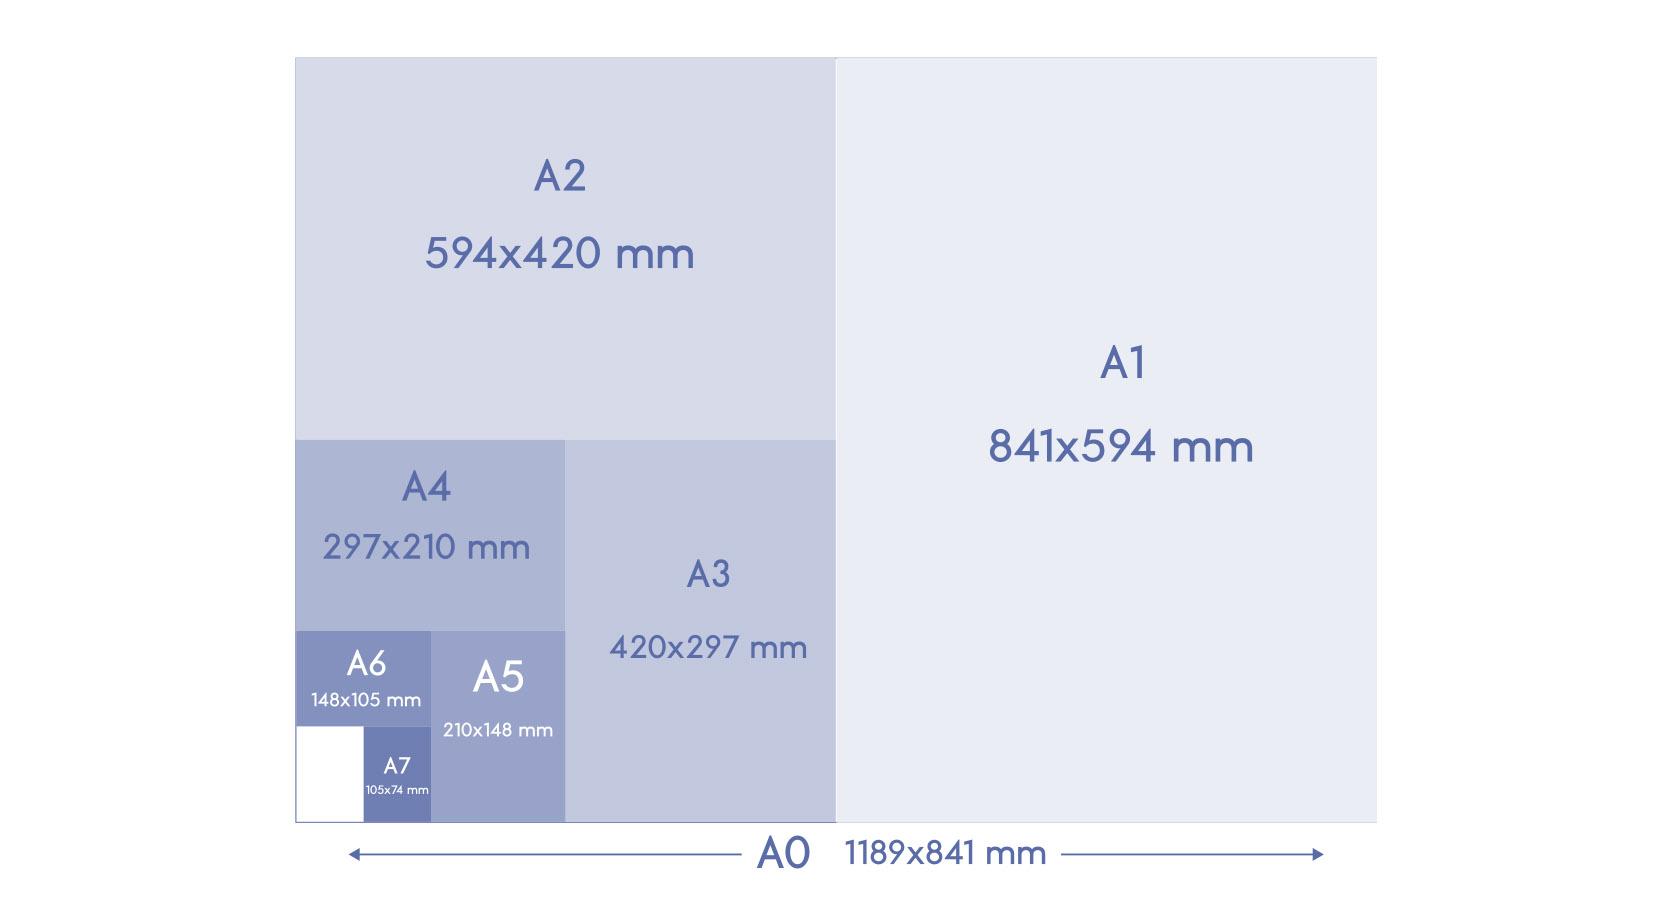
Before adjusting any settings, it's helpful to understand the actual difference between A3 and A4 . An A3 sheet measures approximately 297 x 420 mm, while an A4 sheet measures approximately 210 x 297 mm. In other words, an A3 sheet is exactly twice the size of an A4 sheet, while maintaining the same aspect ratio.
This means that if we reduce an A3 document to approximately 71%, it will fit entirely within an A4 sheet, maintaining its original shape . This percentage is important because many printers and programs use it as an internal reference when you choose options like "Fit to Page" or "Auto Scale."
When we talk about "scaling" a document, we mean changing its printed size without modifying the original file . This can be done to reduce (from A3 to A4) or to enlarge (from A4 to A3 or a larger size), and is usually controlled from the print dialog box or the printer's own settings.
Another key idea is understanding that there are two common scenarios: digital files in A3 format that you want to print in A4 , and physical A3 paper documents that you need to copy or scan to print in A4. In each case, the procedure is different, but the logic is the same: use the reduction or fit-to-page functions.
How to reduce an A3 file to print on an A4 sheet
The most common scenario is having an A3-sized file (for example, a PDF, a Word document, or a presentation) and needing it printed in its entirety, reduced to fit on a single A4 sheet . Fortunately, most modern printers and print drivers now automatically support this feature.
On many modern professional printers, you simply need to specify A4 paper size in the print dialog box , even if the document was created in A3. The system will automatically adjust the scale so that all the content fits on the page without you having to make any further changes to the file.
The logic is simple: the file retains its internal A3 size, but when sent to print, a proportional reduction is applied to adapt it to the actual A4 space . This avoids cropping at the margins and maintains the complete composition, only smaller.
A typical procedure would look something like this:
- Open the A3 document in the corresponding program (Word, PowerPoint, a PDF viewer, CAD software, etc.).
- Go to menu File> Print and choose the printer you are going to use.
- Make sure that "Paper size" or "Paper type" is selected A4.
- Select the option to “Fit to Page,” “Shrink to Fit,” or “Auto Scale”, depending on what the program calls it.
- Check in the preview that Nothing gets cut off at the edges. and that the contents fit in whole.
- Send to print as usual.
In some more technical environments, such as design or CAD programs, things can change a bit. For example, there are workflows that use a printer database and enable advanced options, such as setting the XS_USE_OLD_PLOT_DIALOG variable to TRUE to use a classic print dialog box.
In these cases, to transfer a drawing created on A3 paper to A4 paper that only serves as a draft, it would be enough to follow a scheme similar to the following:
- Open the drawing configured in A3 size.
- Ir a File > Print drawing.
- Select the printer you want to use within the print box.
- Enter the option Add / Edit…, choose the printer and check the necessary settings.
- If you change any settings, tap on Update and then OK to save the settings.
- Define the parameter Scale as “Car” so that the system adapts the drawing to the size of the A4 paper.
- Click on Print to get the eraser in a smaller size.
With this method, the actual scale of the plan or drawing is not respected , but you get a reduced copy that is very useful for review, quick notes, or to take to a meeting without having to print it on A3.
Print an A3 physical document on A4 using a multifunction printer
Another fairly common situation is having an original on A3 paper (a plan, a poster, a large form…) and needing to print it in A4 size using the copy or scan + print function of a multifunction printer.
In this case, we're not starting with a digital file but a physical document, so the key lies in the machine's own reduction functions. Many professional devices, such as Brother multifunction printers or those from other well-known brands, include specific options for copying from A3 to A4.
The procedure usually follows a similar pattern:
- Place the A3 document on the scanner glass or in the automatic document feeder (ADF) if the printer supports it.
- Indicate on the panel that Do you want to make a copy? or a scan for printing.
- Before starting the copy, enter the menu of Options of the touch screen.
- Find and select the function of Zoom in zoom out or “Zoom”.
- Choose the option of reducir and select the desired percentage or combination of sizes (from A3 to A4, if the machine allows it directly).
- Indicate how many copies you want to start the work.
Keep in mind that, in many models, the predefined reduction ratio between A3 and A4 is already set , so with a couple of taps you can switch from one format to the other without having to calculate percentages manually.
This type of function is especially useful when you have corporate documentation, posters, or forms that were designed in A3, but you need smaller versions to file, attach to files, or simply to hand out at a meeting without wasting so much paper.
Is it possible to do the reverse? Print A4 as if it were A3
Although the most frequent question is how to convert from A3 to A4 , the opposite also happens: having a document prepared in A4 and wanting to enlarge it to A3, whether for a poster, a larger plan, or a model. From a software perspective, the process is very similar.
Most printing programs and drivers offer the same scaling options for both reducing and enlarging . Instead of specifying a reduction percentage, you either set an enlargement percentage (for example, around 141% to go from A4 to A3 while maintaining aspect ratios) or choose an option such as "Fit to paper size."
However, if your printer only physically accepts A4 paper , no matter how many times you tell it you want "A3 format," it won't be able to print a larger sheet. What you can do is use features like poster mode or tiled printing to divide that enlarged content across several A4 sheets that you can then join together.
Many mid-range and high-end computers, and some advanced drivers as well, include a special mode called "Poster," "Mosaic," or something similar . This mode automatically divides the larger document into several overlapping A4 pages so you can then cut and paste them precisely.
Some manufacturers, such as those in professional inkjet series (for example, Brother's J6000 series), promote precisely these types of direct enlargement functions to A3 or larger formats, combined with poster settings and tile printing, making it much easier to prepare large-format graphic material from a home or office printer.
Split an A3 file into multiple A4 sheets without losing content
Another classic scenario: you have a design, plan, or image in A3 size within a PDF or similar file, but your printer only supports A4, and you don't want to reduce its size because you'd lose detail. What you need to do, then, is split the A3 into two (or more) A4 sheets , print them, and then assemble them.
A simple way to achieve this is by using Adobe Acrobat Reader or similar tools that allow you to print in poster mode or split pages. In fact, many people wondering how to do it discover that all they need to do is open the PDF with Acrobat Reader and use the appropriate printing options.
The approach to dividing an A3 sheet into two A4 sheets without leaving anything outside the borders is as follows:
- Open the PDF in A3 size with Adobe Acrobat Reader or another advanced viewer.
- Go to menu Print.
- Instead of “Actual Size” or “Adjust”, find and activate the mode “Poster”, “Mosaic” or an equivalent option.
- Check how many resulting A4 pages will be generated (for a horizontal A3 it is usually two vertical A4s, or vice versa).
- Review the options for overlap or joining margin so that when cutting and pasting, a white line is not left in the center.
- Print the pages and then, cut out and join carefully reconstruct the A3 format to actual size.
This method is ideal for mock-ups, school projects, homemade posters, or design tests when you don't have access to an A3 printer but need the full size without reducing detail.
If you're working on a document you're designing from scratch (for example, in Microsoft Word ) instead of a PDF , another practical option is to design the content directly to fit two A4 pages . This way, you control which part of the content goes on each page, avoiding unsightly cuts in important text or images.
Smart scaling: Make the most of your software and printer options
Almost all current printer drivers have automatic scaling options that greatly simplify converting between formats. The trick is knowing how to interpret them and use them according to your needs: saving paper, maintaining the scale, or printing quick drafts.
In the print dialog box, you will often see options such as:
- “Fit to page”: Reduce or enlarge the content to fit within the selected paper size, respecting printing margins.
- “Actual size” or “100%”: respects the original scale of the document, so if the paper format is smaller than the file, some of the content will be cut off.
- “Multiple pages per sheet”: useful if you want to print several reduced A4 pages on a single A4, although it is used less in the A3-A4 context.
- “Poster/Mosaic”: automatically divides the content into several smaller sheets that you can then assemble.
When you want to print a full A3 document within an A4 sheet , the most logical option is to select "Fit to Page" or an automatic scale. This reduces the content while maintaining the aspect ratio and prevents unprinted or cut-off areas.
In some specialized software, such as CAD or technical drawing applications, in addition to paper size, the drawing scale is explicitly controlled (1:100, 1:50, etc.) . If your goal isn't to maintain an exact scale, but simply to have a legible copy, you can use automatic scaling and avoid manual conversions between sizes.
Keep in mind that when reducing an A3 document to A4, text and graphic details become smaller . For documents requiring intensive reading or densely detailed plans, it's advisable to do a test print before printing many copies, ensuring that the fonts remain legible.
Poster mode: when you want a big visual impact with a small printer
If you're looking for the exact opposite— creating something large from many A4 sheets —poster mode is your best friend. Although many users aren't even aware it exists, it comes built into a good number of advanced printers and drivers.
This feature allows you to split a large document (A3, A2, or even larger formats) into several smaller pages, usually A4, which you can then cut out and assemble like a puzzle . It's perfect for posters, decorations, presentation boards, or event visuals.
The activation method varies depending on the printer and software, but the general workflow is usually as follows:
- Open the large file (it can be A3 or larger) in the corresponding program.
- Ir a Print and select your usual A4 printer.
- Locate a tab of “Design”, “Page Layout” or “Advanced Features”.
- Activate mode “Poster”, “Mosaic” or similar.
- Adjust the final scale and page overlap so you can then paste accurately.
- Send to print and then, cut and assemble the pieces on a rigid base or on the wall.
Some professional printers implement it as a direct function from their own panel, and certain series of professional inkjet equipment even include pre-configured modes to expand content to A3 or larger by working in tiling, which greatly simplifies life when you don't want to mess around with fine driver settings.
It is a very economical solution to obtain striking results without the need for a plotter or resorting to external services , as long as you don't mind spending a few minutes cutting and pasting with some patience.
Quality, legibility, and appropriate use according to the objective
While it's technically possible to print an A3 document on an A4 printer, it's worth taking a moment to consider the intended use of the final document . An internal draft is not the same as an official document or an important presentation to a client.
If you only need quick drafts to review content , the option to automatically reduce from A3 to A4 is fantastic: you save paper, space, and time. For highly detailed plans or designs that only need a general review, a reduced copy is usually sufficient.
However, when the document is to be used in formal contexts, presentations, or deliverables to third parties , there are two factors you shouldn't overlook: legibility and the impression the final format makes. An A3 document glued together from two A4 sheets might be perfectly adequate for internal use, but it may not project a sufficiently professional image in an official submission.
In such cases, it may be worthwhile to use a real A3 printer or a professional printing service that guarantees good resolution, perfect alignment, and a more careful finish, with the possibility of printing on special papers, higher weights, checking color modes ( CMYK vs RGB ), or even using binding techniques.
Regarding durability, if you're going to handle the documents a lot or they'll be on display, it's advisable to use slightly thicker or higher-quality paper . This is especially important when assembling posters from several A4 sheets; very thin paper can bend or deteriorate quickly, while a good weight paper will withstand the test of time better.
Overall, printing A3 documents on A4 printers is perfectly feasible as long as you know when it makes sense to reduce the size, when it's best to split the document across multiple sheets, and when it's better not to cut corners and use a larger format . With current scaling, poster mode, and reduced copying features, size limitations are no longer the problem they used to be in offices.
Thanks to all these options, from automatically reducing an A3 to an A4 for drafts, to splitting into several sheets without losing anything at the edges, to using poster mode to create large formats from standard paper, you can adapt virtually any document to your A4 printer and get much more out of it, whether at home or at work.


Passionate writer about the world of bytes and technology in general. I love sharing my knowledge through writing, and that's what I'll do on this blog, show you all the most interesting things about gadgets, software, hardware, tech trends, and more. My goal is to help you navigate the digital world in a simple and entertaining way.