- Configure the client's DNS to point to the domain controller and verify connectivity by name.
- Join teams by GUI or PowerShell with AD credentials and reboot to apply changes.
- Resolve trust failures by reestablishing the secure channel or re-entering the device.
- Checks AD membership, resource access, and policy enforcement after joining.
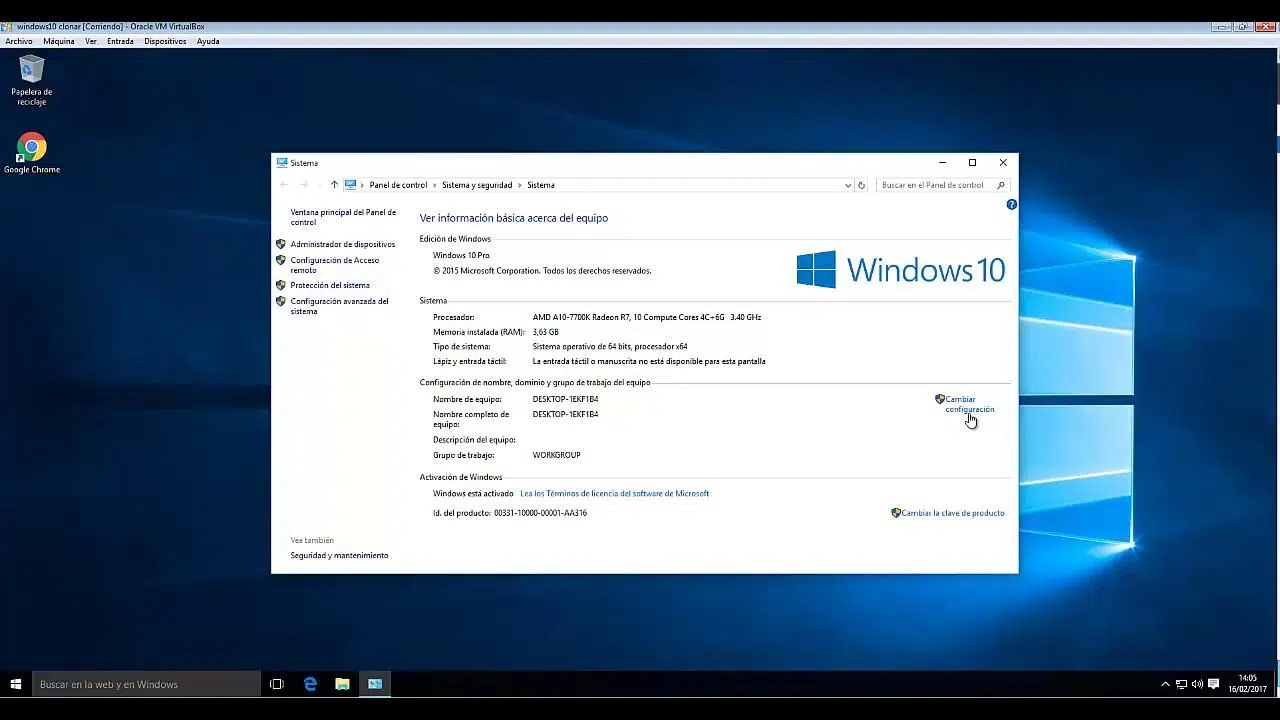
In the following lines, you'll find a complete, clear guide designed to leave no stone unturned: prerequisites, network setup (including DNS), interface and command -line methods , how to rejoin disconnected computers, and how to fix the dreaded trust relationship error. All of this is explained in detail for Windows 10 and Windows 11 , with practical tips to ensure you'll succeed. In environments where a server needs to be elevated to a domain controller, see how to promote a server to a domain controller to complete the infrastructure.
Prerequisites
Before anything else, it's important to confirm that you meet the minimum requirements. Without these, the domain join will likely fail or the process will be unstable.
- Compatible Windows Edition: Domain join is not available on Windows Home (including Home SL). You need Windows Pro or Enterprise.
- Has permissions on the domain- A credential with rights to add computers (usually Domain Administrator or specific delegation).
- Connectivity to the domain controller (DC): The client must reach the DC network without blocking (adequate latency and ports).
- DNS pointing to the DC: The preferred DNS of the computer must be the IP of the domain controller so that it can resolve AD names.
- Time and time zone in sync with the domain (Kerberos authentication is sensitive to time skew).
- Local permits On the computer: Start the process with an account that is a local administrator, if possible.
- Operational domain: AD DS must be installed and functional, with at least one accessible DC.
- firewalls: On domain/private networks, check that it does not block DNS, LDAP/LDAPS, Kerberos, RPC, etc. resolution. On public networks, it is recommended to keep it active.
If you have any doubts about your Windows edition, remember this key detail: Windows Home does not support joining domains ; if this happens to you, the first step is to upgrade to Pro or Enterprise.
Configure the network on the client computer
For the connection to work correctly the first time, the network configuration must be appropriate. The most critical point is the client's DNS : it must point to the domain controller's IP address, not the router or a public DNS server.
Windows 10
In Windows 10, you can leave the IP address assigned by DHCP if your network is properly configured, but ensure that the preferred DNS server points to the domain controller (for example, 192.168.1.5 as the domain controller's DNS server ). If you use a static IP address, define the IP address, gateway, and preferred DNS server for the domain controller, optionally allowing an internal alternate DNS server.
As a quick check for connectivity and name resolution, open PowerShell and ping the domain server by name. Use the actual name of your DC , for example:
ping server-2019-aIf it responds by name, you are validating that the client's DNS resolution is working and that the DC is responding on the network, which is essential.
Windows 11
In Windows 11, you can edit the DNS server assignment in Network Settings and set it to Manual for IPv4, specifying the domain controller's IP address (for example, 192.168.1.5 ) as the preferred DNS server. The remaining parameters can be managed by DHCP if your infrastructure supports it.
Repeat the connectivity test using PowerShell to verify that everything is working correctly:
ping server-2022-aIf you don't get a response, double-check your network settings, firewall, and that the server name is correct. Correcting the client's DNS usually resolves most problems at this stage.
Check that the network configuration is correct
Once you've finished configuring the network, it's a good idea to validate it with some very specific tests. Open a command prompt ( CMD or PowerShell) with the necessary permissions and perform these checks:
- Ping the DC by IP address to confirm IP-level network connectivity.
- Ping the DC by DNS name to verify that The client resolves against the domain's DNS.
- nslookup of the DC name and domain (e.g. contoso.local) to verify that the queries point to the DC's DNS.
If something goes wrong, it's usually a DNS, gateway, or firewall issue. Fix this before attempting the join , or you'll waste time with misleading errors.
Joining a device to a domain
There are two common ways to join a team: through the graphical interface or via command line/PowerShell. Both methods achieve the same result , so use whichever is more convenient or easier to automate for you.
Control Panel Method (graphical interface)
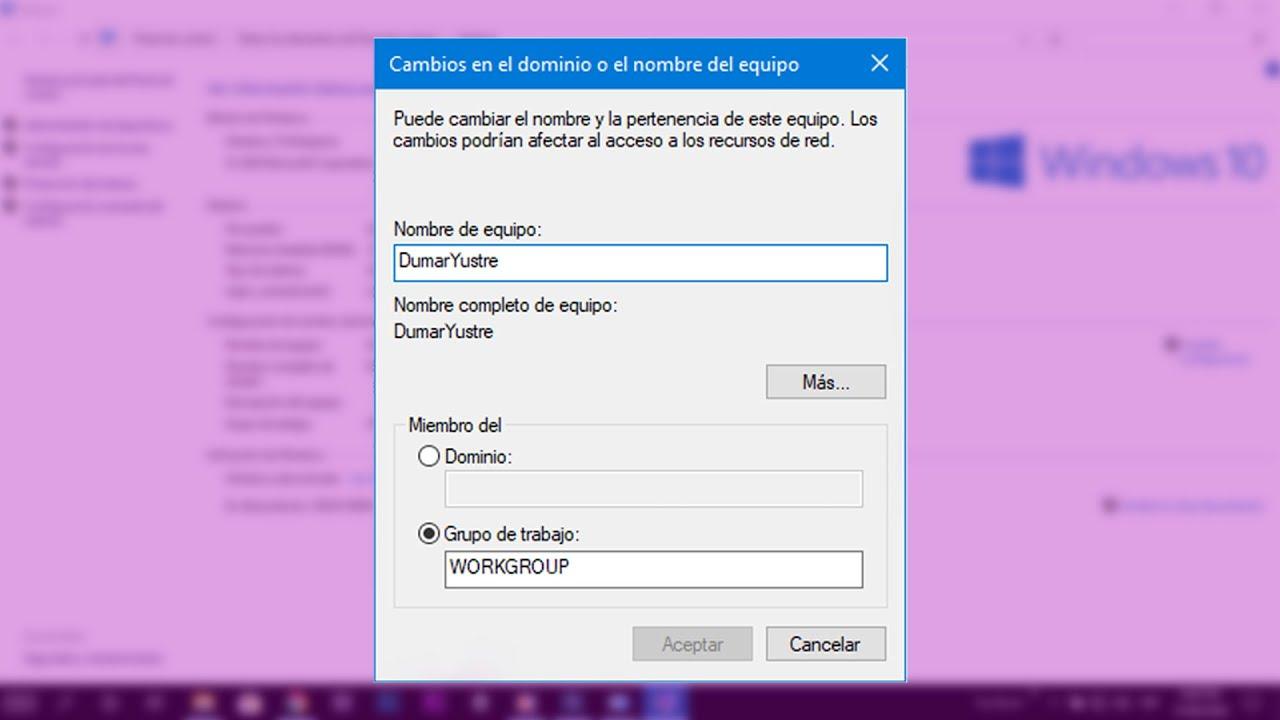
This procedure is valid for Windows 10 and 11 with minor aesthetic differences. The idea is to access System Properties and change the group name to switch from WORKGROUP to the domain.
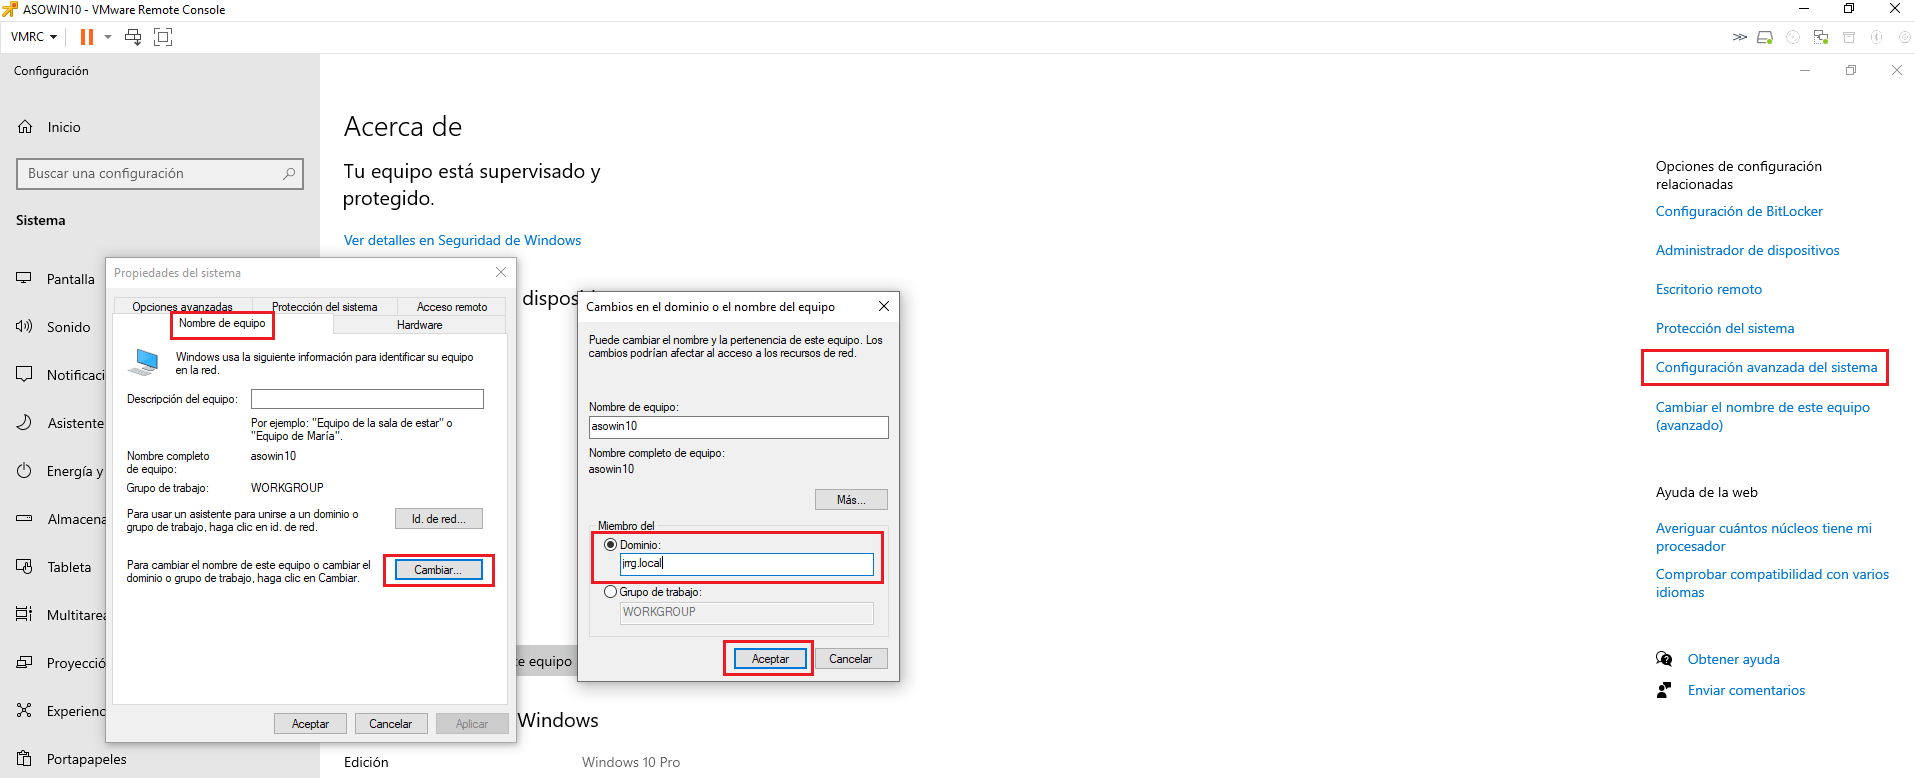
- Open System Settings and go to the About section. From there, open System Information or Advanced System Settings.
- In System Properties, click Change to modify the computer name and membership.
- In the Member of area, select Domain and enter the domain name (e.g., somebooks.local or yours).
- Credentials with permission to join computers to the domain will be requested. Enter a domain username and password.
- If everything is correct, the welcome to the domain message will appear and you will be asked to restart.
- Reboot to apply changes. Until you reboot, the union is not active..
If you have pre-created the team account in the domain (for example, CLIENT-W10-01 or CLIENT-W11-01), make sure to use that same team name on the client before joining, so that it matches the pre-set account.
Command line method
The command line and PowerShell allow you to quickly and automatically join computers to the domain. This is ideal for scripting or mass deployments.
In PowerShell with administrator privileges , you can run:
add-computer -DomainName midominio.local -Credential MIDOMINIO\Administrador -Restart -ForceWhen you run the command, a credentials window will open (if you haven't already entered them) for the domain user with permissions. The computer will join and restart automatically when finished.
If you prefer CMD, you can also achieve this using command-line utilities. The process is the same : specify the domain, credentials, and restart after the operation.
Rejoin a detached device to a domain
A team may have been disconnected from the domain for maintenance, a new branding, or due to issues. In these cases, a controlled disconnection followed by reconnection is recommended to re-establish trust and a secure channel.
Using the graphical interface, go to System Properties, change the membership to Workgroup, confirm, and restart. Then repeat the process to rejoin the domain and restart again.
If you prefer to work from the command line , PowerShell offers a convenient workflow:
# Desunir del dominio (solicitará credenciales de dominio con permiso para quitar el equipo)
Remove-Computer -UnjoinDomainCredential MIDOMINIO\Administrador -PassThru -Verbose -Force -Restart

# Tras reiniciar, volver a unir al dominio
Add-Computer -DomainName midominio.local -Credential MIDOMINIO\Administrador -Restart -Force
This process clears up any inconsistent states of the team account in Active Directory and on the client. When in doubt, removing and rejoining is usually the quickest solution.
Repairing the domain trust relationship
A relatively common error is a broken secure channel between the computer and the domain controller. The typical symptom is the following message on the screen :
The trust relationship between this workstation and the primary domain failed.This usually happens when the computer account password isn't synchronized with the domain database, or if the computer account in Active Directory was deleted or corrupted. The good news is that it can be fixed without reinstalling.
If you have local administrator credentials on the affected machine, you can restore trust from PowerShell:
# Restablecer la contraseña de la cuenta de equipo/canal seguro contra un DC
Reset-ComputerMachinePassword -Server DC01 -Credential MIDOMINIO\Administrador
When finished, restart your computer. Alternatively, if needed, you can use command-line tools for the secure channel. The important thing is to resynchronize the machine account with the domain controller.
If resetting is not possible or fails, apply the previous strategy: detach from the domain and reattach (either via GUI or PowerShell). In most scenarios, one of these methods will restore trust to your site.
Log in to the domain
After the restart following the join, it's time to authenticate with a domain account. The login screen usually displays the last local user , so switch to a domain user.
In Windows 11, click on Other user and enter DOMAIN\username or [email protected] and your password. You will see NetBIOS domain information below the password field , confirming that the session will open against the correct domain.
The first time it takes a little longer because the user profile is being created on the computer. It's normal to see desktop preparation messages during that first startup.
If you're connecting to a newly joined server via Remote Desktop (RDP), remember to include the domain name in your credentials so that authentication is performed against Active Directory. Recommended format: DOMAIN\username.
Checks and tests after joining
It's a good idea to do a few checks to make sure everything is working perfectly. A quick validation will save you from unpleasant surprises later.
- System Properties: Confirm that the computer is listed as a member of the correct domain.
- On the domain controller, open Active Directory Users and Computers and verify that the team account appears in the expected OU.
- Accessing Server Shares: Log in to a test share and create a .txt file to validate permissions and SMB connectivity.
- Policies: Force an update with gpupdate /force and check that domain policies are applied.
- Firewall: On private or domain networks, adjust if necessary. On public networks it is recommended to keep it enabled For security.
Joining computers to a domain shouldn't be a headache if you meet the requirements and follow the logical order: properly defined network and DNS settings, connectivity test by name, choice of method (GUI or PowerShell), and restart. If something goes wrong, repairing trust or rejoining usually restores normality in minutes; and subsequent checks will ensure everything is in place.


Passionate writer about the world of bytes and technology in general. I love sharing my knowledge through writing, and that's what I'll do on this blog, show you all the most interesting things about gadgets, software, hardware, tech trends, and more. My goal is to help you navigate the digital world in a simple and entertaining way.