- Installing AAA games on platforms like Steam or other stores makes it easier to locate their folders and manage updates.
- Mods can change graphics, gameplay, or fix bugs, but they require backups and reliable download sources.
- Tools like Steam Workshop or mod managers simplify the installation, loading order, and deactivation of content.
- Testing mods gradually and checking compatibility avoids conflicts, especially in games with an online component.
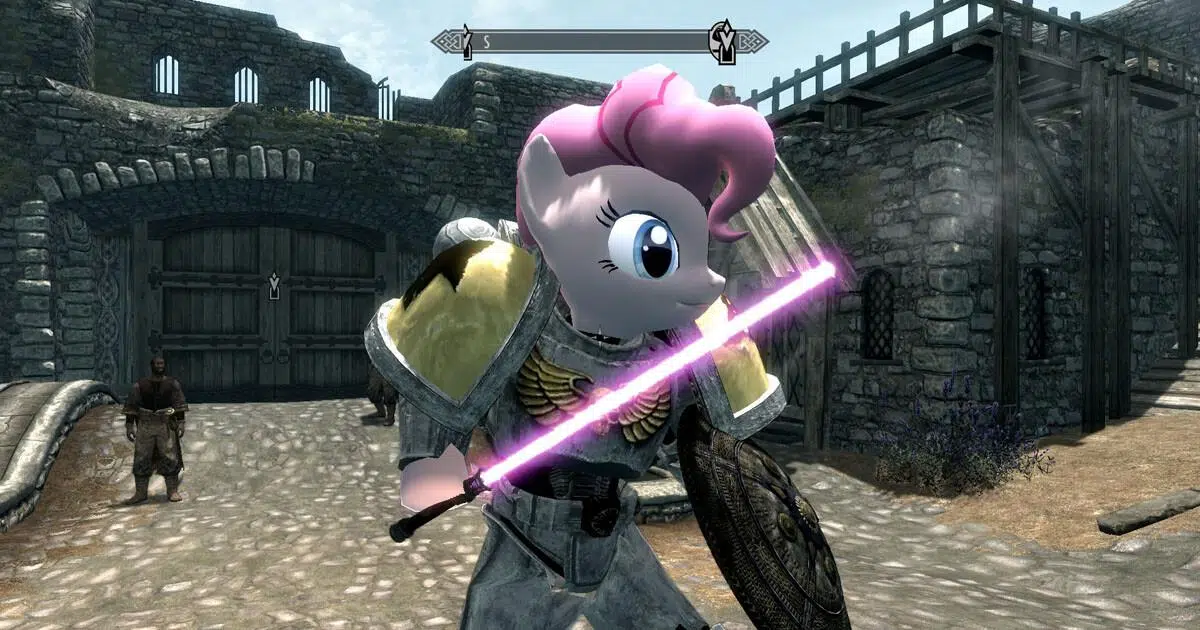
If you're coming from a console gaming background and are now making the jump to PC, it's normal to wonder how on earth you install games and, especially, how to add mods to AAA games without messing things up. Many gamers are in the same boat: they know Steam exists, they've heard about amazing mods, but they have no idea where to start or what they actually need.
In this article, we'll explain everything calmly, as if we were right next to your computer. You'll see what Steam is, how it differs from installing games from a website, what mods are, and how to add them to various AAA titles step by step. You'll also learn how to manage mods so they don't break the game , keep it stable, and what to do when something isn't working. The idea is that, by the end of this article, you'll be able to confidently and fearlessly start trying out mods.
What exactly is a mod and why is everyone talking about them?
Before touching anything on your PC, it's important to understand what a mod is. A mod (short for "modification") is basically a set of files that change or add content to a game: it can range from a simple texture recolor to a new campaign, different characters, gameplay changes, or significant graphical improvements. Mods are not official; they are created by the community, although some studios provide direct support for these modifications.
AAA games—the big-budget releases—typically have very active communities that generate tons of mods. These range from quality-of-life improvements (like enhancing the interface, adding shortcuts, or fixing translations) to major overhauls of the combat system, economy, or story. In many cases, mods extend a game's lifespan for years and make replaying it feel almost like experiencing a brand-new title.
However, it's important to understand that a mod always involves modifying game files, and that comes with risks. A poorly installed mod can cause crashes, graphical glitches, corrupted save files, or even prevent the game from launching at all. That's why it's so important to know how to install, uninstall, and manage mods to ensure the most stable experience possible.
You should also keep in mind that not all AAA titles accept mods in the same way. Some have official systems (like Steam Workshop), others rely on their own launchers, and still others don't allow modifications at all because they would break multiplayer or provide unfair advantages. The key is to always respect the rules of the game and its community.
In short, a mod is a way to customize and improve your experience, but it requires a minimum of organization and common sense to ensure everything works well and you don't end up uninstalling the game in frustration.
Steam and other platforms: where to install your AAA games
Many people who come from console gaming hear about Steam but aren't quite sure what it is. Steam is a digital platform for PC games where you can buy, download, and update games in one central location. Think of Steam as a combination of a store, library, and automatic update manager . Many titles also integrate an official mod system called Steam Workshop. If you need a guide on installing games through Steam, see how to install games on Windows with Steam.
However, Steam isn't the only option. There are other popular platforms like the Epic Games Store, GOG Galaxy, Ubisoft Connect, the EA App, and Origin (depending on the era and the game). Each works similarly: you create an account, buy the game, install it using its official client, and the platform takes care of keeping it updated. The main differences lie in their mod policies, extra features, and how the library is managed.
When you install a AAA game from Steam, the files are usually located in a path like "Steam\steamapps\common\GameName" . The folder structure may vary slightly on other platforms, but the basic idea is the same: there's a main game directory containing the executables and other files. This is precisely where many manual mods are typically placed.
On the other hand, some people download games from external websites (whether official studio stores, legitimate websites with keys, or, in the worst-case scenario, unauthorized sites). In these cases, the installation might be a standalone executable, a standard installer, or even a compressed folder that you simply extract. The important thing is that, to install mods, you need to locate the folder where the game is actually installed , regardless of its source.
Is it mandatory to have the game on Steam to use mods? Not at all. Many tutorials are based on Steam because it's the most widespread platform on PC. But mods also work on copies from other stores as long as you keep the same game version and file structure . However, some mods specific to the Steam Workshop are only designed to work through that system.
Basic requirements before starting to install mods
Before you start downloading files like there's no tomorrow, it's a good idea to check that your PC meets the minimum requirements. AAA games are usually demanding, and mods, especially graphics mods, can increase resource consumption even further. You'll need a reasonably powerful computer with enough RAM, a decent graphics card, and enough disk space to store both the game and any extra files.
One of the most important things is learning how to make backups. Always, always, before installing a mod that modifies important files, make a backup of what you're going to replace. You can copy the entire game folder or, at least, the files specified by the mod author. This way, if something goes wrong, you can restore the previous state without having to reinstall the entire game.
It's also crucial to keep your game updated to the latest stable version, especially on platforms like Steam or GOG. Many mods are designed for a specific version, and if your game is outdated or too far ahead, you may encounter conflicts. Always check the mod's page to see which game version it supports, and if necessary, temporarily disable automatic updates to prevent an official patch from breaking your mod collection.
Don't forget about safety. Only download mods from trusted sources: reputable sites like Nexus Mods, ModDB, the Steam Workshop itself, or official game community forums. Avoid suspicious websites, strange shortened links, and any files that ask you to run unfamiliar installers. While most mods are safe, malicious content can always slip through. Keep your antivirus software active and never run anything you don't understand.
Finally, keep in mind that installing and managing mods is a process with a bit of trial and error. Even if you do everything correctly, you'll sometimes encounter conflicts or unexpected errors. The important thing is to proceed gradually, adding mods in an organized way and checking the game after each change to quickly identify which mod is causing problems.
How to install AAA games on your PC step by step
While it might sound basic, for someone coming from a console, installing a game on PC isn't so obvious. On consoles, you just insert the disc or download it from the store and that's it; on a PC, there are more variables. Even so, the process is usually quite simple, especially if you use a platform like Steam or other digital stores.
If you use Steam, the first step is to create a free account on their official website and download the desktop client. Once installed, log in, go to the store, buy the AAA game you're interested in, or, if you already own it, locate it in your library. From there, simply choose the drive where you want to install it and click "Install." Steam will then download all the necessary files and configure the game automatically.
On platforms like the Epic Games Store, GOG, Ubisoft Connect, or the EA App, the process is very similar: create an account, install the client, log in, purchase or activate the game, and click the install button. Each launcher usually has its own default folder (for example, in Program Files), but almost all allow you to choose a custom directory for your games , which is very useful if you have multiple discs.
When the installation comes from an executable downloaded from the studio's official website, you'll have an .exe file or something similar. Run it, accept the license terms, choose the installation path, and wait for the installer to copy the game files. It's the classic process. Finally, you'll have a shortcut on your desktop or in the Start menu.
What does vary significantly between games is how save files are handled and where settings are stored. In many modern AAA games, save files are stored in a separate folder (Documents, AppData, etc.) and not within the main game folder. This is important because, if something goes wrong with mods, your progress is usually safe in a separate location , although it's still a good idea to back up those save files from time to time.
Types of mods and where to get them safely
Now that the game is installed and running, it's time to talk about the types of mods you'll find. Although each community organizes content in its own way, they can usually be divided into several categories, and knowing them will help you understand what might conflict with what and what's more or less risky to install.
First up are visual content mods: new high-resolution textures, lighting packs, post-processing filters, weather changes, improved character models, and more. These are usually the most visually striking and, at the same time, the most resource-intensive. They can completely transform the look of a AAA game, and if you want specific examples and guides for textures and weather, check out how to install weather and textures in high-resolution mods.
Then there are gameplay mods, which alter the game's internal rules: difficulty, damage, weapon balance, enemy AI, economy, mission rewards, and so on. These mods are extremely popular in open-world and RPG titles because they allow you to tailor the experience to your liking. However, they often conflict with each other, as many modify the same internal files or scripts.
We mustn't forget the quality-of-life improvements and fixes: improved translations, corrected subtitles, bug fixes that the studio never patched, clearer menus, advanced configuration options… These kinds of mods are highly valued because they make the game feel more polished without drastically altering its original spirit. In more than one modern AAA title, the community has ended up fixing problems that the developers left unresolved.
As for where to find them, it's best to stick to a few well-known sites. Nexus Mods is one of the leading resources: it has an advanced search engine, a user system, ratings, reviews, and download managers. ModDB is another veteran site with thousands of projects. And, of course, if your game has official support, the Steam Workshop is one of the most convenient and secure ways to manage mods, since everything is handled directly from the Steam client.
Install mods with Steam Workshop
For many AAA games, the easiest and cleanest way to install mods is through the Steam Workshop. If your game supports it, you'll see a link to "Workshop" on its store page or in your Steam library. From there, you'll access a kind of mod catalog organized by category, popularity, and date , where you can subscribe to the ones that interest you most.
The process is very straightforward: log in to Steam, go to the game's page, navigate to the Workshop, and when you find a mod you like, click "Subscribe." From that moment on, Steam will automatically download the content when you open the game or the client itself, depending on how that title is configured. You don't have to manually copy files or access the game's folder.
In most games with Workshop, the title menu usually includes a "Mods" or "Additional Content" section where you can easily enable or disable each mod you've subscribed to. Some allow you to change the loading order, while others simply require you to check an activation box. It's a system designed to save users from having to deal with internal files.
A major advantage of the Steam Workshop is that it also manages mod updates. If the creator uploads a new version, Steam will download it automatically, keeping everything up-to-date without you having to worry about it. However, this can also mean that something might suddenly stop working if the author drastically changes the mod or if the game receives a major official patch.
If a Workshop mod starts causing problems, you can disable it from the game menu or simply "cancel the subscription" from the mod's page on Steam. This will cause Steam to remove the files associated with that content in the next game update. In extreme cases, you may need to verify the integrity of the game files through Steam to ensure no corrupted files remain.
Manual installation of mods in AAA games
Many AAA titles, especially those with highly technical or long-established communities, still rely on the manual installation of mods. This means you'll need to download a compressed file (.zip, .rar, .7z, etc.), extract it with a program like 7-Zip or WinRAR, and copy certain files to the game folder following the author's instructions.
The first step is to locate your game's installation path. If you have it on Steam, you can right-click on the title in your library, go to "Properties," and then to "Installed Files" to open the folder directly. On other platforms, you'll have to look in the location you chose during installation or check your client settings. Once you've found it, it's a good idea to memorize it or create a shortcut, as you'll be referring back to it often.
Within that main folder, there may be subfolders such as "Data," "Mods," "Content," "Paks," or similar, depending on the game engine. Many mod authors include a pre-set folder structure so you only need to drag and drop the extracted content into the game directory, merging folders when prompted by the system.
It's crucial to read the "Readme" file or the instructions on the mod's website. These usually indicate which original files you should back up, whether anything needs to be renamed, if you need to launch the game with special parameters, or if the mod depends on another component (for example, a script extender or an additional library). Skipping this step is the fastest way to end up with inexplicable errors and crashes right from the start.
To uninstall mods manually, it's best to have made a backup before overwriting anything. In that case, you simply restore the original files. If you didn't, you'll have to try deleting the added files and, if the game still crashes, use the "verify game files" option in Steam or reinstall from scratch. Hence the emphasis on always making a backup of anything you're going to modify.
Mod managers: order in chaos
In some games with thousands of available mods, installing everything manually becomes a real nightmare. To avoid this, the community has created dedicated mod managers, such as Vortex (for many games), Mod Organizer, and tools specific to certain game series. These programs handle the centralized installation, activation, deactivation, and organization of mods , greatly reducing the likelihood of conflicts.
The general process is usually similar: you install the mod manager, tell it where your game is located, and then download the mods, either directly from the program (in the case of some linked services) or by adding them as files. The manager takes care of placing them in the appropriate folders and, in many cases, creates a kind of virtual "layer" so that the original game files aren't physically touched. If you want to learn how to use Vortex as a practical example, there are guides that explain the process step by step.
One of the great advantages of these mod managers is that they allow you to change the loading order of mods, which is critical in games where many mods modify the same resources. The order determines which mod "wins" when changes to the same file overlap. By adjusting this priority, you can ensure that several mods coexist without conflicting with each other, or at least minimize compatibility issues.
Furthermore, most mod managers allow you to group mods by category, activate and deactivate entire sets (for example, a "light mods" profile for when you want more stability and a "heavy mods" profile for when you feel like experimenting), and see at a glance if there are any officially detected conflicts between certain packages . It's a much more convenient way to keep track of what you've installed.
However, using a mod manager doesn't exempt you from reading the instructions. Some mods don't work well with certain managers, others require additional manual steps, and sometimes it's best to avoid duplicating methods (for example, installing both a manual mod and a Workshop mod that affect the same thing). Ideally, you should follow the recommendations of each game's specific community and avoid mixing methods unnecessarily.
How to avoid errors and conflicts when using mods
The tricky part of all this is getting mods to coexist peacefully. The more mods you add, the greater the chance of something breaking, especially in very complex AAA games. That's why it's essential to follow a set of best practices to minimize errors and facilitate troubleshooting when something goes wrong.
The golden rule is to install mods one at a time or in very small groups, testing the game in between. Install a mod, launch the game, enter a save file (preferably a new one or a copy of your main save), play for a few minutes, and if everything is stable, move on to the next one. This allows you to pinpoint exactly which mod is causing a problem, instead of installing twenty at once and having no idea where the issue lies.
It's also a good idea to keep a record, even if it's just in a notepad, of the list of mods you use, their versions, and where you downloaded them from. This way, if you need to ask for help on a forum or the mod's website, you can provide useful information to the community. Many experienced players always request that the list of active mods and their load order be published so they can identify potential incompatibilities.
If a mod is causing errors, the first thing you should do is disable or remove it and see if the problem disappears. Sometimes, however, the damage can remain in the game (for example, missing objects, incomplete scripts, etc.). That's why some developers recommend not removing certain mods mid-game, or only doing so by following specific steps. Again, carefully reading the instructions section is crucial.
On a technical level, it's advisable to keep your graphics card drivers up to date, especially if you use mods that change lighting, resolution, or apply advanced filters. Many strange graphical errors can be resolved simply by updating the necessary drivers and libraries (such as DirectX, Visual C++ Redistributable, etc.) before blaming the mod itself; and there are also specific guides on optimization and stability that can help you keep your game running smoothly.
If the game refuses to launch after installing a mod, try verifying the integrity of the game files from the game client (on Steam, this is an option within the game's properties). This forces the platform to check which files differ from the official version and re-download them, restoring any corrupted files the mod may have damaged. It's a very useful tool when the original backup has been lost.
Mods and online games: extra precautions
Another sensitive issue is the use of mods in AAA games with online or competitive components. In multiplayer-focused titles, developers are usually very strict with any modifications that could provide unfair advantages, alter character behavior, or manipulate game data. In these cases, using unauthorized mods can result in bans or penalties.
In games with both offline and online modes, the basic rule is to carefully review what the studio says about mods. Some allow purely cosmetic client-side modifications (for example, reshades or interface changes that only you can see), but prohibit any alteration of gameplay or network files. Others outright block all types of mods, even if they seem harmless.
Games that embrace modding usually make this clear and often limit its use to single-player mode. There are cases where you can launch the game with or without mods depending on the type of game you want, clearly separating a "clean" multiplayer experience from a fully modified single-player campaign . Pay attention to how the game starts and what options it offers.
If you have doubts about a specific mod, it's best to consult the game's community: official forums, Discord servers, subreddits, etc. Many players share lists of "safe" mods to use under certain conditions or explain which tools are the maximum tolerated by the anti-cheat system. Never assume that just because something works without apparent errors, it's allowed by the terms of service.
In any case, if your goal is to enjoy mods in single-player campaigns or games focused on the offline experience, you'll have much more freedom and fewer risks. That's where the world of modding truly shines, allowing you to customize AAA titles to your liking without worrying about anti-cheat systems or bans.
Practical tips for those starting from scratch
If you've never installed a mod before and you're coming from consoles, seeing so many terms, folders, and tools can be a bit overwhelming. But with a few basic habits, the process becomes quite routine, and before long, you'll be switching between and testing mods like it's nothing. The key is to take your time and follow a few logical steps.
To begin, choose a single AAA game as a "testing ground" for your first mods. Ideally, choose one known for having an active community and good documentation. Install it on Steam or another official platform, make sure it launches smoothly, and play for a while without mods to verify that your PC can handle it. Only then should you start adding modifications, beginning with small and simple ones, and gradually progressing to more complex ones.
Become familiar with your system's folders. Learn where games are installed, where save files are stored, and how to navigate there without getting lost. The more comfortable you are moving between directories, the easier it will be to follow mod authors' instructions . Don't be afraid to create backup subfolders with clear names so you know what's what.
Get into the habit of reading other users' comments on each mod's page. They often contain valuable information: whether the mod works well with the latest version of the game, if it conflicts with other popular mods, if the author frequently answers questions, and so on. Many times, players themselves explain tricks or steps that aren't clear in the original description . If you're interested in starting with a well-documented title, you can check lists of essential Skyrim mods for practical installation and compatibility examples.
Finally, don't get frustrated if you ever have to uninstall everything and start from scratch. It's all part of the learning process. The first few times you'll make mistakes, forget to make backups, or mix incompatible mods. The important thing is to get into the habit of working systematically, testing, and gradually building a stable configuration tailored to your preferences that transforms your favorite AAA games into unique experiences.
Once you get used to this world, a huge range of possibilities opens up: from improving graphics and performance to completely changing the rules of the game, adding fan-made campaigns, or even totally transforming a title into something almost new. With some patience, good security practices, and support from reliable communities, installing and managing mods in AAA games stops being a hassle and becomes just another part of the fun.


Passionate writer about the world of bytes and technology in general. I love sharing my knowledge through writing, and that's what I'll do on this blog, show you all the most interesting things about gadgets, software, hardware, tech trends, and more. My goal is to help you navigate the digital world in a simple and entertaining way.