- OpenClaw is an open-source AI agent that performs real-world actions on your system and integrates with multiple messaging platforms.
- The installation can be done on Windows, macOS, Linux or on a VPS, the latter being the safest and most practical option for 24/7 use.
- Choosing the right AI model and API provider is key to controlling costs, combining powerful models with cheaper options.
- With careful configuration of permissions and security, OpenClaw allows you to automate complex tasks while maintaining control over your data.
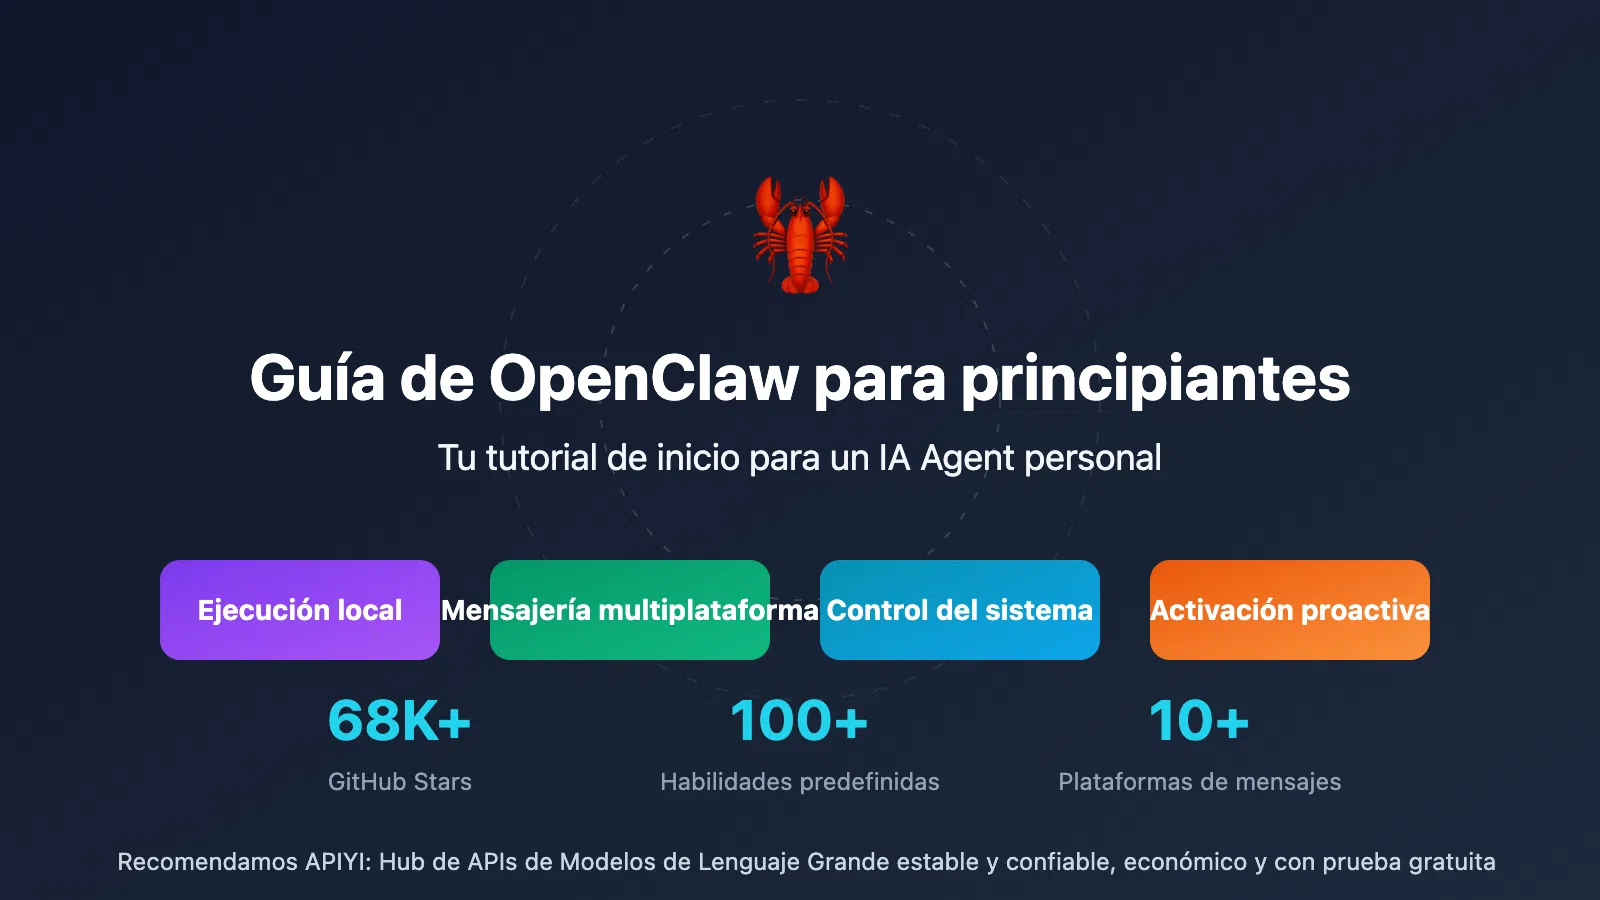
If you've been tinkering with artificial intelligence for a while, you've probably heard of OpenClaw, formerly known as Clawdbot or Moltbot, an autonomous agent capable of running your computer almost like a person. It's not "just another ChatGPT": this little guy opens windows, browses the web, reads emails, moves files, and connects to your messaging apps to work for you 24/7.
In this guide, we'll see how to install and configure OpenClaw step by step on Windows, both on your own PC and on a VPS server . We'll cover the risks of giving AI control of your machine, which language models to use to avoid breaking the bank, and how to communicate with it via Telegram or WhatsApp. The goal is for you to finish this article with your own personal "Jarvis" up and running and, above all, with a clear understanding of its limitations.
What is OpenClaw and why is it so talked about?
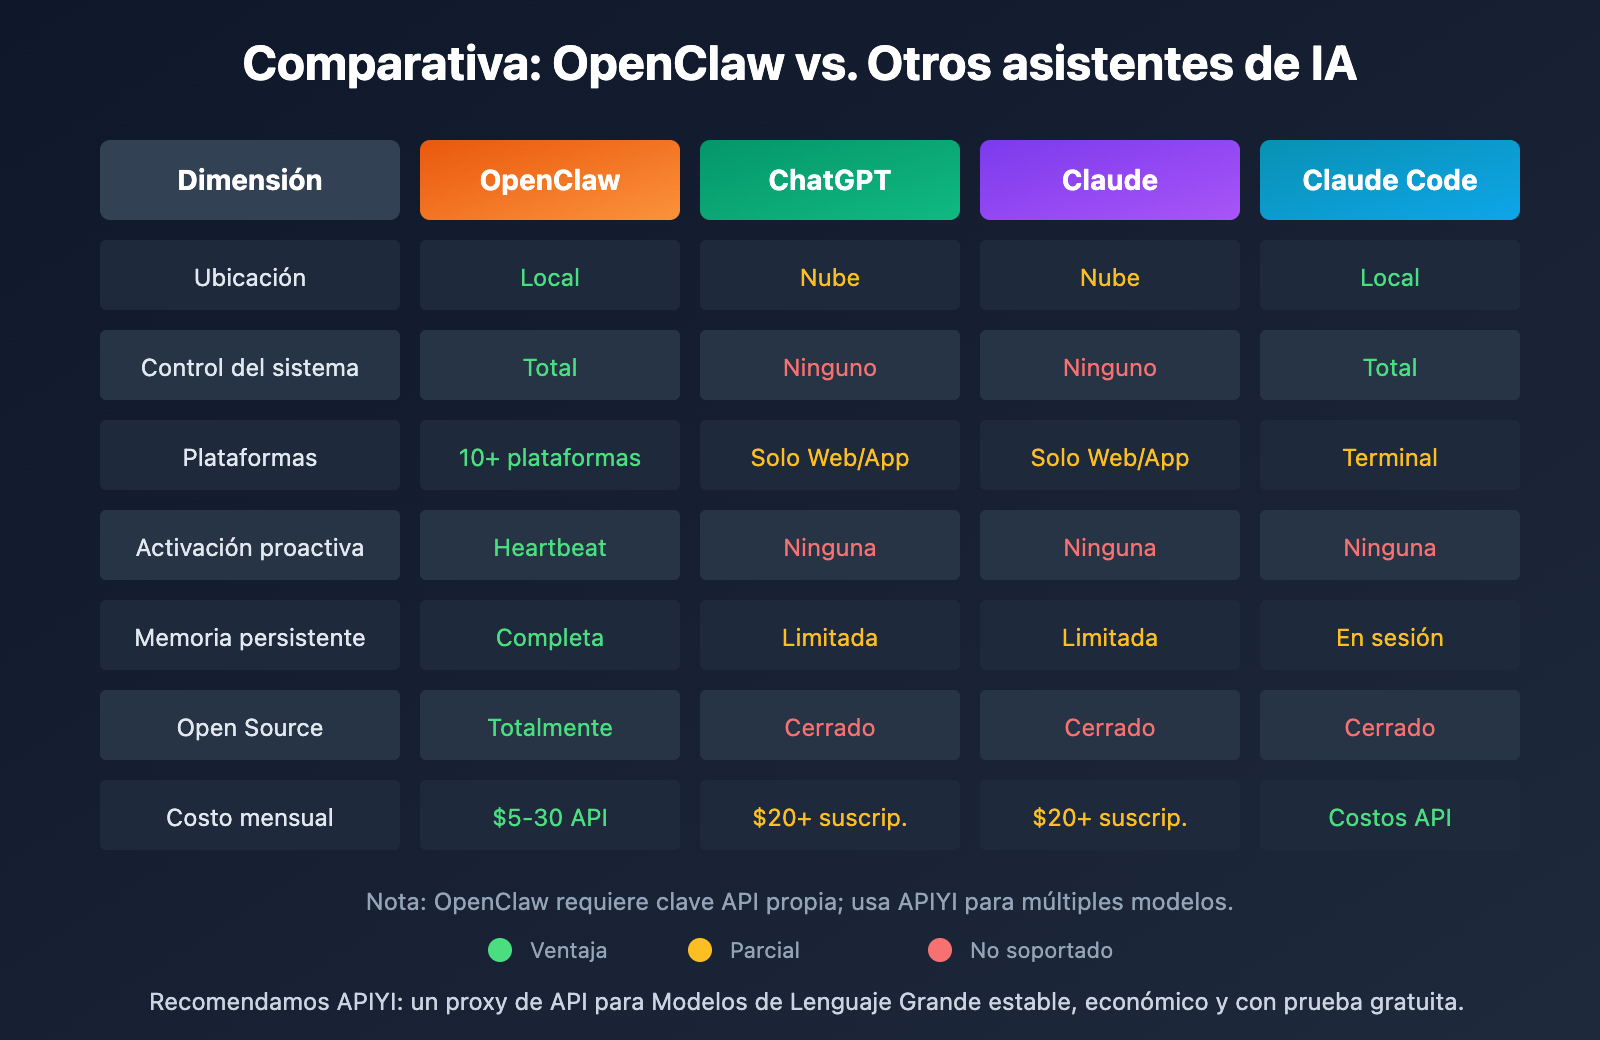
OpenClaw is an open-source AI agent that not only converses but also performs real actions on your computer . Unlike ChatGPT, Gemini, or similar models, it doesn't just give you instructions: it can open your browser, fill out forms, manage files, check your calendar, or automate repetitive tasks without you having to touch your mouse.
It originally became famous under the name Clawdbot, then Moltbot, and finally OpenClaw after several changes due to trademark issues (especially with Anthropic and its AI Claude). If you see old tutorials with the previous names, don't worry: they're talking about the same project, just with a new look.
The project's philosophy can be summarized as "Your assistant. Your machine. Your rules." You choose where it runs (laptop, desktop, home server, or VPS), what permissions to grant it, and which AI model is behind it. All data control and automation remain within your infrastructure.
Among its capabilities are its integrations with more than ten messaging platforms (WhatsApp, Telegram, Slack, Discord, iMessage, etc.) , its persistent memory to remember context and preferences, and the Heartbeat function, which allows it to act proactively: checking your email, monitoring websites, or preparing things before you ask it to.
However, to understand and generate text, OpenClaw relies on APIs from major language models such as Claude, GPT, Gemini, and others compatible with the OpenAI API . The "body" is free and open source; you choose the "brain" from various providers, either directly or through aggregators like OpenRouter or platforms such as APIYI.
Risks and best practices before installing OpenClaw

The first thing to understand is that OpenClaw can have full access to your system if you allow it : files, applications, browser history, saved passwords, bank details, sensitive documents… It's not an innocent toy that answers four questions and that's it.
That's why it's strongly recommended that you don't install it initially on your main computer where all your digital data is stored . It's much wiser to use a secondary laptop, an older computer dedicated solely to testing, or, even better, an isolated virtual machine to limit the impact of any AI errors.
The idea is that, at least initially, you limit the data OpenClaw can access : no disks with family photos, tax documents, or passwords saved in your browser. A clean and controlled environment is the best way to learn how to use it without any unpleasant surprises.
In addition to isolation, it's advisable to start with restricted permissions (sandbox mode) , gradually expanding them and carefully reviewing any automations you configure. OpenClaw can execute shell commands, scripts, manage the file system, and control a browser; each extra permission is more power you give to an AI over your computer.
And one last important warning: always install OpenClaw from its official website or GitHub repository . Since it has changed its name several times, clones and fake websites have appeared trying to sneak in malware or steal API keys. Be wary of binaries from dubious sources and never share your private keys with anyone.
Pre-preparation in Windows: requirements and settings
On Windows, the installation process has a couple of extra nuances because OpenClaw is primarily designed for Unix environments (macOS and Linux) and relies heavily on the command line. Simply pasting the command from the website will likely lead to permission or dependency errors.
Before launching the installer, it's advisable to install Git from its official website (git-scm.com) . Download the version for your Windows system, run the installer, and accept the default options; there's no need to change anything in the wizard.
Another key point is PowerShell. In some Windows configurations, the execution policy blocks scripts downloaded from the internet. If you receive a warning when running the OpenClaw installation command that scripts cannot be executed due to the execution policy , you will need to change it manually.
To do this, open PowerShell with user privileges (admin privileges are not required in most cases) and run the command `Set-ExecutionPolicy RemoteSigned -Scope CurrentUser` . When prompted to apply the changes, answer yes. This allows unsigned local scripts and signed remote scripts to run for your current user.
It's not mandatory, but it's a good idea to check that you have a recent version of PowerShell installed and, if you're doing manual installations, that you have Node.js and npm. You can verify this by typing `pwsh --version`, `node -vy`, and `npm -v` in the console . The OpenClaw installer usually handles Node.js automatically, but if you already have it updated, even better.
How to install OpenClaw on Windows step by step
With everything prepared, we can now proceed with the actual installation. The entire process is done from the console, but if you know how to copy and paste, it's quite straightforward.
In Windows, we'll use PowerShell as our main terminal . Open PowerShell (you can search for it in the Start menu) and navigate to any folder where you have user permissions; you don't need any special paths.
On the official OpenClaw website, you'll find the Windows installation command, which is usually something like `iwr -useb https://molt.bot/install.ps1 | iex` (or an equivalent URL updated with the new domain and name). Copy that command exactly as shown into your browser.
Paste the command into the PowerShell window and press Enter. The OpenClaw installer for Windows will then download and run , automatically detecting your operating system and downloading necessary dependencies such as Node.js and other components.
During the installation, messages will appear in the console indicating what is being configured. You should generally accept the default options when prompted, unless you have very specific requirements. At the end of the process, you should see several green checkmarks indicating that all steps have been completed successfully.
Once the installation is complete, you'll see a green message confirming that OpenClaw has been successfully installed . Within a few seconds, without you having to do anything, the initial setup wizard (onboarding) will open in the console itself, where you'll configure the AI model, messaging channels, and other basic settings.
Installation on macOS and GNU/Linux
If you're working on macOS or a GNU/Linux distribution, the procedure is quite similar to Windows, but the installation command changes. In this case, you'll use the system's standard terminal (Terminal on macOS, the usual console on Linux).
Open your terminal and navigate to the folder where you want to install the files (or stay in your home directory if you prefer). From the official OpenClaw website, copy the Unix command, which is usually something like ` curl -fsSL https://clawd.bot/install.sh | bash` or similar with the updated URL.
Paste the command into the terminal and press Enter. The script will download the dependencies, check the Node.js version, and prepare OpenClaw for its first startup . Just like on Windows, you'll see a sequence of messages, and when it's finished, the interactive setup wizard will appear.
If you prefer a more manual approach, you can also clone the official GitHub repository with `git clone`, navigate to the directory, and run `npm install` to install the dependencies. Then, configure your `.env` file with the API keys and launch OpenClaw with `npm run start`. This method is more flexible, but also somewhat more technical.
Installing OpenClaw on a VPS: the most practical option
Many users started by installing OpenClaw on their laptop or a Mac Mini at home, but in the medium term, having a computer running 24/7 is a nuisance : noise, heat, power consumption, and above all, the question of whether you want an experimental AI to have access to your personal data.
A cheap VPS server solves several problems at once: it's always on, isolated from your home files, and you pay monthly without having to invest 700 or 800 euros in new hardware that you might not even use. For OpenClaw, you don't need a GPU or a monster CPU, because the heavy lifting is done by the cloud API.
With a basic plan from a trusted provider (for example, a VPS with about 4 GB of RAM and a few euros per month ) you have enough power for OpenClaw to run automation tasks, light scraping, email management and more without breaking a sweat.
The typical flow is simple: you contract the VPS, wait for the activation email with the IP and root password, and then connect via SSH from your computer (terminal on macOS/Linux or PuTTY on Windows) using the credentials given to you by the company.
When you see the black server console on the screen, you are already inside your "cloud computer" and you can start installing OpenClaw as if it were a normal Linux machine.
Preparing the VPS: Docker, basic security, and web access
Before installing OpenClaw on a VPS, it's advisable to update the system and leave Docker running , as many guides and official scripts use containers to encapsulate all components and avoid dependency conflicts.
On a Debian or Ubuntu-based distribution, the usual practice is to start with `apt update && apt upgrade`, and then install Docker and its ecosystem following the official instructions or an automated script. Once finished, verify that everything is working correctly with `docker ps` or `docker --version`.
Next, you can download the OpenClaw files and scripts from their repository and run the deployment wizard, which creates and starts the necessary containers . At the end of the process, the script itself usually displays a message indicating that the services are "Up" or "Running," a sign that your wizard is now live on the VPS.
To access the OpenClaw web interface (if you choose to use it), you usually just need to open a browser on your computer and type the server's IP address followed by port 18789 , i.e.: http://YOUR_VPS_IP:18789. There you will have a panel similar to a ChatGPT chat, but connecting directly to your instance.
However, since you're exposing a service to the internet, you can't leave it as is. It's highly recommended to install Fail2Ban to block brute-force attacks and configure a firewall with UFW, allowing only SSH access and the OpenClaw port, while blocking all others. With just a few commands, you can significantly strengthen your server's basic security.
AI model selection and configuration
During OpenClaw onboarding, one of the key steps is selecting which AI model will handle your thinking . This is where cost and performance considerations come into play, because an autonomous agent can generate dozens of API calls for each command you give it.
When you ask ChatGPT for something like "find me a cheap flight," it's usually a single request. When you ask OpenClaw to do it, it enters a loop of planning, opening websites, extracting data, comparing results, and writing a response . A single instruction can trigger 50 or 100 internal API calls.
If you always use the most powerful model from each provider (for example, a Claude 4.5 Opus or a latest-generation GPT ), your bill can easily reach hundreds of euros per month without you even realizing it, even after just a few days of heavy use. That's why it's crucial to develop a smart model strategy.
A very common combination is to use an economical or free model for everyday tasks (for example, Gemini Flash, some open source model through OpenRouter or low cost providers such as DeepSeek, SiliconFlow, etc.) and reserve the "top" models for specific, high-demand tasks, such as complex programming or sensitive reports.
OpenClaw is compatible with the OpenAI API standard, so you can easily switch providers by editing the configuration file (~/.openclaw/openclaw.json or similar) or from the web panel itself: just modify the base URL and API key to jump from one service to another.
Recommended models: Claude, OpenRouter and other providers
Today, many users agree that Claude (especially the Sonnet and Opus variants) offers excellent performance as the "brain" of OpenClaw , particularly in complex reasoning tasks, long writing, and programming.
Many specialized guides recommend starting with a powerful model like the Claude 4.5 Opus , which will better understand complex instructions and assemble your assistant's structure with less friction, and then switching to a cheaper model like the Claude 4.5 Haiku for everyday use.
To give you an idea of the differences, it's said that a message with Opus can cost around $0,10 , while one with Haiku can be less than $0,001. When an autonomous agent sends dozens of messages per task, that 100x price difference makes a big difference.
A very convenient option for easily managing multiple models is to use OpenRouter as a gateway . You create an account, add some credit, and obtain a single API key that allows you to call many different models (Claude, Llama, Gemma, etc.), often at competitive rates compared to the original providers.
The beauty of OpenRouter is that changing the model in your OpenClaw is as simple as selecting a different option in the setup wizard menu or adjusting the model identifier in the settings file. This allows you to experiment with different intelligences without having to reconfigure everything from scratch each time.
OpenClaw Initial Onboarding: QuickStart and Basic Settings
Once the installation is complete (on both PCs and VPSs), you'll see an interactive setup wizard open in the terminal. The first thing you'll see is a warning message asking you to confirm that you understand the risks of giving AI so much power over your machine; select Yes using the arrow keys and press Enter.
Next, you'll be offered several startup paths, including the QuickStart option, designed for a quick setup without having to go into the details of each parameter . For most new users, this is the best choice, because later you can fine-tune the configuration directly from the OpenClaw chat.
The next step is to select the AI provider and the specific model you want to use. The list usually includes options like OpenAI, Google (Gemini), Anthropic, OpenRouter, and other compatible services. If you already have a subscription to a provider or credits, it makes sense to start there.
If you choose OpenRouter, the wizard will show options like “OpenRouter API Key”; when you select it, OpenClaw will ask you to enter your API key. Paste it into the terminal (in many cases by right-clicking or pressing Shift+Insert) and press Enter to save it.
A list of available OpenRouter models will then appear, including Claude Opus 4.5, Claude Sonnet, Haiku, and many others . Select the one you'll use for this initial phase (for example, Opus for onboarding) and confirm with Enter. After a few minutes of configuration, OpenClaw will have successfully linked to the chosen AI.
Choice of communication channel: Telegram, WhatsApp and more
The next section of the wizard focuses on defining how you'll communicate with your OpenClaw . You can use only the console interface, but the real power lies in integrating it with your messaging apps: Telegram, WhatsApp, Discord, Slack, Teams, Matrix, and many more.
The most popular option, especially for personal use, is usually Telegram , due to its speed, free bots, and the ease of sending and receiving files. That's why many tutorials focus on setting up this channel as the primary entry point.
When you select Telegram on the channels screen, the assistant will show you simplified instructions that involve creating a new bot with @BotFather, the "godfather" of Telegram bots . From your Telegram account, search for that user and open a chat with them.
In the BotFather chat, type the command /newbot . It will first ask for a name for the bot (the one users will see) and then a unique username ending in “bot”. Once you complete these steps, BotFather will return a long token made up of letters and numbers.
Copy that token and paste it into the OpenClaw configuration screen in your SSH console or PowerShell window, right where it asks for the Telegram bot key. Press Enter, and the wizard will verify that everything is correct to link your OpenClaw installation to that specific bot.
Link the Telegram bot with OpenClaw
Once you've entered the token, the technical bridge is created, but you still need to authorize the connection between your Telegram user and the OpenClaw instance . The system itself will guide you through this with a code that appears in the bot's chat when you launch it.
Open Telegram, find the bot you just created, and send it a /start command . It will reply with a message that includes a temporary code used to pair your account with the server running OpenClaw.
Return to your SSH console or the terminal where you're running OpenClaw, and if you're still in the CLI wizard, exit using Ctrl+C . Then run a command like ` openclaw pairing approve telegram <your_telegram_code>` , replacing the part between angle brackets with the actual code the bot gave you.
If the code is correct, the terminal will confirm that the Telegram pairing was successful . From that moment on, any message you send to that bot will become an instruction for your OpenClaw, and the responses will be sent directly to your mobile device.
This same linking pattern is repeated, with variations, for other channels such as WhatsApp (via a QR code that you scan with your phone), Discord, or Slack. This allows you to have a single assistant accessible from various platforms, whether you're working, relaxing on the couch, or out and about.
Gateway, skills, and continuous operating mode
Near the end of the onboarding process, OpenClaw will ask if you want to configure additional "skills" at that time . These are modules that integrate specific functions: connecting with third-party apps, predefined workflows, development tools, etc.
Activating them initially is not mandatory. In fact, many users choose to answer "No" to complete the basic setup as quickly as possible and let OpenClaw configure itself later via chat , guiding them step by step with questions like "help me connect my Google calendar" or "configure the GitHub integration."
Another key component installed in this stage is the Gateway, the service that keeps OpenClaw always awake and proactive . Thanks to it, the agent can receive messages at any time, run periodic heartbeats, monitor systems, and react to events without you having to manually start it each time.
In some environments, you can also install a web interface to manage OpenClaw from your browser . This UI is convenient, but on a public VPS, it means opening another port to the internet, so it's often recommended to continue managing the instance from the SSH console to minimize risks.
Once the Gateway is up and running and the setup wizard finishes, you'll see a message in the terminal indicating that OpenClaw is now operational and listening for commands . You can test it by typing commands directly from the CLI, but if you've configured Telegram, the most practical approach is to start communicating with it through the bot you just linked.
Advanced features: messaging, heartbeat, and persistent memory
Once you have OpenClaw up and running, it's worth understanding a little better what it can do beyond chatting and why it's considered an autonomous agent and not just a pretty-looking chatbot.
On one hand, its cross-platform messaging system allows you to centralize conversations from WhatsApp, Telegram, Slack, Discord, Teams, iMessage, and other channels into a single assistant. You continue using your usual apps, but OpenClaw receives, categorizes, and responds according to the rules you've defined.
The Heartbeat feature adds a proactive element: you can schedule regular checks of your email, calendar, or specific web pages . The agent can alert you to urgent emails, prepare daily summaries, check for changes on important websites, or trigger automated tasks at specific times.
Persistent memory completes the circle. OpenClaw doesn't just remember the context of a specific conversation; it stores preferences, ongoing projects, and relevant details between sessions , so that over time it understands you better, anticipates your needs, and adapts its responses to your style.
This combination of real-time execution on the system, proactivity, and long-term memory is what sets OpenClaw apart from a basic chat assistant. Properly configured, it becomes very close to a digital twin, working in the background while you focus on what matters.
Costs: APIs, consumption, and how to avoid skyrocketing your bill
As we mentioned, the OpenClaw software itself is completely free and open source . Costs begin with hosting (if you use a VPS) and, above all, with the APIs for the AI models that act as the brain.
As for the server, a small VPS for around €3-4 per month is more than enough for personal or even semi-professional use, provided you don't do anything too demanding. This cost is comparable to a basic subscription on many platforms, but with the advantage of having complete control over the environment and your data.
With APIs, things are more variable. The final cost depends on how many requests OpenClaw generates and which model you use . For light use (a few automations per day), you can expect to spend around $5-10 per month; if you put it to serious work every day monitoring things and making decisions, it's easy to jump to $20-30 or more.
The key is that, unlike a one-off chat with GPT, an autonomous agent multiplies the invisible calls to the API in the background . That's why it's so important to start with inexpensive or free-tier models, carefully review each provider's limits, and activate spending alerts where possible.
Services like Google Gemini, OpenRouter, Mistral, DeepSeek, SiliconFlow, and aggregation platforms such as APIYI offer a wide variety of pricing plans, welcome credits, and cost-saving models . The sensible approach is to start with these more affordable options and reserve the "premium" models only for specific, controlled tasks.
Use cases and ideal user profiles
OpenClaw is a particularly good fit for developers, productivity-obsessed individuals, privacy-conscious users , and generally anyone willing to invest some time in setting up an assistant that goes beyond a simple chat.
In the world of development, for example, it can be used to review recent commits, detect pull requests that have been unmerged for too long , launch tests, deploy services, manage issues, or prepare daily summaries of the state of a repository.
For those who live surrounded by notifications and platforms, OpenClaw can act as a smart message router : it unifies conversations from Slack, WhatsApp, and Discord, classifies them by priority, sends urgent alerts to your mobile, and generates periodic reports with the rest so you don't live glued to ten apps at once.
If privacy is your priority, the beauty of OpenClaw is that you can keep your data locally or on a VPS that you control, without sending your files to third-party services beyond the strictly necessary calls to the language model API.
And for the more curious, it's a perfect laboratory: being open source, you can modify its code, create new skills, integrate your own services , or even connect it to local models via Ollama if you're willing to sacrifice some quality in exchange for greater independence from the cloud.
Ultimately, if you take the time to install it properly, choose a reasonable AI model, set it up in a secure environment (ideally a VPS), and link it to your messaging apps, OpenClaw can become an assistant that actually does things for you , and not just another chatbot to ask silly questions to from time to time.

Passionate writer about the world of bytes and technology in general. I love sharing my knowledge through writing, and that's what I'll do on this blog, show you all the most interesting things about gadgets, software, hardware, tech trends, and more. My goal is to help you navigate the digital world in a simple and entertaining way.
Table of Contents
- 1 What is OpenClaw and why is it so talked about?
- 2 Risks and best practices before installing OpenClaw
- 3 Pre-preparation in Windows: requirements and settings
- 4 How to install OpenClaw on Windows step by step
- 5 Installation on macOS and GNU/Linux
- 6 Installing OpenClaw on a VPS: the most practical option
- 7 Preparing the VPS: Docker, basic security, and web access
- 8 AI model selection and configuration
- 9 Recommended models: Claude, OpenRouter and other providers
- 10 OpenClaw Initial Onboarding: QuickStart and Basic Settings
- 11 Choice of communication channel: Telegram, WhatsApp and more
- 12 Link the Telegram bot with OpenClaw
- 13 Gateway, skills, and continuous operating mode
- 14 Advanced features: messaging, heartbeat, and persistent memory
- 15 Costs: APIs, consumption, and how to avoid skyrocketing your bill
- 16 Use cases and ideal user profiles