- The API of Windows allows you to obtain HICON and read pixels with GetDIBits (BGRA).
- En Python, ctypes covers ExtractIconExW and converting to images with Pillow.
- .NET makes it easy to display the icon associated with a file with ImageList + ListView.
- Manages GDI handles and channel order to avoid leaks and errors.
If you work in Windows, sooner or later you'll want to extract the icon from an executable or an .ico file to reuse it in another app, a list, or for your tests. In the Windows ecosystem, there are several ways to do this: the native API (ExtractIconExW, GetDIBits…), Python with ctypes, .NET with Icon.ExtractAssociatedIcon, and even older solutions in classic Visual Basic . Each has its nuances and advantages. You can check out a guide on NirSoft Utilities.
In this guide, we bring all those pieces together in one place. You'll see everything from how to request the "small" and "large" HICONs exposed by an .exe or .ico file from Windows, to reading the bitmap in BGRA format, converting it to RGBA if needed for PyGame or Pillow, and how to display the icon associated with a file in a Windows Forms ListView using an ImageList . We also review a classic VB approach to listing and storing icons and discuss practical considerations.
What's inside an .ico and .exe: sizes and where they appear
A single icon can contain multiple internal images of varying sizes (16x16, 32x32, 48x48, etc.). In Windows, it's common for so-called "small" icons (16x16) to be used in windows and in File Explorer, where caches like Windows thumbs.db can store thumbnails, while "large" icons (32x32) are displayed in the taskbar and when switching between them with Alt+Tab. Executable files (.exe) and libraries (.dll) store icons as resources , and the .ico files themselves are containers for multiple resolutions and color depths.
The Windows API makes this easy: with ExtractIconExW (in shell32.dll ) you can request the small or large icon that a file exposes, whether it's an .exe or an .ico. That function returns HICON handlers ready to draw or, if you want to go deeper, to read the underlying bitmap and manipulate the pixels.
If you need the raw data (for example, the bitmap bytes to process with your own libraries), the process includes GetIconInfo to convert the HICON to its HBITMAP and GetDIBits to dump the contents into a buffer you control. This gives you complete control: exact size, byte order, transparency, and format.
It's important to keep in mind the internal format that Windows returns in these cases: we're usually dealing with 32 bits per pixel in BGRA (blue, green, red, and alpha). This difference from the conventional RGBA is important if you plan to pass the image to engines or libraries that expect a different channel order.
The key is understanding that the API returns data in GDI's own reading order. With the correct header and negative height, you can receive the image top-down , making it easier to use directly in other libraries without having to flip the buffer.
Extracting icons with Python and the Windows API (ctypes): from HICON to image bytes
If you're using Python on Windows, the most direct route today is to use ctypes to call the native API . We might consider pywin32, but there's an important detail: pywin32 doesn't expose GetDIBits , and that function is necessary to obtain the actual pixels from a HICON . Therefore, ctypes is the practical way to define structures, prototypes, and calls exactly as the Windows API expects.
The typical sequence is as follows: create a compatible DC (CreateCompatibleDC), call ExtractIconExW to get the small or large icon, resolve the color and mask bitmaps with GetIconInfo , prepare a BITMAPINFO with a 32-bit header, indicate negative height for top-to-bottom coordinates, and finally dump the pixels with GetDIBits into a Python buffer (ctypes.create_string_buffer).
from ctypes import byref, sizeof from ctypes import c_int, c_void_p from ctypes import create_string_buffer from ctypes.wintypes import BOOL, BYTE, DWORD, HBITMAP, HDC, HGDIOBJ, HICON, LONG, LPCWSTR, LPVOID, UINT, WORD
import ctypes # Common constants BI_RGB = 0 DIB_RGB_COLORS = 0 # Minimum structures for GDI class ICONINFO(ctypes.Structure): _fields_ = class RGBQUAD(ctypes.Structure): _fields_ = class BITMAPINFOHEADER(ctypes.Structure): _fields_ = class BITMAPINFO(ctypes.Structure): _fields_ = # DLLs shell32 = ctypes.WinDLL('shell32', use_last_error=True) user32 = ctypes.WinDLL('user32', use_last_error=True) gdi32 = ctypes.WinDLL('gdi32', use_last_error=True) # Essential prototypes shell32.ExtractIconExW.argtypes = shell32.ExtractIconExW.restype = UINT user32.GetIconInfo.argtypes = user32.GetIconInfo.restype = BOOL user32.DestroyIcon.argtypes = user32.DestroyIcon.restype = BOOL gdi32.CreateCompatibleDC.argtypes = gdi32.CreateCompatibleDC.restype = HDC gdi32.GetDIBits.argtypes = gdi32.GetDIBits.restype = c_int gdi32.DeleteObject.argtypes = gdi32.DeleteObject.restype = BOOL # Simple enumeration for sizes class IconSize: SMALL = 1 LARGE = 2 @staticmethod def to_wh(size): return {IconSize.SMALL: (16, 16), IconSize.LARGE: (32, 32)} # High-level function (sketch) def extract_icon(filename, size): dc = gdi32.CreateCompatibleDC(0) if dc == 0: raise ctypes.WinError() hicon = HICON() # We order the large or the small as appropriate out_large = byref(hicon) if size == IconSize.LARGE else None out_small = byref(hicon) if size == IconSize.SMALL else None got = shell32.ExtractIconExW(filename, 0, out_large, out_small, 1) if got != 1: raise ctypes.WinError() info = ICONINFO() if not user32.GetIconInfo(hicon, byref(info)): user32.DestroyIcon(hicon) raise ctypes.WinError() w, h = IconSize.to_wh(size) bmi = BITMAPINFO() ctypes.memset(byref(bmi), 0, sizeof(bmi)) bmi.bmiHeader.biSize = sizeof(BITMAPINFOHEADER) bmi.bmiHeader.biWidth = w bmi.bmiHeader.biHeight = -h # negative for top-down bmi.bmiHeader.biPlanes = 1 bmi.bmiHeader.biBitCount = 32 bmi.bmiHeader.biCompression = BI_RGB bmi.bmiHeader.biSizeImage = w * h * 4 bits = create_string_buffer(bmi.bmiHeader.biSizeImage) copied = gdi32.GetDIBits(dc, info.hbmColor, 0, h, bits, byref(bmi), DIB_RGB_COLORS) if copied == 0: # Minimal cleanup if info.hbmColor: gdi32.DeleteObject(info.hbmColor) if info.hbmMask: gdi32.DeleteObject(info.hbmMask) user32.DestroyIcon(hicon) raise ctypes.WinError() # Clean up GDI and HICON if info.hbmColor: gdi32.DeleteObject(info.hbmColor) if info.hbmMask: gdi32.DeleteObject(info.hbmMask) user32.DestroyIcon(hicon) return bits # bytes BGRA
With the above, you can now obtain the small or large icon of any executable. For example, if you want to try it with the Python interpreter itself (path available in sys.executable ), simply extract both sizes and work with their buffers.
# Usage example import sys small_icon = extract_icon(sys.executable, IconSize.SMALL) large_icon = extract_icon(sys.executable, IconSize.LARGE)
The result is a block of bytes where each pixel occupies 4 bytes in BGRA . In 16×16 you will have 16×16×4 = 1024 bytes, and in 32×32, 4096. The order is row by row and column by column, from top to bottom and from left to right if you used negative height in the header, which simplifies reading the correct index for each (x, y).
If you want to verify the size, you can print the length of the 16x16 buffer and check that it's 1024 bytes . This check saves you from surprises when working with resources that include multiple resolutions and color depths.
To visualize pixel by pixel and appreciate the reading order, a useful teaching technique is to use PyGame: you traverse the buffer row by row, convert each BGRA to RGBA, and paint with set_at. You can even introduce a small initial delay to "see" how the icon fills on the screen.
# Render the 32x32 icon with PyGame, converting BGRA -> RGBA from winicon import IconSize, extract_icon import pygame import sys pygame.init() screen = pygame.display.set_mode((320, 240)) icon_size = IconSize.LARGE w, h = IconSize.to_wh(icon_size) icon_large = extract_icon(sys.executable, icon_size) rendered = False offset_x, offset_y = 50, 50 while True: for event in pygame.event.get(): if event.type == pygame.QUIT: sys.exit() screen.fill((0, 0, 0)) for row in range(h): for col in range(w): index = row * w * 4 + col * 4 b, g, r, a = icon_large color = (r, g, b, a) screen.set_at((offset_x + col, offset_y + row), color) if not rendered: pygame.time.wait(10) pygame.display.flip() rendered = True
In practice, you won't always want to manually adjust pixels. To save the icon to disk as an image, Pillow (PIL) makes things much easier: you create the image from the bytes using 'RGBA' mode, specifying that the input is 'BGRA', and save it as BMP, PNG, or whatever format is appropriate . An adapter like win32_icon_to_image(icon_bits, size) handles this conversion for you.
# Converting the BGRA buffer to a PIL Image and saving from PIL import Image def win32_icon_to_image(icon_bits, size): w, h = IconSize.to_wh(size) img = Image.frombytes('RGBA', (w, h), icon_bits, 'raw', 'BGRA') return img img_small = win32_icon_to_image(small_icon, IconSize.SMALL) img_large = win32_icon_to_image(large_icon, IconSize.LARGE) img_small.save('python1.bmp') img_large.save('python2.bmp')
Display the icon associated with a file in .NET (WinForms): ListView + ImageList
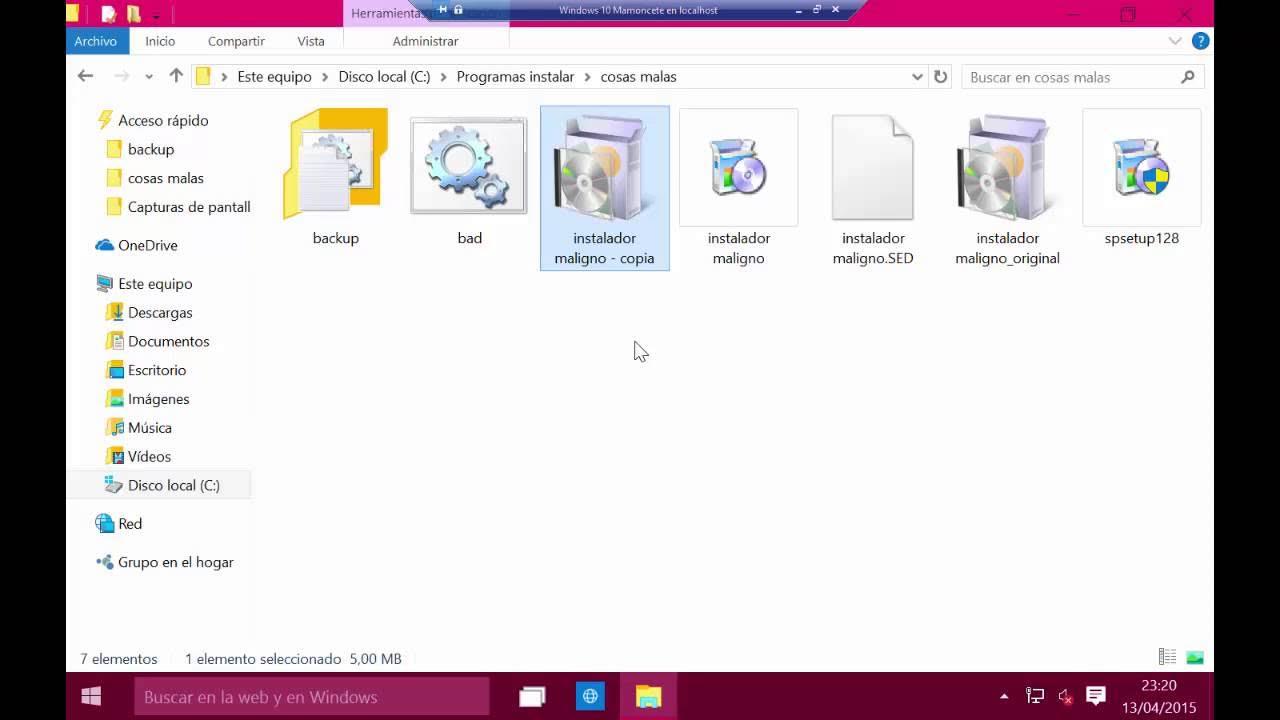
Another common need is to display, alongside each file name, the icon that Windows associates with its extension (for example, .docx with the Word icon). In WinForms, you can accomplish this using Icon.ExtractAssociatedIcon and storing the results in an ImageList that is linked to a ListView configured in SmallIcon view.
The idea is to iterate through the files in a directory, checking for each one if you already have an image in the ImageList with a key matching the extension ; if not, extract the icon and add it. This avoids duplicates and speeds up loading. For the ListView item, assign the ImageKey property with that extension and add the item. If something goes wrong, you can use a fallback like SystemIcons.WinLogo.
ListView listView1 = new ListView(); ImageList imageList1 = new ImageList(); listView1.SmallImageList = imageList1; listView1.View = View.SmallIcon; // Loop through files (requires using System.IO) var dir = new System.IO.DirectoryInfo(@"C:\\"); foreach (var file in dir.GetFiles()) { var item = new ListViewItem(file.Name); var key = file.Extension; if (!imageList1.Images.ContainsKey(key)) { var icon = System.Drawing.Icon.ExtractAssociatedIcon(file.FullName); imageList1.Images.Add(key, icon); } item.ImageKey = key; listView1.Items.Add(item); }
To compile it quickly, paste the code into a Windows Forms form , create and configure the ListView and ImageList in the constructor or Load event, and remember to import the System.IO namespace . You don't need to manually deal with HICON or pixels; you rely entirely on system icon associations.
Classic approach with Visual Basic (extractor/viewer and saving to BMP)
Before .NET and modern wrappers, many utilities in VB 4/5/6 already accomplished this task by calling the API: ExtractIcon from shell32 to obtain HICON, DrawIcon to paint in a PictureBox, and BitBlt to copy to another surface and create a thumbnail strip. These programs enumerated the icons in an .exe or .dll file by incrementing the icon index until the function stopped returning results.
The typical workflow was: after selecting a file, start at index 0 and, while ExtractIcon returned a valid handle, draw it in the PictureBox, refresh, and move to the next index. In parallel, using BitBlt , the 32x32 grid was copied to a second surface at offset positions (for example, to X = 2 + index × cell) to see all the embedded icons at a glance.
To save, VB offered two options with SavePicture : saving the Picture property as is or the Image property (the latter always as a BMP). Additionally, some forms included a file selector with filters for file extensions such as .ico, .bmp, .exe, .dll, and others, and even displayed a preview if the file was an image.
This approach remains valid for understanding how to interact with the API from "traditional" Windows languages. However, if you need the pixel buffer today , it's better to use GDI and GetDIBits (or, in modern .NET, methods that serialize the image) instead of relying solely on DrawIcon for controls.
Important detail: size, byte order and row/column reading
When retrieving pixels with GetDIBits, specifying biHeight as negative sets the origin to the top-left corner , which is what many graphics libraries expect. If you don't, you'll get a bottom-up buffer and have to reverse the blocks row by row.
In 16x16, the first row occupies 16x4 = 64 bytes (4 per pixel). Therefore, the offset to row n is nx64 and the offset to column m is mx4. In 32x32, each row is 128 bytes , for a total of 4096. The BGRA order (B, G, R, A) is what these GDI calls return; if your target library wants RGBA, you will have to reorder the channels as was done with PyGame or specify it when creating the image with Pillow.
If you're going to manipulate transparency, the alpha channel will be the fourth byte of the pixel. Remember that icons also use a mask (hbmMask) ; when working with 32-bit BGRA, transparency is usually already represented in the alpha of hbmColor , so the mask can be ignored for common uses.
Icons in Resources and Replacement: Quick Considerations
Executables and libraries store their icons as resources . You can extract them using the API as explained, or, if you prefer a visual approach, there are resource editors and utilities with a graphical interface that allow you to replace or export icons. If you plan to automate, the programmatic approach using HICON, GetIconInfo, and GetDIBits gives you complete control and reproducibility.
To read icons "associated" with extensions (without extracting them from the .exe file itself), .NET simplifies the process with Icon.ExtractAssociatedIcon . This method relies on registry associations and returns the icon that the system would display for each file, which is ideal for lists, explorers, and viewers.
Good practices and resource cleaning
Working with GDI involves explicitly managing handlers and memory . Every time you obtain a HICON or an HBITMAP, you must plan for its lifecycle: destroy the HICON with DestroyIcon and release the bitmaps with DeleteObject . Forgetting to do this can lead to resource leaks, which, in applications with many calls, result in resource leaks and erratic behavior.
In Python/ctypes, it's convenient to encapsulate cleanup in a small function or context manager . Always ensure you run cleanup on error branches, especially if GetDIBits returns 0 or if ExtractIconExW doesn't return the expected number of icons. Also, validate that the DC returned by CreateCompatibleDC is valid before proceeding.
When to choose each approach
If you only need to display the icon "that Windows would show" for a file, .NET with ExtractAssociatedIcon is simple and effective. If you want to read the actual bitmap of an icon embedded in an .exe or .ico file to edit, convert, or save it yourself, the API with ctypes gives you all the control you need. For legacy tools or rapid prototyping, the classic VB approach remains illustrative and functional in its context.
If your goal is to save icons as lossless alpha-layered images, consider formats like PNG using Pillow, ensuring proper channel ordering. BMP is straightforward and widely compatible, but if you prefer compression and transparency, PNG or ICO (if repackaged) might be more suitable.
By integrating native APIs, Python, and .NET, you can handle everything from simply displaying icons associated with the extension to extracting BGRA bytes with full control over size, transparency, and reading order, as well as listing icons embedded in legacy or modern executables. This variety of approaches allows you to create everything from viewers and listings to icon export and editing pipelines.


Table of Contents
- 1 What's inside an .ico and .exe: sizes and where they appear
- 2 Extracting icons with Python and the Windows API (ctypes): from HICON to image bytes
- 3 Display the icon associated with a file in .NET (WinForms): ListView + ImageList
- 4 Classic approach with Visual Basic (extractor/viewer and saving to BMP)
- 5 Important detail: size, byte order and row/column reading
- 6 Icons in Resources and Replacement: Quick Considerations
- 7 Good practices and resource cleaning
- 8 When to choose each approach