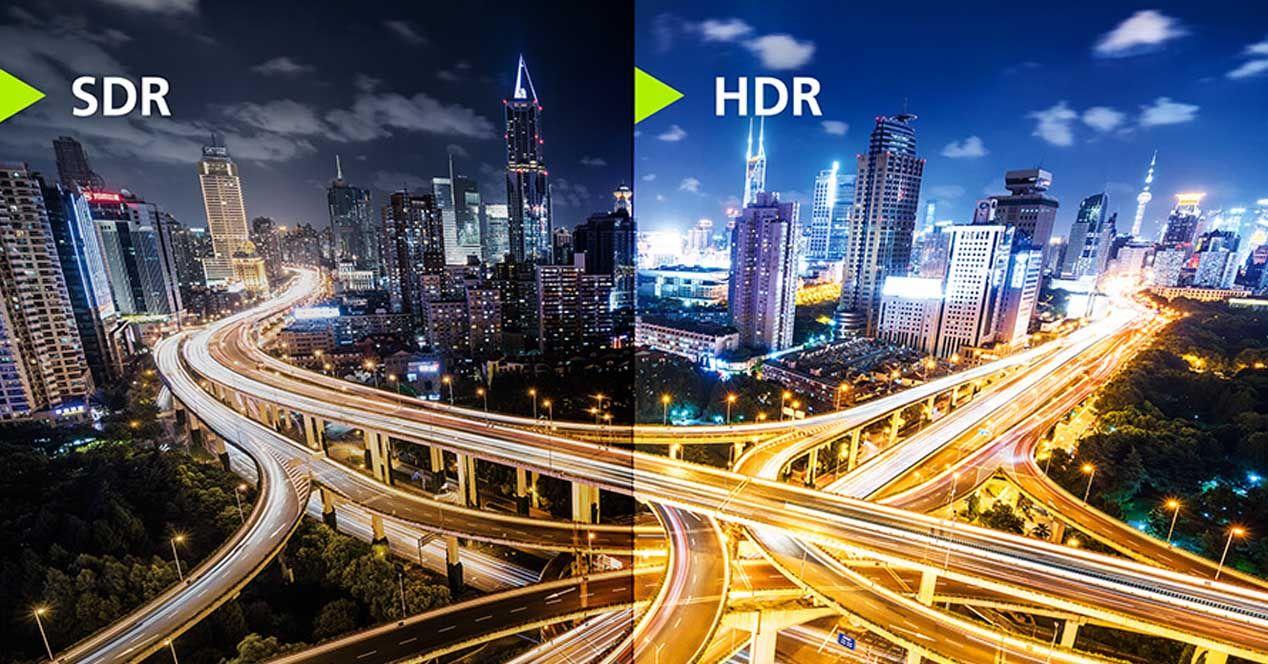
If you want your games to truly shine on an HDR-compatible monitor, you need more than just flipping a switch: you need to calibrate, choose the right profile, and understand how Windows handles color . This guide brings everything together in one place so you don't waste time with endless adjustments and testing.
You'll learn how to create specific color profiles, when to use HDR10, DisplayHDR, or Dolby Vision, and why some games ignore your settings. You'll also learn how to use the Windows HDR Calibration app, manage ICC/ICM profiles, and avoid common washed-out color issues on your desktop. All of this is combined with practical, step-by-step tips to get you just a click away from the sweet spot between color accuracy and performance.
The essentials of HDR in Windows: HDR10, DisplayHDR and Dolby Vision
Windows performs tone mapping of HDR content on the GPU before rendering the desktop, using monitor information and content metadata; this means that, on both DisplayHDR and Dolby Vision monitors, the key conversion is done at the source within the system and no second monitor-dependent tone mapping is expected for each video or game.
In practice, when Dolby Vision is available, Windows will automatically prefer it because it's considered a superior "superset" of quality compared to DisplayHDR . However, some monitors limit peak brightness to around 450 nits when DisplayHDR or Dolby Vision is enabled, and certain manufacturers include an uncertified HDR10 mode in the OSD that unlocks peak brightness of up to 1000 nits. If you prioritize brightness over accuracy, disabling Dolby Vision and enabling this uncertified HDR10 mode can give you the extra punch you're looking for in games.
Note: On non-Windows platforms, the workflow may vary and rely more on the monitor. Here, we focus on the Windows ecosystem, where the desktop can mix windows in different color spaces without losing coherence, thanks to pre-composition on the GPU with the correct metadata.
The operational conclusion is simple: make sure your GPU and display are correctly reporting their capabilities and that the system is applying the appropriate tone mapping path for the HDR10 or Dolby Vision content you're using in your games.
HDR Requirements and Activation on Windows
To play and play games in HDR on your PC, first check the requirements. In Windows 11 , simply go to Start > Settings > System > Display > HDR to enable the option if your monitor is compatible; in Windows 10, the path is similar within Display and Windows HD Color. You can also use WIN + ALT + B to quickly toggle HDR.
Practical requirements: Windows 10 version 1803 or later; Windows 11 has native compatibility, but the calibration app has specific requirements. You need an HDR display (integrated or external) and a modern GPU, as well as WDDM 2.7 or later drivers for features like SDR/HDR saturation to work correctly. Update via Windows Update or the GPU manufacturer's website.
For HDR streaming and 10-bit video, install codecs such as HEVC, VP9, or AV1 where applicable. If you're connecting an external TV/monitor, use an 18 Gbps (Premium High-Speed) HDMI cable or higher. Also, be sure to enable HDR streaming in the Windows HD Color settings if you'll be watching compatible online content.
Once HDR is enabled, adjust the Brightness slider for SDR content on the HDR page in Windows 11. This softens the whitish effect on your desktop when HDR mode is active, without affecting the HDR content in your games.
Windows HDR Calibration: Official App and HGIG Patterns
The Windows HDR Calibration app, available in the Microsoft Store, is the quickest way to adjust your display using patterns recommended by the HGIG group . It must be run in full screen on the HDR display you're calibrating, with HDR already enabled on your system.
The application guides you through three tests: determining the darkest visible details , the brightest details, and the panel's maximum brightness. For each pattern, you must move the slider until the pattern is no longer visible. This aligns your screen's behavior with the HDR signal sent by Windows.
The app also includes a color saturation control for HDR and SDR content (when HDR is active). The effect can be subtle and will depend on the panel. Make adjustments under the same ambient lighting conditions you usually play in for greater consistency.
Helpful notes: If your monitor applies post-processing by default, disable it from the OSD to prevent interference with calibration. If you change monitors or add another one, run the app again. And if you want to delete a profile created by the app, go to Control Panel > Color Management > All Profiles and delete it.
HDR-certified displays typically deliver solid results out of the box, but even then, it's worth running the app. Remember to keep your drivers up to date and, if possible, avoid aggressive post-processing modes on your monitor while calibrating.
ICC/ICM Profiles in Windows: What They Are and How to Install Them
In addition to HDR calibration, an ICC profile defines how to translate colors on your device. It's an .icc or .icm file that encapsulates the colorimetric characteristics of a monitor, printer, or camera, according to the standards of the International Color Consortium.
Many monitor manufacturers provide ICC profiles for their models. If your monitor came with a CD/USB, it may include one; if not, search the manufacturer's support website for the exact model. Universal profiles also exist, but for design work, it's best to use device- or software-specific profiles.
Installation on Windows 10/11: Open Color Management (from Finder, from the Control Panel with small icons, or from Settings > System > Display > Advanced display settings > Color Management). On the Devices tab, choose your monitor, check 'Use my settings for this device', click Add, and then Browse to select the ICC file. Set it as the default profile.
Profiles are saved in the path C:/Windows/System32/spool/drivers/color . If you copy a new profile there, the Color Manager will detect it. Remember that color settings are saved per user ; to define system-wide values, use the 'Change system defaults' button.
Switching between profiles and advanced options
To quickly switch profiles, open Color Management again , go to Advanced Options, and under 'Windows Color System Defaults', expand 'Device Profile' and select the desired profile. Save changes and, if necessary, adjust the default working space as well ( sRGB is usually the safest for general use).
If you work with multiple displays, don't assume that two identical monitors will show the same thing. Even with the same profile, each panel has factory variations. The solution is to create a custom ICC profile for each display using calibration and repeat the process periodically to compensate for panel drift over time.
Finding the ideal profile for your monitor
You have two main options: download it from the manufacturer's website (for example, an LG 27UP850-W may have its ICC on LG support) or search on specialized sites like TFT Central , where they usually include profiles with recommended OSD settings.
Always follow the OSD recommendations that accompany the profile (brightness, contrast, color temperature, etc.) to ensure ICC functions correctly. Keep in mind that results vary depending on the graphics card and its drivers , so there may be slight differences between systems even with the same monitor.
Some examples commonly cited by the community are monitors like the Dell Alienware AW3423DW (OLED), ASUS ProArt PA32UCX (professional-grade IPS), and BenQ PD3220U (4K HDR). Each responds differently to profiles and settings, especially with HDR.
Professional-level calibration
The best way to achieve true accuracy is with calibration hardware (e.g., X-Rite ). You place the sensor on the screen and run software that displays patches of color and grayscale; this ultimately generates a custom ICC profile for that specific monitor.
The process takes from 10 minutes to an hour, depending on the precision of the adjustment. It's advisable to repeat it periodically to maintain consistency, especially if you use the equipment for photography or video, where even a small deviation can ruin the consistency between devices and outputs.
Common problems: wallpapers and desaturation
Sometimes a photo looks fine in the viewer, but when you set it as your desktop background, the colors become desaturated. Before you panic, check Settings > System > Display > Advanced display settings > Adapter properties > Color management, choose your display, and select or add the desired profile.
Also check the advanced color options and make sure there are no conflicts with the system's color management . If you use multiple monitors, verify that they all have a suitable profile and consistent OSD parameters (temperature, gamma, etc.).
Games that ignore the ICC profile: what you can do
Some games completely ignore the system's color management. It's frustrating, but it makes sense from their perspective: they want you to see the game as they designed it. You can try forcing the profile with tools like Color Clutch, but it's not recommended because it can cause visual artifacts or errors.
The most sensible approach is to use the HDR settings within the game itself . Most games detect HDR displays and allow you to calibrate the black point, peak brightness, and sometimes saturation. If you need to switch HDR only for gaming, remember that WIN + ALT + B toggles HDR on or off on the fly (though there might be a few seconds of black screen).
Auto HDR on PC: Over 1000 games benefit
Microsoft has brought the Auto HDR feature , which debuted on Xbox , to PC , intelligently expanding the color and brightness range in SDR games (DX11 and DX12). It initially arrived in Insider builds (starting with version 21337) and is now available in Windows 11 on the HDR page as an additional option.
To activate it: open Settings > System > Display > HDR, enable 'Use HDR' and then Auto HDR . Microsoft warns that it consumes GPU resources, but the expected impact is moderate. If you notice drops, disable it in competitive titles where performance is key.
Windows HD Color: Benefits and Requirements for HDR Video
Windows HD Color is Microsoft's umbrella for everything HDR-related in Windows 10/11: it allows for greater bit depth and a wider color gamut, better separating highlights and shadows without losing detail. It also enables HDR video streaming on compatible services.
For smooth HDR video, in addition to a compatible display and GPU, install the necessary codecs (HEVC/AV1/VP9) and enable Stream HDR video in Windows HD Color options if you are going to consume online content with HDR10 or Dolby Vision metadata.
Create and edit HDR videos in Windows (optional)
If you want to produce HDR content in addition to gaming, tools like Wondershare Filmora offer capture and editing with optimized workflows. You can record your screen , camera, and system audio simultaneously, and export in HDR formats such as Rec.2100 HLG or PQ.
- Quick steps to record: Open Filmora > Create Project > Screen Recorder, set resolution, aspect ratio, and source (full screen, window, or area). Activate Microphone/Audio System/Camera If you need to, adjust the quality and FPS in Settings and press REC. Export when finished.
- To edit and export in HDR: import the recording, place it on the timeline, open the editing panel, go to File > Project Settings > Color Space and, when exporting, choose HDR – Rec.2100 HLG o HDR – Rec.2100 PQ. You can add effects like 'HDR effect' from NewBlue FX if it suits you.
Which color profile to use in Windows 11: sRGB, Adobe RGB, or P3
For general use (non-color-critical games, office applications, web browsing), sRGB is the safest and most compatible option. It ensures consistency across apps and devices and prevents color inconsistencies in online content.
If you work with photos/prints and need a wider color gamut, Adobe RGB is appropriate as long as your monitor and printer support it and are calibrated for that color space. If your workflow involves multimedia and HDR, DCI-P3/P3 profiles make sense on displays that actually cover that gamut.
To select it: right-click on the Desktop > Display settings > Advanced display settings > Color profile and choose the appropriate one. In professional environments, create custom profiles with a hardware calibrator to nail the playback in your pipeline.
Enable and adjust HDR in games and on the system
- In Windows 11: Start > Settings > System > HDR, choose the compatible display, turn on Use HDR and, if you like, Auto HDR. Adjust the 'SDR content brightness' so your desktop doesn't look washed out when HDR is active.
- In Windows 10: Start > Settings > System > Display, select your monitor and activate it. Play games and apps in HDRFor supported titles, calibrate in-game: Ideally, each game should adjust its black point, maximum white point, and paper white point based on your system's baseline calibration.
DisplayHDR vs. Dolby Vision: When to Prioritize Brightness or Accuracy
If your monitor supports both, Windows will select Dolby Vision by default. This may result in brightness limits on some models (around 450 nits). If you notice your highlights aren't popping, go into the OSD and enable the uncertified HDR10 mode , which unlocks peak brightness levels close to 1000 nits, disabling Dolby Vision in the process.
Choose based on your preference: precision and stable mapping with Dolby Vision, or a greater brightness punch with uncertified HDR10 on certain monitors. Test it on your reference games and decide with your own eyes.
Ultimately, creating a solid HDR gaming environment involves understanding how Windows manages color (GPU tone mapping), installing and applying the appropriate ICC profile , calibrating with the official app, deciding if Auto HDR is right for you, and adjusting the desktop's SDR brightness so it's not distracting when you're not gaming. If you also master the internal settings of each game and the specifics of your monitor (DisplayHDR/Dolby Vision and its OSD), you'll have a consistent and repeatable foundation for enjoying your titles without any color surprises.

Passionate writer about the world of bytes and technology in general. I love sharing my knowledge through writing, and that's what I'll do on this blog, show you all the most interesting things about gadgets, software, hardware, tech trends, and more. My goal is to help you navigate the digital world in a simple and entertaining way.